- Web Captures are HTML-based copies of any application that is accessed on a browser. This provides an interactive experience that looks and feels just like your app, including scrolling abilities, hover states, and more. Web App captures may be edited using Navattic’s no-code HTML editor.
- Media Captures are most often used to create demos of Mobile or Desktop native apps. Images, .GIFs, or Videos can be used for just a few steps or your entire demo.
Take Captures
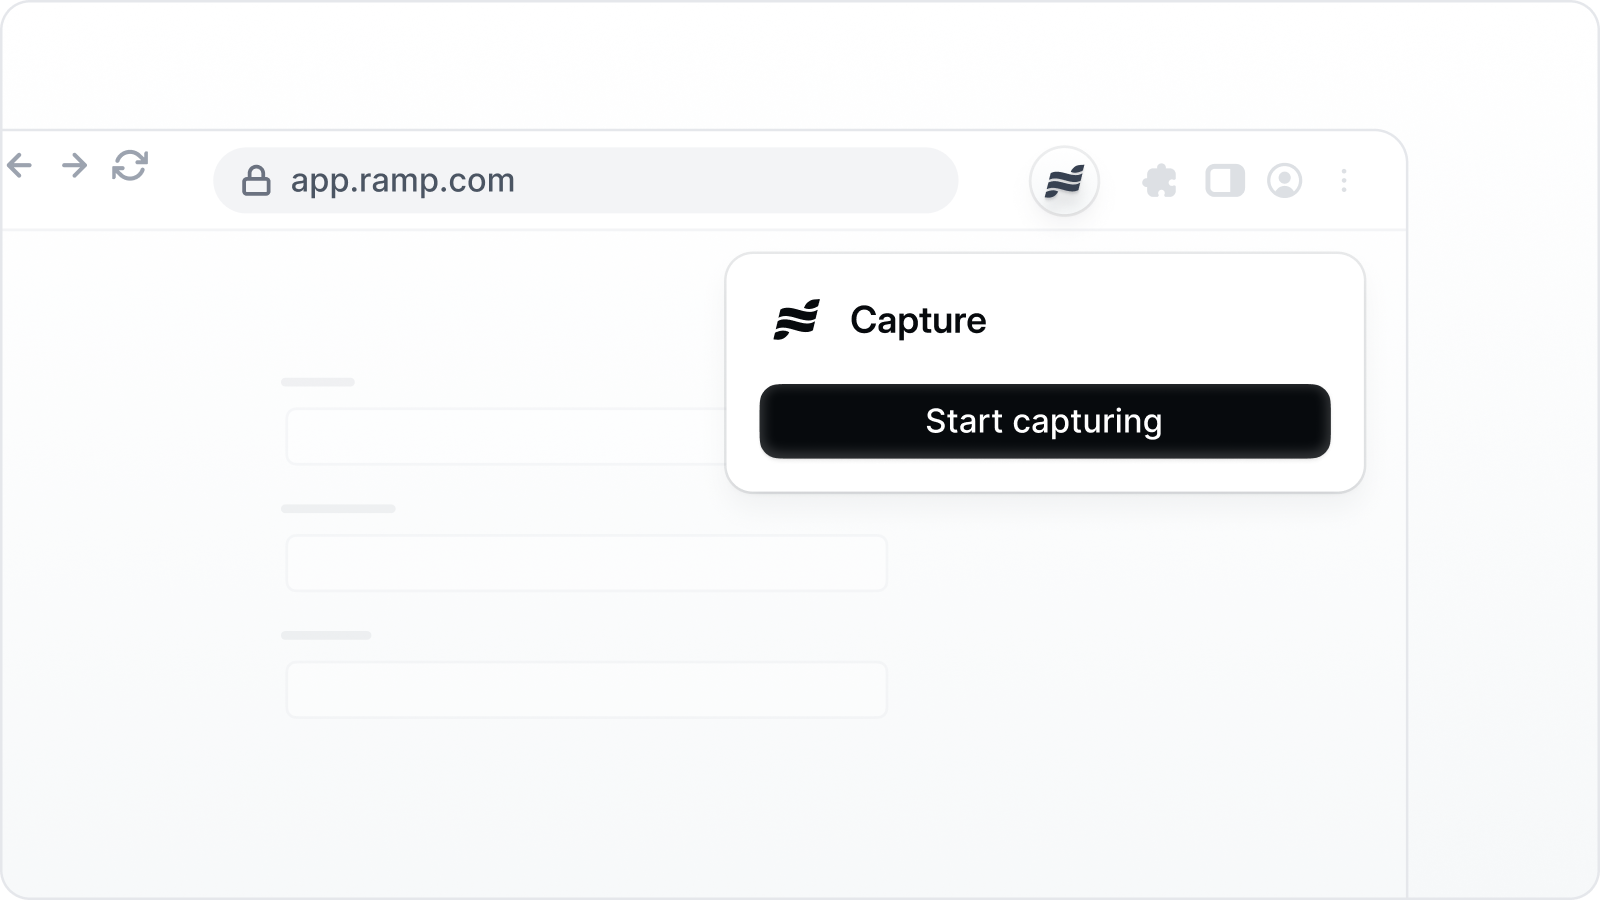
Follow the in-app prompt to install the Navattic chrome extension if needed. Visit Product Demos > **** Create demo. Select Creating new captures and enter your App URL. Click Start Capturing.If you are working in an existing demo, visit the Captures tab > click New Collection > select Start Capturing > Enter in the name for the collection and add your App URL > click Start capturing.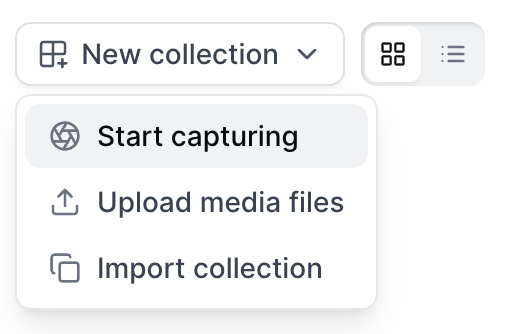
- Click Capture to save the contents onscreen
- Once the Capture finishes loading, navigate to the next page and repeat the process
- Click Finish > Begin building demo to return to view your completed Capture Collection
Tip: Navattic introduced the ability to Click to Capture. This is an option to automatically Capture the content on each screen, in order to save time while building your Flow. Click to Capture is best used for demos that primarily use Tooltips, Beacons, or Triggers.
1325x819 → 1512x288). The prompt is shown once per session and dismisses automatically after you take your first capture.You can also set or update a collection’s default dimensions manually. Open the collection, click Edit collection details, and enter your preferred Width and Height values. When you’re capturing into that collection later, a Collection preset button appears in the viewport sizing panel so you can quickly resize to match.Add Captures to a Flow
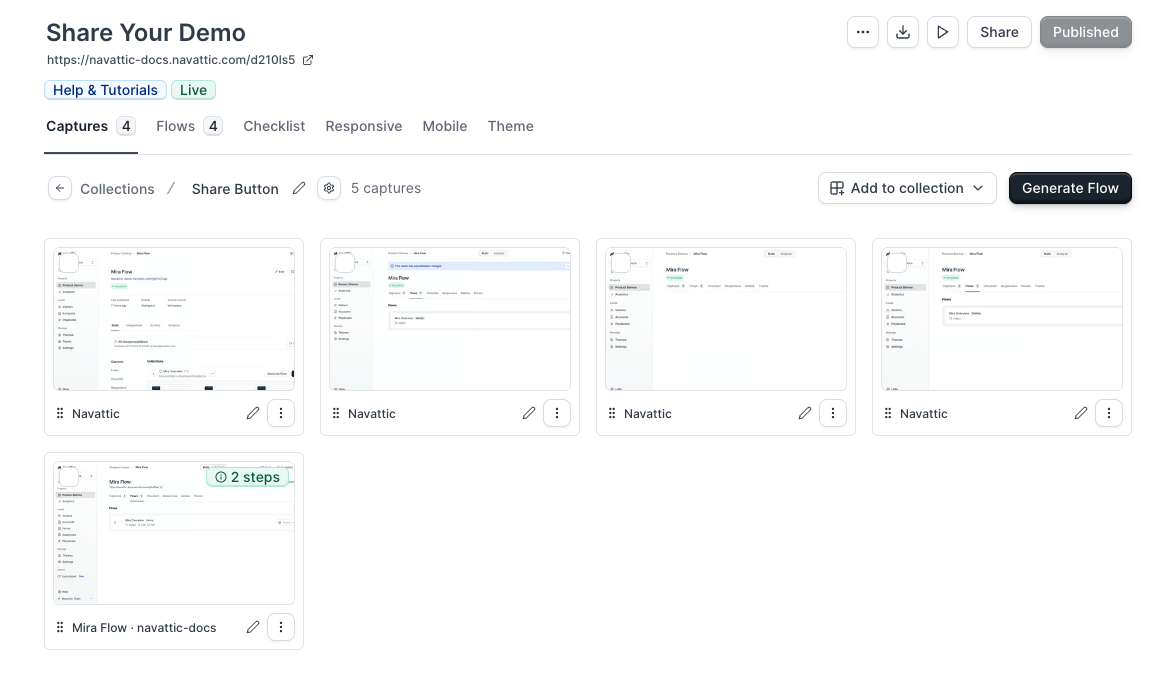
Flows combine Captures with dialog boxes to tell a story about your product. From your Capture collection, click Generate flow. This will automatically arrange Captures in the order in which they were taken.This video demonstrates how to create a flow and the different step types within the Flow builder.
Edit Captures (optional)
The Navattic Capture Editor is used to make no-code adjustments to HTML-based captures. You may launch the Editor in two ways:
- From within a Capture Collection, click on any Capture and select “Edit”
- From the Flow Builder, click on any Capture as it appears in a Step and select “Edit”
Show preview
Show preview
Edit Text
Replace or reformat text anywhere in your Captures. From the Capture Editor > select any text field > type within the Text / HTML container in the upper right or directly in the Capture.Show preview
Show preview
Change Element Appearance
Blur, Hide, or Delete elements in your Capture to provide the cleanest demo environment.Show preview
Show preview
Replace Images
Replace a profile image or icon to customize your Captures. You can also use the Background feature to replace background images.You can also use Edit with Copilot to modify images using AI prompts directly within the editor.Show preview
Show preview
Lock Element Scrolling
To limit the scrolling abilities of an element, select the element > Scroll > lock Vertical or Horizontal scroll.Show preview
Show preview
Copy/Paste Elements within a Capture
Copy and paste a similar element in your Capture. You can also copy similar elements across different Captures.Show preview
Show preview
Magic Editor
The Magic Editor is a powerful suite of tools that allow you to make advanced, dynamic edits to your captures. From personalizing content to animating text, these features help you create more engaging and realistic interactive demos without needing to write any code.Collection edits
Collection edits let you apply a change you’ve made to one capture across all matching captures in the same collection — without having to repeat the edit manually on each one. When you save changes in the capture editor, the Save button offers two options:- Save — Apply changes to this capture only.
- Save and review collection edit — Save this capture, then review which other captures in the collection match your changes before applying them.
Capturing multiple flows in one session
During a capture session, you can record screens for multiple flows without stopping and restarting. This lets you build all the flows for a demo in one go.Starting a new flow
While capturing, click New flow in the capture bar to begin a new flow. Give the flow a name and continue capturing. A badge on the capture list marks which flow is currently active, and a notification appears each time a new flow starts.Keep each flow focused on a single topic or user journey. A notification appears in the capture bar if a flow has too many captures — split the content into a new flow to keep your demos easy to follow.
Reviewing and finishing the session
When you’re done capturing all flows, click Complete session. A review screen shows every flow you recorded. You can rename any flow before finalizing. Click Create to save all flows at once and return to the demo builder.For Agent Demo environments, multi-flow capture is always on — every capture session creates flows that feed directly into the environment’s flow list.
FAQs
How do I edit a Capture after adding it to a Flow?
How do I edit a Capture after adding it to a Flow?
From the Flow Builder, locate the Capture you would like to edit > click the arrows icon to expand the Capture > click “Edit”. Save & Exit when complete. Keep in mind that your edits will be applied to every step that references this Capture (to avoid applying edits to every step with this Capture, first duplicate the Capture you are editing).
How do I edit the background of a Capture when a popup message or modal is present?
How do I edit the background of a Capture when a popup message or modal is present?
In the capture editor, use the up and down arrows to select the background element > open Magic Editors > Overlay > Ignore Overlay. You may have to remove the Overlay on a few different layers before being able to access the element you are hoping to edit.
How do I edit text in my Captures?
How do I edit text in my Captures?
First, please never capture sensitive data. While the Capture Editor can be used to quickly replace simple strings of text or to alter the appearance of distracting elements, we ask our customers to avoid capturing sensitive data altogether.To edit non-sensitive text, open the Capture Editor > select your text field > and type something new in the Text / HTML box. Most text fields are easily accessible in the Editor; this tutorial shows you a workaround if you are having trouble selecting a given “text” field.
How can I add an image as the background of a captured element?
How can I add an image as the background of a captured element?
To add an image to the background of a captured element (a DIV, NAV, or other non-IMG element type), open the Capture Editor > Select the element where you want to add the image > Background > Upload image > Upload the image from your local storage. Use the Position, Size, and **Repeat **dropdowns to adjust the image if needed.
I am unable to load the Chrome Extension.
I am unable to load the Chrome Extension.
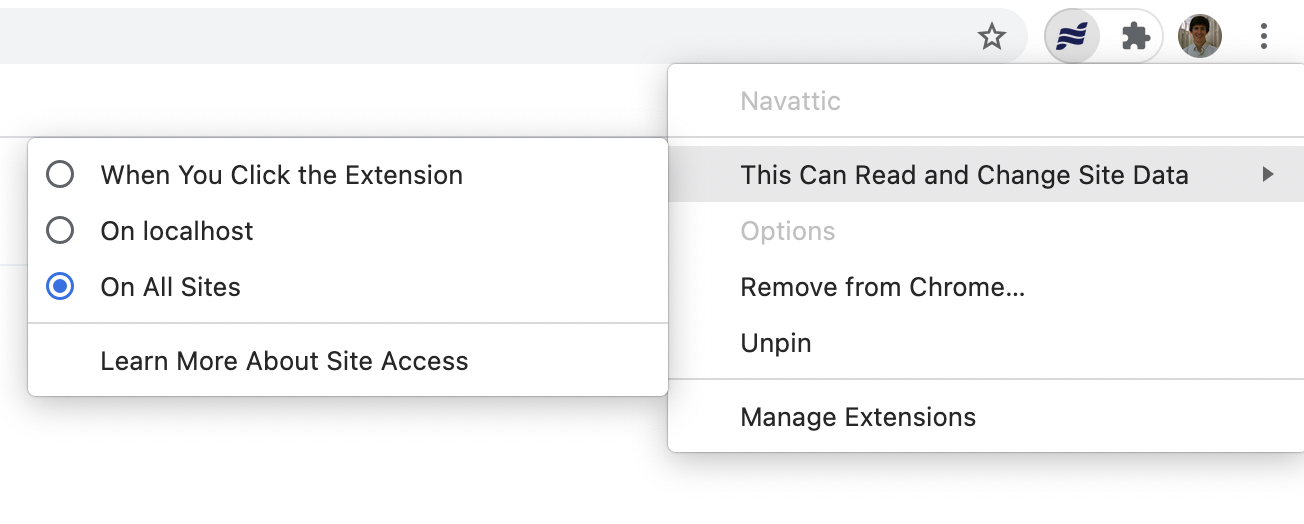
When you start capturing a new domain, the Navattic Chrome extension automatically requests permission to access that site. A browser dialog appears — click Allow to grant access. Once access is granted, the extension activates on that page and the capture session begins.If the permission dialog does not appear, or you previously declined it, you can grant access manually:
- Click the Navattic icon in the Chrome extension bar. If it’s not visible, click the puzzle icon and select it from the dropdown (click the pin to add it to the extension bar).
- Open the This Can Read and Change Site Data tab.
- Select the appropriate sites.
-
Refresh app.navattic.com and any pages where you want to run the extension.