If you are having trouble capturing an onscreen element, try using the keyboard command Ctrl+C (or Command+C for Mac) to take the capture.
How do I edit a Capture after adding it to a Flow?
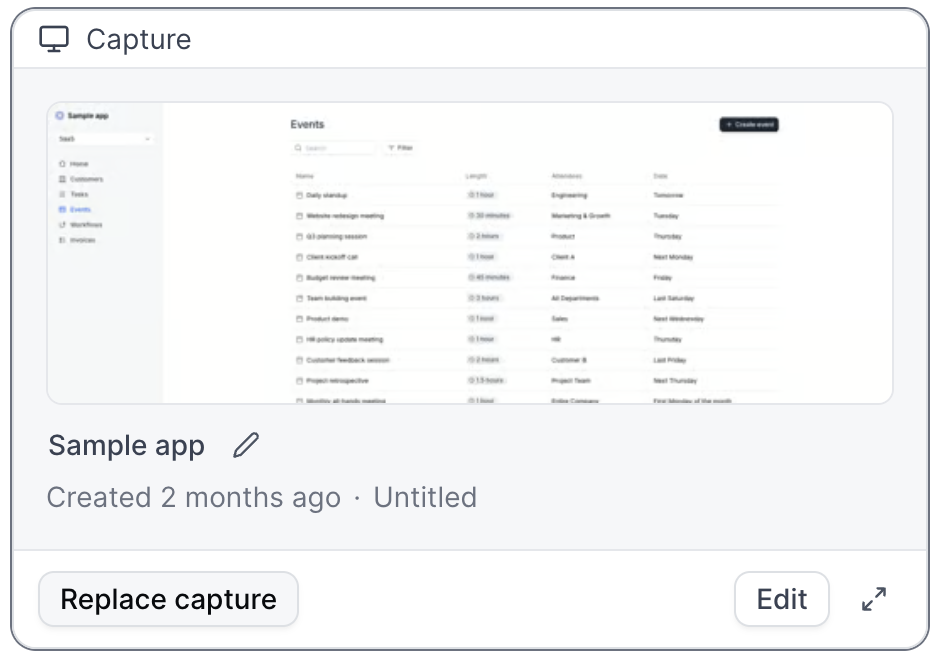
From the Flow Builder, locate the Capture you would like to edit > click the arrows icon to expand the Capture > click “Edit”. Save & Exit when complete. Keep in mind that your edits will be applied to every step that references this Capture (to avoid applying edits to every step with this Capture, first duplicate the Capture you are editing).
How do I edit the background when a popup or modal is present?
In the capture editor, use the up and down arrows to select the background element, open Magic Editors and Overlay and select Ignore Overlay. You may have to remove the Overlay on a few different layers before being able to access the element you are hoping to edit.
How do I edit text in my Captures?
First, don’t capture sensitive data. While the Capture Editor can be used to quickly replace simple strings of text or to alter the appearance of distracting elements, we ask our customers to avoid capturing sensitive data altogether.To edit non-sensitive text, open the Capture Editor > select your text field > and type something new in the Text / HTML box. Most text fields are easily accessible in the Editor; this tutorial shows you a workaround if you are having trouble selecting a given “text” field.
I am unable to load the Chrome Extension.
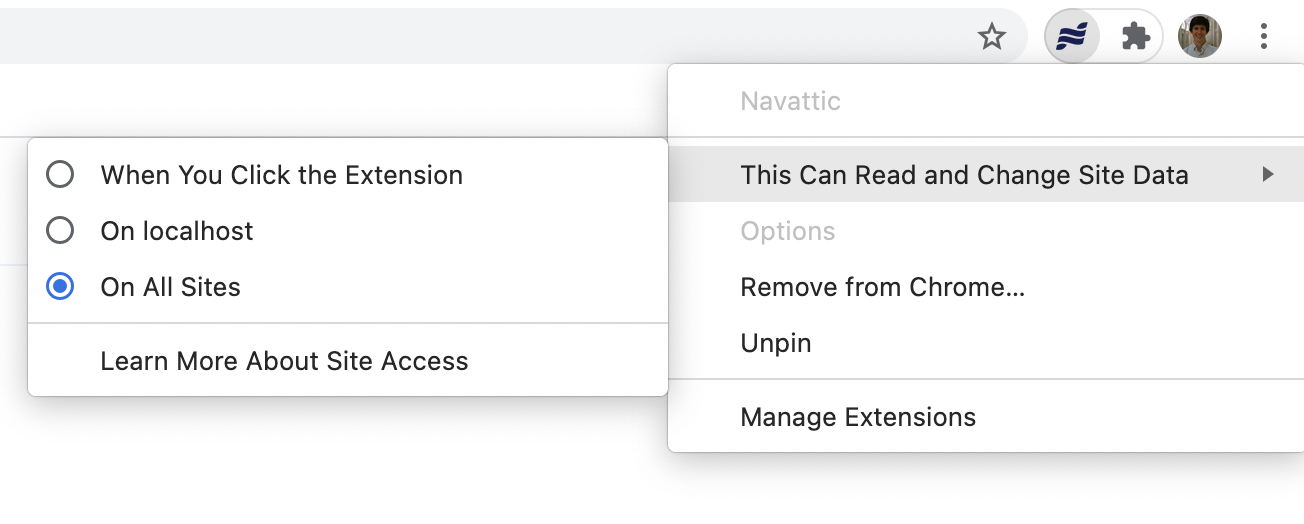
If you’re having trouble loading the Navattic Chrome Extension, it’s possible that the extension does not have the correct permissions. If you want to use the application on any domain the chrome extension needs to have the permission “On all sites”. If you just want it to work on specific applications, it should have the permissions for “navattic.com” and any other domains you want.To update permissions:
Click on the Navattic icon in the Chrome extension bar. If it’s not visible click the puzzle icon and select it from the dropdown menu (click the pin to add it to the extension bar).
Open the tab “This Can Read and Change Site Data”
Select the appropriate sites
Refresh app.navattic.com and any pages that you have open where you want to run the extension.
How can I take a Web Capture of a Figma file?
Follow the instructions in this video to learn how to convert your Figma files into an editable Web Capture.
Navattic includes mobile, tablet, and desktop borders for Apple and non-Apple devices. Adding a device border helps end users best visualize your desktop or mobile application. Learn more about’ ’ adding a device border’ ’ to a media capture.
How can I get my screenshot to better fit the device borders?
Using device mode in Google Chrome paired with a tool like
this , you are able to take screenshots that better fit with the device borders.
Can I edit a media capture using the Capture Editor?
No. Navattic does not currently support image editing. We recommend using a tool like Figma or Adobe to make modifications prior to uploading.
What is the recommended resolution for screenshots in Navattic?
We recommend using images that are greater than 1200px in width as smaller images will appear blurry in Navattic.
How do I avoid the need to scroll when using a device border?
To avoid the need to scroll, find the ratio of the device border and ensure your image has the same ratio before uploading it to Navattic.
The ratio for the Desktop border within Navattic is 3:2.
An easy way to get the correct ratio is to set up a Google Slides deck with this same ratio as the device border you want to use. Then, fill the slides with your images before downloading each individual Slide.
You can add images, videos, and audio clips in Modals and Tooltips. From the Flow Builder, navigate to your desired step > click the dialog box > click ”+” in the dialog header that appears > select and upload your media.Images and audio recordings will be uploaded directly from your device. Videos will require a link to a public video on Youtube, Vimeo, Loom, Wistia or Vidyard. We recommend keeping media attachments short to encourage users to explore your product on their own.
How should I end my Flow?
We recommend adding dual CTAs to the last step of your Flow. You may click + to add a Button to the Modal or Tooltip, or hide Navigation
Buttons on the last step if needed. This will make it clear to your end user that they have completed the demo and encourage them to convert.
How do I use Navigation Buttons and CTA Buttons together?
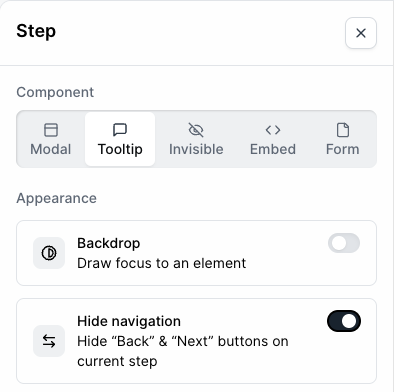
To hide Navigation Buttons, click your step heading (ex. “Modal” or “Tooltip”) > toggle on Hide navigation in the right-hand menu. Now that the navigation buttons aren’t visible on this step, click the + button in the step and select Button. If you want to add more than one button, repeat this step.
How can I highlight multiple elements in a single step?
While each step can only include one Tooltip or Modal, Beacons can be used to highlight multiple elements at once ( example ). To do this, find your Step in the Flow Builder and simply add Beacons . We recommend including a Tooltip on this Step to communicate the intended workflow with users.
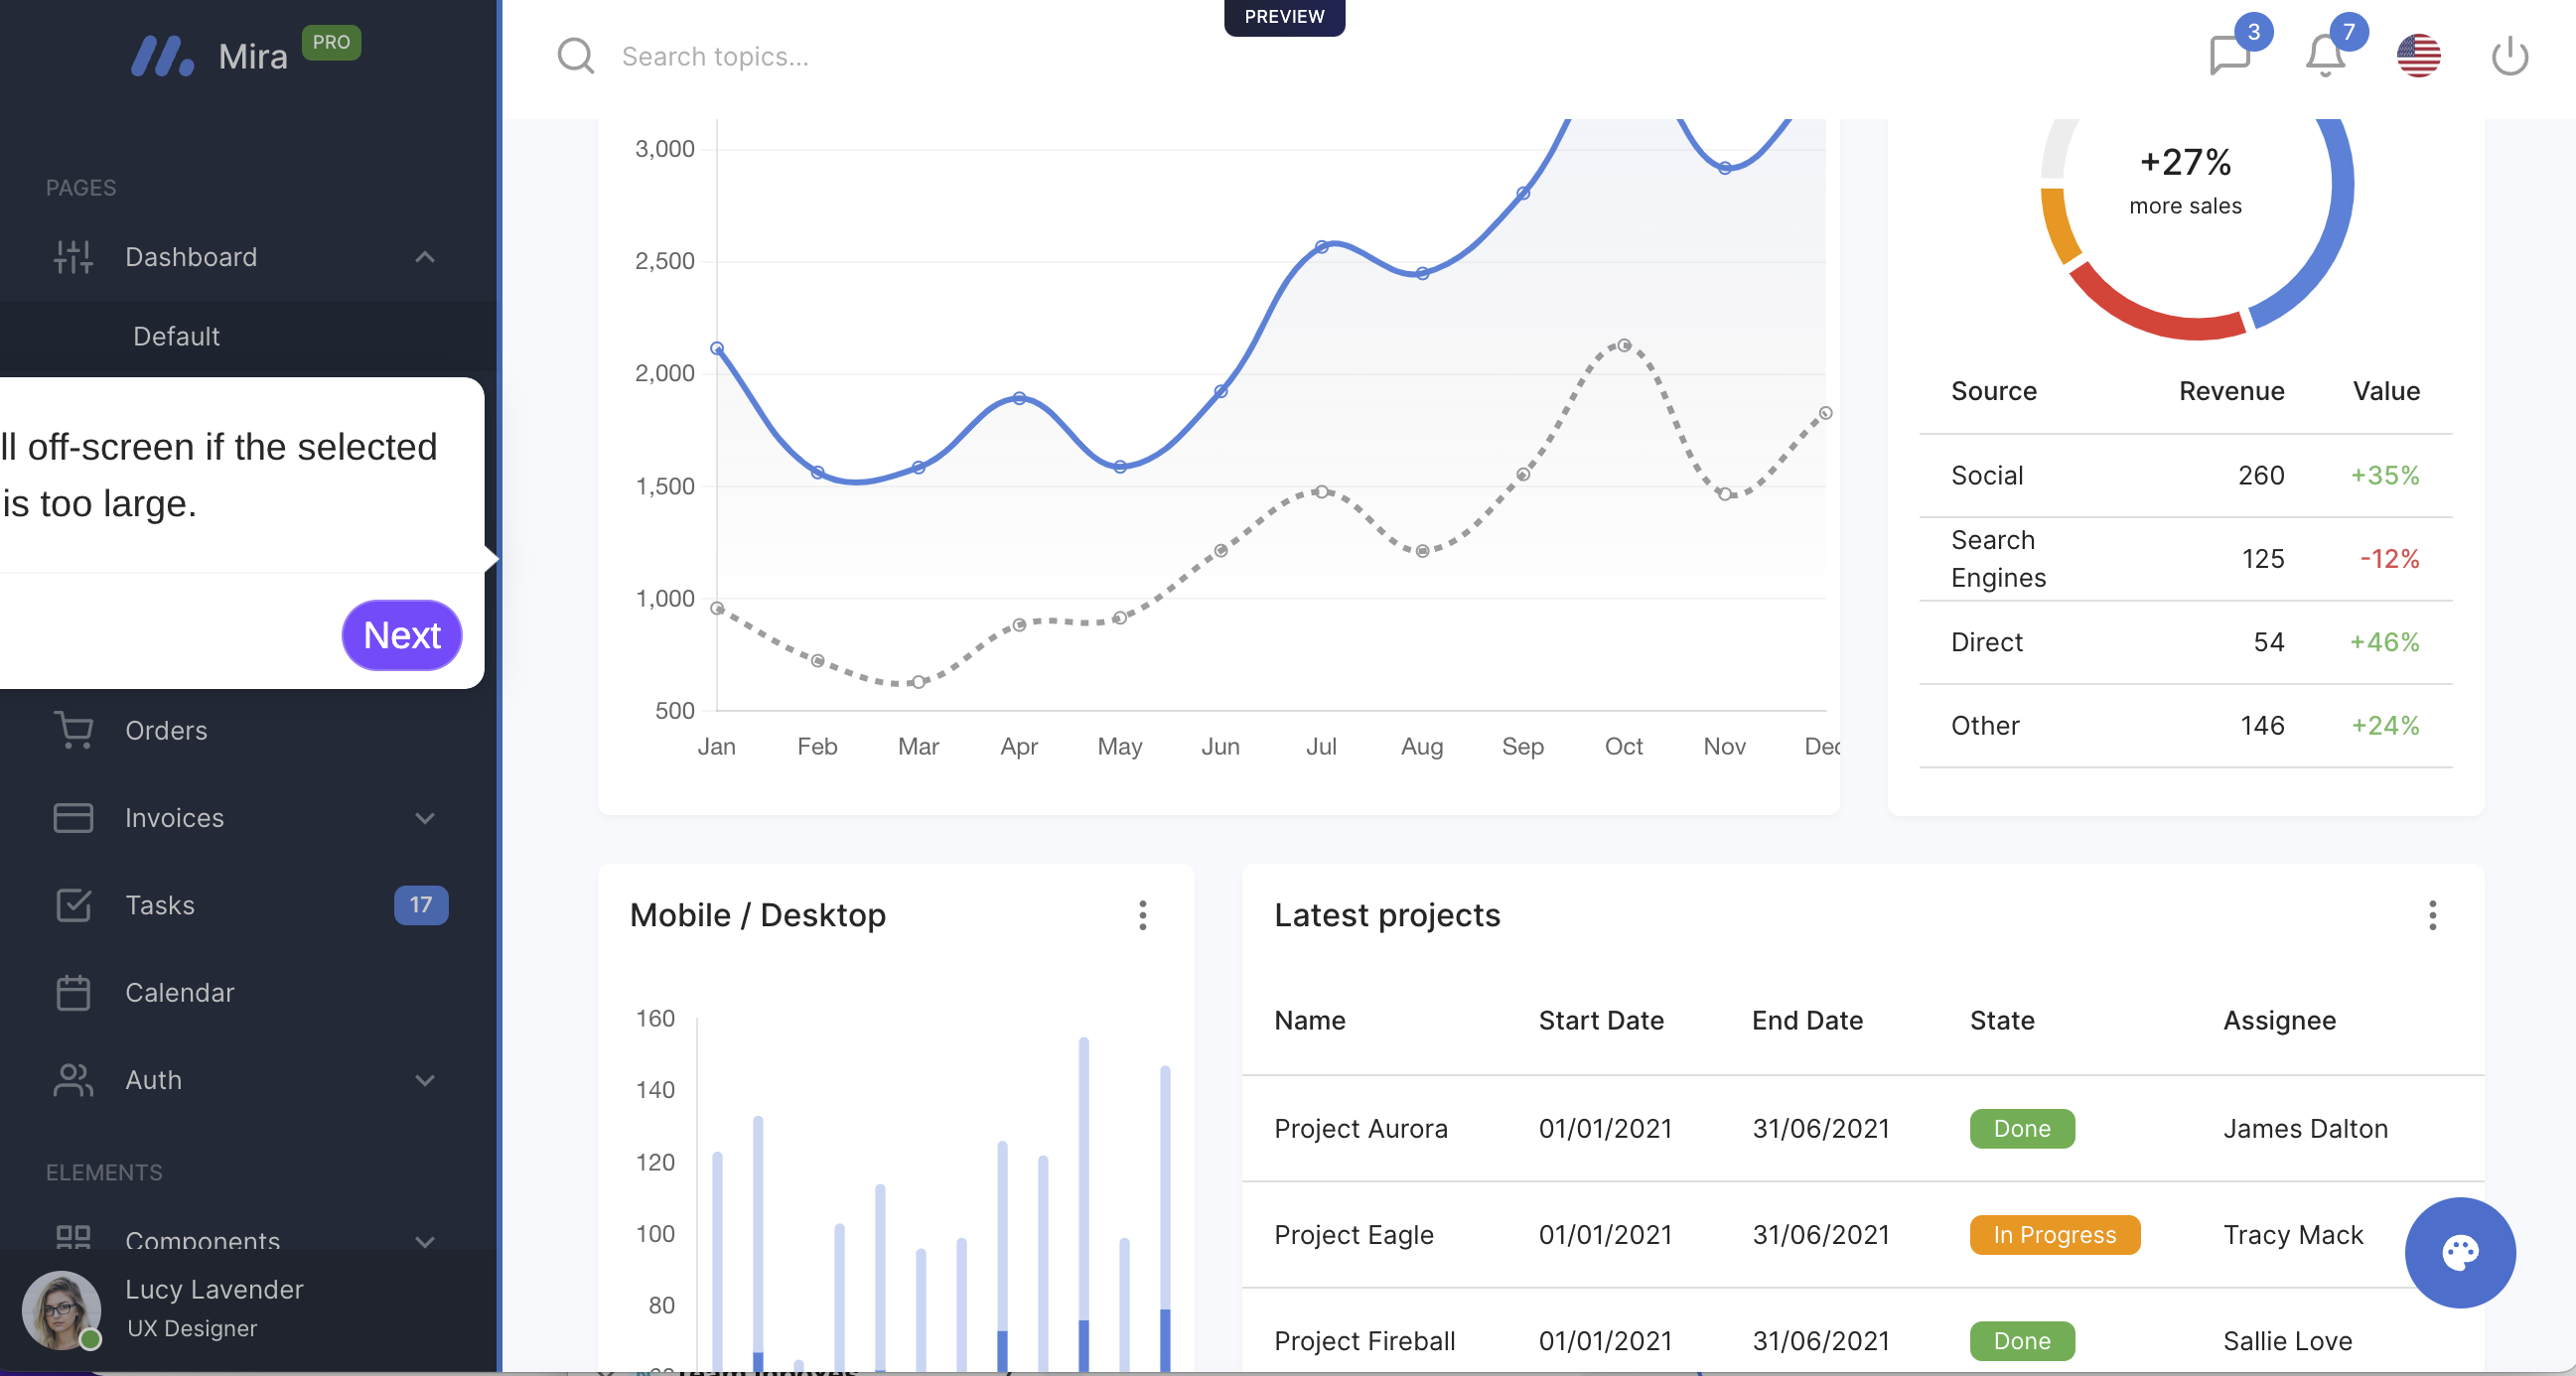
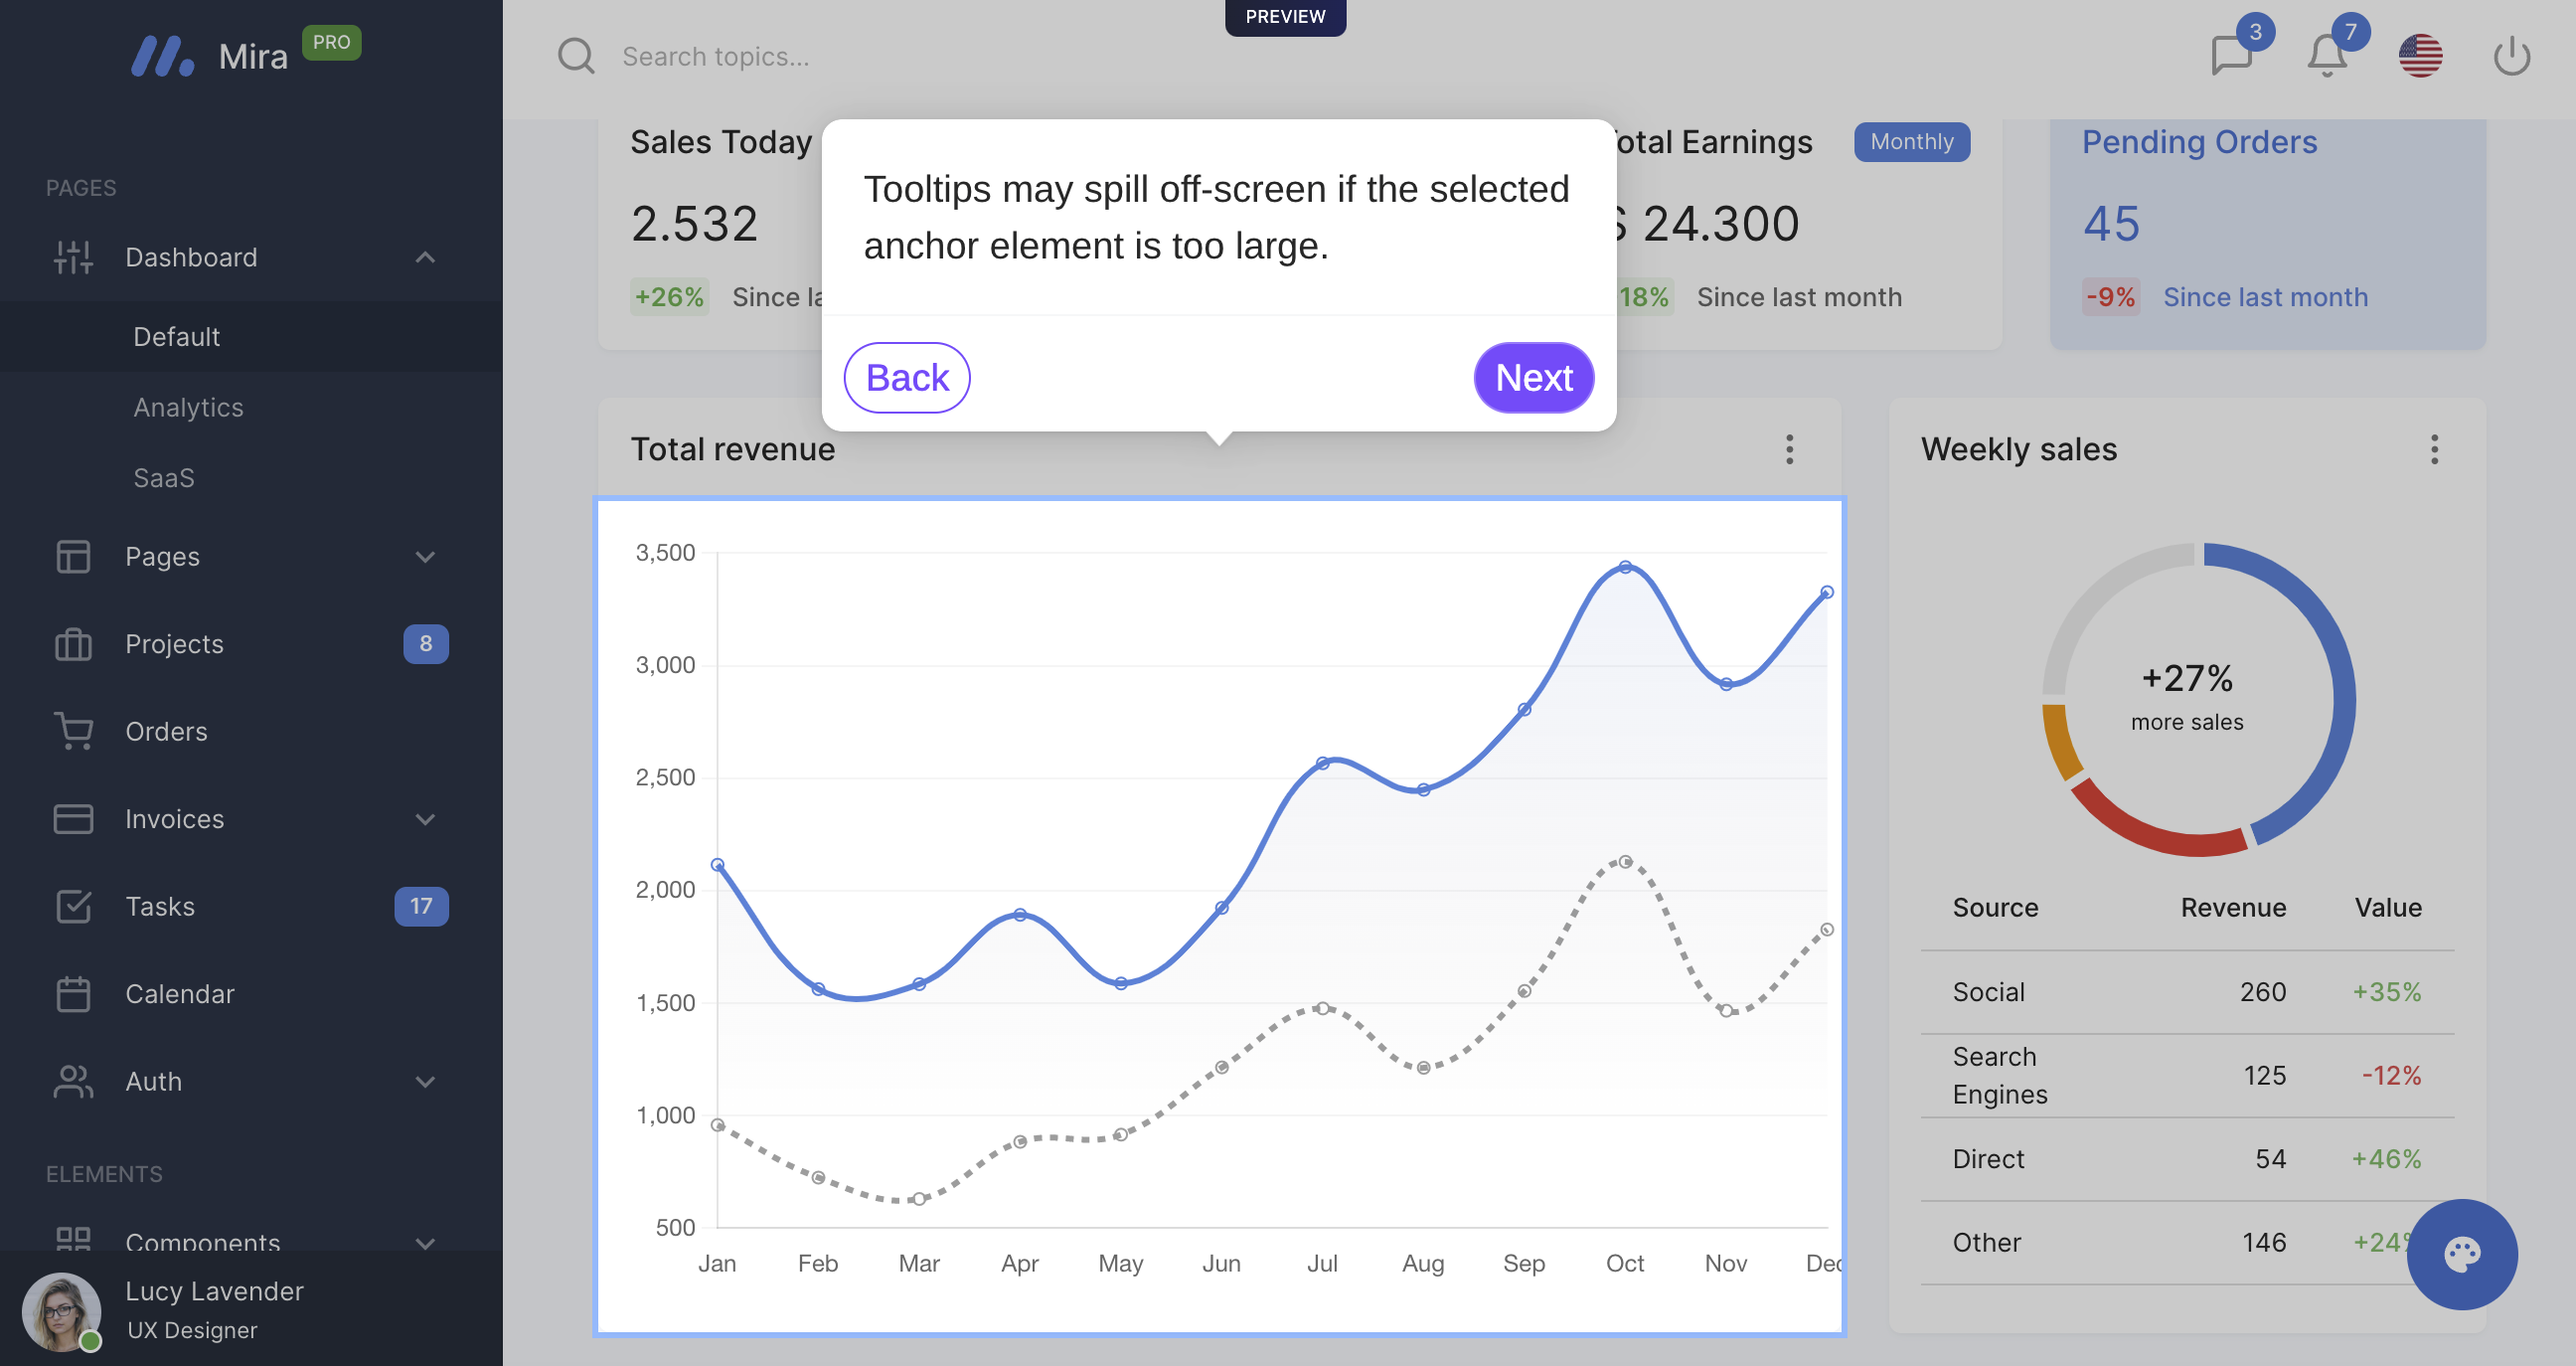
How do I fix a Tooltip that appears to run offscreen?
Tooltips may run off screen if the selected anchor element is too large and does not leave enough room to display the Tooltip fully. You can change the tooltip position, edit the tooltip height and/or edit the tooltip width to try and get the Tooltip to fit.If these edits do not solve the problem, please select a smaller anchor element for this step.
How do I replace Captures within a Flow?
From the Flow Builder, locate the step where you want to switch the Capture and click on Replace Capture. This will open a dropdown menu where you can select a Capture from the current Collection, Add to the Collection, or select Captures from a different Collection in your workspace. If the new Capture has similar elements to the old Capture, the anchor element will automatically be updated.
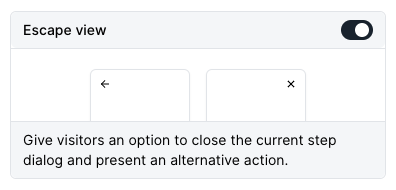
How will the Escape View appear in a Flow?
Escape View will match the Escape step that can be found at the end of your flow builder. To turn on Escape view, click settings > toggle on Escape view.
When should I include a Form in my demo?
Forms are used to gather user information such as name, email, company, and more. If the goal of your demo is to directly generate leads, a Form may be helpful for gathering information. Typically, about 20% of demo Visitors will fill out a Form on the first step.If using a Form, we recommend introducing this early in your demo and keeping it brief (1-2 fields if possible). Remember, your demo likely also includes other CTAs and conversion points that help high-intent viewers make their interest known.
I am unable to select elements within the Flow builder.
The Navattic Chrome
Extension is required in order to select elements within the Flow builder. Be sure to install this extension first. If it is already installed, please remove and re-add it to update it.
How do I enable a text input trigger?
Text input has value condition can be used to have viewers engage with the capture by adding a text string to a text input field or contenteditable element. If a text input condition is used in conjunction with a tooltip on the same step, you will also want to toggle off the Progress on click option on the step (found by clicking on the Anchor > Advnaced) so that the demo does not move to the next step when the element is clicked.
Can I highlight elements without using Tooltips?
While most Navattic demos benefit from dialog boxes that tell a story about your product,’ ’ Beacons can be used to highlight standalone elements in your Captures. From your Flow > add a Beacon. By default, a Beacon is a blinking dot next to an element.
Can I make edits across multiple steps at once?
With the Bulk Editor, you can apply edits across multiple steps at once. Bulk edits include:
Updating all beacons to triggers
Turning multiple modals into tooltips
Changing all beacons to have a highlight appearance instead of pulse
Deleting multiple beacons or triggers at the same time
Copying or Moving Steps to other Flows within your demo or to other Demos
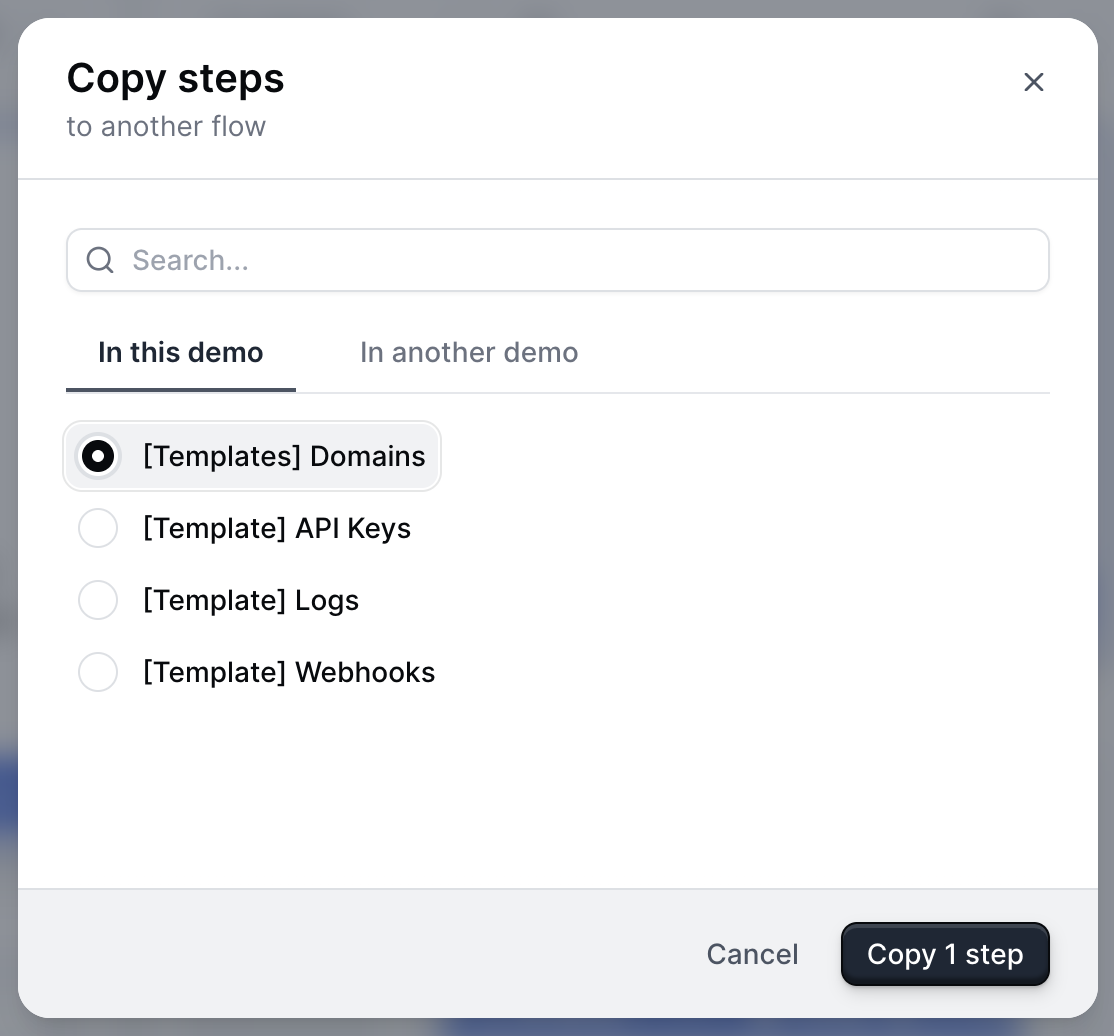
With the Bulk Editor, you can copy or move steps into another Flow within the same demo or to another Demo in your Workspace.To do this, check off the steps you want to move or copy and then select the Copy to… or **Move to.. **icon at the bottom of your screen. From here, you’ll be prompted to select whether you want to copy the steps into a Flow within this demo or in another demo. Once you select the Flow you want to move it to, click Copy # step.View a 2-minute tutorial here
How do I copy or move a flow to another Demo?
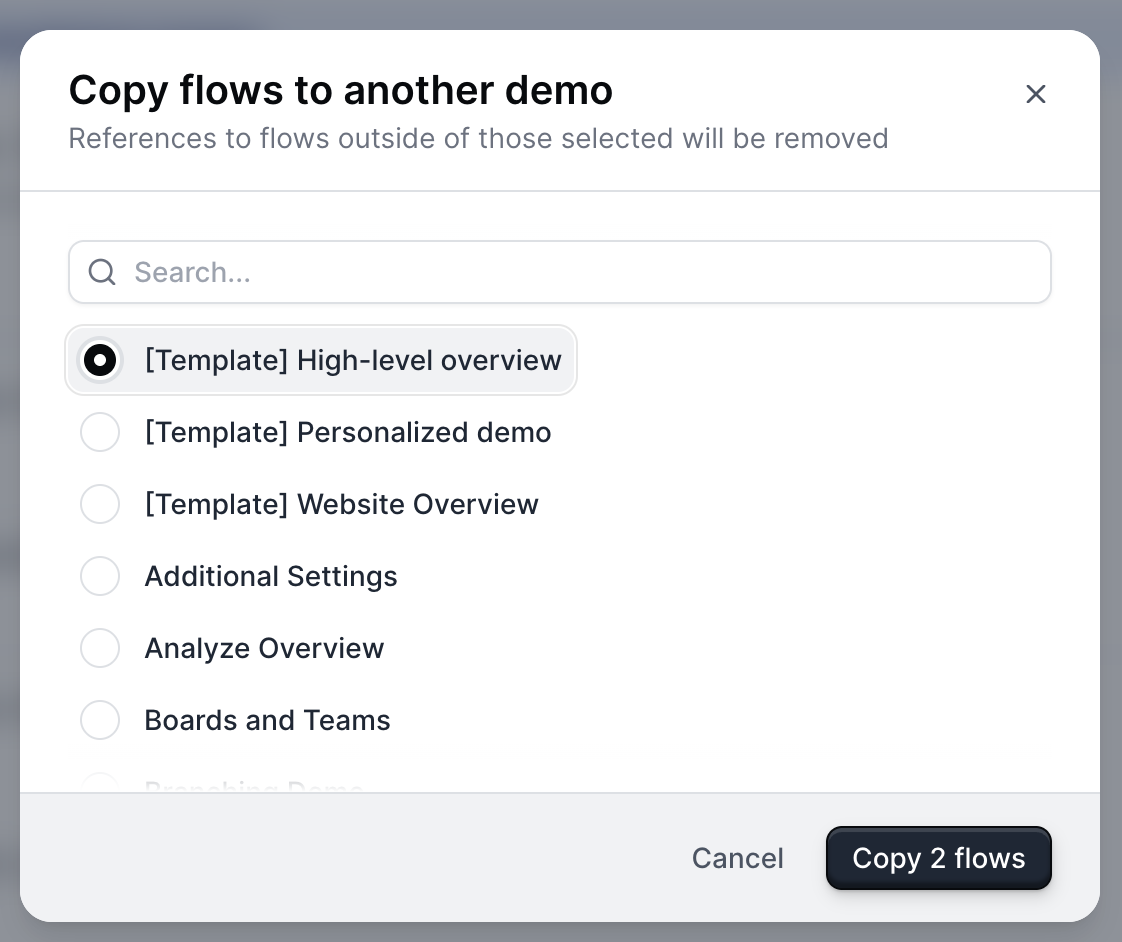
With Product Demos, you can copy over Flows from existing Product Demos. To do this, visit Flows > + Create Flow > Copy. Select the target Product Demo and desired Flow to copy into your new Product Demo.You can also copy or move multiple Flows at once by selecting the Flows you want to Copy and then selecting the Copy to… or Move to… icon at the bottom of the screen. From here, you’ll be prompted to select which Demo you want to add the Flows to.View a 2-minute tutorial here .
Can I add navigation buttons to my demo without using a Modal or Tooltip?
Yes, you can add navigation buttons without using a modal or tooltip by creating a Theme with a transparent dialog box and border.To create a Theme, visit Themes > + Create theme. From here, select Dialog > Dialog Background Color > use the opacity slider under the color picker to make the dialog box transparent. Repeat this step with the Dialog border color.Learn more about Themes.
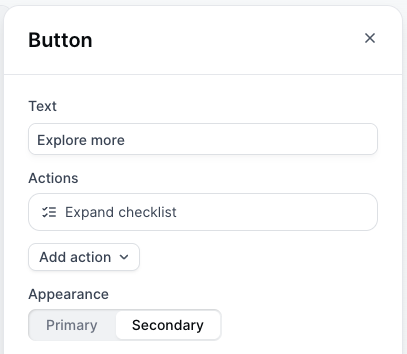
While viewers can manually expand at any point, you can also add an action to any Beacon, Trigger, or Button in your flow to prompt a Checklist to open automatically at a certain point, including after the last step. Expand Checklist can be paired with any condition, including Timer.
How do I adjust the appearance of my Checklist?
Visit Themes to adjust the appearance of your Checklist. Common adjustments may be:
Adjust the shape and size of your Checklist Launcher
Change the color of the checkmark
How do I view the Checklist created?
To view your Checklist, visit a Product Demo > Checklist. You can also preview the checklist when previewing the flow.
How do I move my Checklist to the left or right of the screen?
To move the Checklist position, you can drag and drop the checklist in the builder. Alternatively, visit the Checklist tab in your demo > Edit > Position > Select Left or Right.
How do I reset my progress in a Checklist?
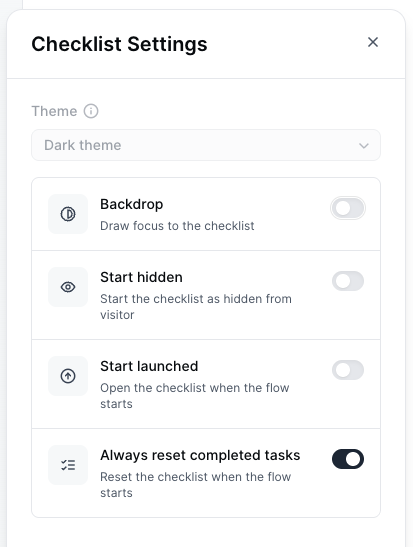
When testing a Product Demo that contains a Checklist, you may notice that the Checklist tasks are already completed or include a strikethrough. This is due to your browser caching each previously completed step of the demo.To restart your Checklist each time, visit your Checklist Settings > Always reset completed tasks.
How do I hide my Checklist until after a Form is submitted?
To prevent Visitors from skipping the Form by using the Checklist, visit your Checklist > Settings > Toggle on Start hidden.Once this is toggled on, visit the Flow with the Form > locate the Form Step > add the Show checklist action to When form is submitted.
How do I customize Product Demo links for sharing?
You may customize the path of your Product Demo URL under Share > Share links. (https://workspace.navattic.com/CustomizablePortion)Visit your Product Demo > Share > Share links > + Create link > Enter a Name for your link > type into the customizable portion of the Share link at the bottom > Create.
How do I remove responsiveness from my Product Demos?
While your application’s native responsiveness settings will work well in most cases, Scale width will be helpful for smaller iframe embeds or viewports. Instead of rearranging onscreen elements per your app’s default responsiveness behavior, Scale width will shrink the entire Capture proportionally to fill your viewport. This ensures that end users will see the same elements onscreen as you did while taking the Capture.You can turn this on within Product Demos > Responsive > Scale width.
How do I create a .GIF or Video (.MP4) of my Product Demos?
Select the three dots next to the Share button and click Export Preview > Select GIF or Video > Select the Flow > Choose the number of steps to include and the Time per step > click Export.
How do I optimize a demo of a Mobile App for viewing on Mobile Devices?
The goal of this section is to fine-tune a demo of a Mobile App on a Mobile Device (ex. demo the Slack mobile app on an iPhone). Please visit this section of mobile viewing for information on presenting a demo of a Web App on a Mobile Device, which is a different scenario.To try the example below, visit this demo of the Famly Mobile App on a mobile device. If you do not have a mobile device handy, installing a mobile simulator like this may help quickly preview demos from a desktop.Step 1: Create a new Capture Collection and upload screenshots of your mobile app interface (Upload Images tutorial). Do not add device borders to your screenshots. They should appear full-screen when previewed.
If you are creating a demo of a Mobile Website rather than a Mobile App, here is a tutorial for taking scrollable screenshots of a Mobile Website. GoFullPage is a helpful browser extension for this.
Step 2: Create a Flow using these Captures as you usually do (Create a Flow). When building, use these tips to further fine-tune your Flow for a mobile audience:
Use Tooltips rather than Modals to create an engaging experience
Add a heavy backdrop to steps that include a Tooltip. This helps highlight important elements, even on a smaller mobile screen
Add Beacons when necessary to show users where to click
Include Navigation buttons to help users easily progress thorugh the demo
Step 3: Select ‘Show desktop demo’ under the Mobile tab to ensure your demo appears as expected on mobile devices.Step 4: From your website builder, link to the adjusted copy of your demo when a device under 800-px wide is detected. Most builders provide the option to create a responsive layout for your page that will present slightly different elements when viewed on Mobile vs. Desktop.
How can I set up my demo so visitors can select the desktop or mobile app based on their device?
Follow the instructions below to build out a demo that allows your visitor to select whether they would like to view the desktop or mobile app based on their device:
Build out two Flows in the same demo:
Desktop App Demo: Follow these instructions to build a Flow of your desktop demo.
Mobile App Demo:Check out the FAQ above to learn how to build a demo of a Mobile App for viewing on Mobile Devices.
Add a checklist to your demo: After building out the desktop Flow and mobile Flow in the same demo, add a checklist to your demo that will serve as the device selector.
Set the checklist to “Floating”:This ensures that it takes up a small portion of the screen.
Add the two checklist tasks and update the descriptions to something like:
**“I’m on a desktop” **— Directs users to the desktop version of your demo.
“I’m on a mobile device” — Sends mobile users to your mobile-optimized demo.
Turn on “Start launched”: Within the Checklist Settings, toggle on Start launched, which ensures the checklist automatically opens when the demo loads, prompting the visitor to choose their experience right away.
(Optional but recommended) Enable “Backdrop” in the Checklist Settings:This subtly dims the rest of the screen so the device selector stands out, reducing the chance a visitor misses it.
Preview and publish:Test both paths to confirm the desktop and mobile flows open as expected. Once everything looks good, publish your demo.
How do I embed my demo in my Zendesk help center?
Check out this demo to learn how to embed a demo in your Zendesk help center.
How do I change the text in the banner of a Pop Up Embed Demo?
If you’re using the HTML Pop up embed code , you can easily update the data-navattic-title attribute within the button element. By default, this attribute is set to the demo’s title, but you can change it to any title you prefer.Alternatively, you can edit the name of your demo, publish the changes, and then re-embed the demo using the updated embed code.
Can the embedded demo automatically show the visitor's preferred language based on location or browser settings?
Yes, as long as you are using the Languages feature, you can manually configure the embedded demo to reflect the correct language by passing a query string to the iframe embed or demo share link following these steps.For example, many websites allow visitors to select their preferred language, then append a query parameter like ?lang=en to the URL of subsequent pages to maintain that language preference. To ensure the demo reflects the correct language, you should pass the same query parameter to the demo embed or share link—and ensure it matches the language codes supported by Navattic.
How do I link to a specific flow within a multi-flow demo?
To link to a specific flow, use the following format: capture.navattic.com/projectID/?g=flowID&s=stepNumber.You can find the projectID and Flow ID in the URL of the flow builder. In the example below, the projectID is highlighted in red and the Flow ID is highlighted in green.The share link for this specific flow would look like this: capture.navattic.com/clxy49afk000009jn3ss2d3rt/?g=clxz2h9b8000109lcf9sa07dk&s=0.If you wanted to link to step 2 of this flow, then you would switch s=0 to be s=1. If you wanted to link to step 3, then you would change it to s=2 and so on.
Can I add a full screen option to my embedded demo?
Yes. You can allow viewers to toggle your demo into full-screen mode.To enable this, visit your demo’s Build page > Click the three dots next to the Share button > Select Settings > Enable Full screen toggle > Click Save.
How do I pass UTMs from a landing page URL into an embedded demo?
You may notice that your embedded Navattic demo does not automatically receive UTMs from the landing page it is embedded on. Take these steps to pass UTMs from the landing page URL into an embedded demo.
Locate your iframe source (“iframe src”) in your demo embed code. It will look like this. Add your UTM_source to the end of this iframe src, as highlighted below.
You will now see Visitor UTMs appear in your CSV export and your Visitors tab > expand a Visitor > “Tracking” section.
What are the app.navattic.com cookies used for?
The following filtered cookies:
__Secure-xxxxxxx
__Host-next-auth-.csrf-token'
are used for Navattic app auth and are not used for Visitor tracking. These cookies would never be sent from a Visitor page.
Does Navattic collect cookies for demo visitors?
If Customers decide to enable visitor cookies (this is an optional setting within the platform), visitor cookies will be tracked. If a Navattic form is used, these cookies will allow previously identified visitors to automatically skip subsequent Navattic form fills, providing a streamlined experience for both the visitor and the vendor (Customer).
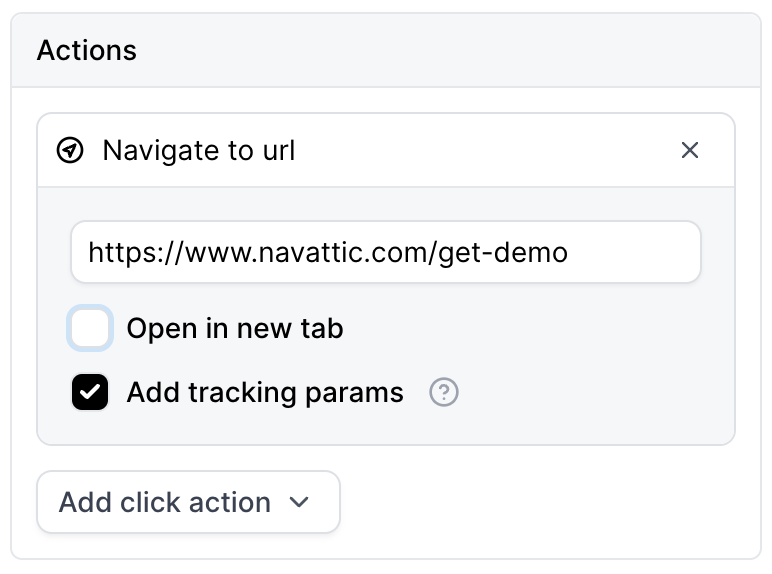
How can I add tracking parameters to CTA buttons?
You can add flexible tracking parameters to URLs that visitors click throughout your Navattic demo. If you have tracking parameters like UTMs, Campaign IDs, etc., present in your demo share link, you can now add these to the CTA links that visitors click during your demo.This provides a fuller picture of a user’s journey from your demo referrer page to your demo, to your CTA page, and beyond.To set this up, locate a Navigate to URL click action within your demo. Then:
Check the box for Add tracking params.
Add tracking params in a similar format as you have on other pages. For example, ?utm_source={{utm_source}}&utm_medium={{utm_medium}} would insert the present value for utm_source into this field.
If your demo is embedded, check out the Navattic JS docs to automatically tack UTM parameters.
First, add a’ ’ “Mark as Converted”’ ’ click action to the primary CTA button in your demo. Next, visit your Navattic Workspace > Visitors > Filters > Events: Converted. If you only want to see converted Visitors for a specific demo, you can also add a Product Demo Filter.
How do I see the total number of Visitors for a Demo?
From your Visitors tab, Filter by your Product Demo name to see only the Visitors who have engaged with this Demo.
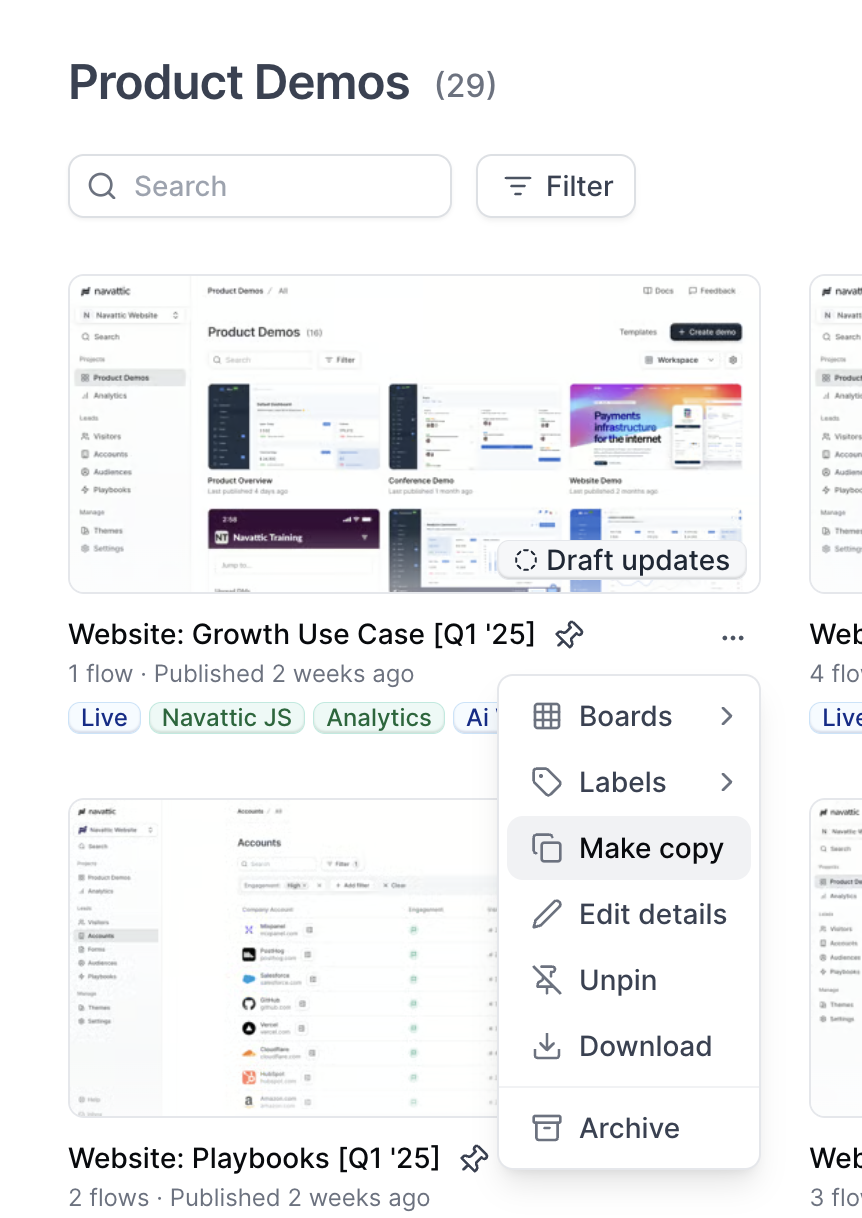
How do I separate Product Demo Analytics for different embeds or links?
There are several ways to separate engagement data if you are using the same demo in multiple places. If you are sharing your demo via Share Links, our recommendation is to create different share links for your product demo and to view the /path in your CSV export.If you are embedding your demo, our recommendation is to create multiple copies of your demo, so that each demo has a unique embed code. To copy a demo, visit the Product Demos page > locate the demo > click the three dots > Make copy.
Do demos with or without Forms see more user engagement?
Form-gated demos may see a higher % of conversion events, as viewers who complete a Form are oftentimes higher-intent. However, we have found ungated demos had about on average 12% higher completion and 5% higher engagement rates.
Why are there a lot of Step 1 views?
If your demo is embedded as an iFrame on a high-traffic landing page and does not include a third-party form, each website visitor is “loading” the first step of your demo. In this case, Step 1 views represent each time your webpage has been loaded and may include users who do not click into your demo; for ungated embedded demos, Step 2 views would provide a better representation for how many users have interacted with each Demo.
Why are there more Views for later steps?
Within the Product Demo page, each step view represents a time that page has been loaded. If a user refreshes a particular step of your demo, this will count this as two views. If present, this discrepancy is usually small.
How do I add UTMs to an embedded demo?
To track UTMs for Visitors to an embedded demo, add your UTMs to the end of the src link in your Navattic Website Embed code (the highlighted section below). Note that Navattic does not pull UTMs from the top frame of the page for embedded demos.
How can I configure my Navattic form to accept only business/work emails?
To ensure visitors enter their work email in a Navattic form, navigate to the Form > Select Email> form field to open the settings > toggle on Require work email.
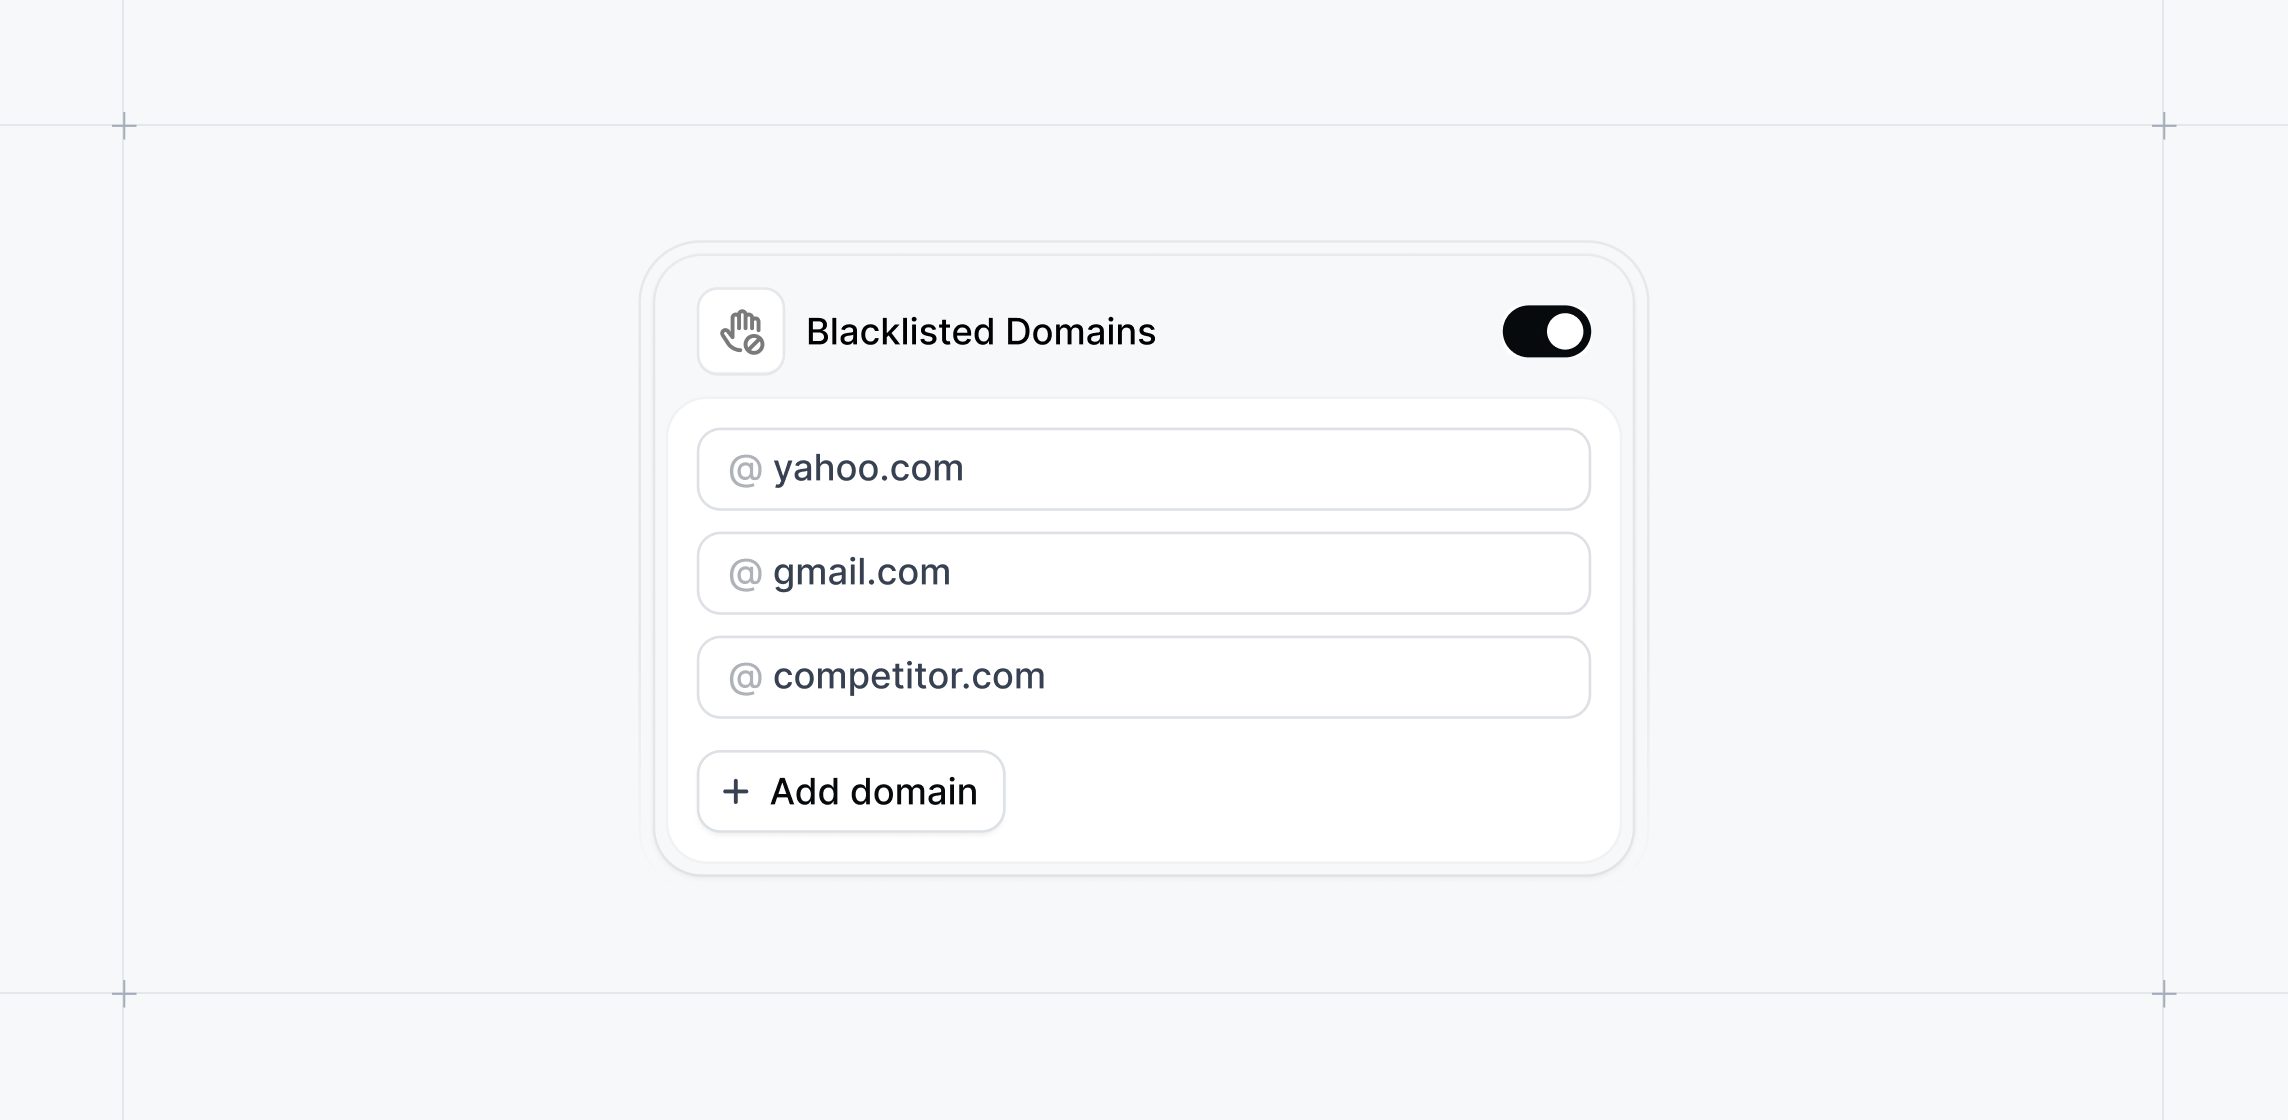
How can I block unwanted email domains from accessing my demos?
You can restrict access by adding a Form with an email field and enabling the Blacklisted Domains setting. To set this up, go to your Form Builder, select the email field, toggle on Blacklisted Domains, and enter the domains you want to block.This feature is available for Growth and Enterprise workspaces.
How can I autogenerate a Theme using my company colors?
To autogenerate a Theme, go to Themes > Quick Builder. From here, you can choose a primary color and a secondary color > Click “Generate theme”. If you want one of the colors to be the default background color, toggle on “background”.These colors will automatically apply to all of the elements in Themes including buttons, beacons, tooltips, etc.
How can I change the font?
To edit the font used in your demo, go to Themes > Font. You can edit the font color, size, line height, link color, and link hover color. You can also select a custom font.
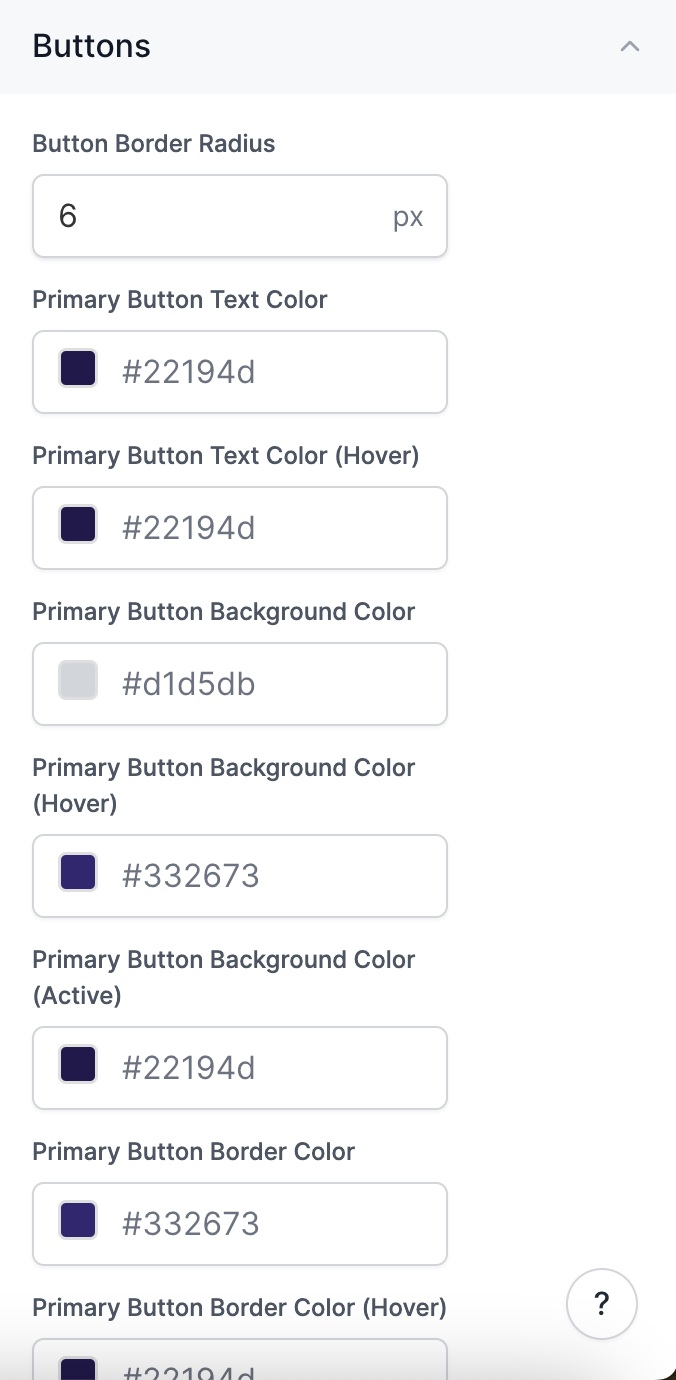
How do I edit the Button color and size?
To customize the Button, go to Themes > Select “Buttons” in the menu on the right. From here you can edit the Button border, text color, background color, font weight, and padding.
How do I edit the Beacon color and size?
To edit the color and size of the Beacon, go to Themes > Select “Beacons” in the menu on the right.
How can I customize the width of my Tooltips?
To edit the Tooltip width, go to Themes > Tooltip. Use the arrows to change the Tooltip widths for Small, Medium, and Large. Check out Customize Tooltip
Width for more details.
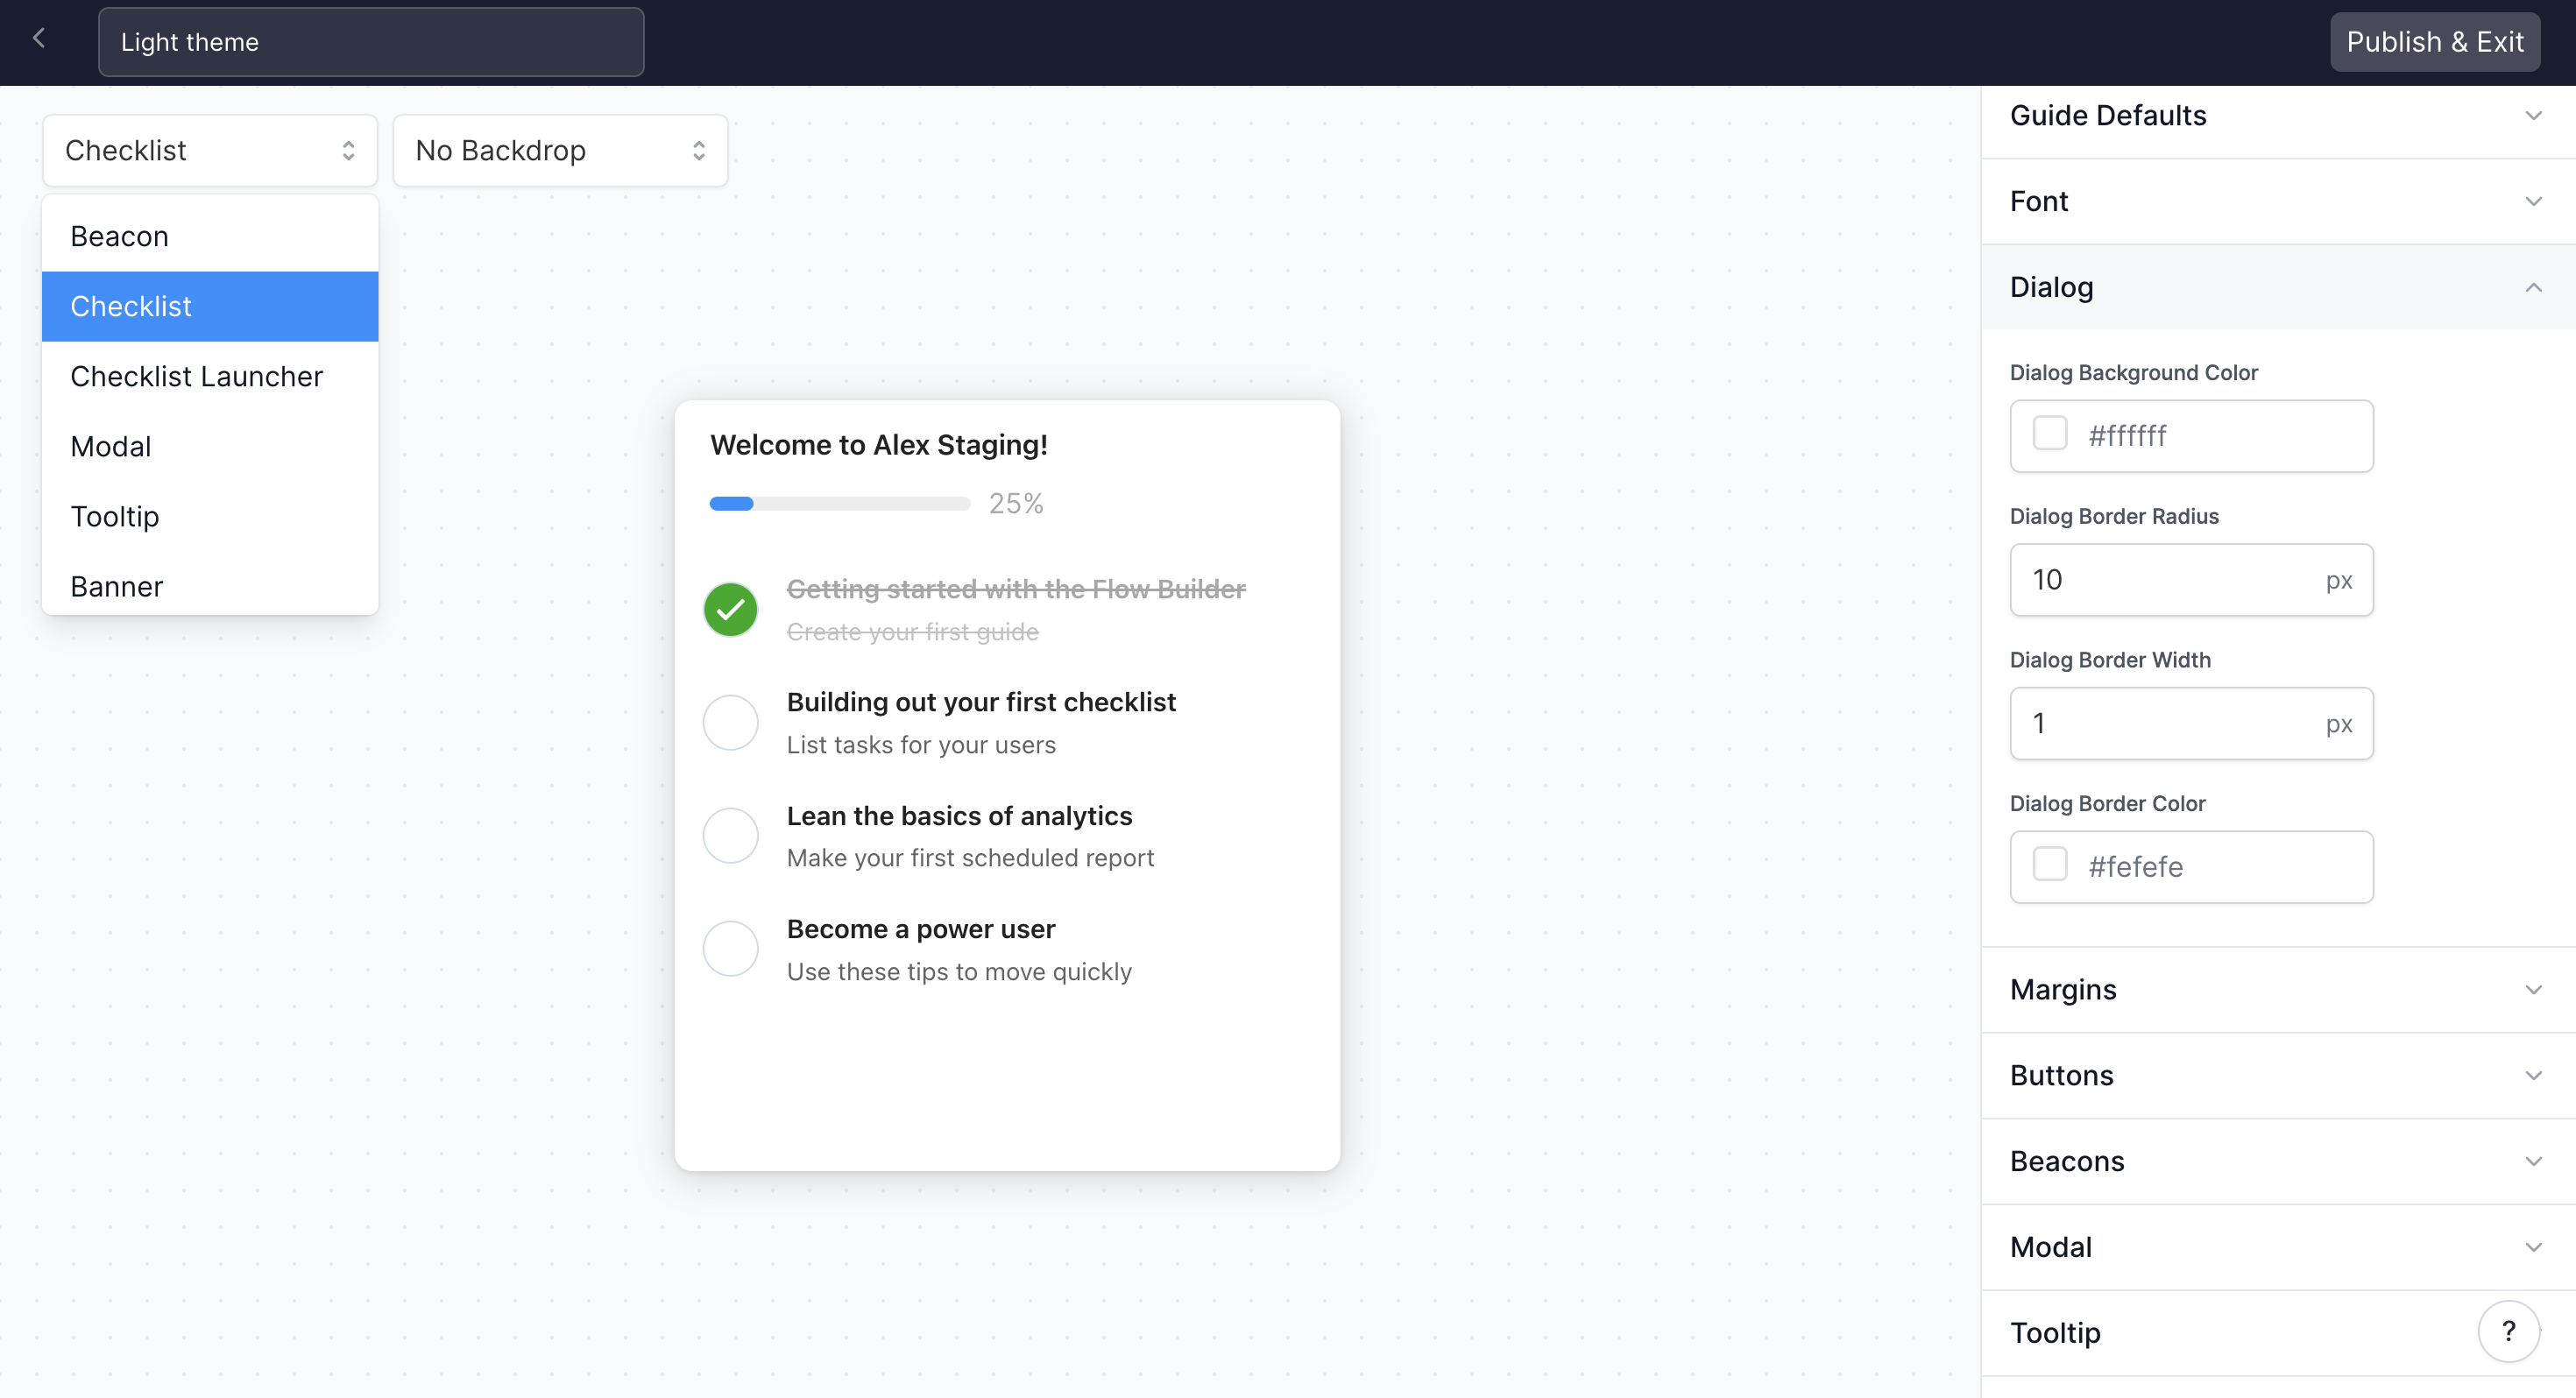
How do I edit the Checklist background color, border, and font?
To edit your Checklist background color and border, go to Themes > Use the drop down to select Checklist > Select Dialog.You can also edit the Font in your Checklist directly above Dialog. Make sure to Publish & Exit after making changes to your Checklist.
How do I edit the Checklist checkmark color and task completion decoration?
To edit the Checklist checkmark color visit Themes > Select Checklist in the righthand menu.
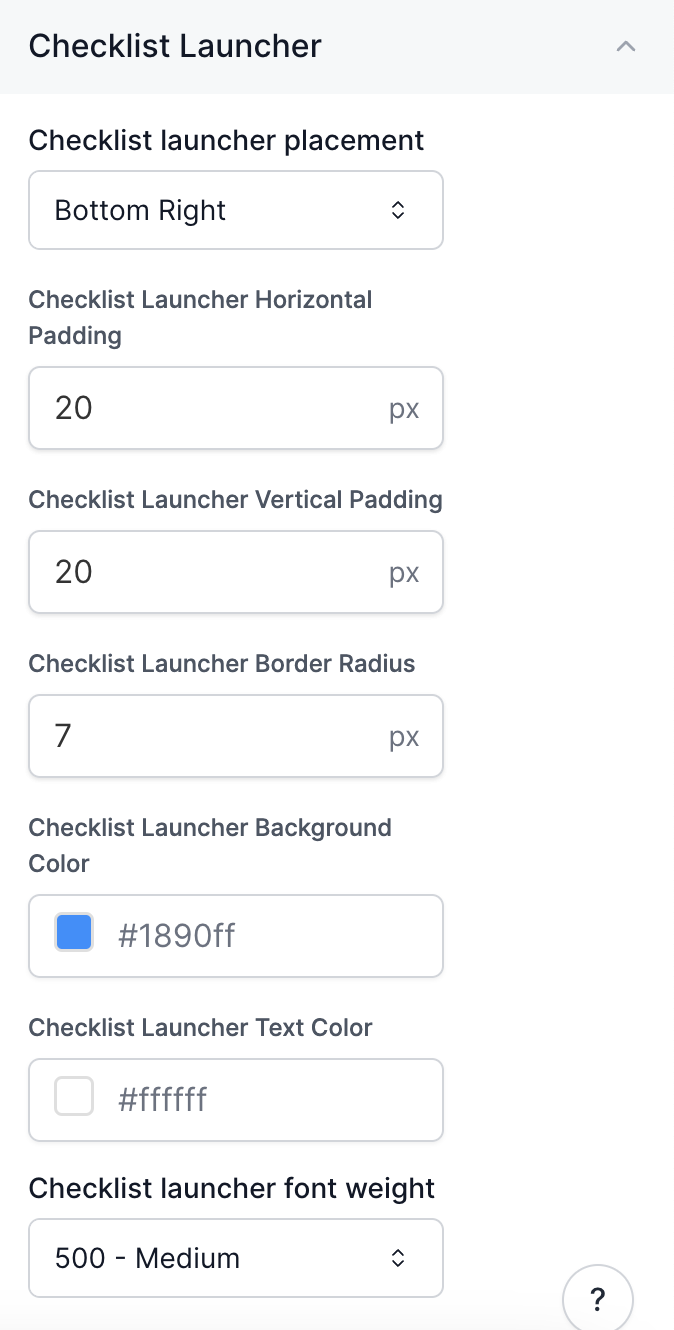
How do I edit the Checklist Launcher?
To edit the Checklist Launcher visit Themes > Select Checklist Launcher in the righthand menu.You can edit the placement, the horizontal and vertical padding, the border radius, the background color, the text color, and the font weight.
How do I edit the Progress Bar?
To edit the Progress Bar (for your Modals, Tooltips and Checklist), visit Themes > Select Progress Bar in the righthand menu. Select “Show checklist progress bar” to turn on the Progress Bar for Checklists or “Show dialog progress bar” to turn on the Progress Bar for Modals and Tooltips.
To preview what the Progress Bar will look like for Modals, Tooltips, or the Checklist you can use the dropdown menu in the top lefthand corner.
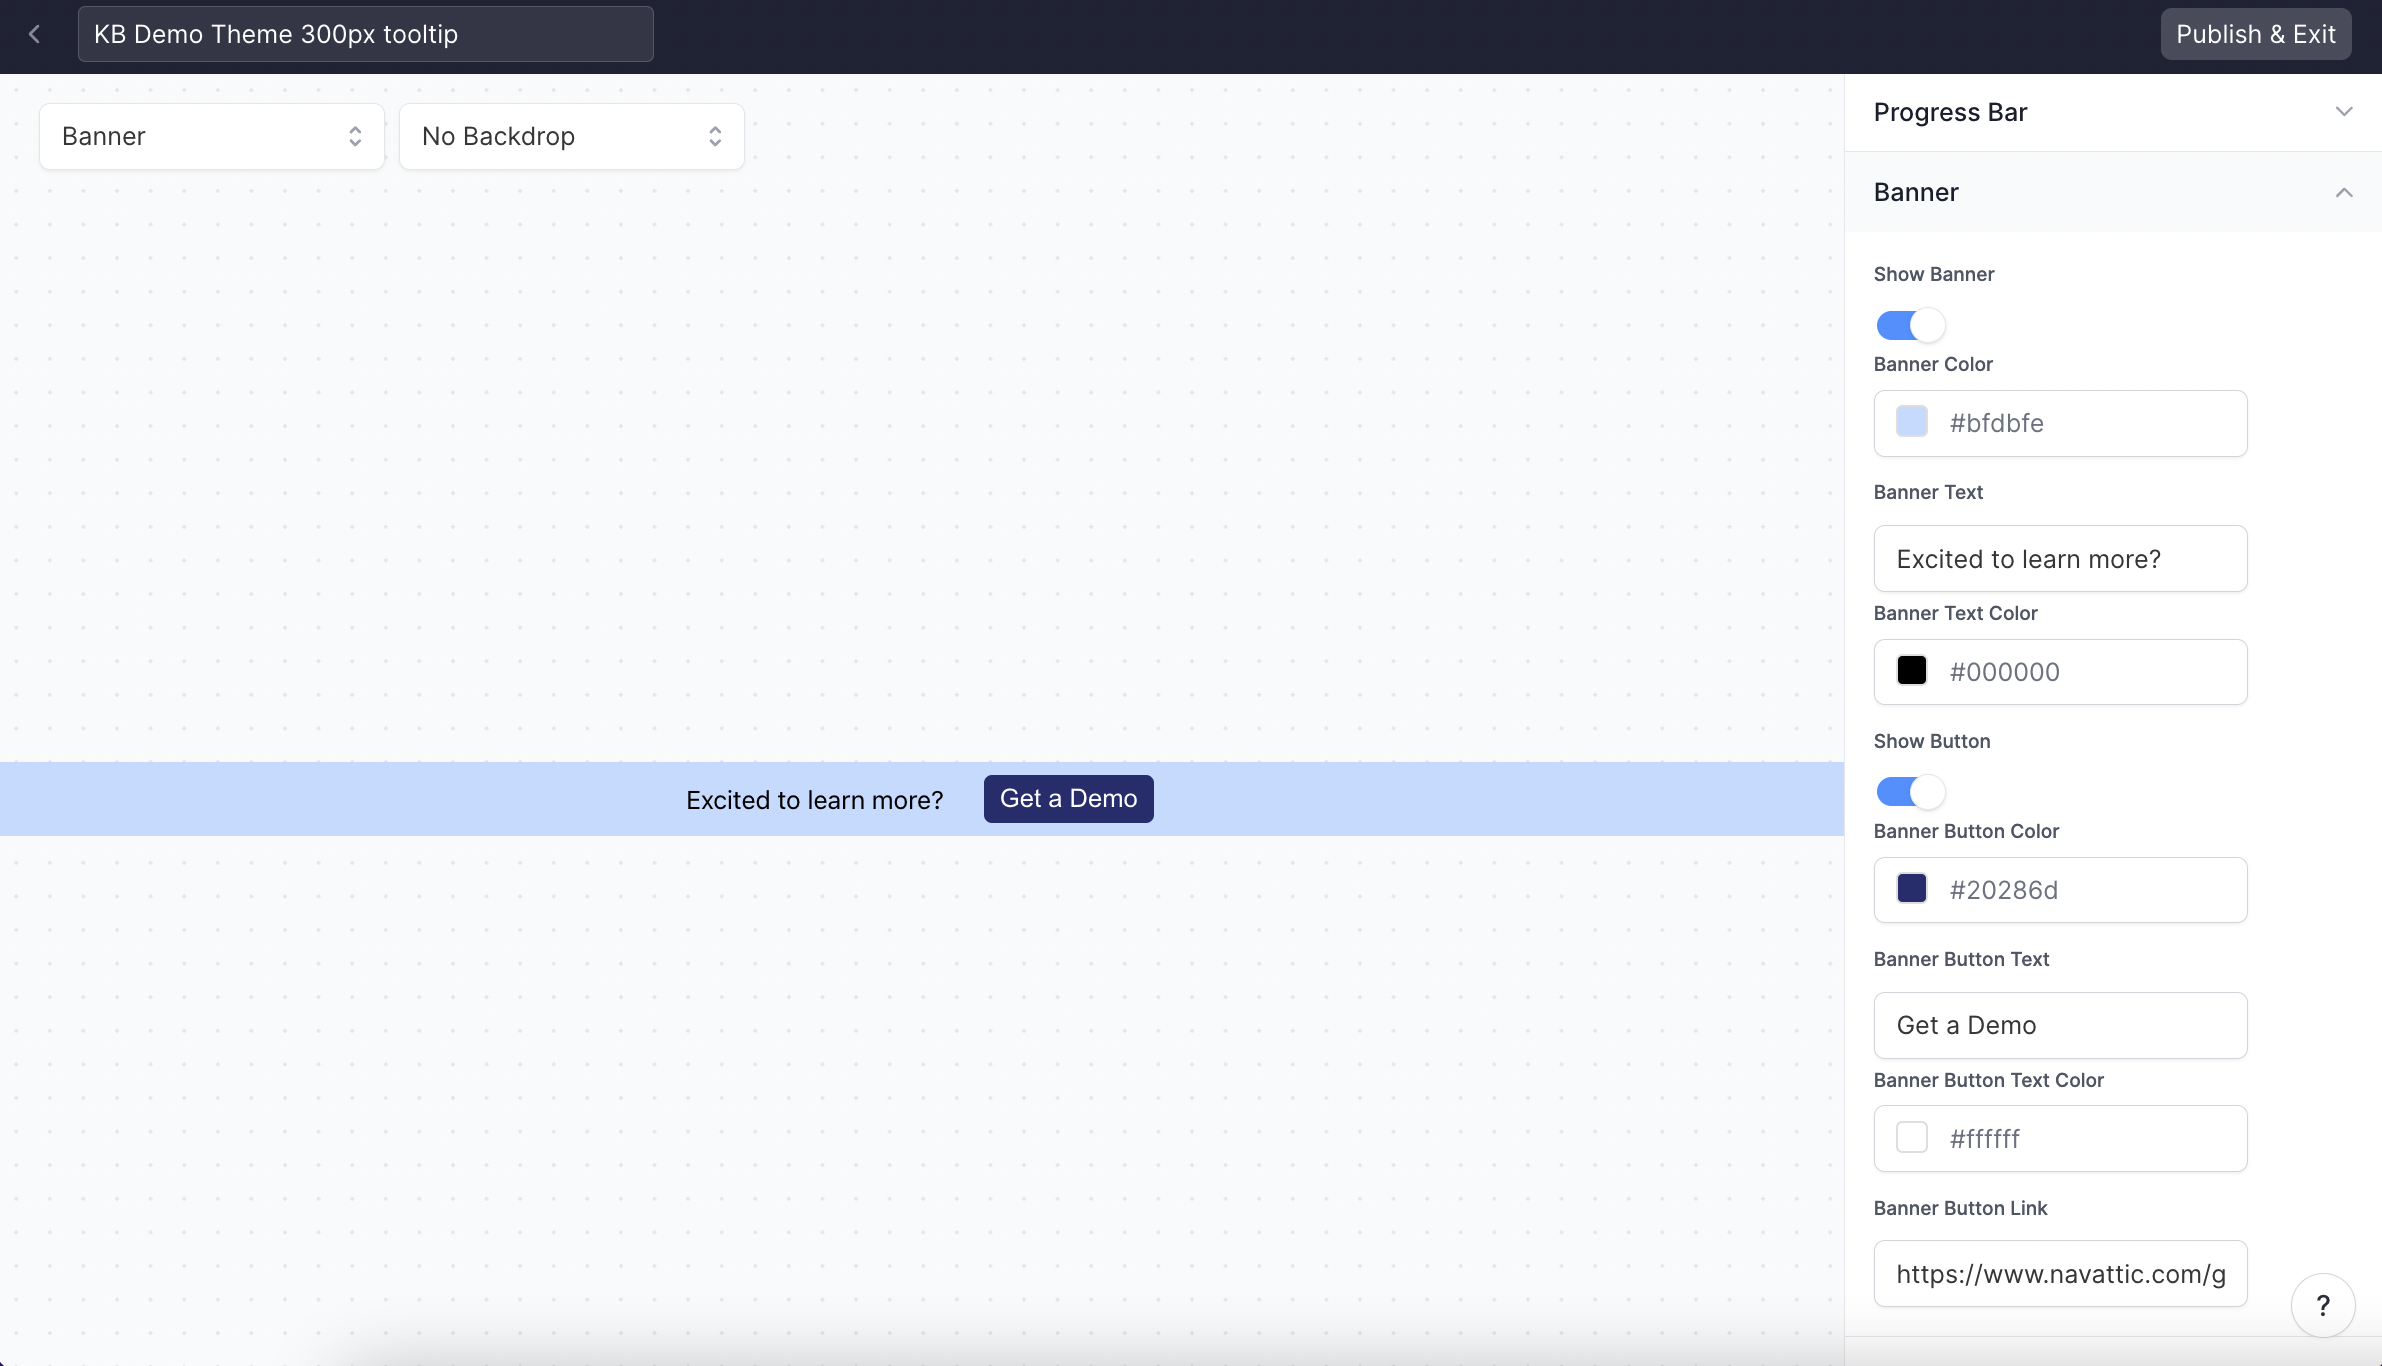
How can I add a CTA banner to my demo?
Visit Themes > Banner to create a custom CTA Banner for your demos. Customize the banner’s colors, text, and linked resources. Publish & Exit to add your banner to existing projects.
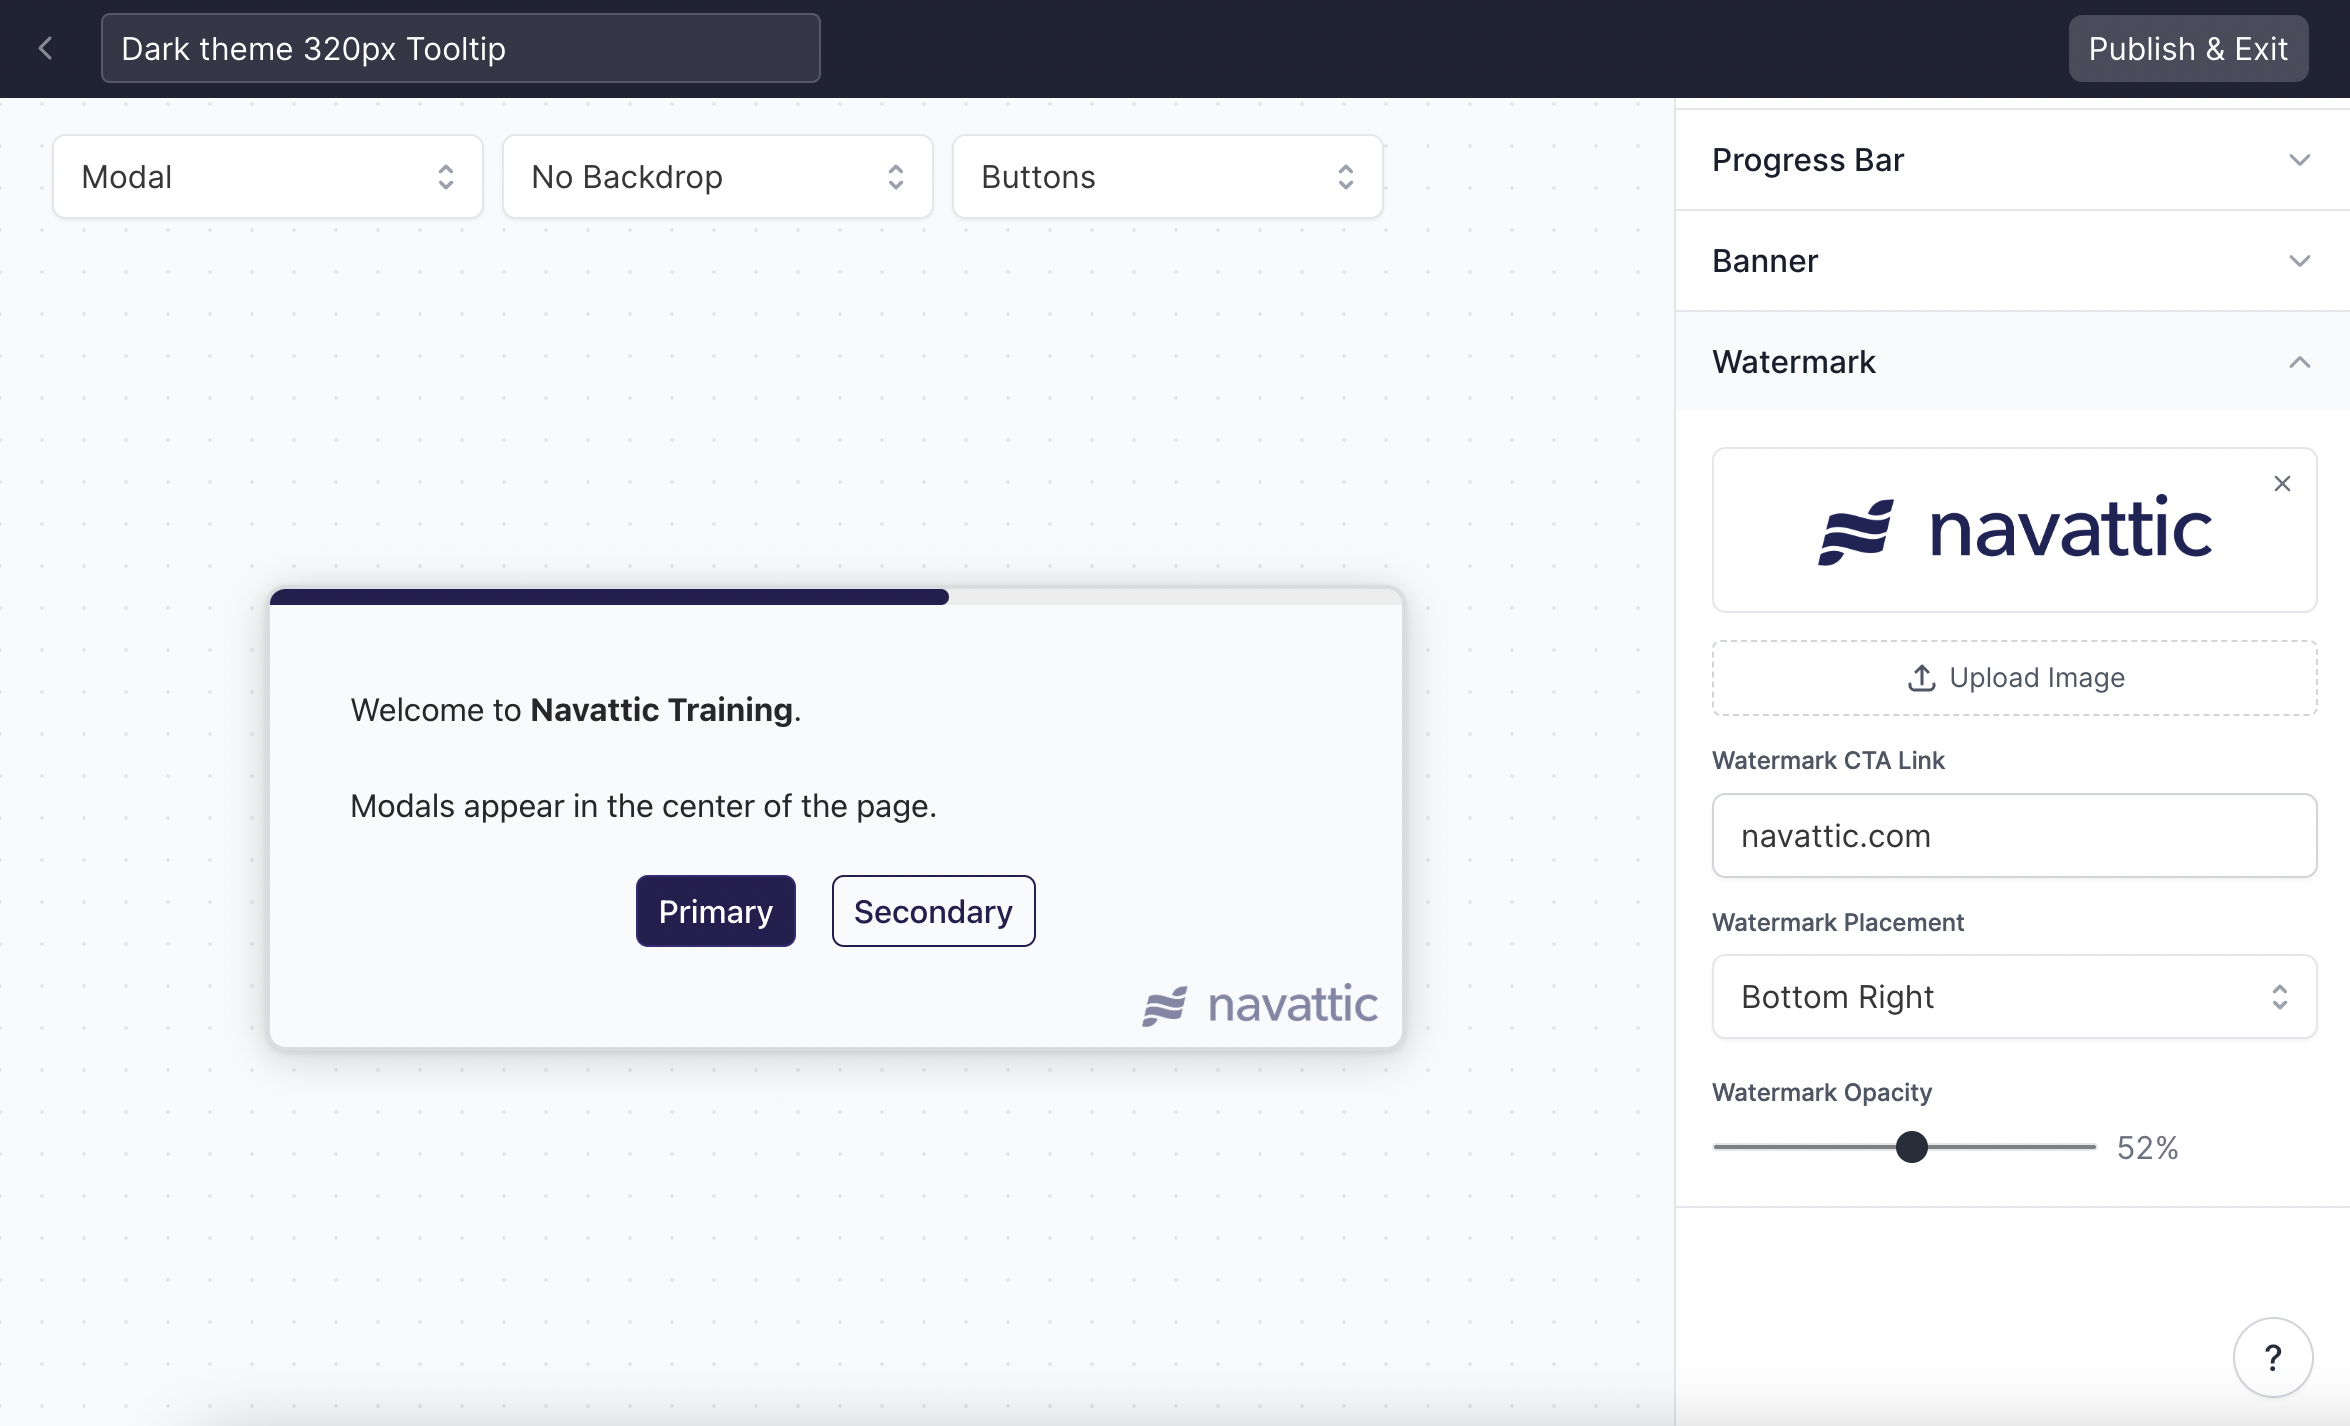
How can I add a custom watermark to Tooltips and Modals?
Visit Themes > Watermark to upload an image to be used in Modals and Tooltips, and set your watermark’s position, CTA link, and opacity.
How can I change the Tooltip Border Color when paired with a Backdrop?
Visit Themes > Tooltip > Anchor backdrop highlight color to change the backdrop border color. Check out how to’ ’ add a backdrop to your Tooltip
Every time you publish a demo, a new version is created, capturing a snapshot of your demo at that moment. This creates a complete history of your published changes, allowing you to see how your demo has evolved over time. Your current unpublished work is always available as “Drafted changes.”
What can I do with a previous version?
From the version history, you can:
Restore: Revert your current draft to a previous version.
Preview: View a specific version to see how it looked and functioned.
Edit Details: Update the title and description of a version to keep your history organized.
How do I restore a previous version of my demo?
You can restore a previous version from the demo’s “Versions” panel.
From the demo header, open the menu and select Versions.
A timeline of all your demo’s versions will appear.
Find the version you want to restore and select the Restore option.
What happens when I restore a version?
When you restore a previous version, its content will replace your current draft. A confirmation message will appear to let you know that all changes made to your draft since that version was created will be overwritten.
Does restoring a version automatically publish it?
No, restoring a version only updates your current draft. It does not automatically publish the changes. You will need to publish the demo to make the restored version live for your viewers.
What is the difference between a 1:1 and a 1:many share link?
A 1:1 link is created for a specific company or prospect. You specify the company domain when creating the link, which allows Navattic to personalize the demo and track engagement to that account. A 1:many link is designed for outbound campaigns where you’re sharing with multiple prospects or companies at once. Navattic recommends 1:1 links for most deals, as they provide better personalization and more accurate engagement tracking.
Can I identify individual viewers from a 1:many share link?
Not by default. 1:many links are not tied to specific recipients, so viewers are tracked anonymously. To identify individual viewers, enable the Recipient form gate when creating the share link — this prompts each viewer to enter their name or email before accessing the demo.
What happens if a prospect forwards a 1:1 link to someone else?
Each person who opens the link creates a separate session in Navattic. If no recipient gate is enabled, those additional sessions will be unidentified. Enabling the Recipient name or email gate prompts new viewers to identify themselves, which helps you discover additional stakeholders in the buying process.
How do Launchpad demo sessions track to Salesforce opportunities?
There are two ways sessions are associated with Salesforce records. If the rep selects a Salesforce Opportunity when creating the share link, sessions from that link are logged directly to that opportunity. If no opportunity is selected, the Salesforce integration playbook automatically matches sessions to Leads, Contacts, and Accounts using the visitor’s email address and company domain.
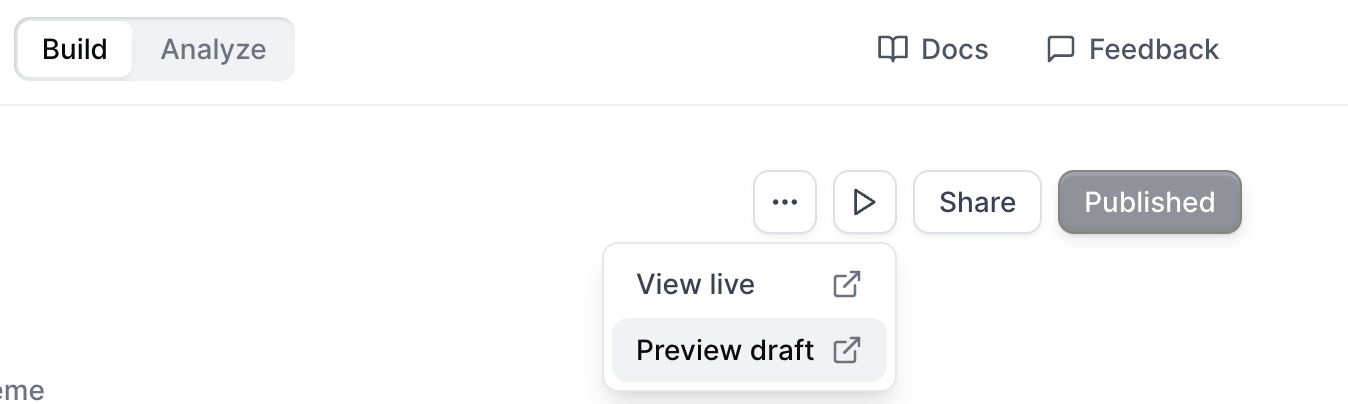
You can preview an entire demo by visiting the Build tab of your demo and clicking the Play button in the top navigation bar. This will open an interactive preview of your draft directly within the builder.
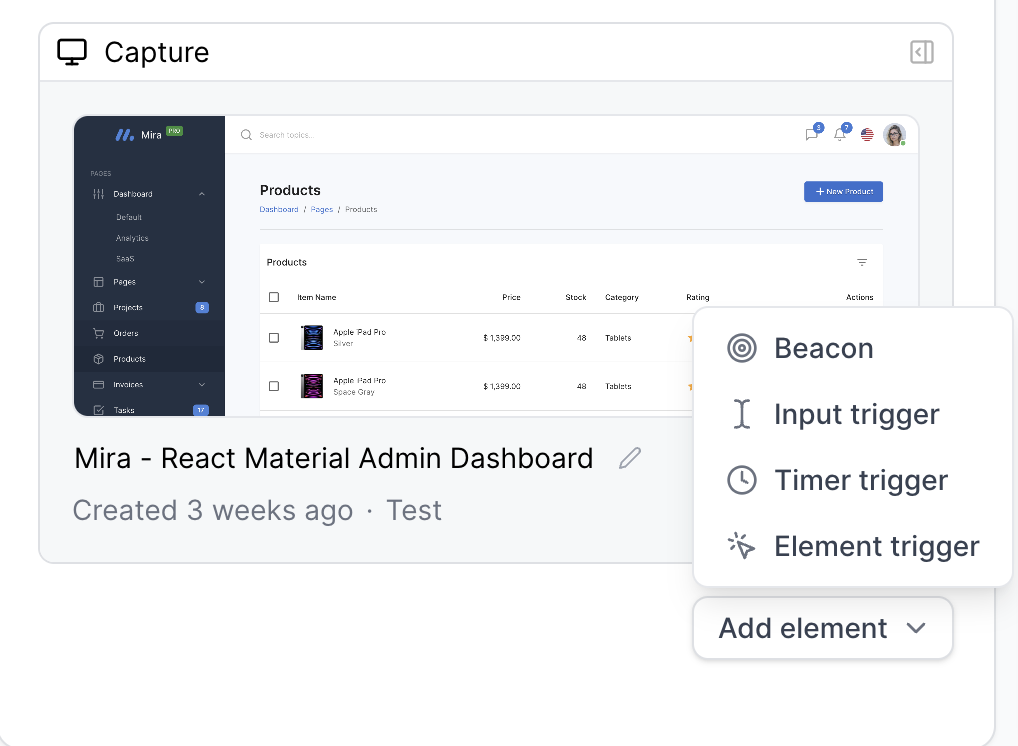
How can I add a beacon or trigger?
You can still add a beacon or trigger to steps in your flow. To do this, scroll down and select Add element. A dropdown will apear and you can select either Beacon, Input trigger, Timer trigger, or Element trigger.
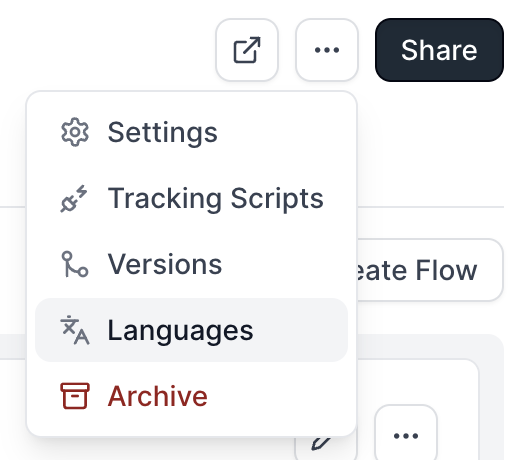
Where can I find Tracking Scripts?
Tracking Scripts can still be found at the individual demo level. Select the three dots next to the black Share button > Tracking Scripts.
Where can I find Languages (Share links to translated demos)?
You can translate your demo or view Share links for different language versions of your demo by select the three dots next to the black Share button > Languages. Click + Add Language to translate your demo.
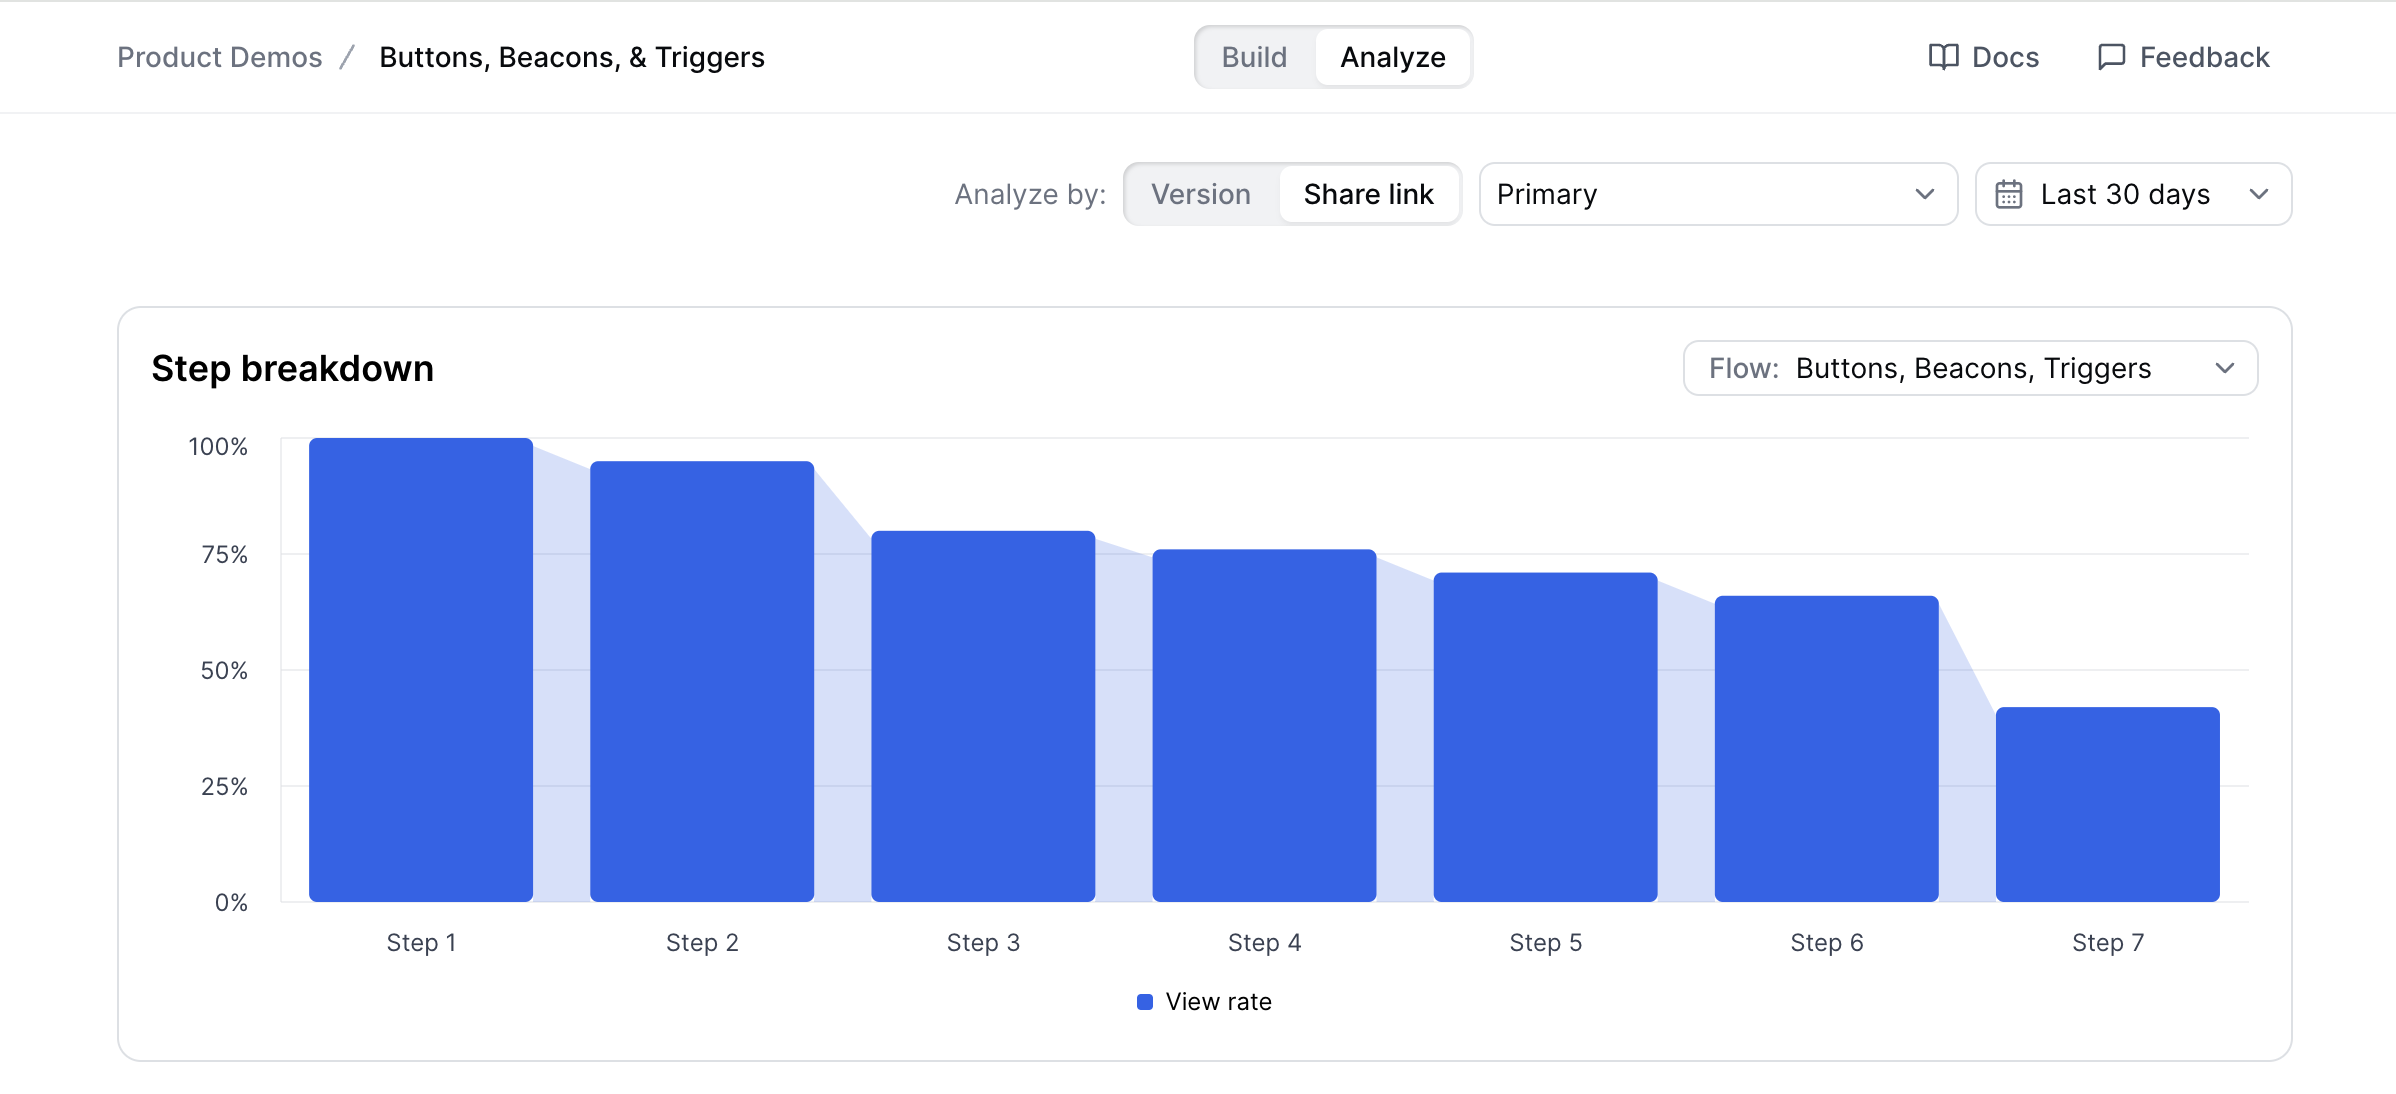
Where can I find the Flow Activity and step breakdown?
To see a step breakdown of your flows, visit a demo > Analyze>Step breakdown. You can analyze by a specific Version or by a share link. Use the dropdown Flow to select which flow you want to see the step breakdown for.
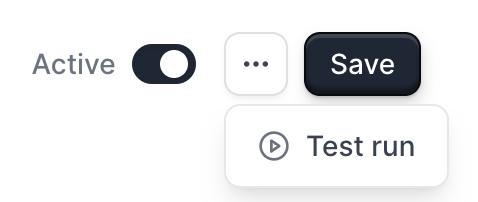
How can I send a Test run in Playbooks?
To send a Test run in Playbooks to ensure your Integrations are working as expected, click the Playbooks tab > select a Playbook > Under Configuration, select the three dots (…) next to Save > Test run.
How do I copy a demo?
To copy or duplicate an entire Product Demo, click + Create demo and select the Make Copy option. This will duplicate all associated Capture collections, Flows, and the Checklist.
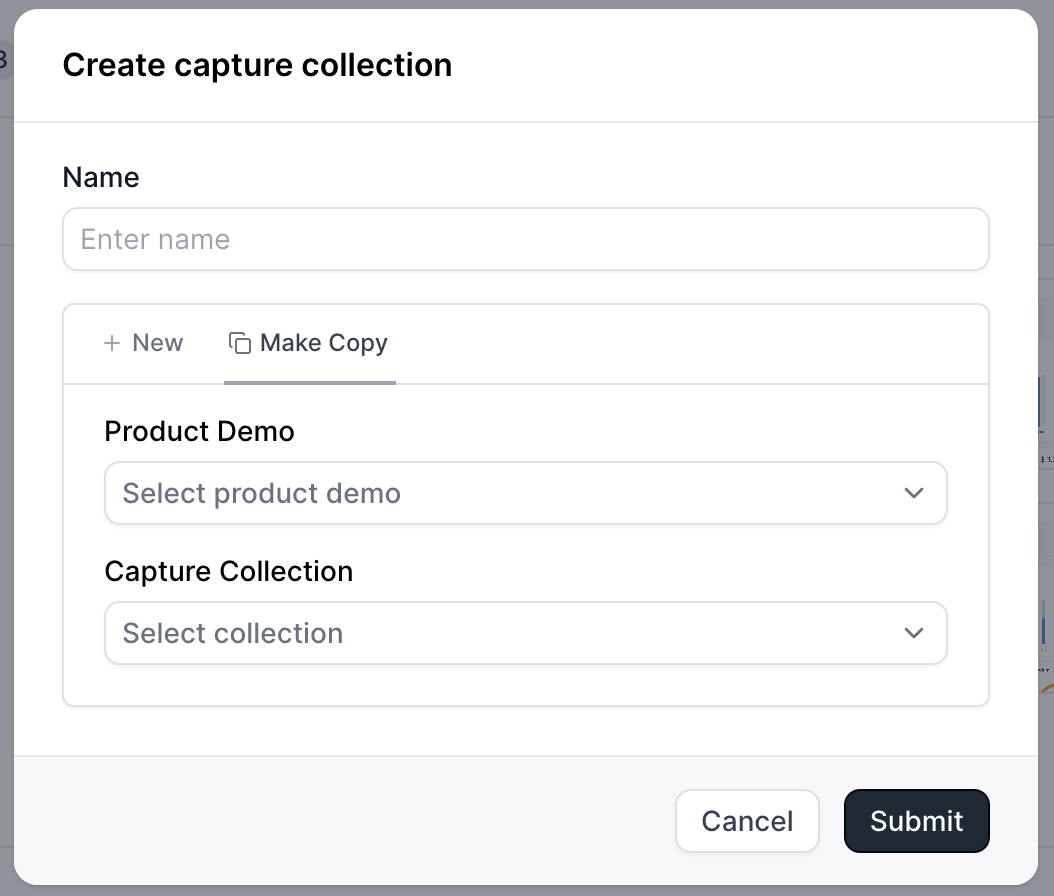
How do I copy a capture collection?
With Product Demos, you can make copies of Capture Collections from existing Product Demos. To do this, visit Captures > + Create Collection > Make Copy. Select the target Product Demo and desired Capture Collection to copy this asset into your new Product Demo.
How do I archive a product demo?
To archive your Product Demo, visit your demo > click the three dots next to the Share button > Settings > Danger zone > toggle on Archive.You can also archive a demo on the Product Demos page by clicking the three dots next to the demo’s title > Archive.
How do I find archived product demos?
To search for Archived Product Demos, visit Product Demos > Filters > Status: Archived.You can then unarchive the Product Demo by selecting the demo click the three dots next to the Share button > Settings > Danger zone > toggle off Archive.
How do I archive a flow?
To archive a single flow, open your demo and go to the Flows tab. Click the three dots next to the flow you want to archive and select Archive.To archive multiple flows at once, select them using the checkboxes and click the archive icon in the bulk action bar at the bottom of the screen. Navattic will show you any steps or checklist tasks that depend on the flow before confirming.
How do I unarchive a flow?
Archived flows are stored in your workspace archive. To find and restore them, go to Workspace > Archive in the left sidebar. Filter by Flow to narrow the list, then select the flow and click Unarchive.
How can I update my Workspace Name, Slug, and Logo?
You can update your Workspace Name, Slug and Logo under Settings > General.The logo is pulled directly from your website favicon based off the Website Domain added under General. Once your website favicon updates, the logo should automatically update as well.
How can I prevent Builders in my workspace from editing a published demo?
You can enable the Require approval to publish demos setting for your workspace. To find this, click Settings > Workspace > General.When this setting is turned on, only the Project Owner or a Workspace Admin can publish changes to a demo that has already been published. Other builders will still be able to view the demo, but they won’t be able to publish updates to the live version.If a non-authorized builder attempts to publish changes, they’ll see a message indicating that the demo is locked and that they should contact the project owner or a workspace admin.
Are Navattic demos accessible and WCAG compliant?
Navattic demos are WCAG compliant, so end viewers can navigate and interact with your demos using assistive technology. Specific accessibility features include:Keyboard navigation
Full keyboard support for navigating demos: Tab to move between interactive elements, Enter or Space to activate buttons, beacons, triggers, and checklist tasks, and Escape to dismiss dialogs
Skip to content and Skip to capture links for jumping past navigation
Automatic focus on the first interactive element when a step loads (form fields, buttons, checklist tasks, etc.)
Screen reader support
ARIA roles applied to dialogs (role="dialog", aria-modal="true"), buttons, links, and presentational elements
aria-live regions on dialog content so screen readers announce step changes
Beacons, triggers, and anchors include dynamic aria-label values describing the available action (for example, “Continue” or “Jump to step”)
Builders can author custom ARIA descriptions for tooltips, beacons, and triggers to provide additional context
Dialog header controls (Back, Close) include explicit aria-label attributes
Focus indicators
Visible focus styles on all interactive elements via :focus-visible
Focus ring color and width are customizable under Themes, so the focus indicator can meet your contrast requirements
Images and media
Builders can set alt text on media captures, swipe step images, and inline images in modals and tooltips
The image editor includes a field for alternative text descriptions
Theme controls
Color, contrast, and typography are fully customizable under Themes, so demos can be configured to meet the contrast ratios required for your audience
For additional questions about accessibility and compliance, contact support@navattic.com.


 When this setting is turned on, only the Project Owner or a Workspace Admin can publish changes to a demo that has already been published. Other builders will still be able to view the demo, but they won’t be able to publish updates to the live version.If a non-authorized builder attempts to publish changes, they’ll see a message indicating that the demo is locked and that they should contact the project owner or a workspace admin.