May 2026
Workspace Capture Collections
Reuse captures across demos without duplicating work.Store capture collections in a shared workspace library, so your team can build multiple demos without having to re-take or duplicate captures.
Edit or recapture once, and it will instantly update all associated demos using the shared collection. When updating, the capture will also show which demos it’s associated with.For Growth and Enterprise customers, Workspace Collections are now live! We also support custom permissions for controlled access to Workspace Collections.
Navattic MCP
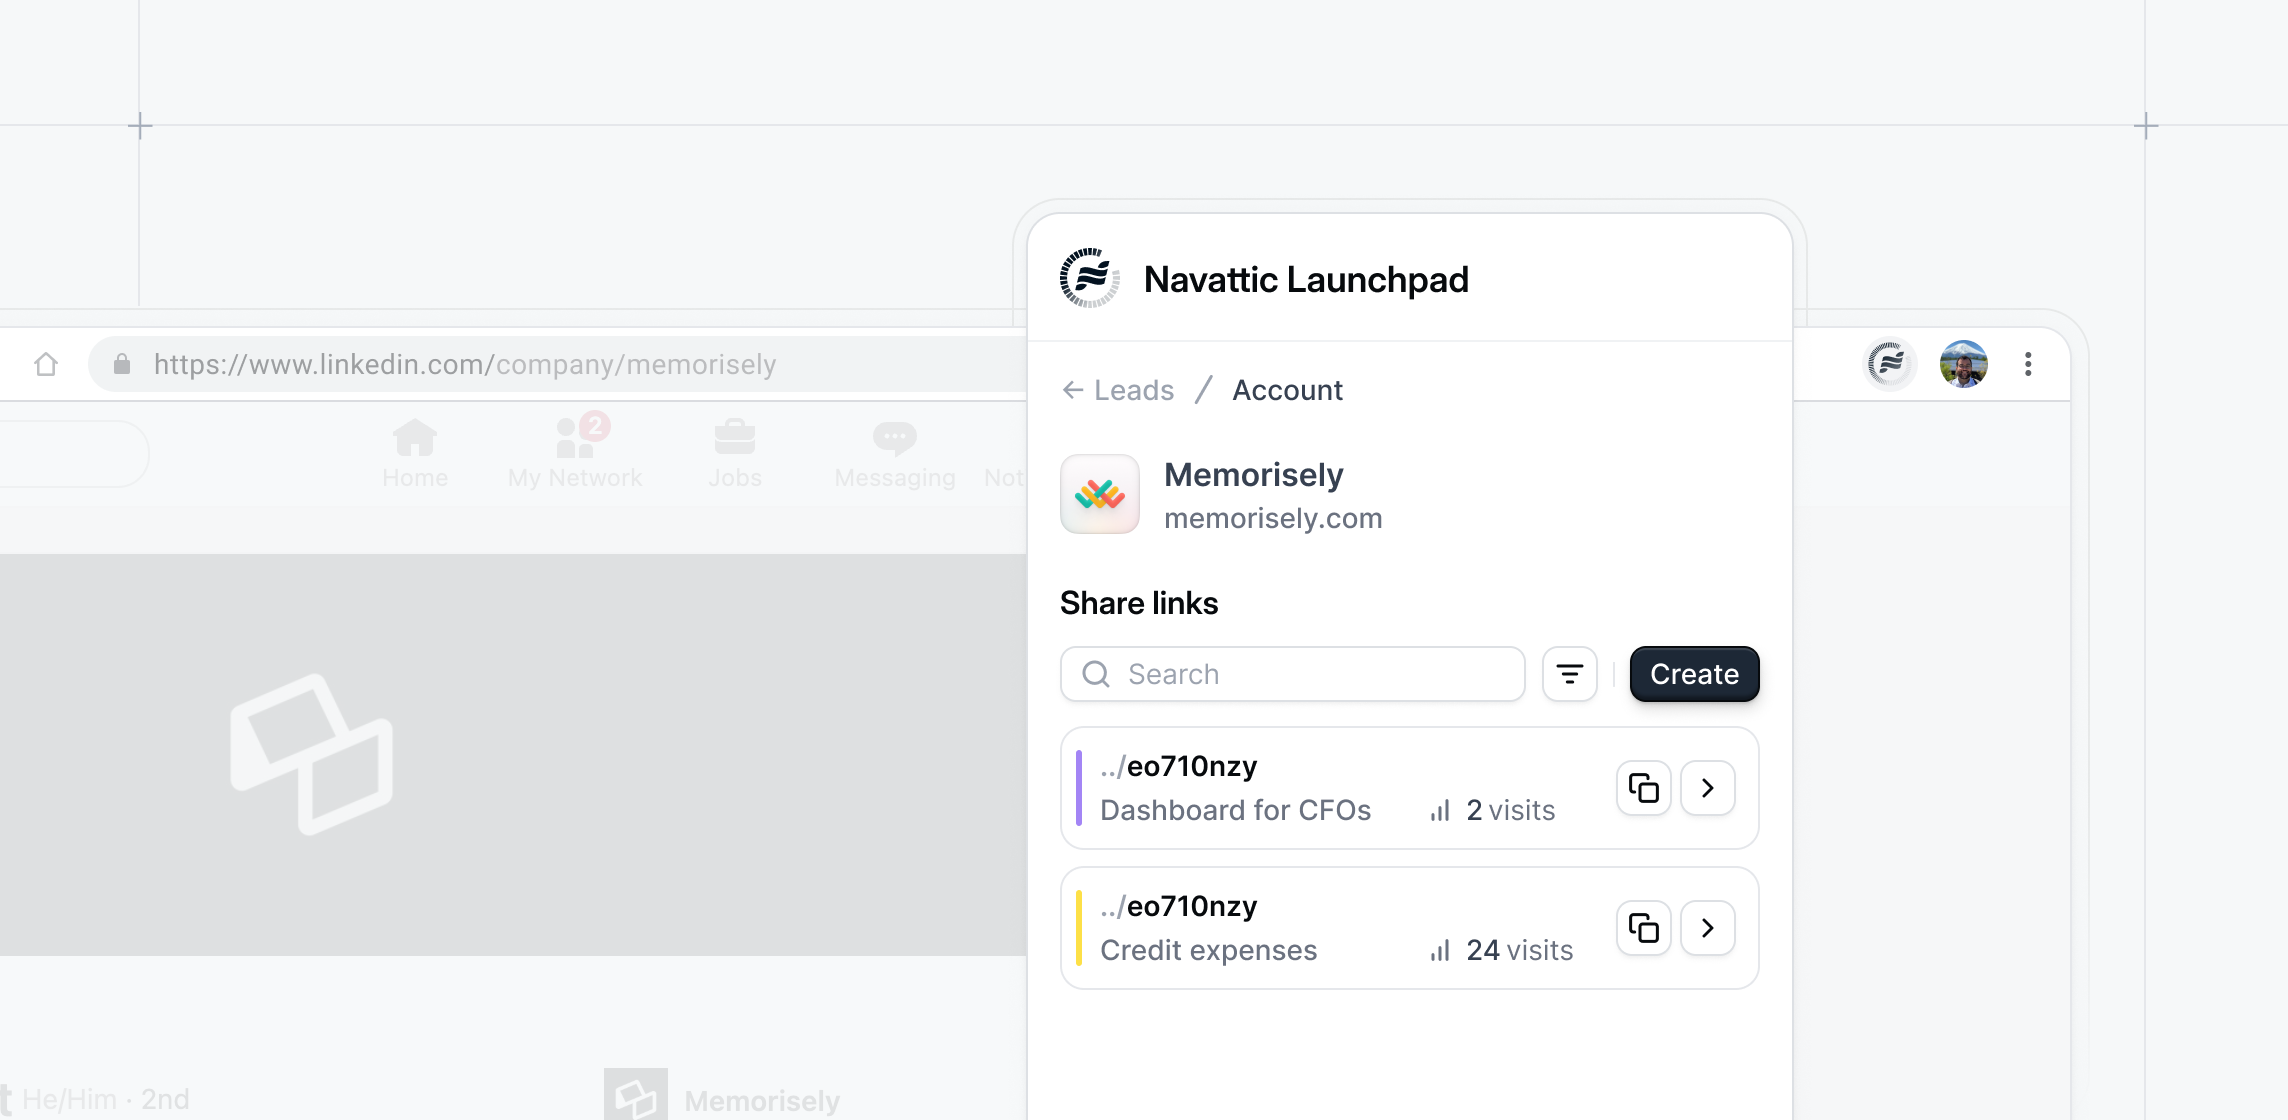
The Navattic MCP is now out of Beta. Connect to Claude or ChatGPT to report on demo performance, see high-intent demo leads, or quickly monitor which demos haven’t been updated in a bit. For Base, Growth, or Enterprise customers, start using the MCP by following these instructions. Note that a Claude or ChatGPT admin will need to set up the MCP.If you use Launchpad, you can use the MCP to view and build custom share links.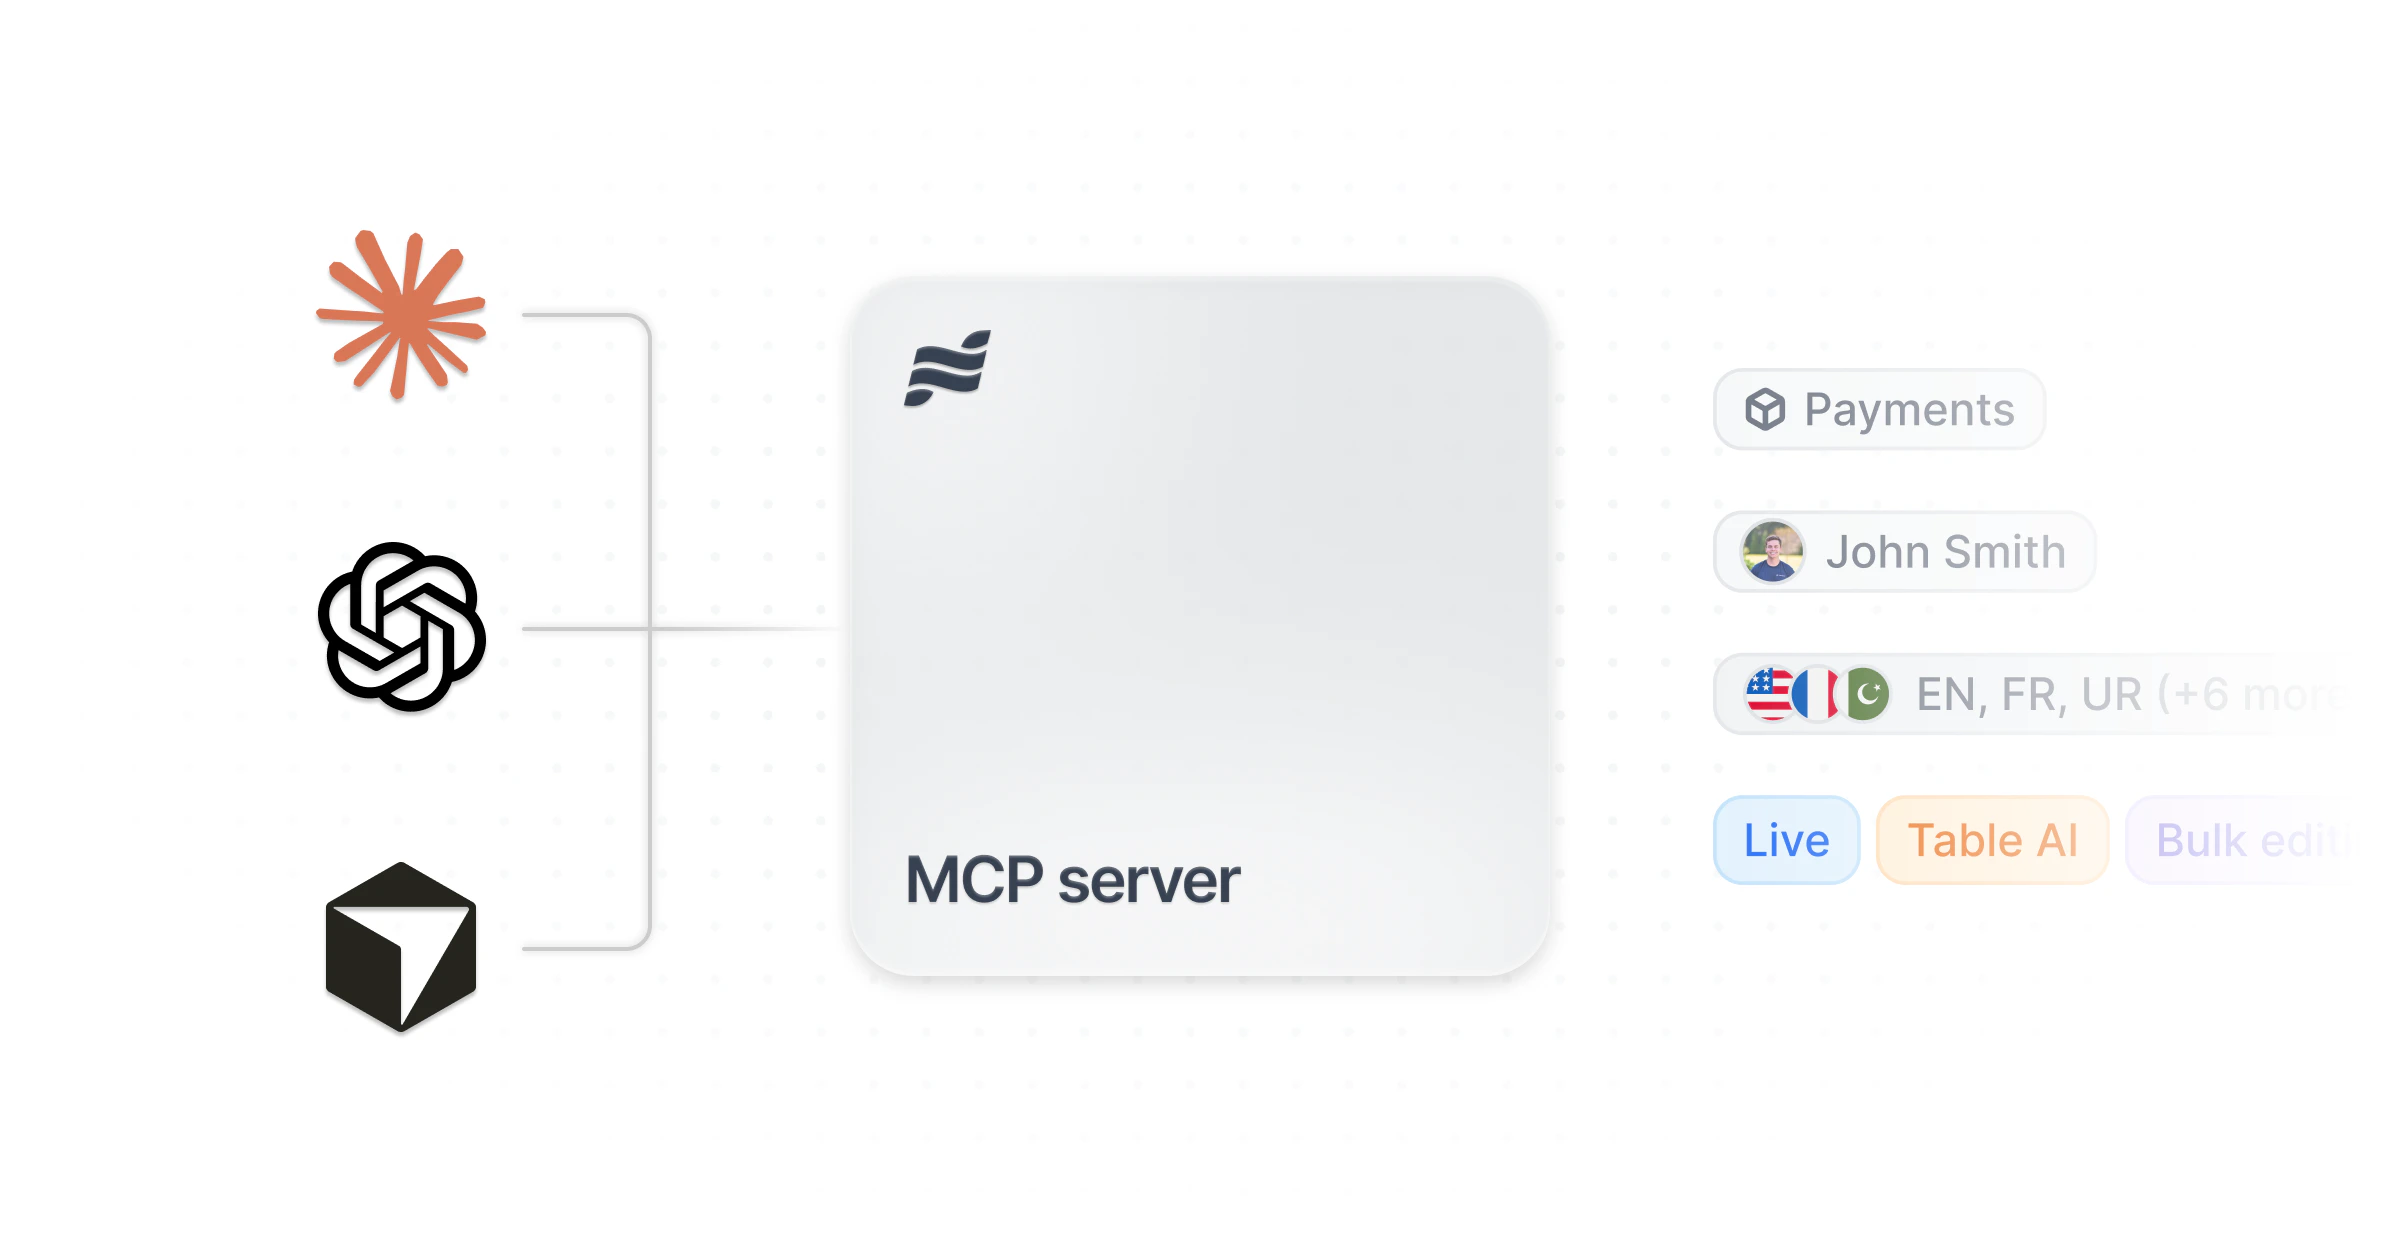
Upload Content
Copilot can now read your brand guidelines directly from a website or file.Add a URL or upload a PDF, DOCX, TXT, or MD file, and Copilot extracts your brand voice, product context, and GTM context into Workspace Knowledge.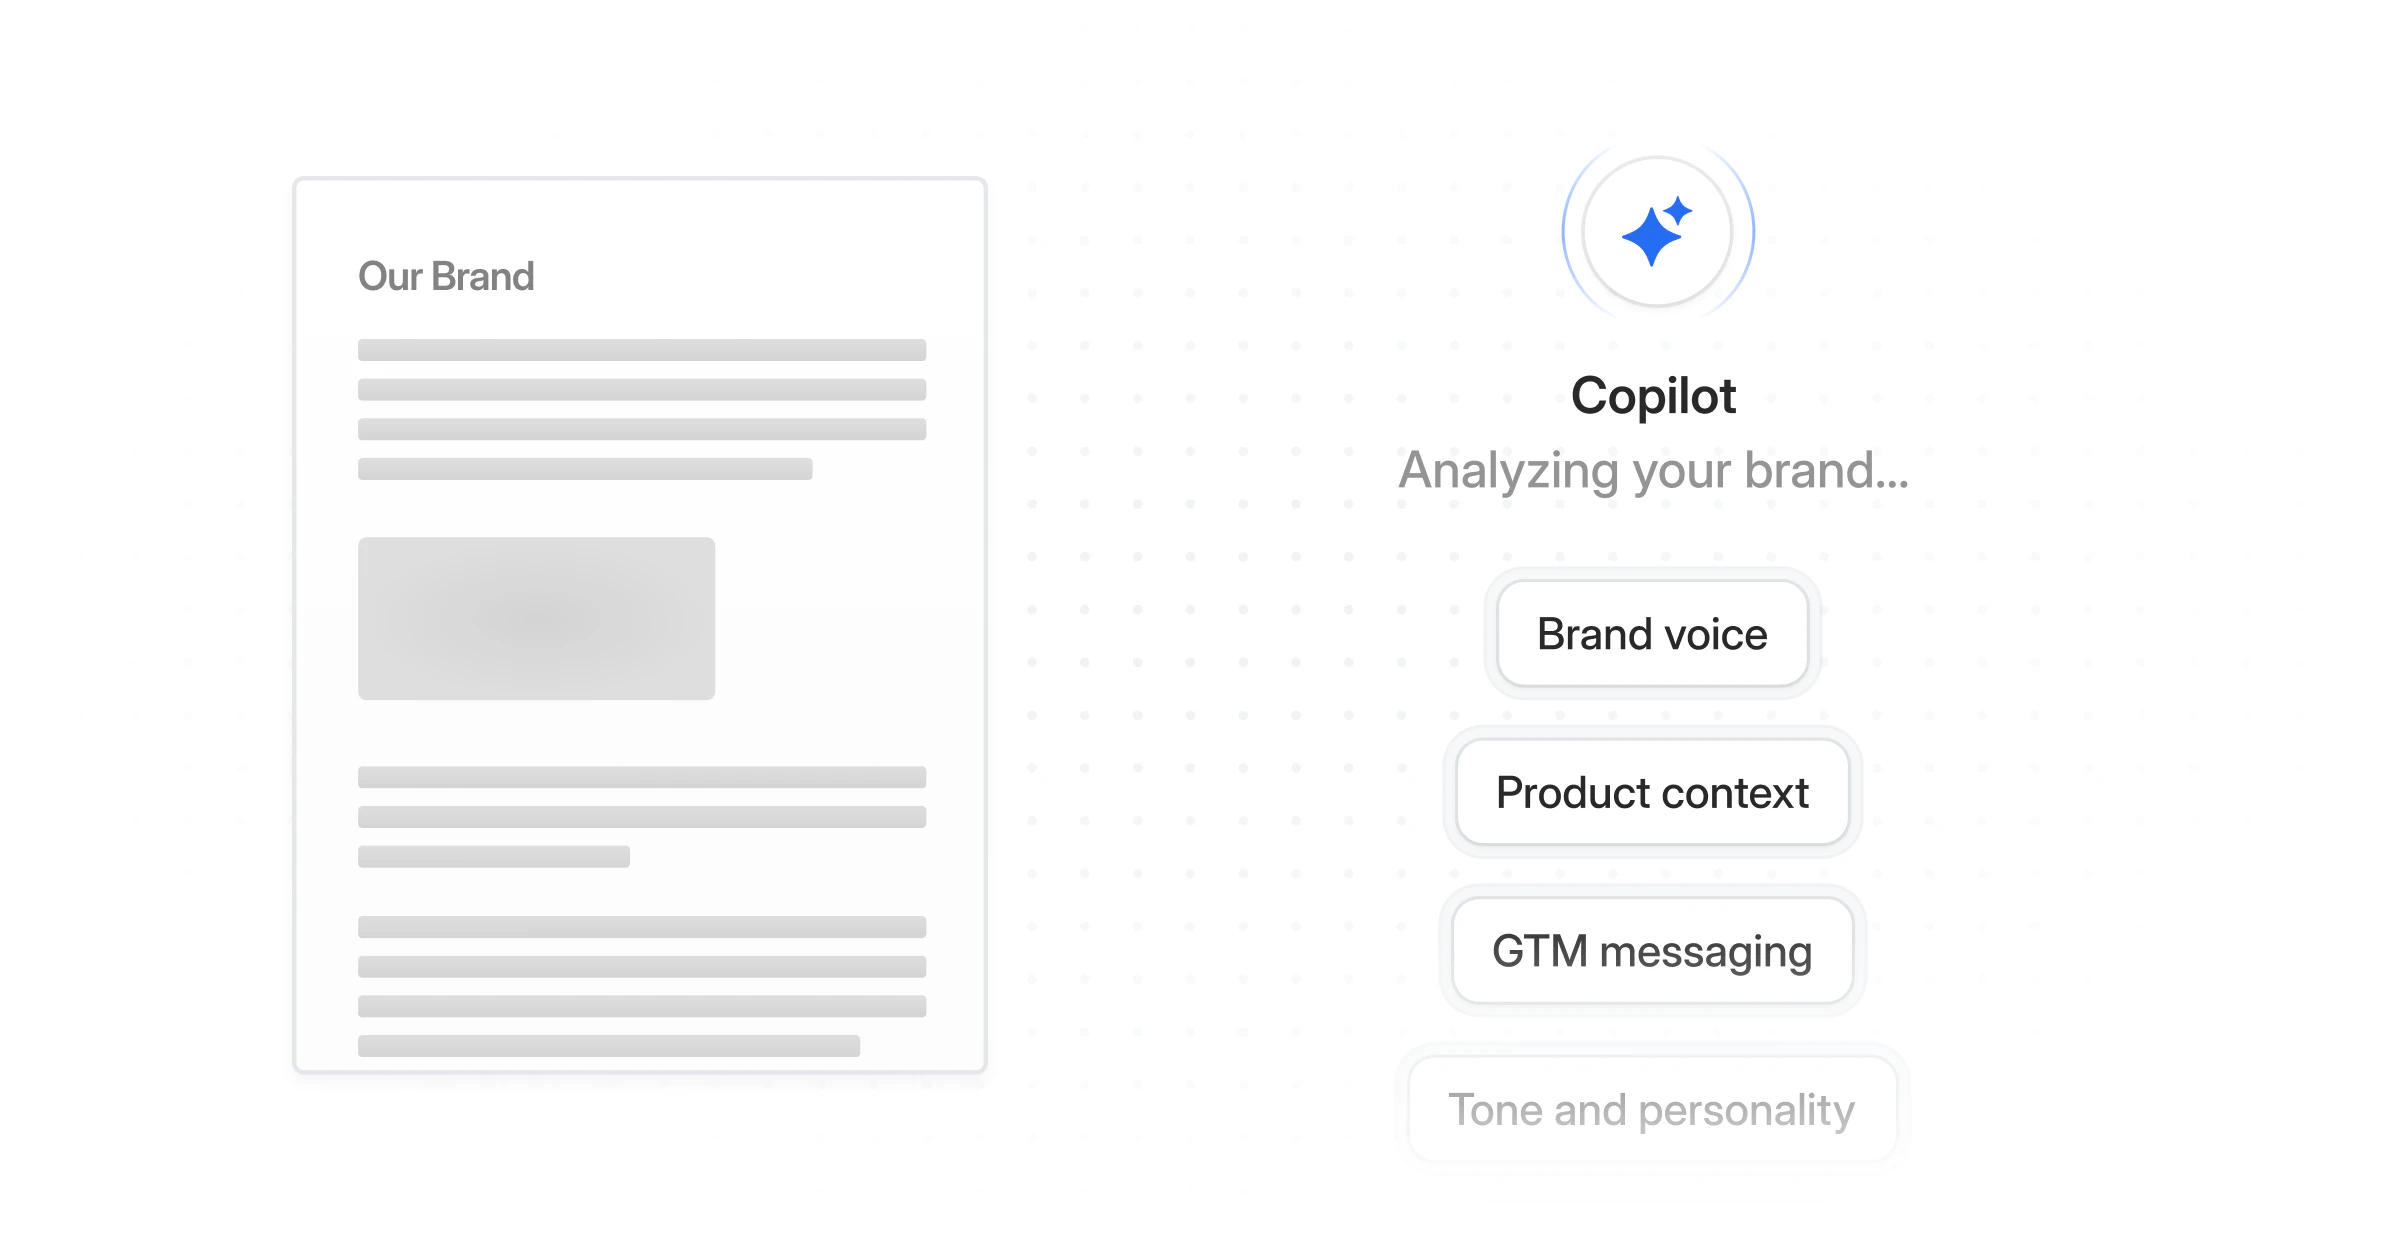
Voiceover Defaults
Set a default voice for each of your demo languages at the Workspace Level, and new steps inherit it automatically.You can also bulk-sync all flows to the workspace default from the flow builder.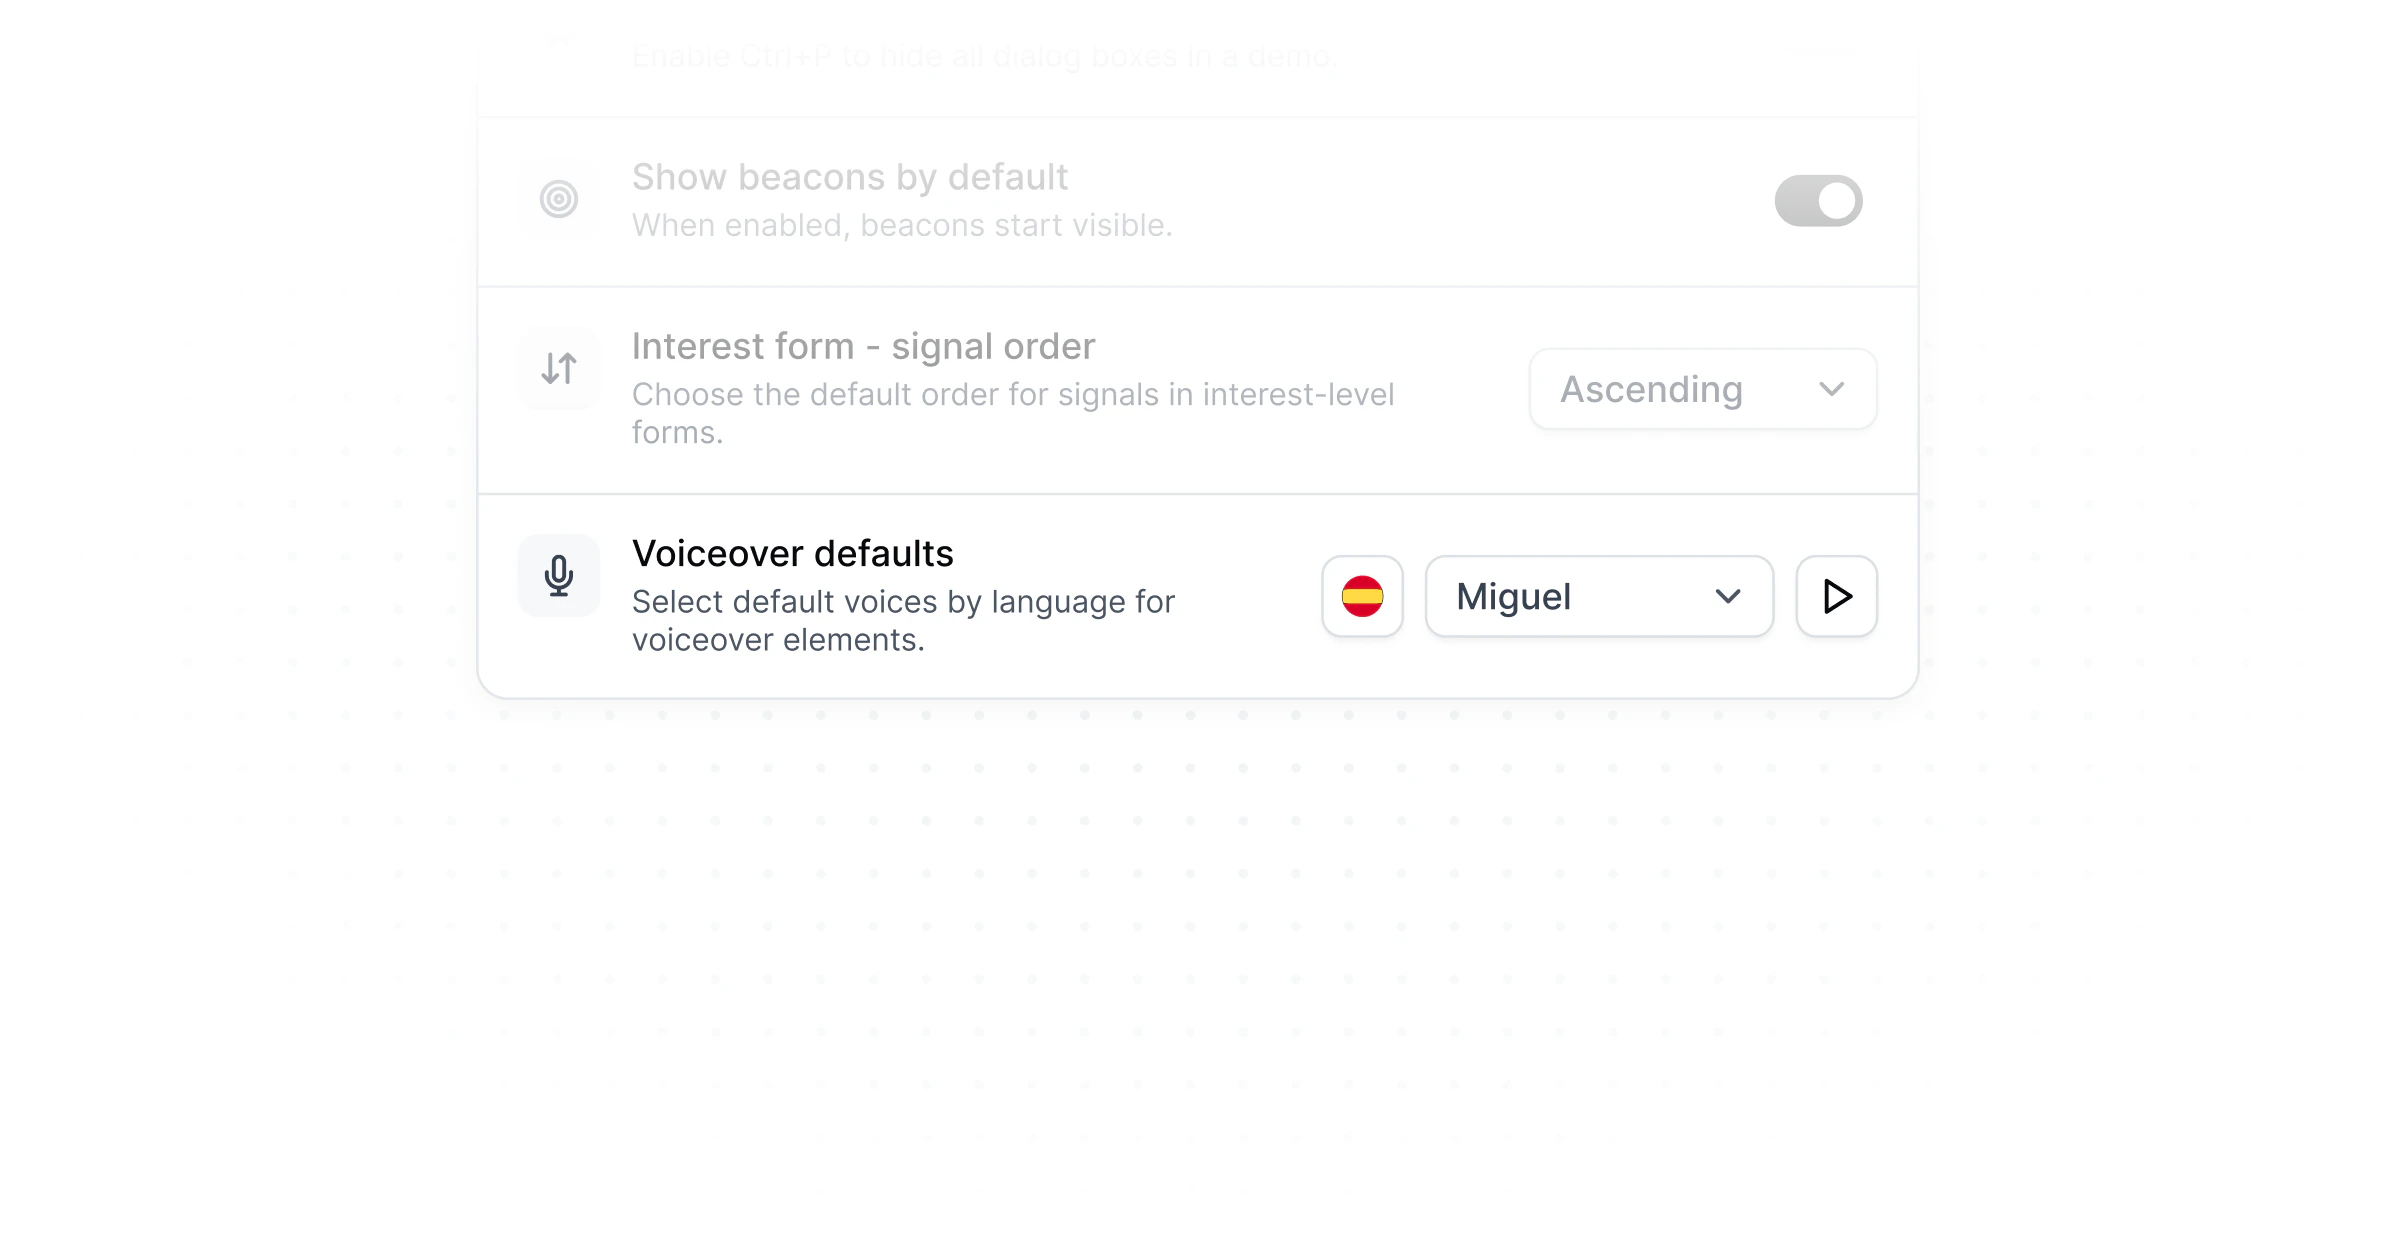
Team-level Permissions
Directory Sync (SCIM) now provisions teams automatically. Map directory groups from your identity provider to Navattic teams, and membership stays in sync.When a group changes, Navattic reflects it, and you control whether to keep or remove members when a mapping is removed.Available for Growth and Enterprise customers with Directory Sync enabled.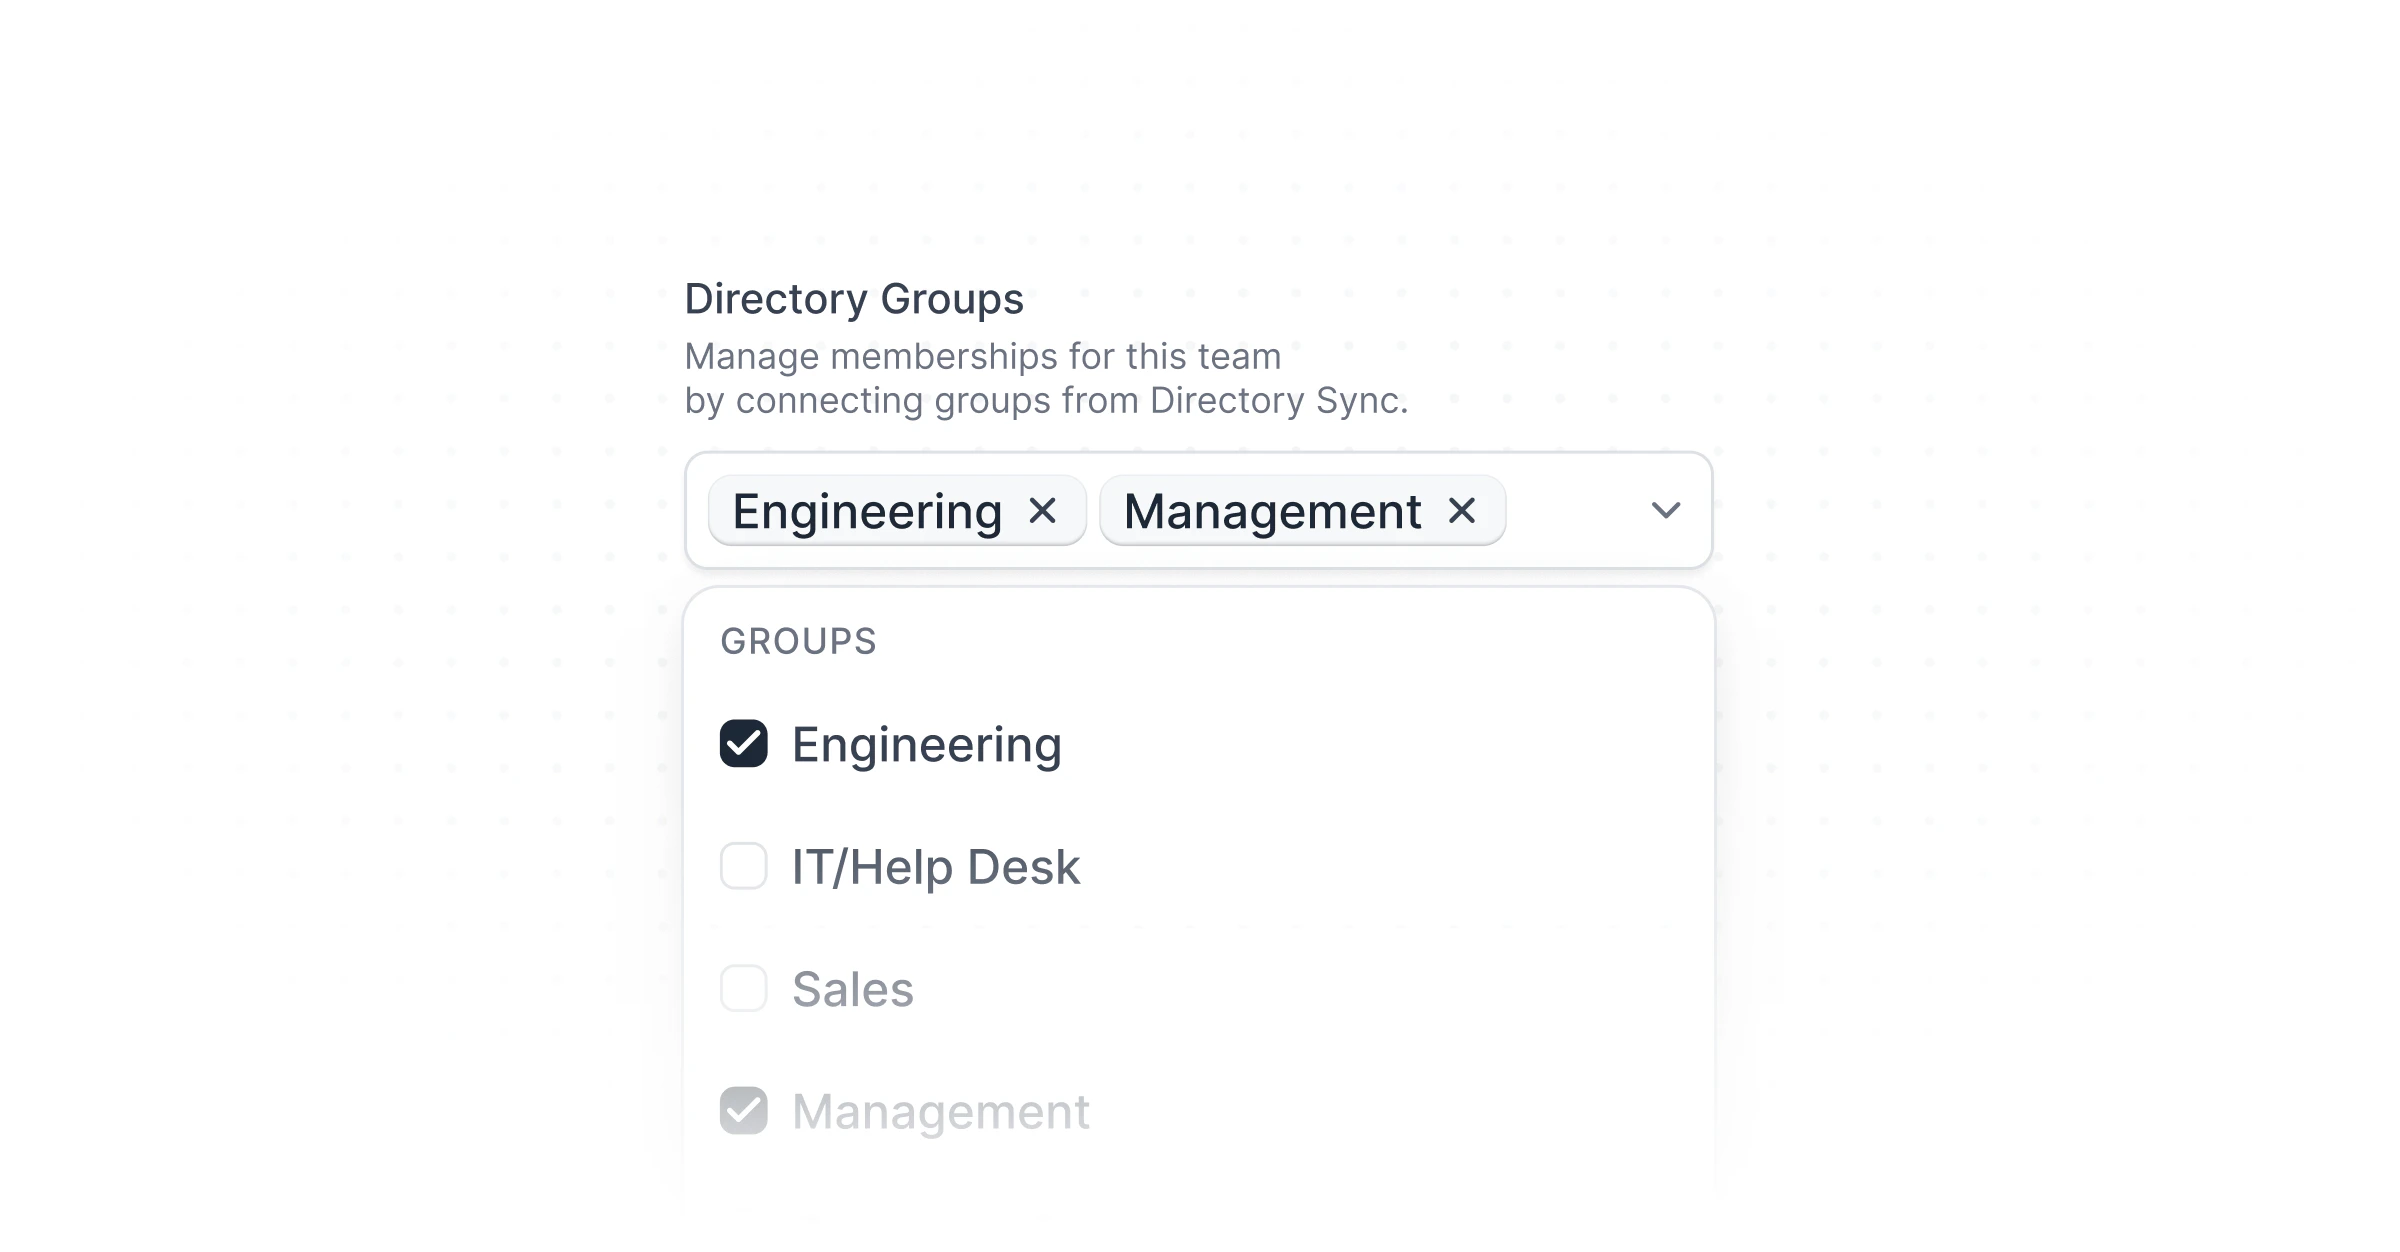
April 2026
Navattic MCP server (Beta)
The Navattic MCP server lets teams connect Navattic directly to AI tools like Claude, Cursor, and ChatGPT. Query demo analytics, pull workspace data, and trigger Navattic actions like create flow without leaving your LLM of choice.See a demo of the MCPWe are looking for beta testers and feedback on new tools to add to the MCP.Email team@navattic.com to get early access.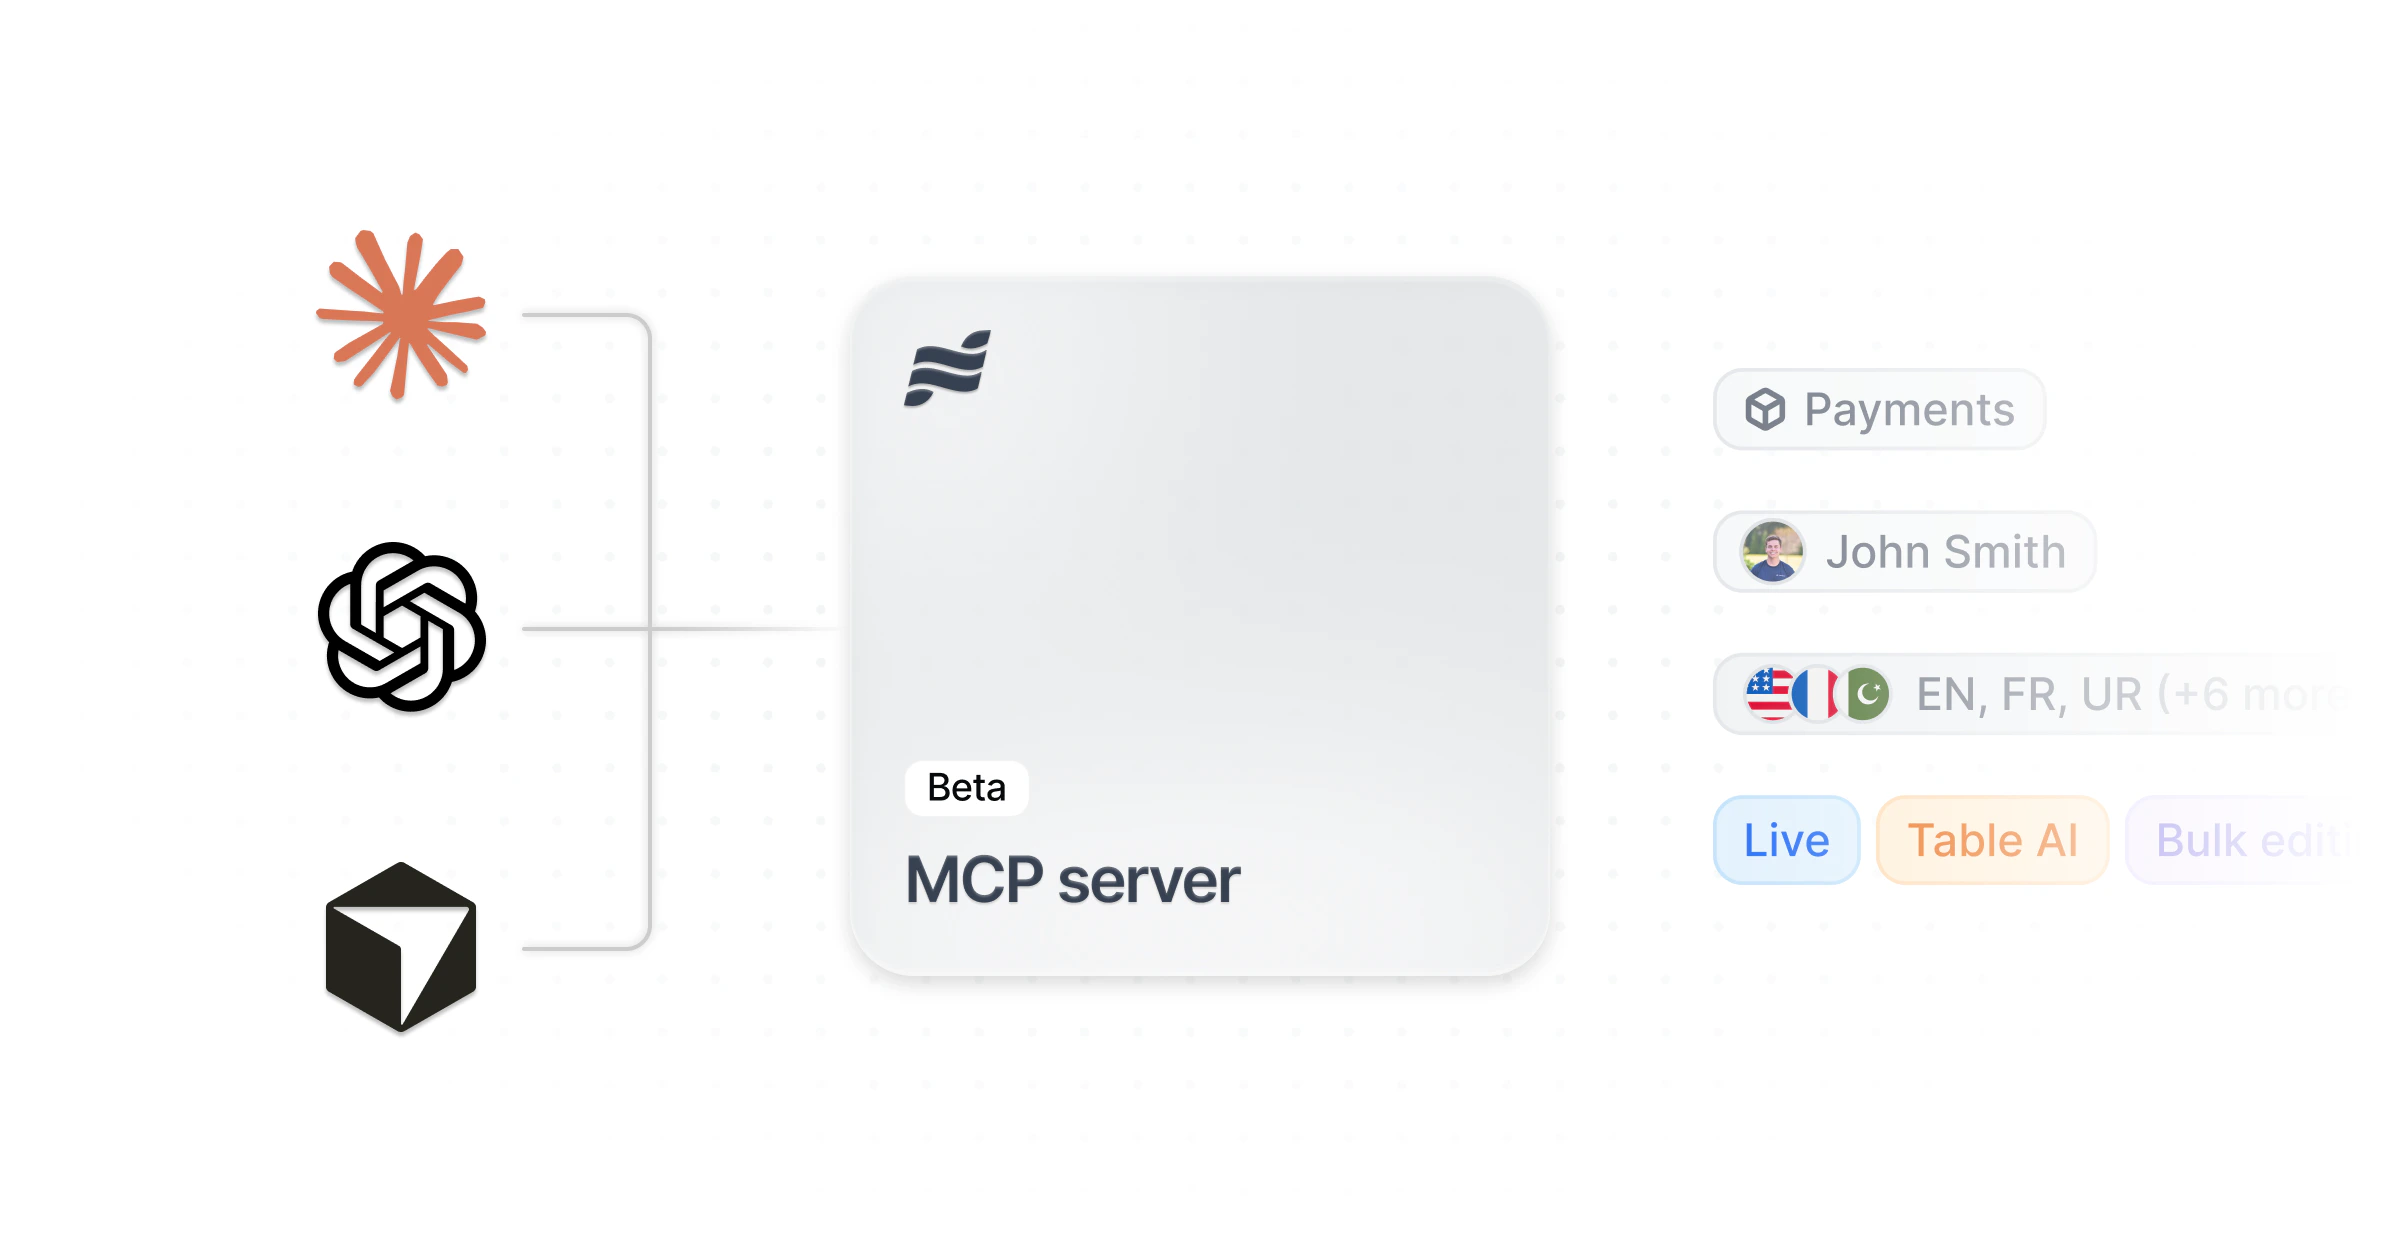
Capture translation
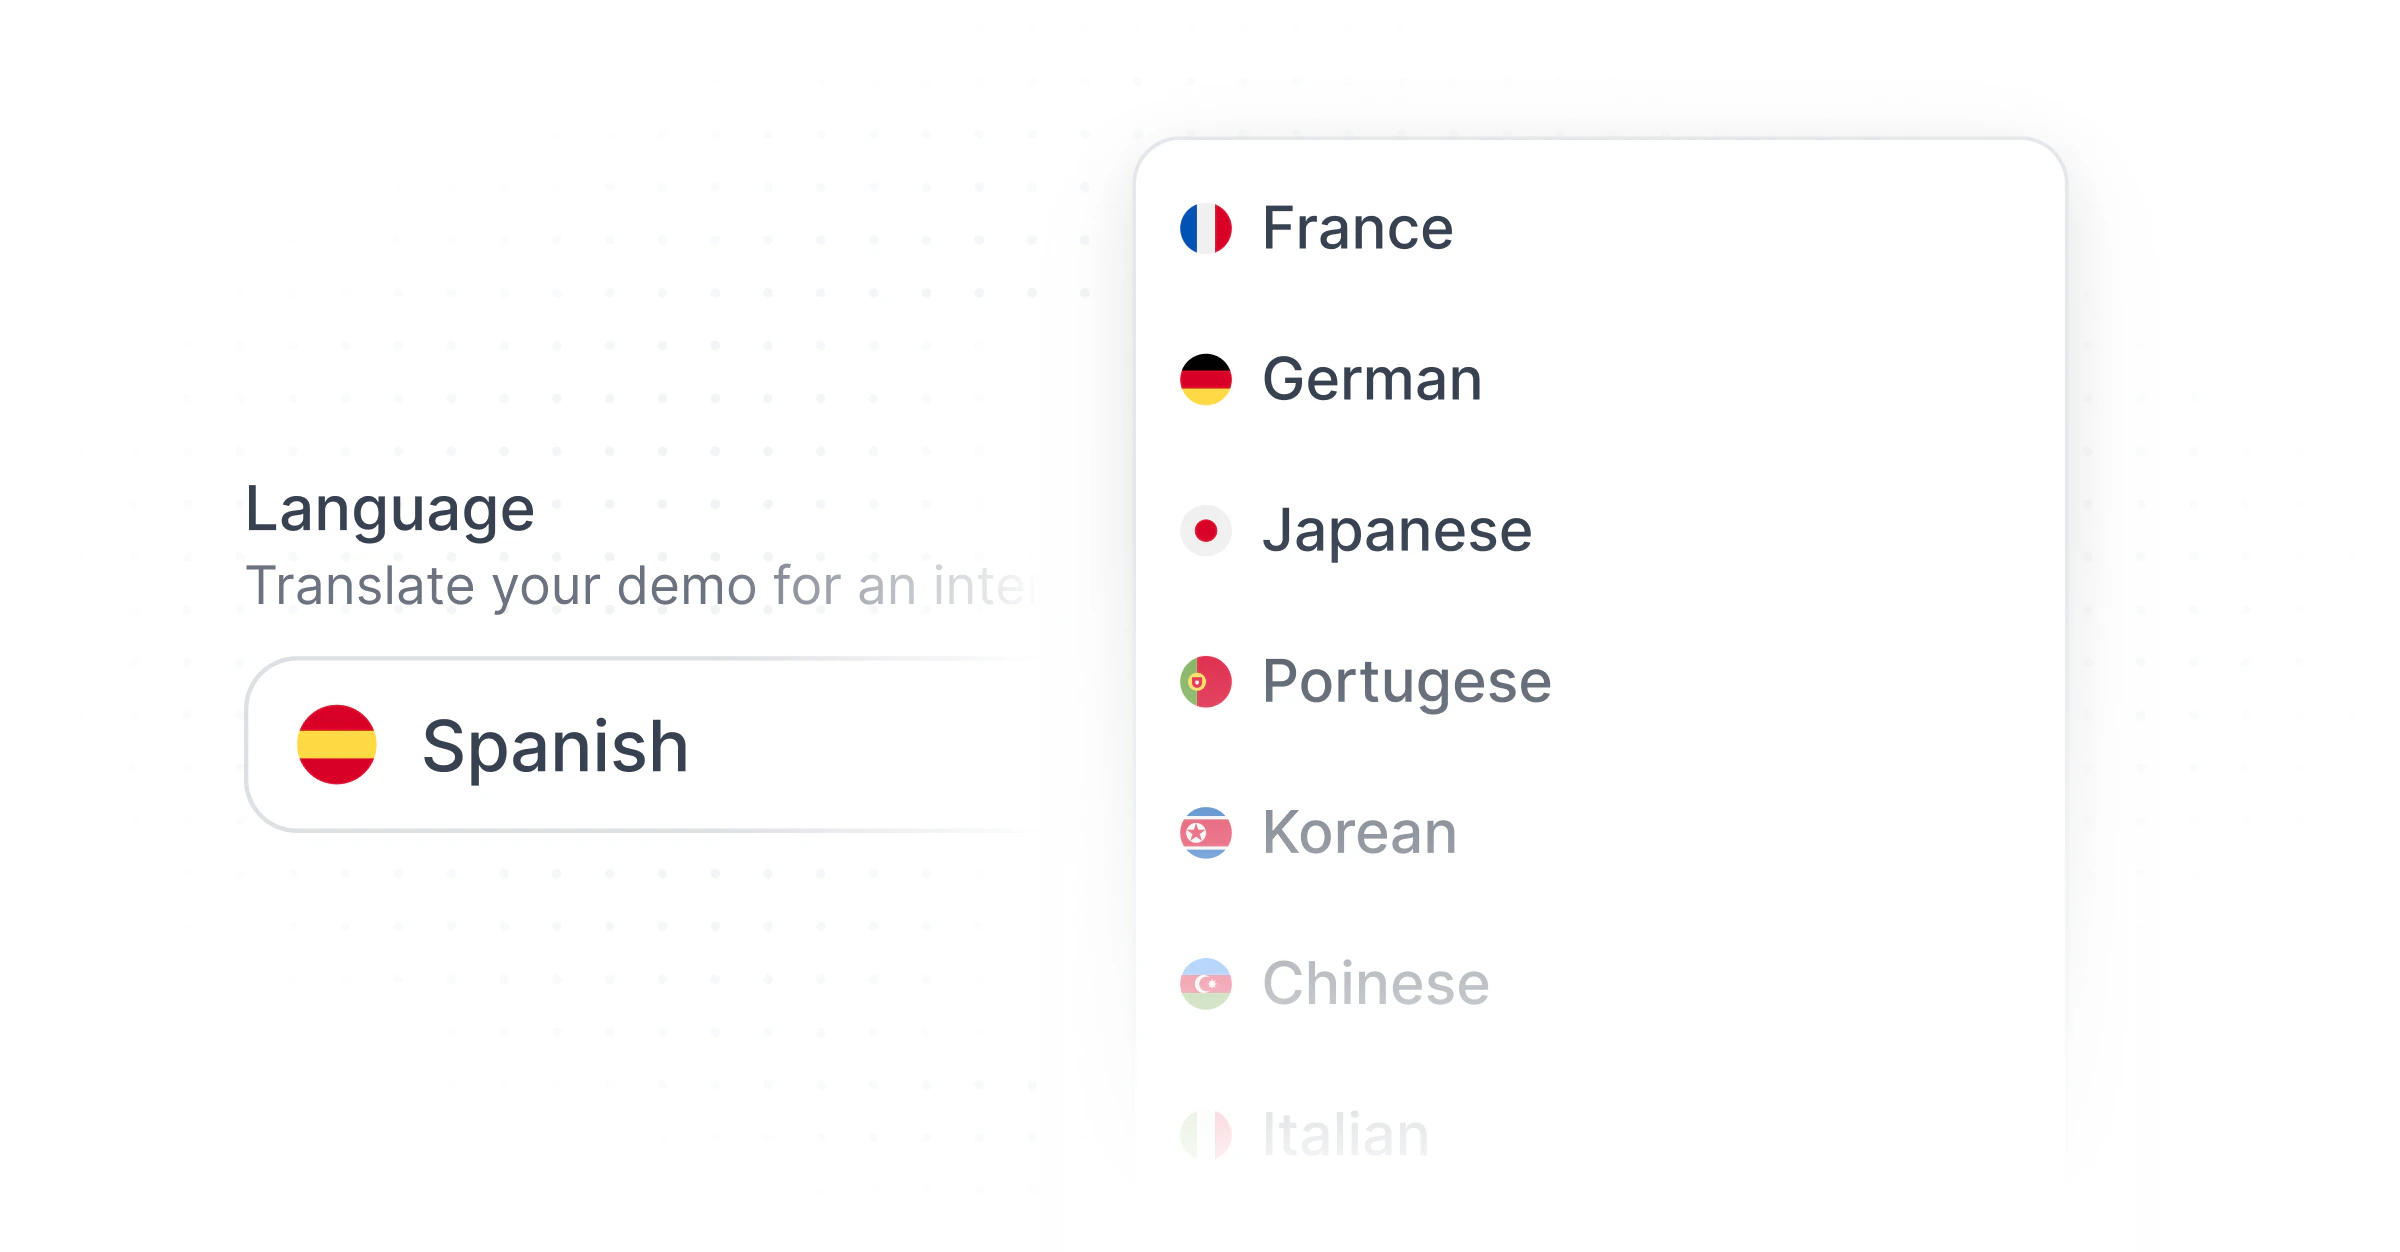
Translate an entire demo for an international campaign in a few clicks. Captures, voiceovers, and AI avatars can now be translated alongside step text, so every part of the experience speaks the viewer’s language.Use the new Glossary to fine-tune terminology and standardize specific words and phrases across all your demos at once.See a demo of Capture translationCapture translation is part of our Enterprise plan. Reach out to your CSM if you are interested in adding this to your workspace.
Narrated demos
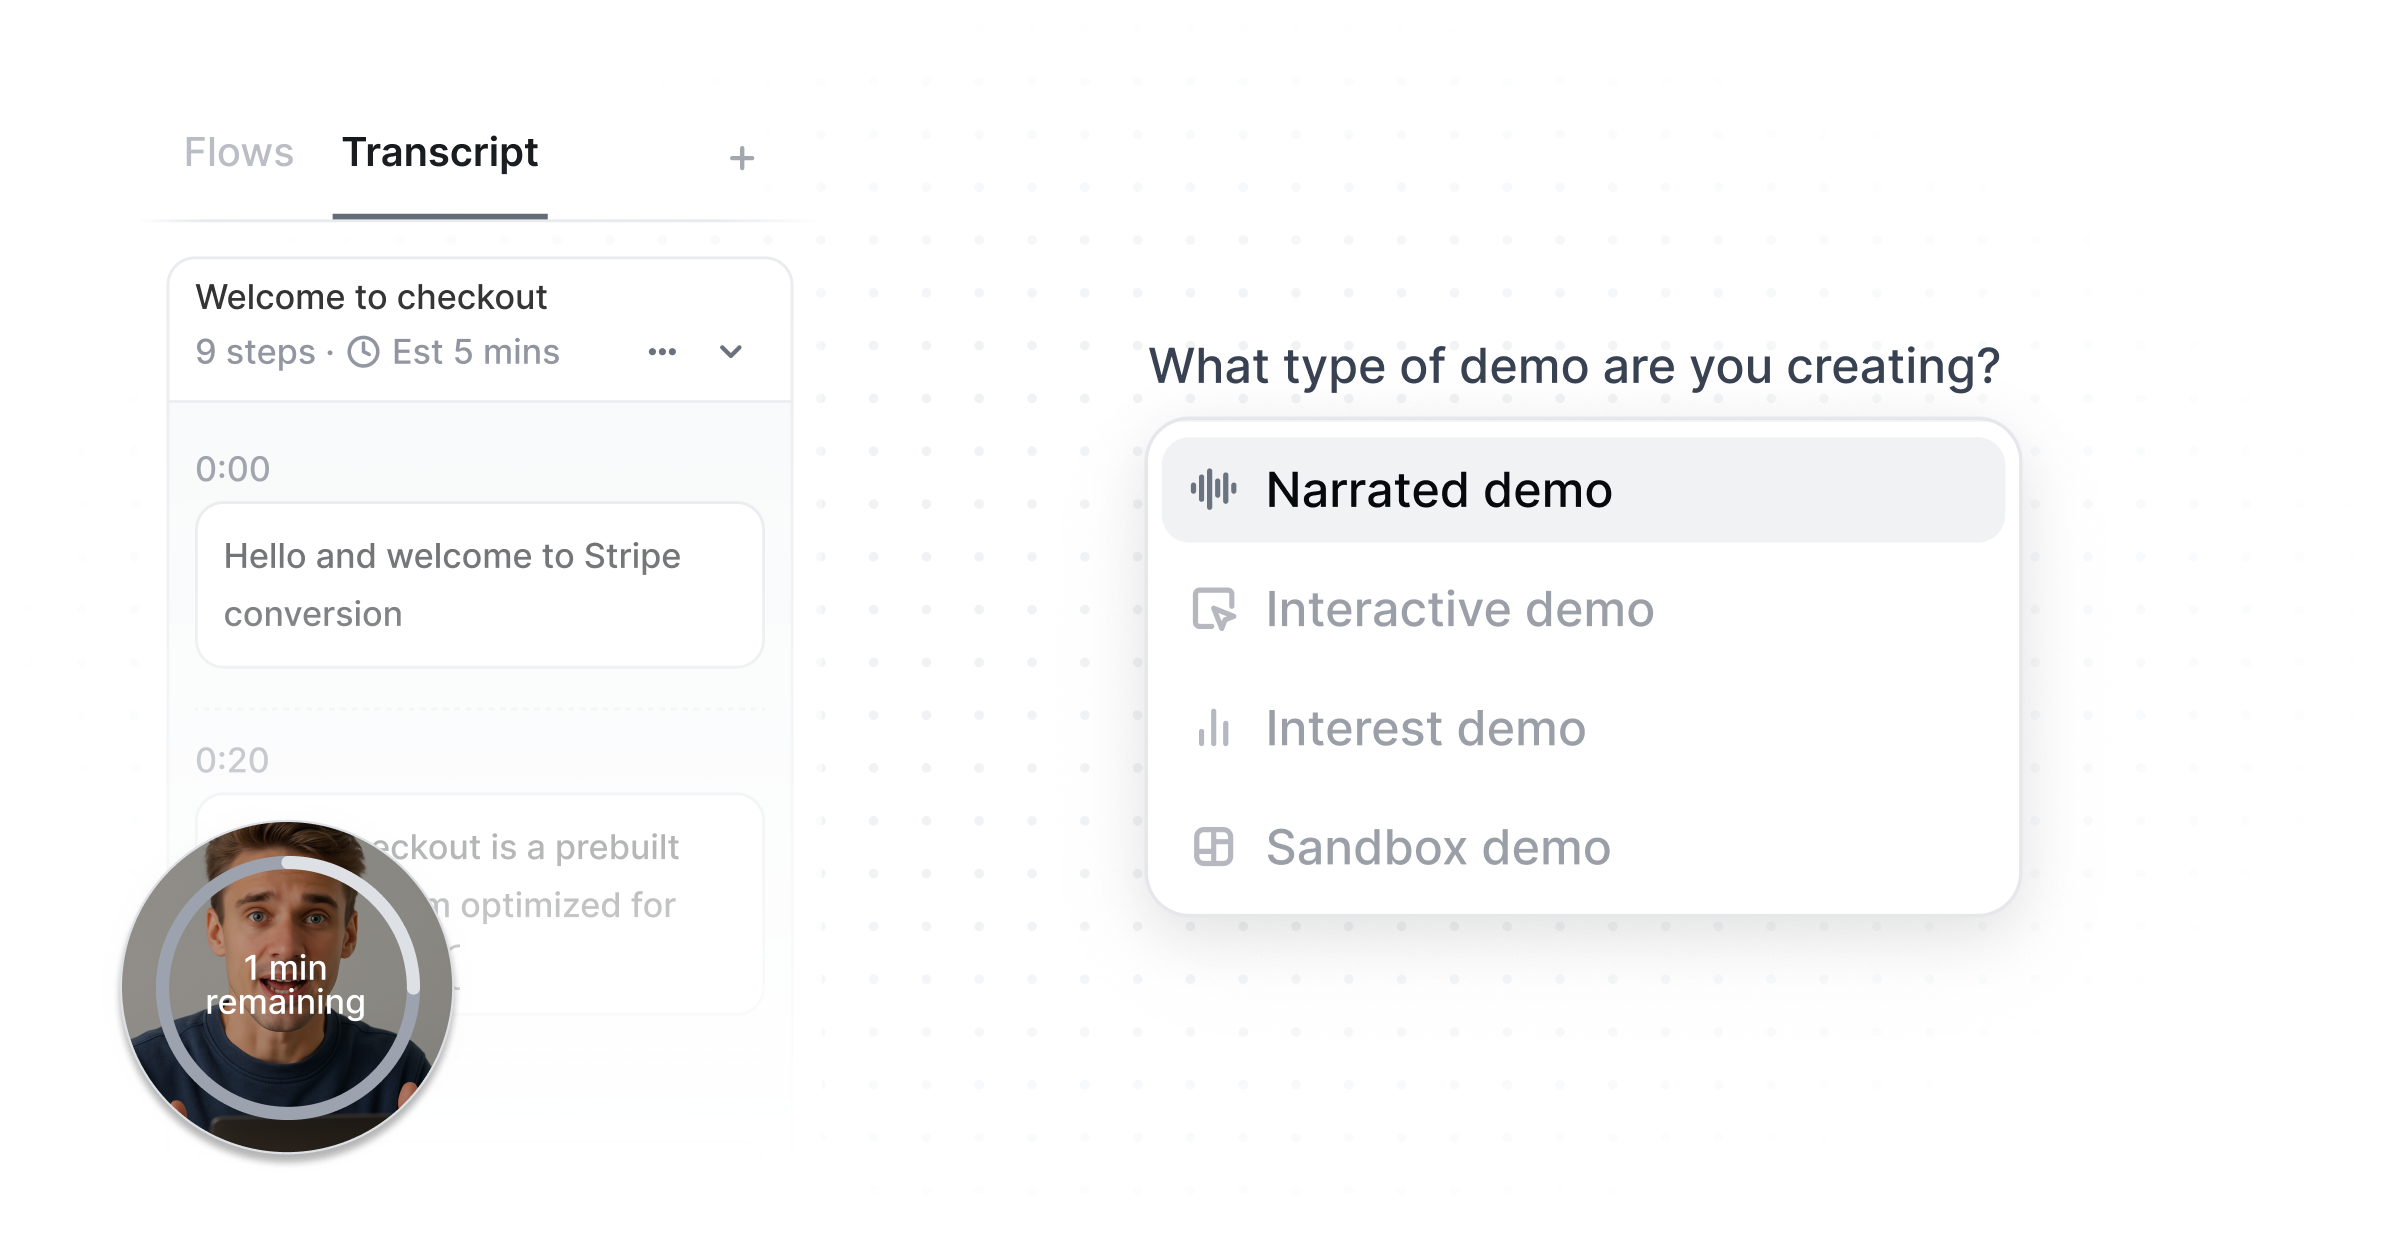
Narrated demos let you capture your screen alongside a live voice narration, then use Copilot to generate a demo with synced audio and screen.Choose to display your Narrated demo with voiceovers or custom AI avatars.
For Growth and Enterprise customers, when you go to build a new demo, you’ll be prompted to create an Interactive demo, Sandbox demo, or Narrated demo.
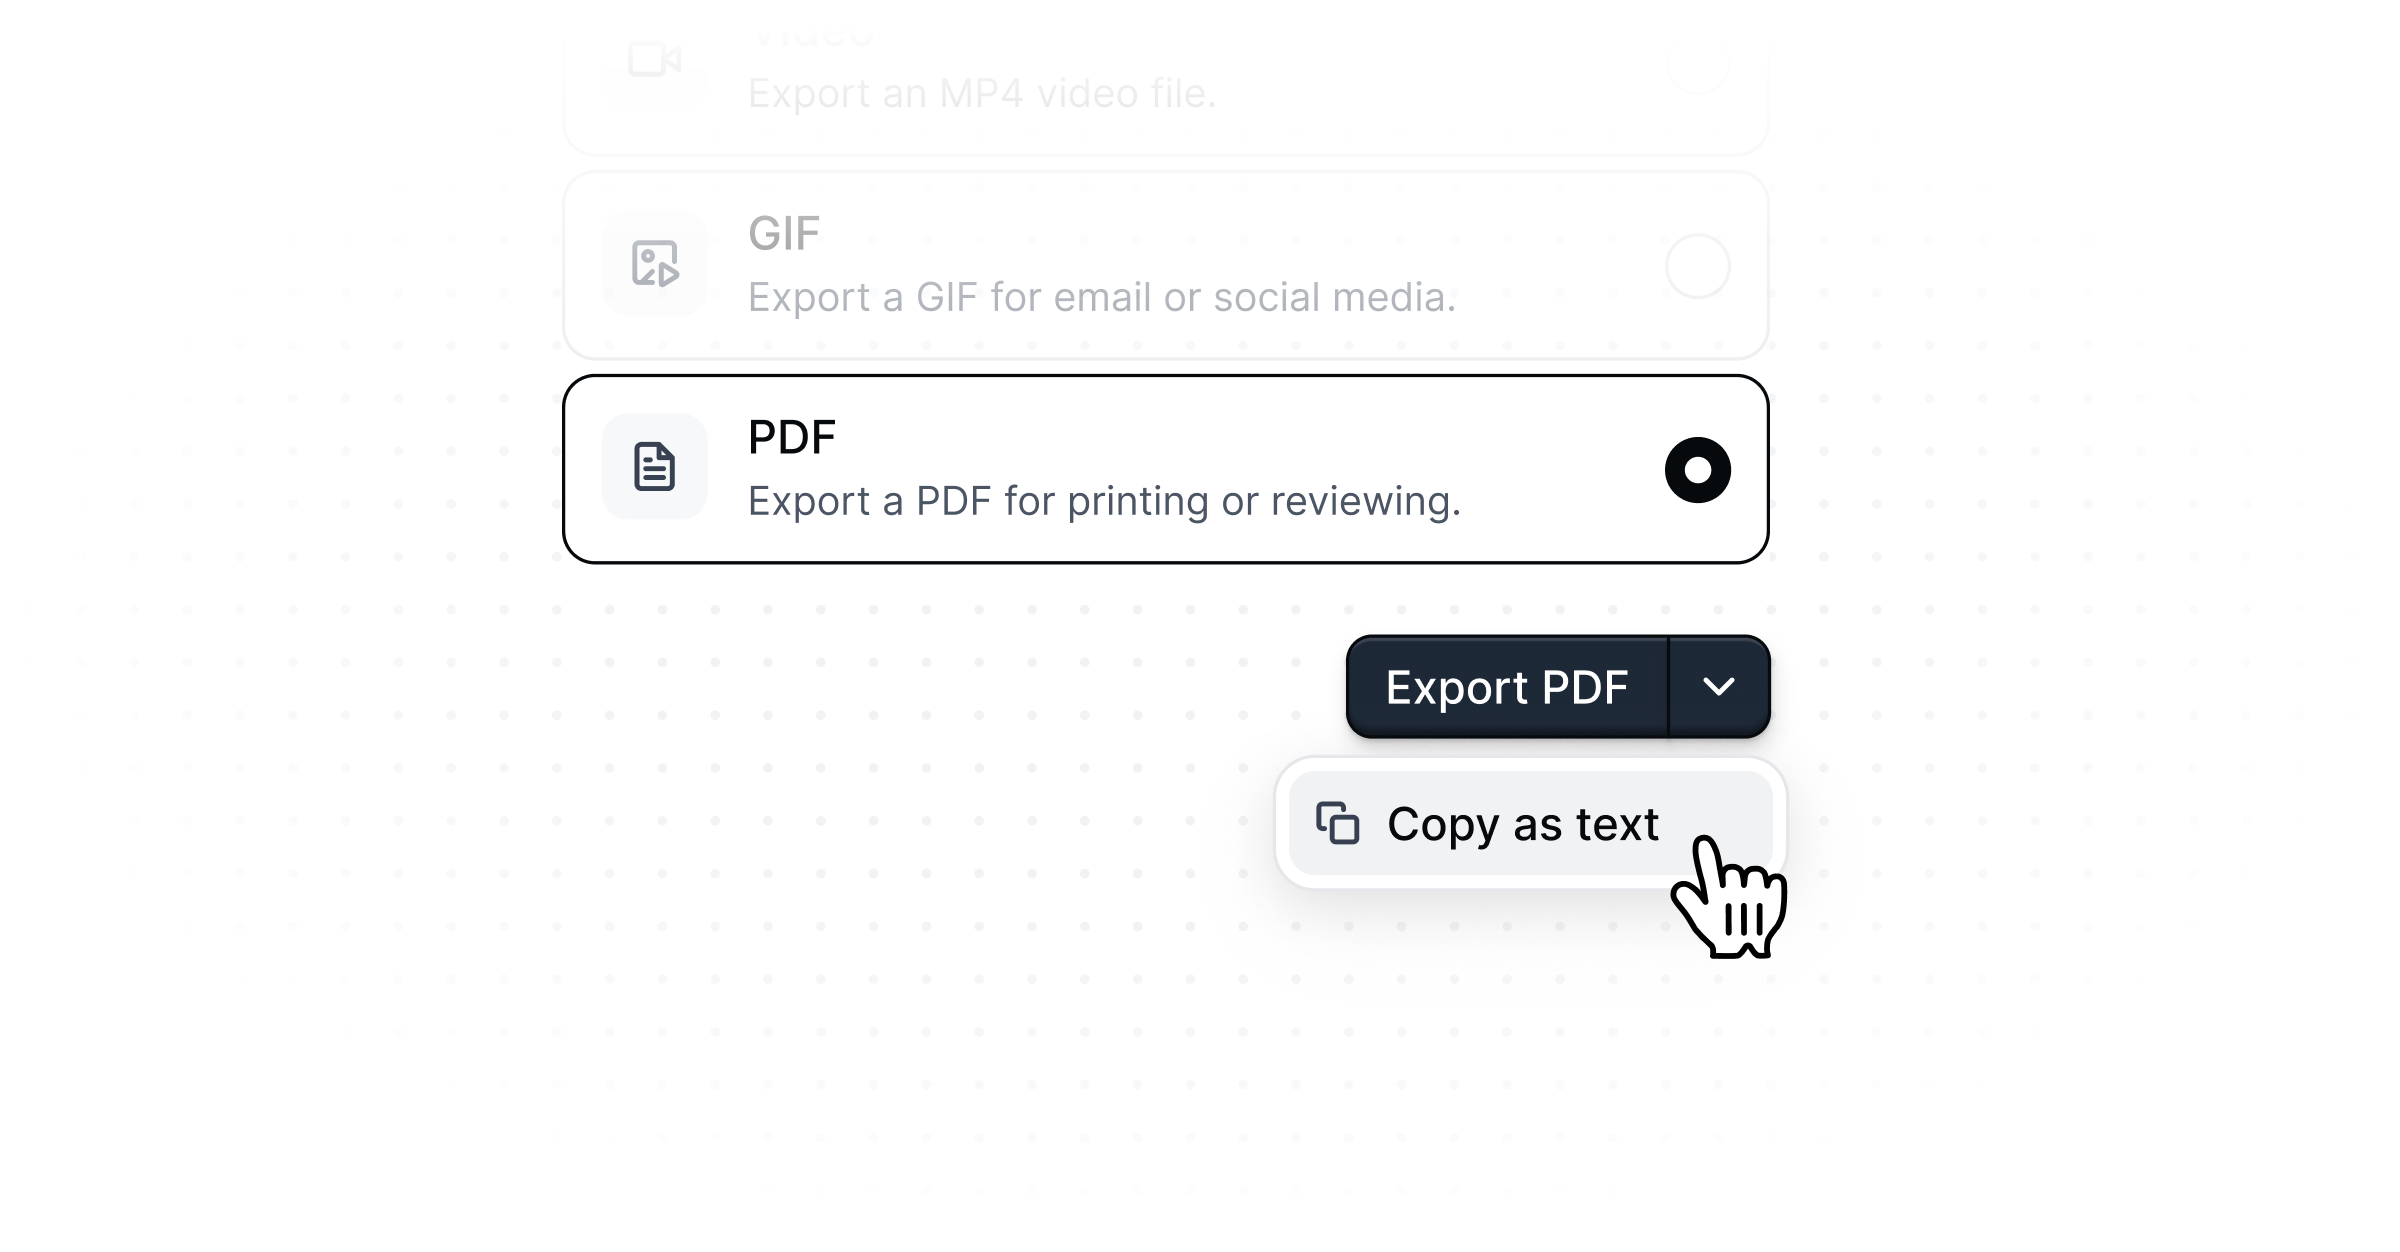
Document export as PDF
Share demos as a PDF with step screenshots and copy, or as a plain numbered text list.Convert your demo into a one-pager in seconds for async reviews, stakeholder sign-offs, or buyers who want something to reference later.
March 2026
Video Controls in Single Step View
Video duration settings, playback options, actions, and an advanced settings menu are now accessible directly in the single step view. This applies to both video steps (uploaded/embedded videos) and video captures.You can configure autoplay behavior, looping, duration limits, and post-video actions all from the same panel where you’re editing the step – the full set of video controls lives right alongside your other step settings.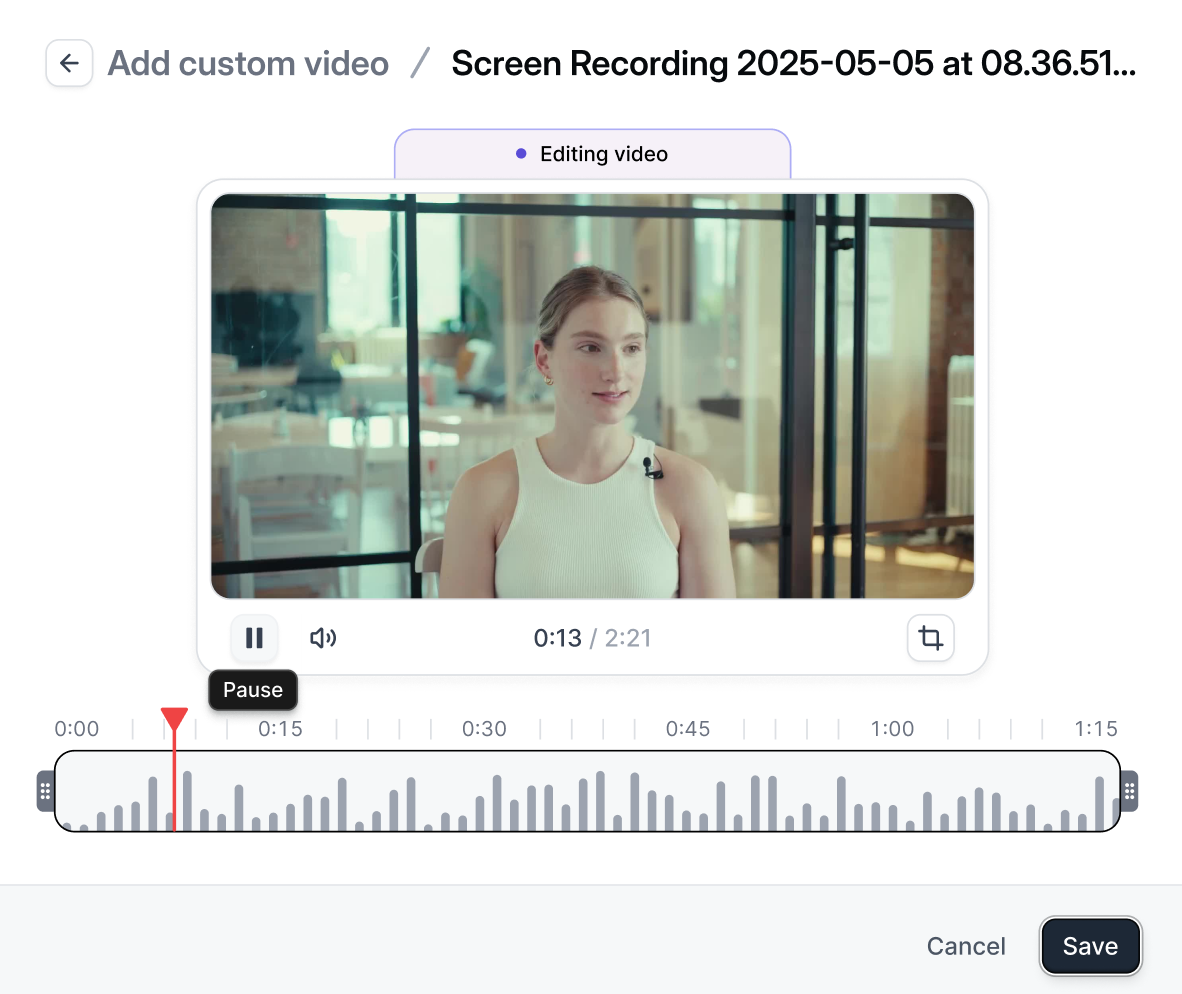
HubSpot on Sales & Pipeline Impact Dashboards
The Sales Impact and Pipeline Impact dashboards now work with HubSpot in addition to Salesforce. HubSpot integrations can opt into a “deal mode” in their integration settings, which syncs opportunity and pipeline data through the same attribution engine that powers Salesforce analytics.Once enabled, your HubSpot deals flow into the same dashboards – pipeline created, deals influenced, revenue attributed to demos. If your workspace has both Salesforce and a deal-mode HubSpot connected, a CRM source dropdown appears on both dashboards so you can toggle between data sources. Your selection persists across sessions.Learn more about the HubSpot Integration.
Workspace Knowledge for Copilot
Copilot now draws on workspace-level knowledge to deliver more tailored suggestions across all review features – writing, CTAs, flow structure, and full demo reviews.A new settings panel lets you define three types of context: brand voice (tone, terminology, style guidelines), product context (what your product does, key features, differentiators), and go-to-market positioning (target audience, use cases, competitive landscape).An “Auto-populate with AI” button generates a starting point from your company’s domain, pulling from trained data and falling back to web search for newer products. This knowledge is stored at the project level, so workspaces with multiple products can maintain separate context for each.Learn more about Copilot.
February 2026
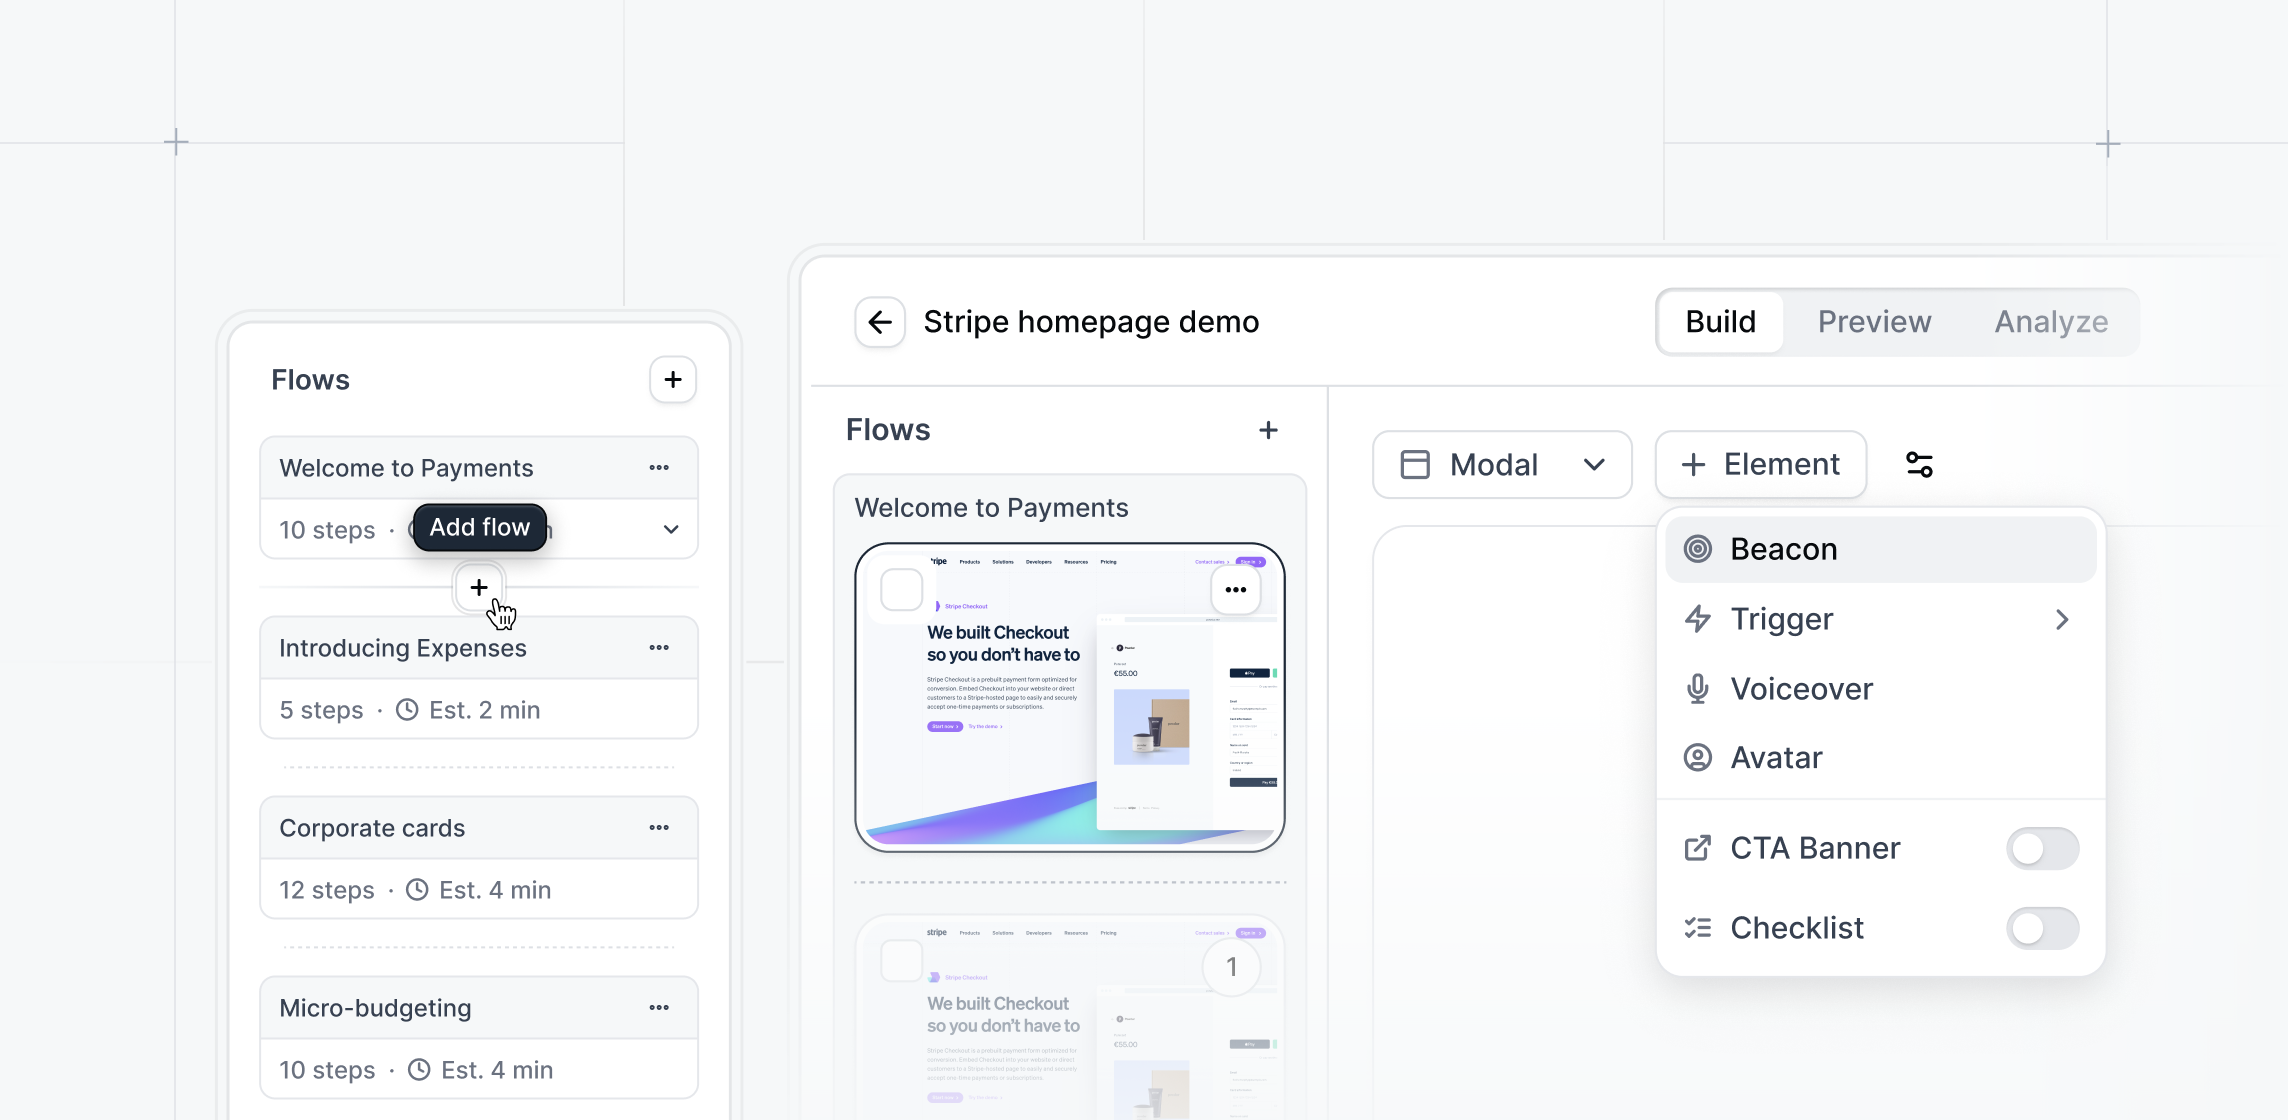
Single-Step Demo View
Introducing a new, more intuitive demo building experience.Captures, Flows, Checklists, Mobile settings, and Themes - previously spread across multiple pages - are now accessible from a single building view. Use the sidebar to move between steps in different flows and keep your story consistent across the entire demo. Prefer the previous layout? Toggle back to the multi-step view at any time.
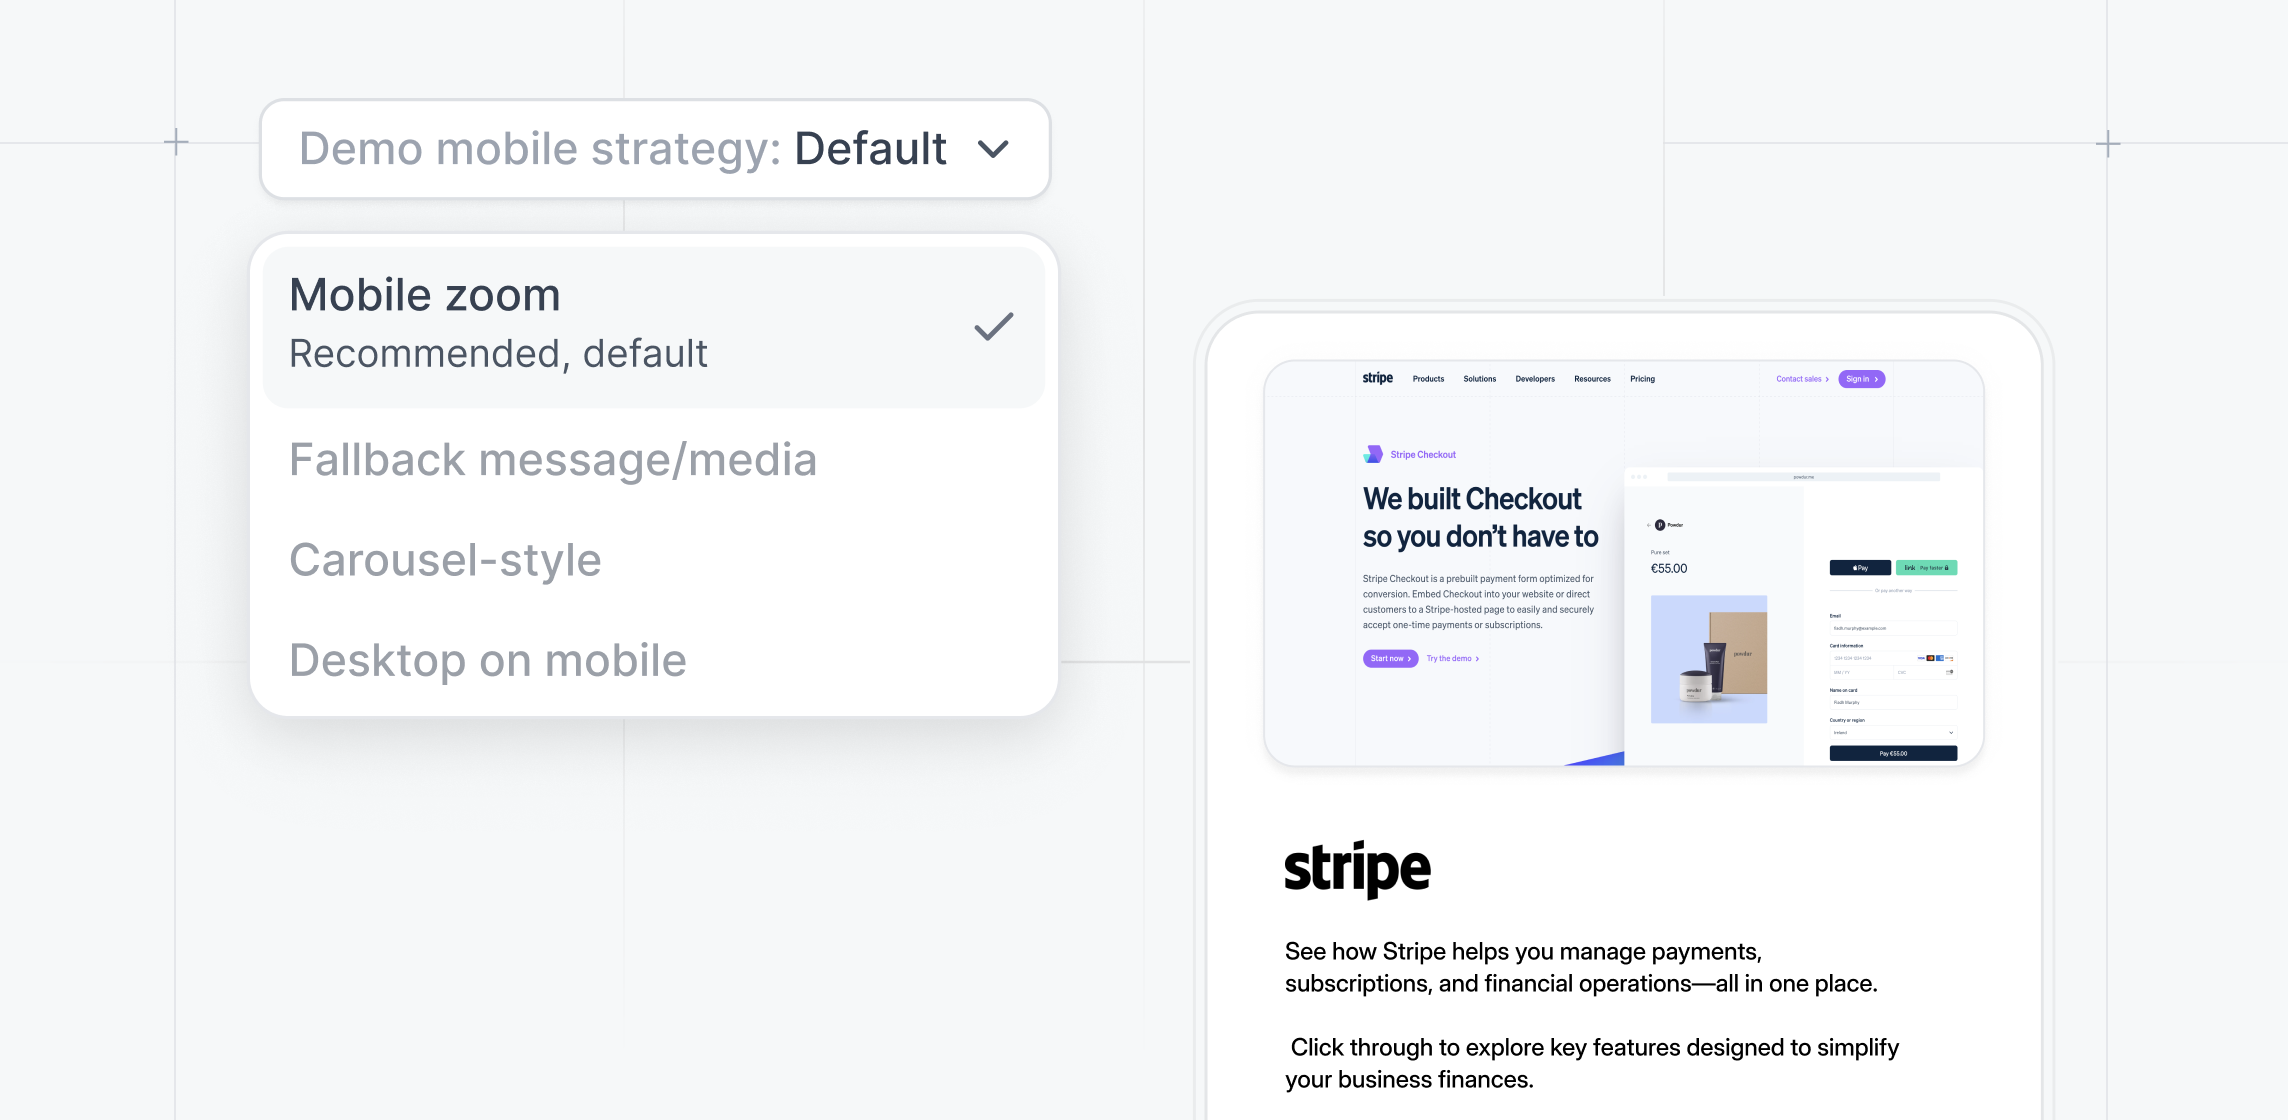
Mobile Zoom
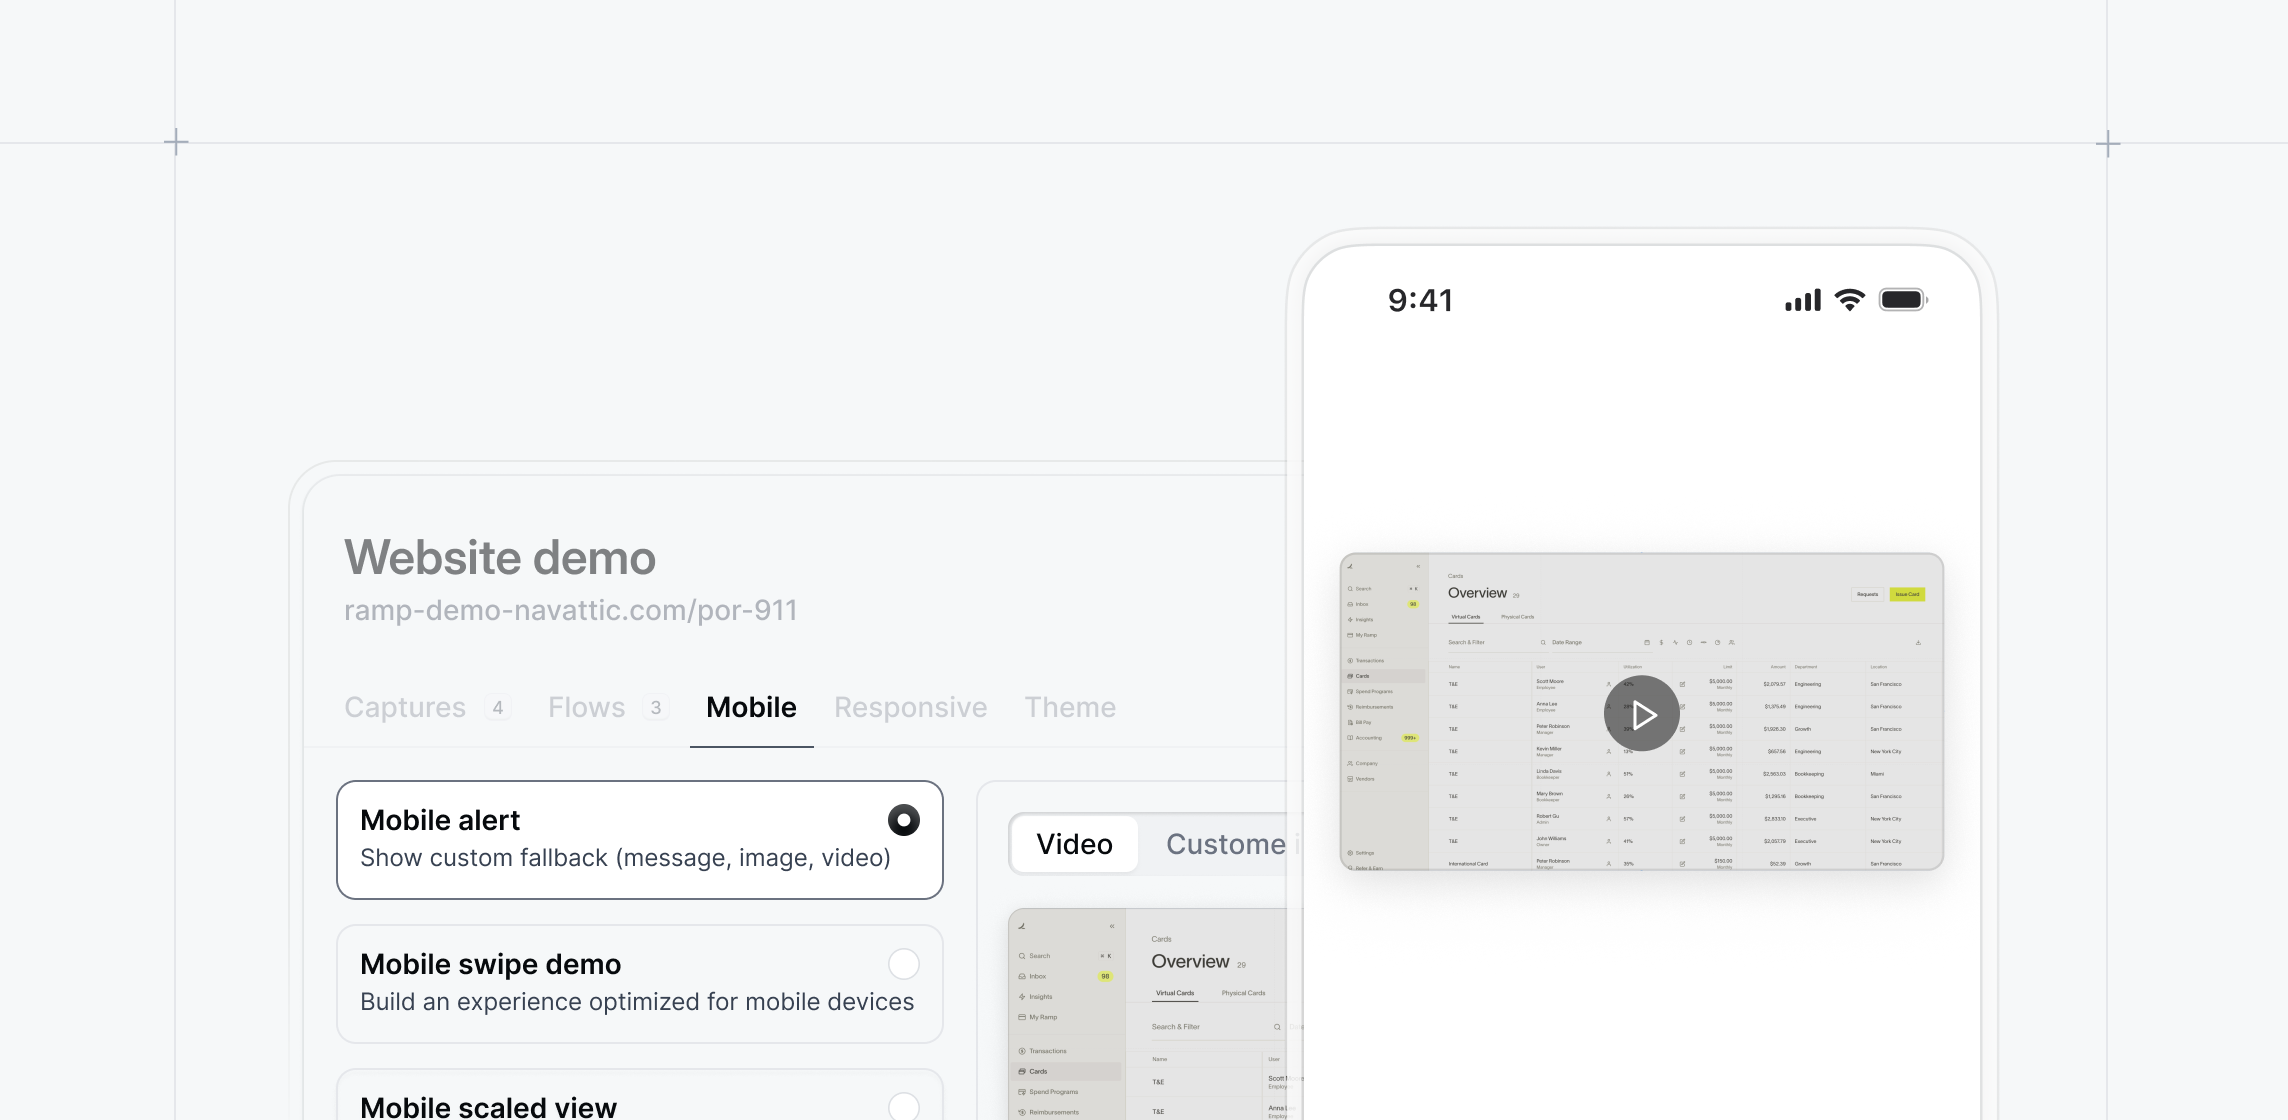
Let mobile viewers explore your full desktop demo.Mobile Zoom is a new strategy in the Mobile tab that gives mobile viewers full access to your desktop demo with pinch-to-zoom and panning.Zoom in to read text, explore details, and navigate the product.There are now three main Mobile Strategies available:
- Mobile Zoom: Shows the full desktop demo with pinch-to-zoom and panning
- Mobile Swipe Demos: Shows a swipable demo experience built for mobile
- Mobile Alert: Shows a custom fallback message, video, or image
January 2026
Copilot Review
Run demos through Review to instantly analyze your demo for structure, clarity, and engagement, and flag any issues missing, such as CTAs or unclear copy.Get a demo score based on our highest-performing demo benchmarks. Apply step-by-step suggestions like “improve writing in step 11” or “shorten this step for clarity” with one click.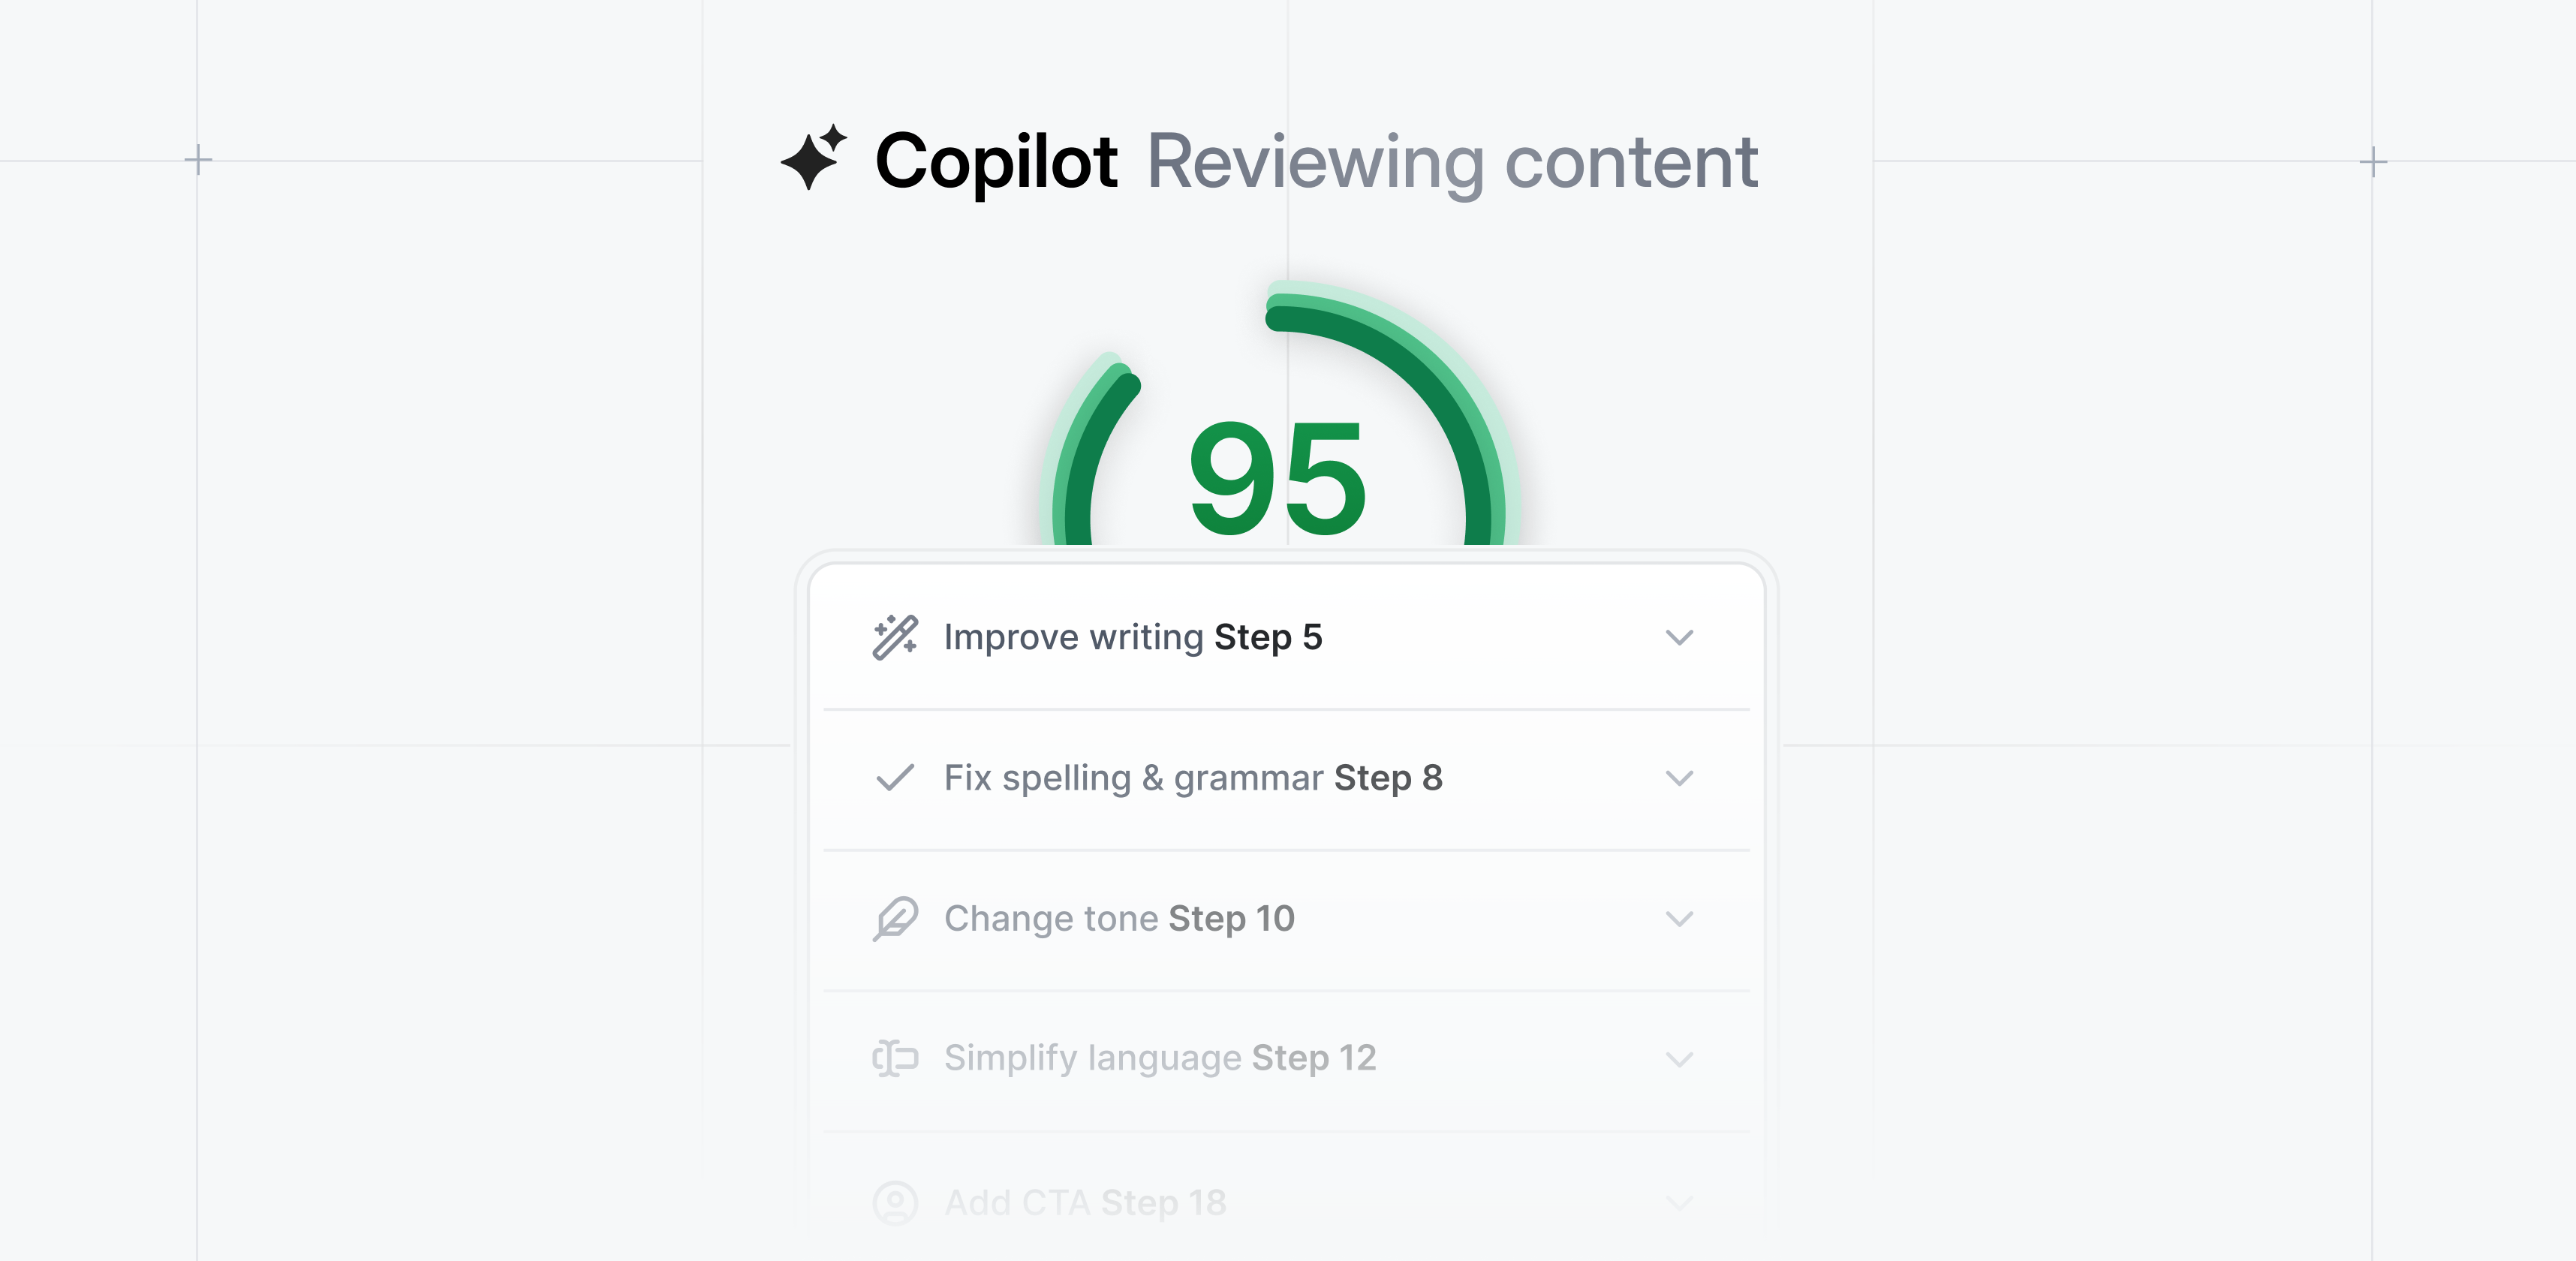
Highspot Integration
If you’re using Highspot, you can now embed Navattic interactive demos directly into their Digital Sales Rooms and Spots.Sellers can browse, select, and personalize demos without leaving Highspot, giving buyers hands-on product experiences alongside decks, case studies, and other sales content.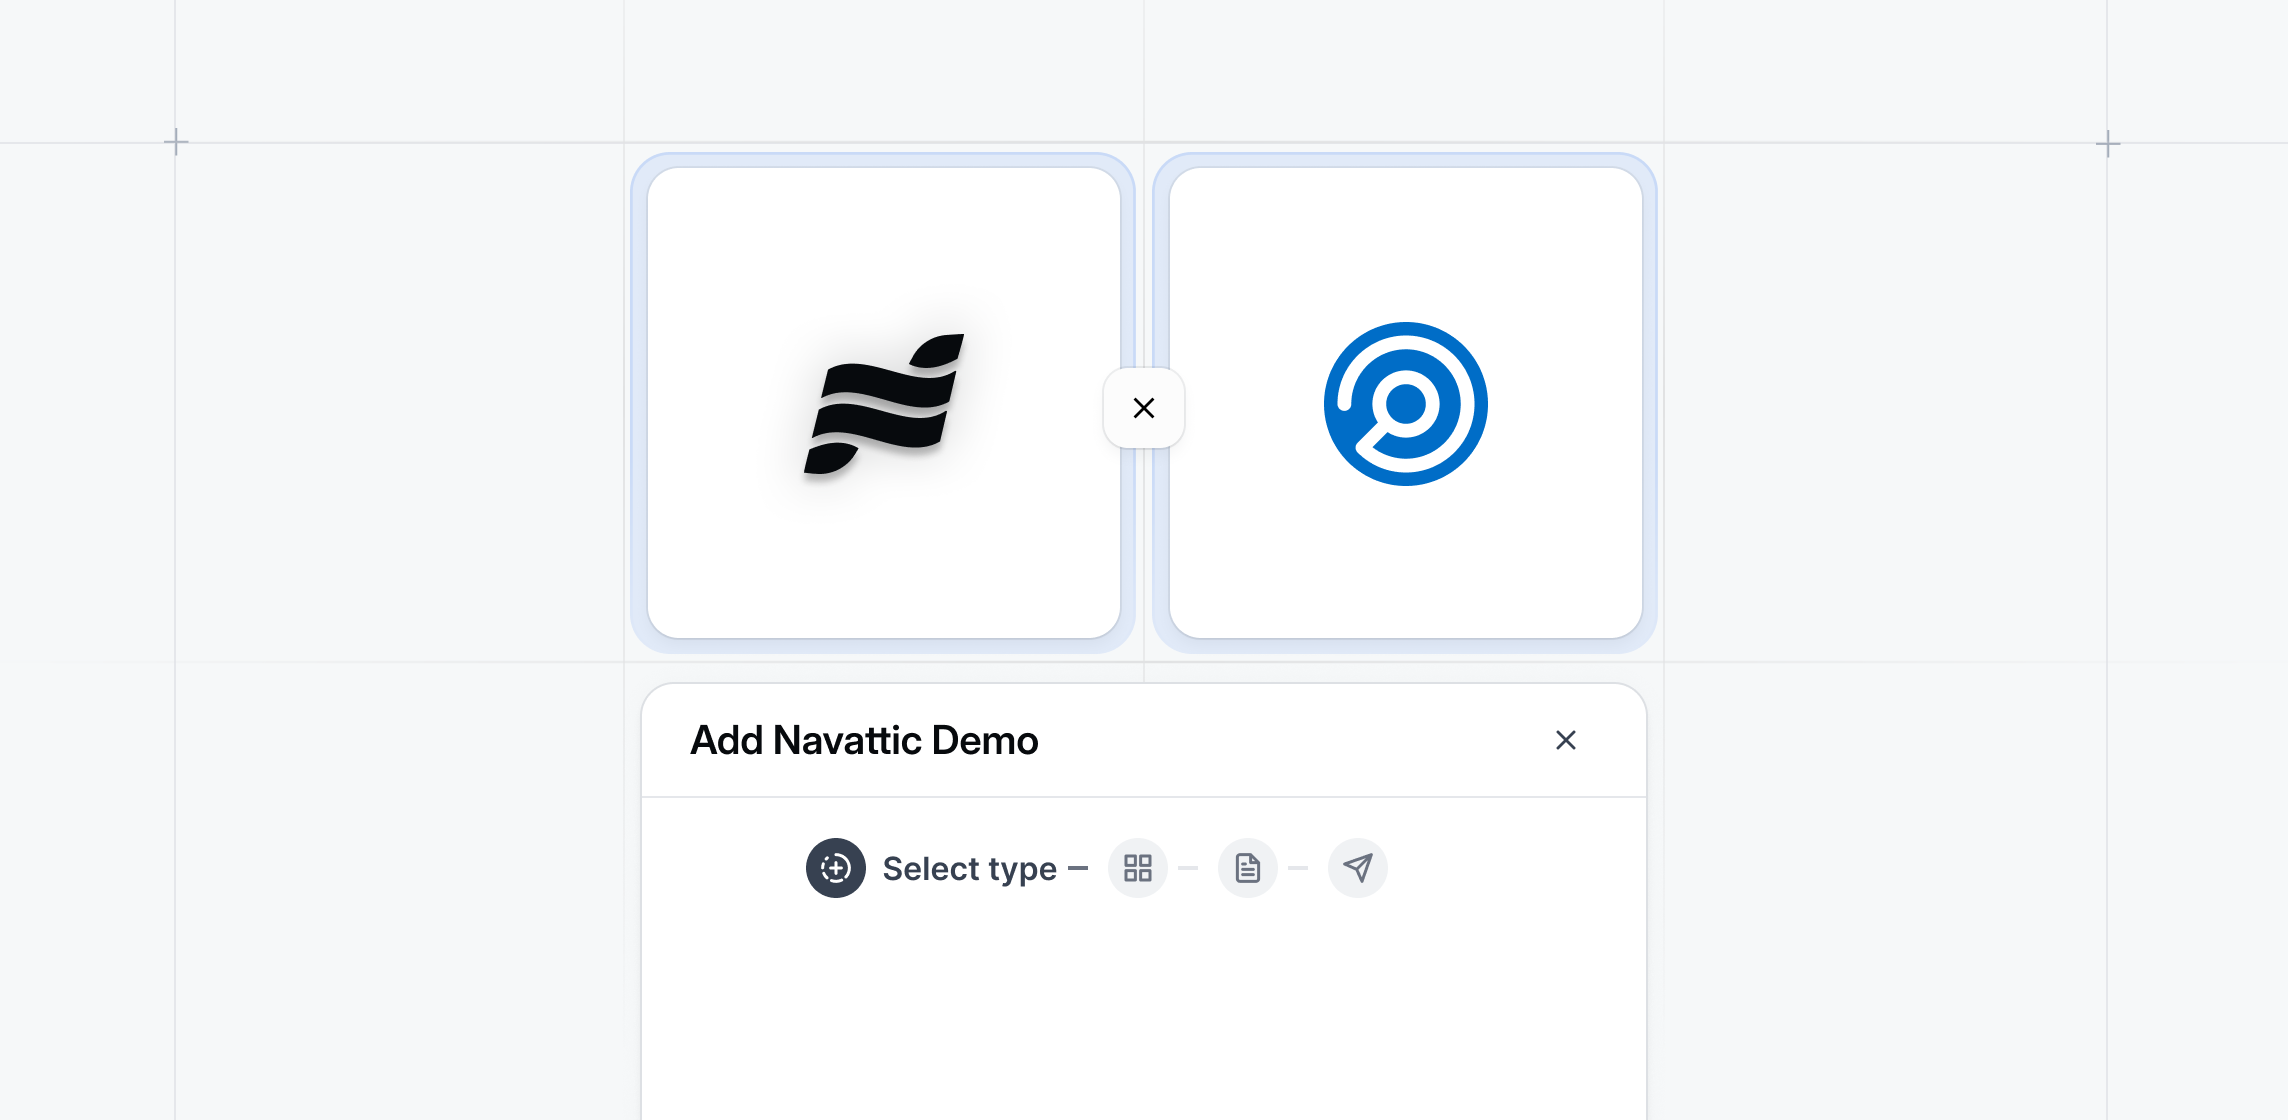
December 2025
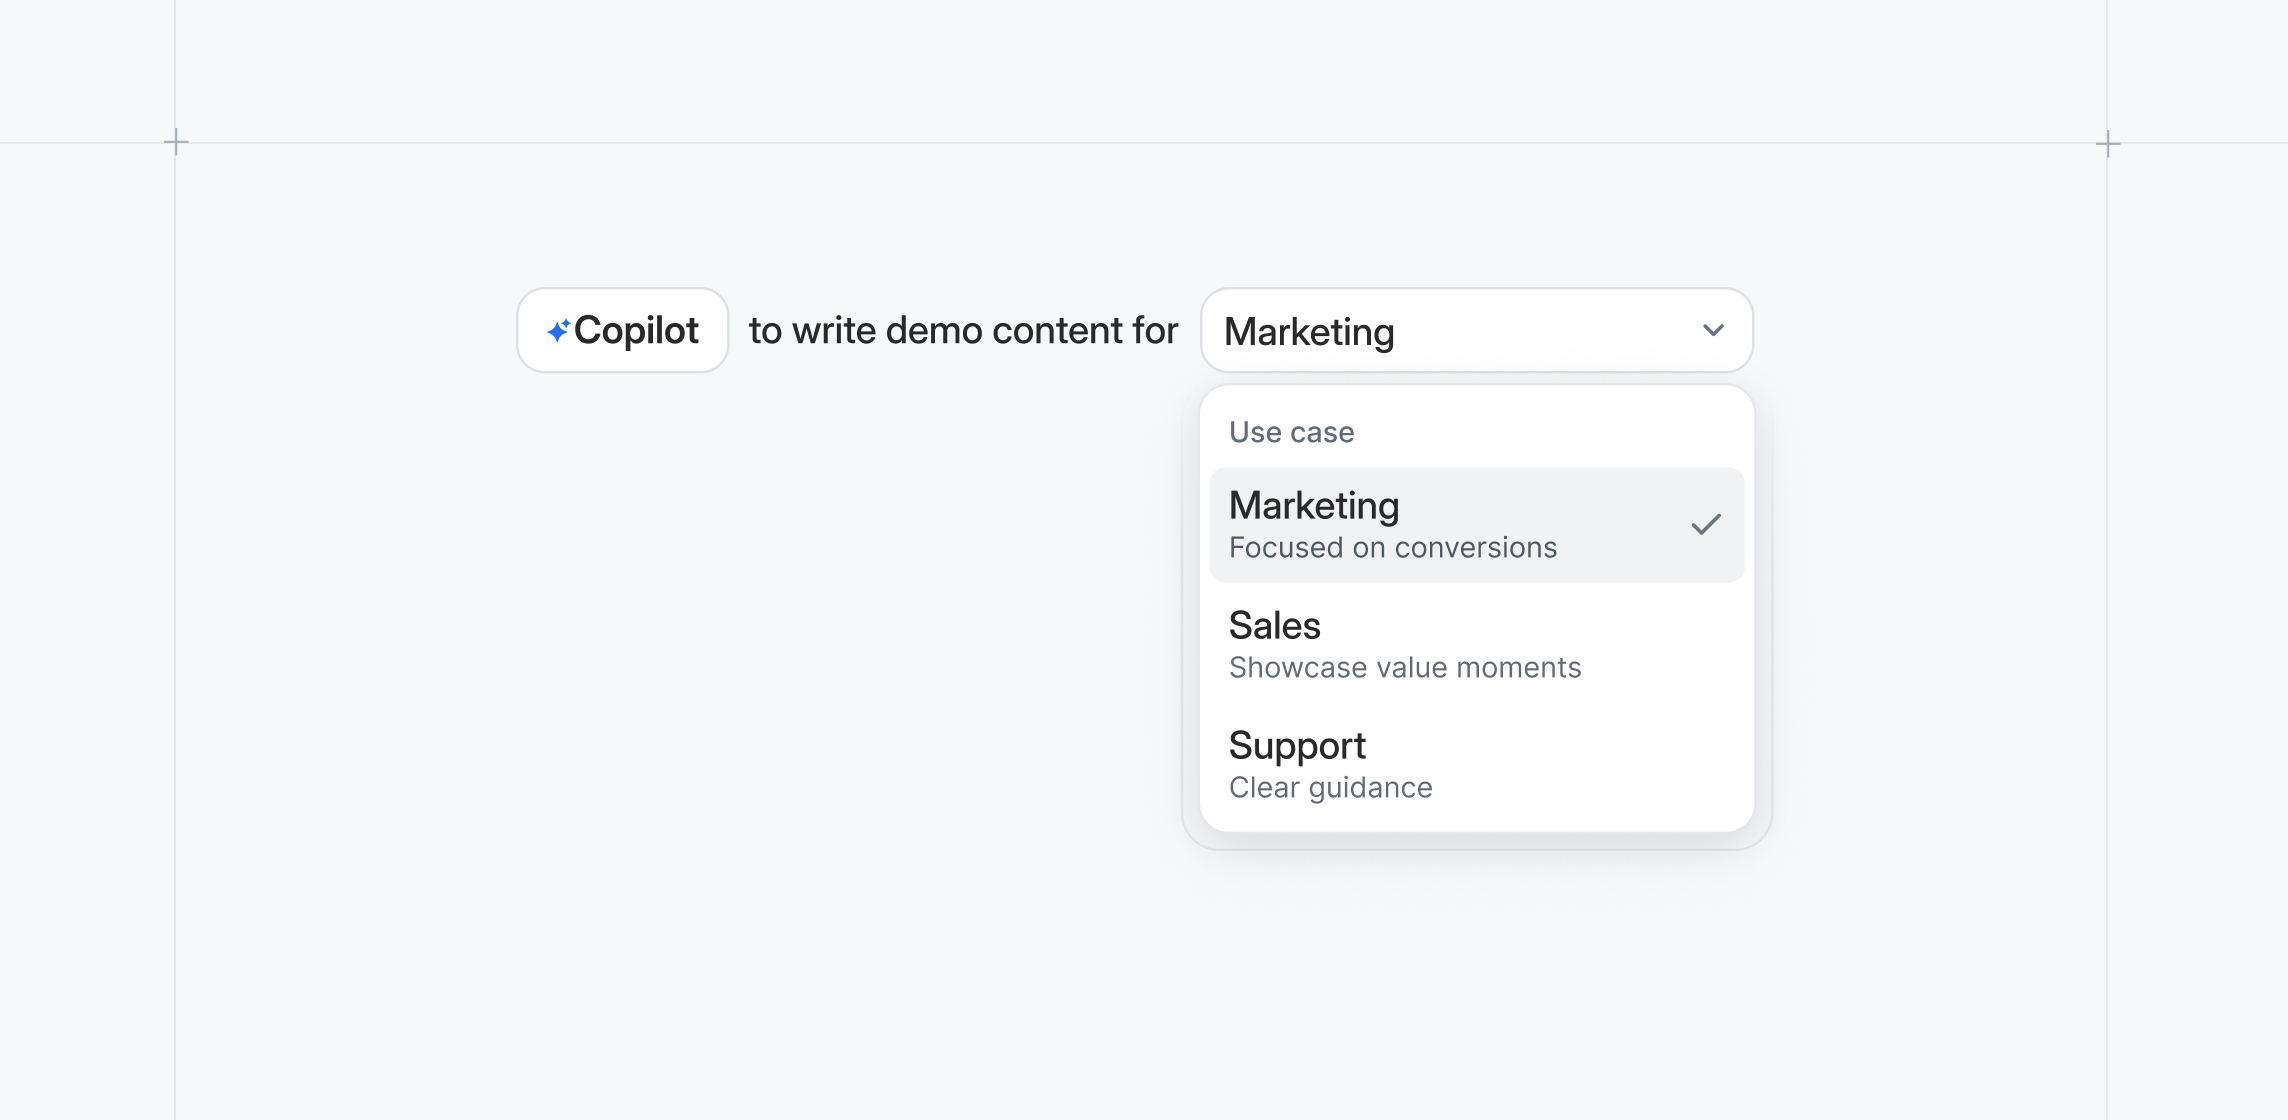
Copilot Generate
Let Copilot build a first draft of your demo for you.Choose a relevant Use Case, and Copilot will automatically write demo copy, anchors, tooltips, and craft a compelling demo story.

Copilot Brand & Tone
Add Brand and Tone context to build all your demos with brand consistency.Adjust prompts to match your messaging style, so every team member can build, edit, and personalize demos with set guardrails for brand tone.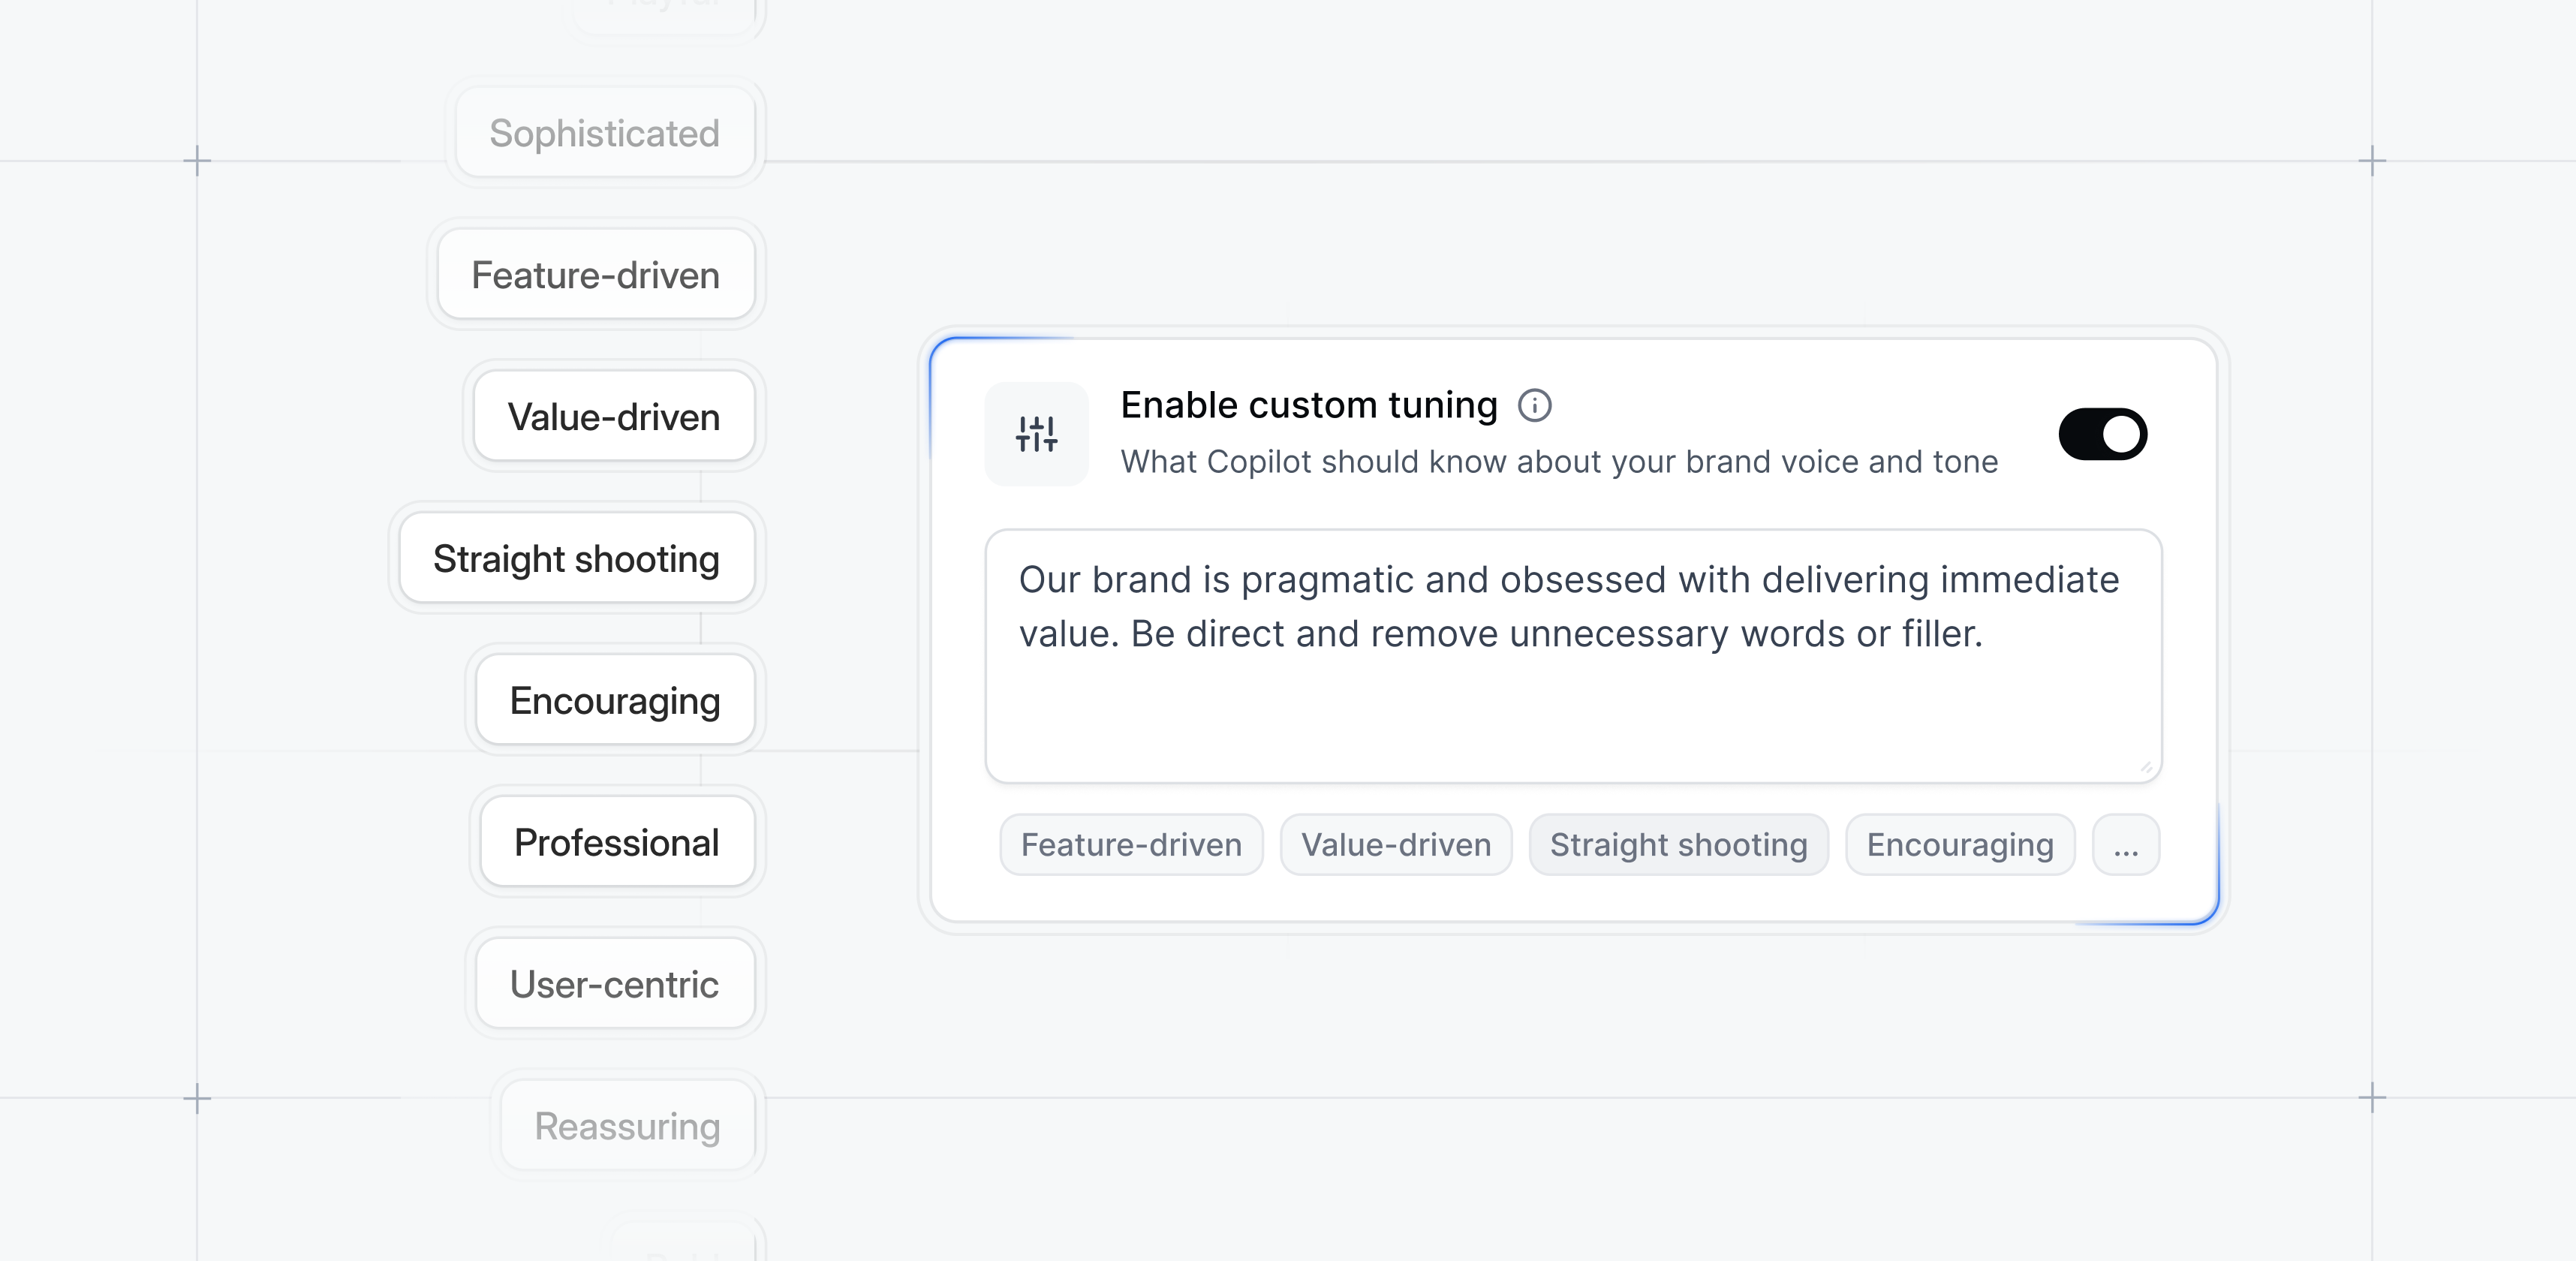
Copilot Prompt
Make bulk edits or quick fixes without touching individual steps.Whether you need to rename steps, update CTAs, or insert new steps, Copilot Prompt understands natural language and handles the updates for you.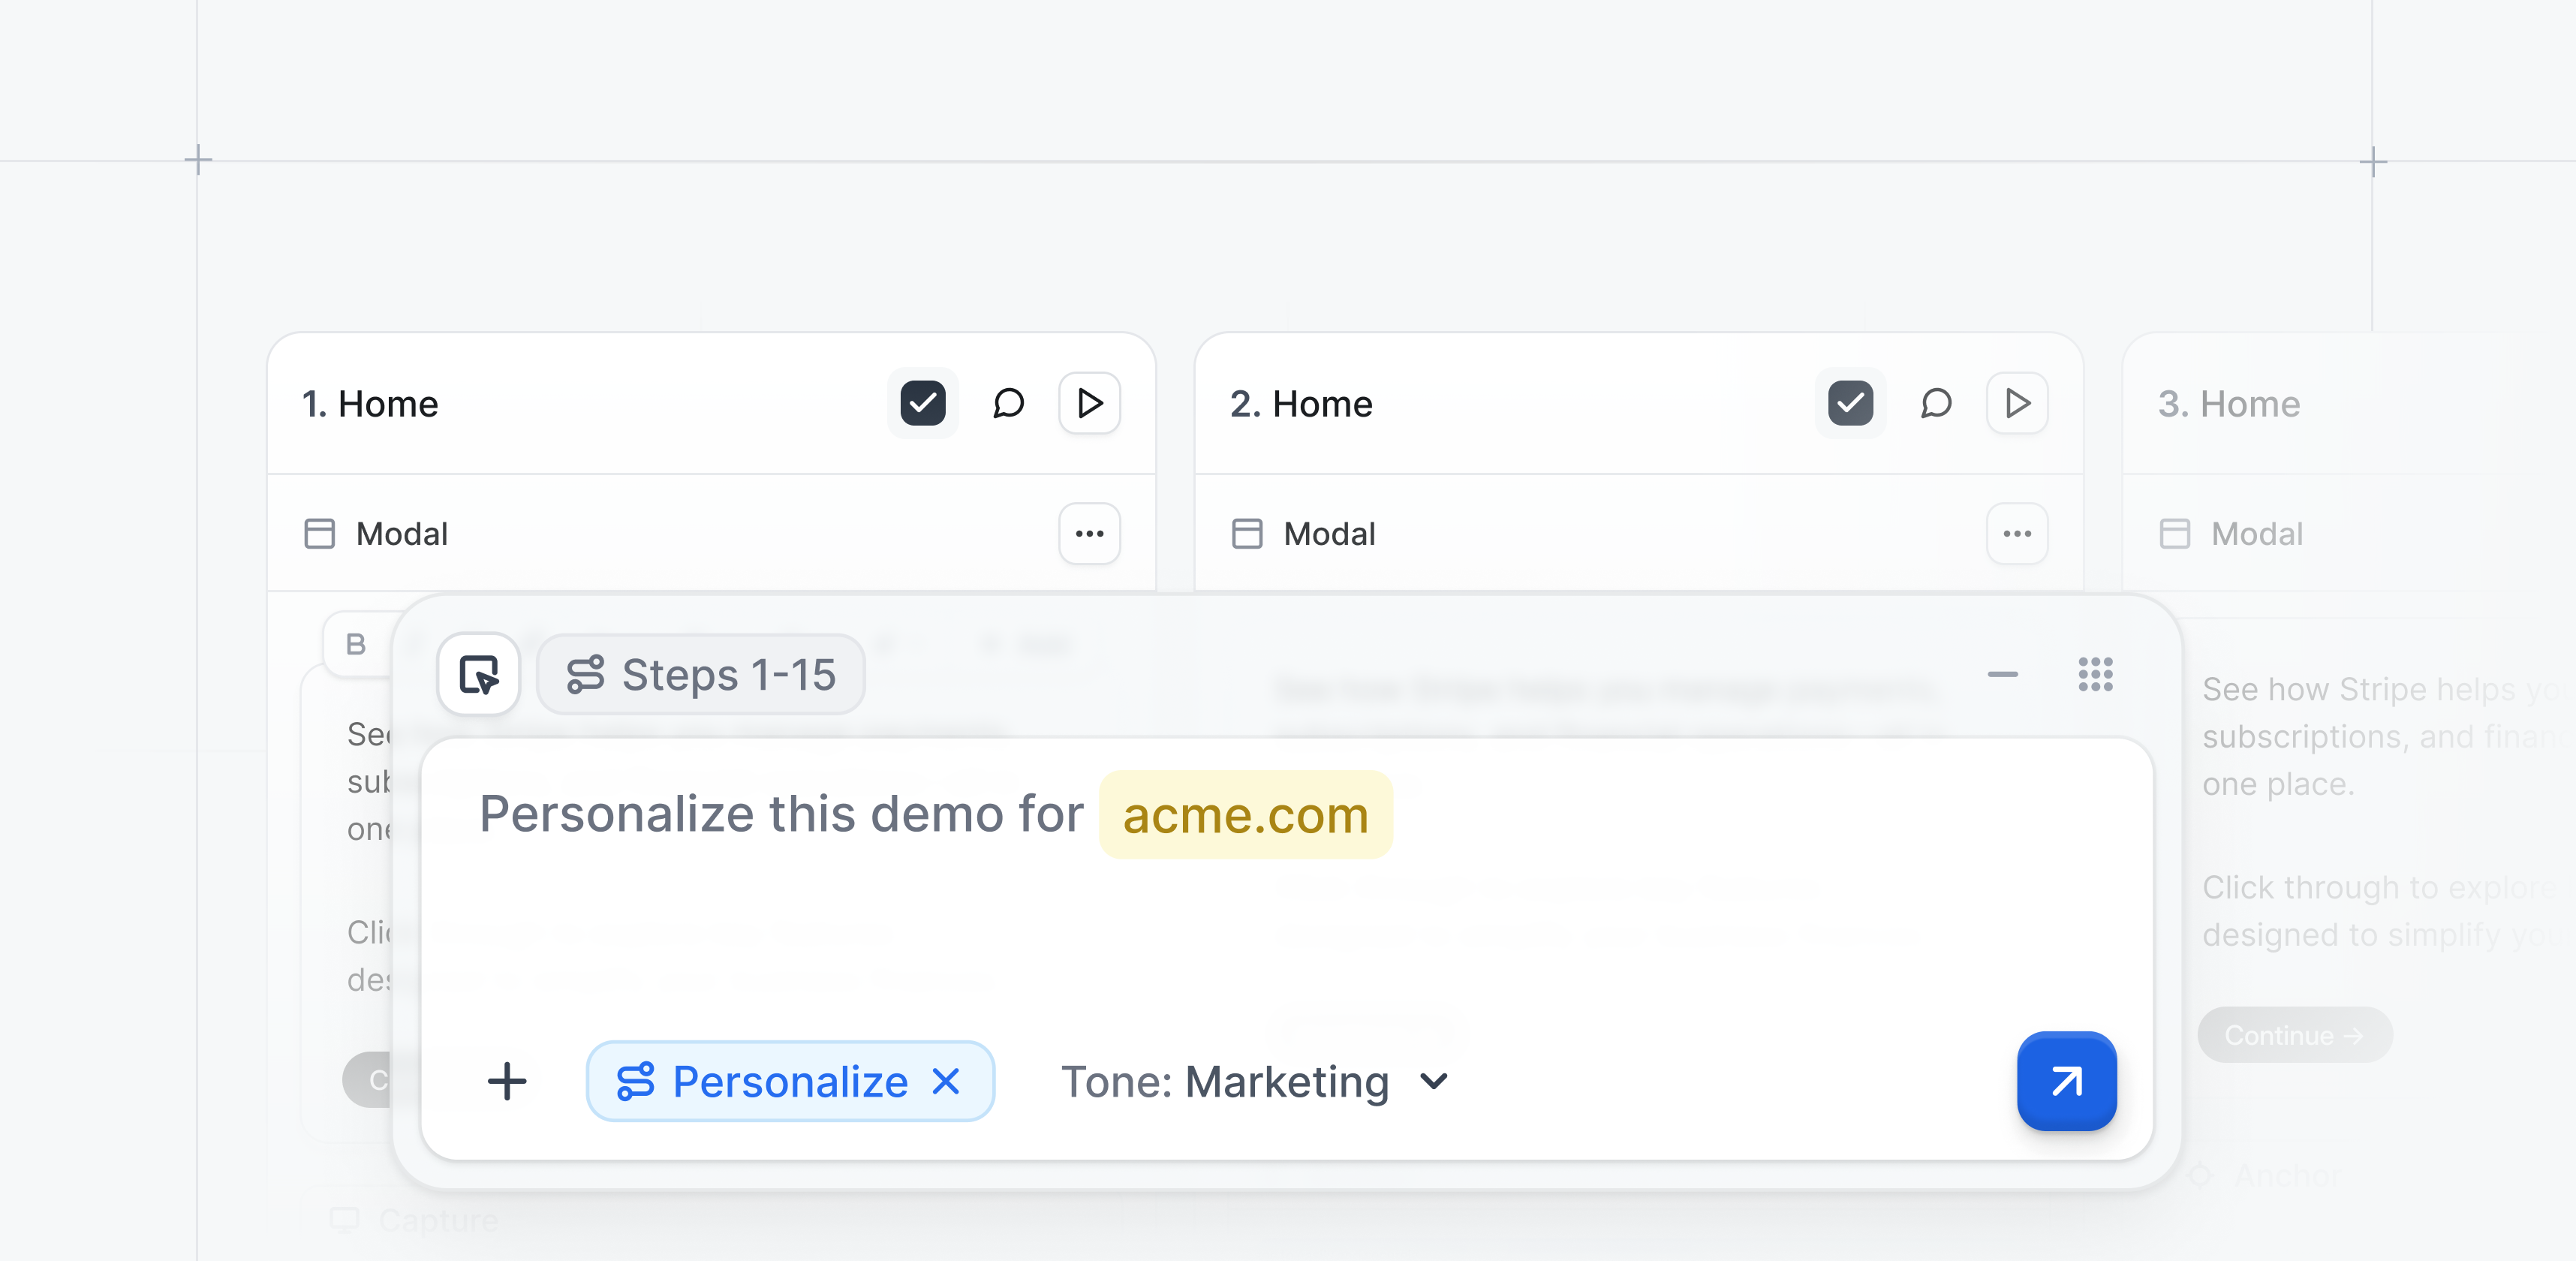
November 2025
Gong Integration
Share demos directly inside Gong and track engagement alongside your call recordings.Create and send personalized demo links without leaving Gong. All demo engagement data syncs automatically to visitor and account records for full visibility.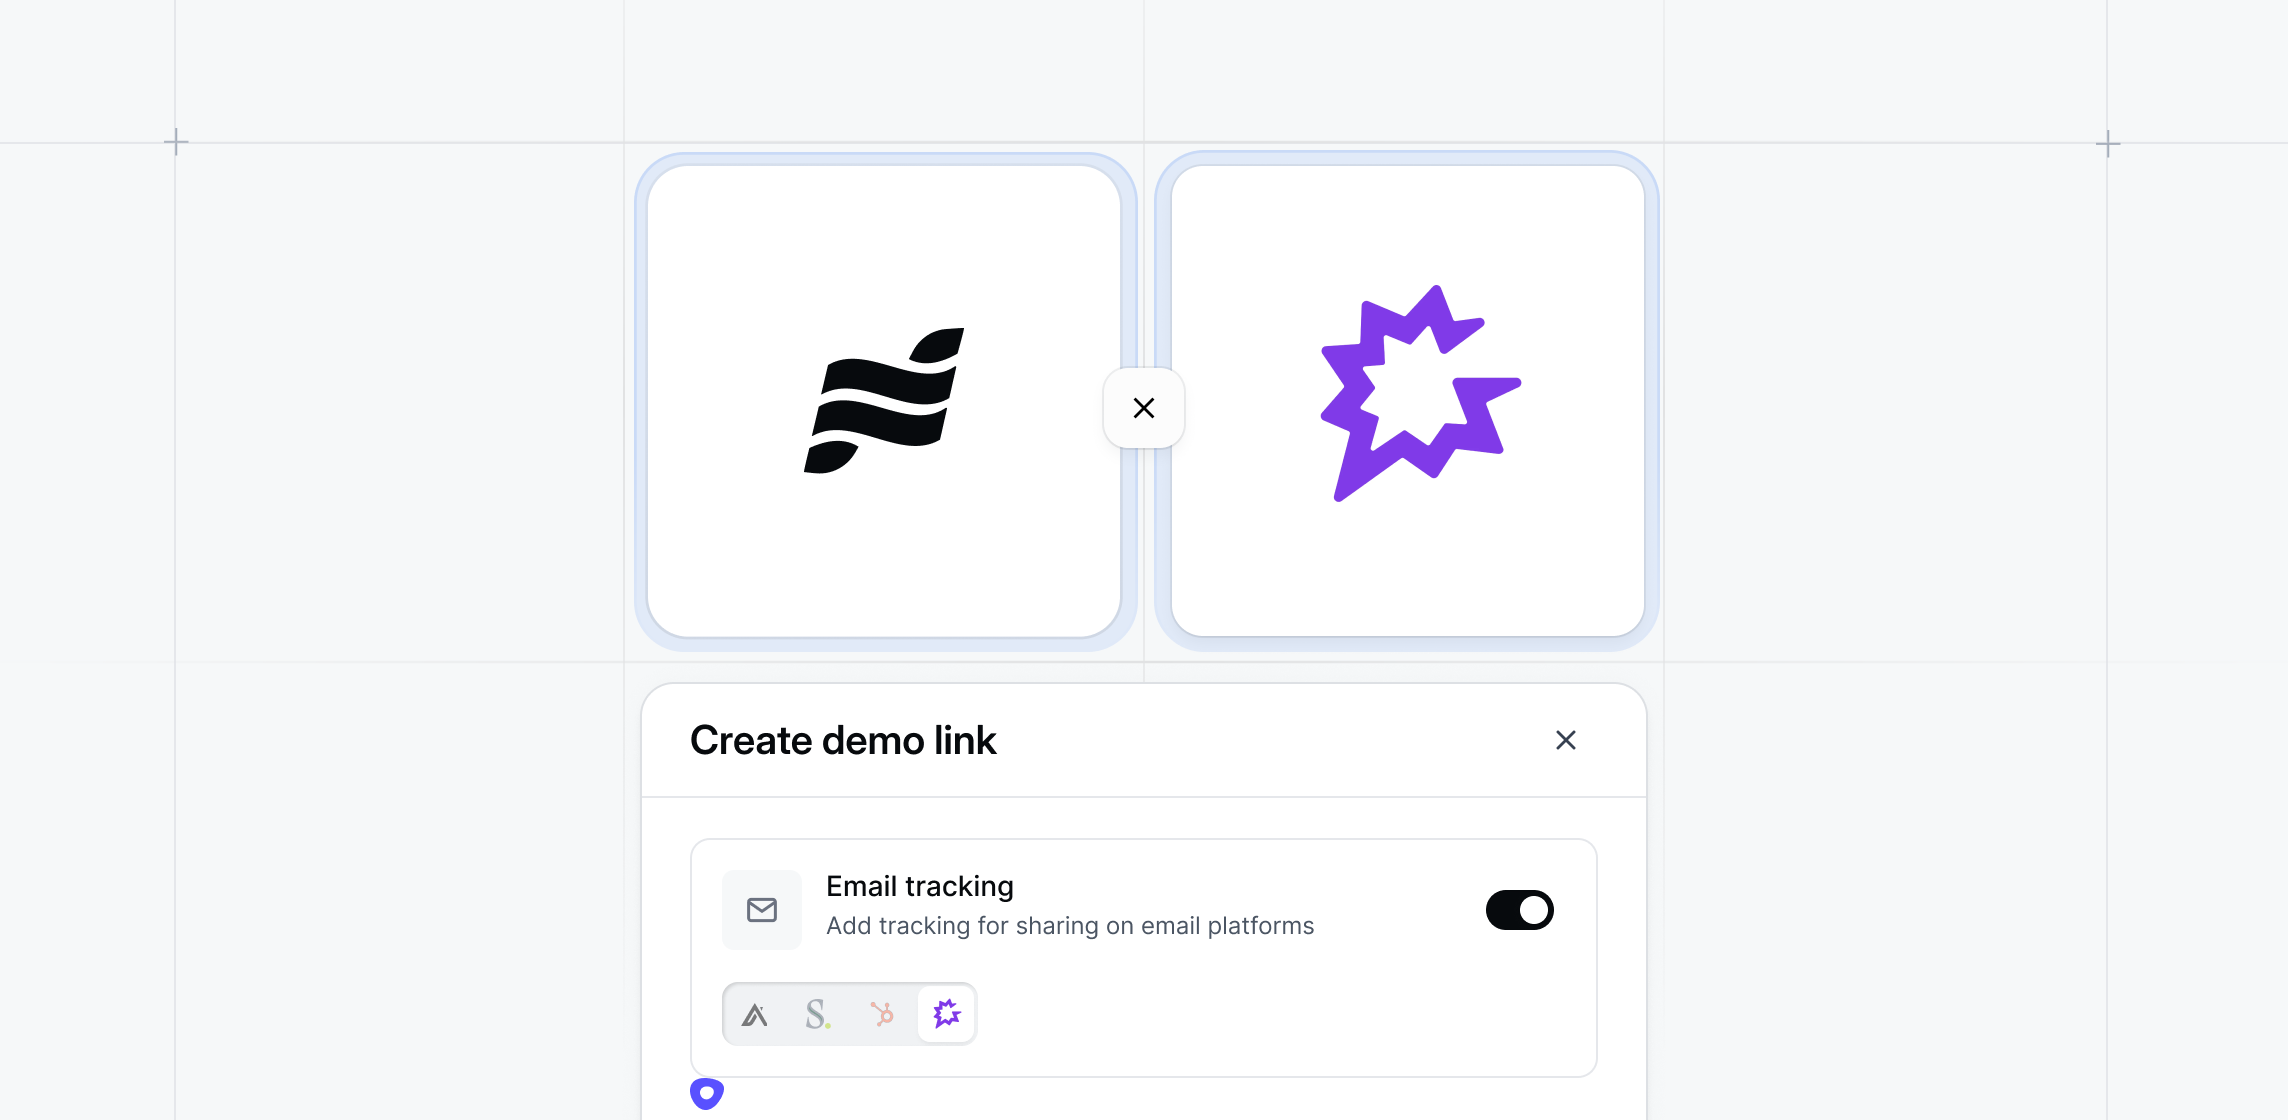
Copilot: AI Theme generator
Auto-generate demo themes based on any website.Provide a URL and Copilot will pull brand colors, typography, button styles, and other design tokens to generate a cohesive demo theme, ideal for account-specific personalization.Generate via Settings → Themes → Generate with Copilot.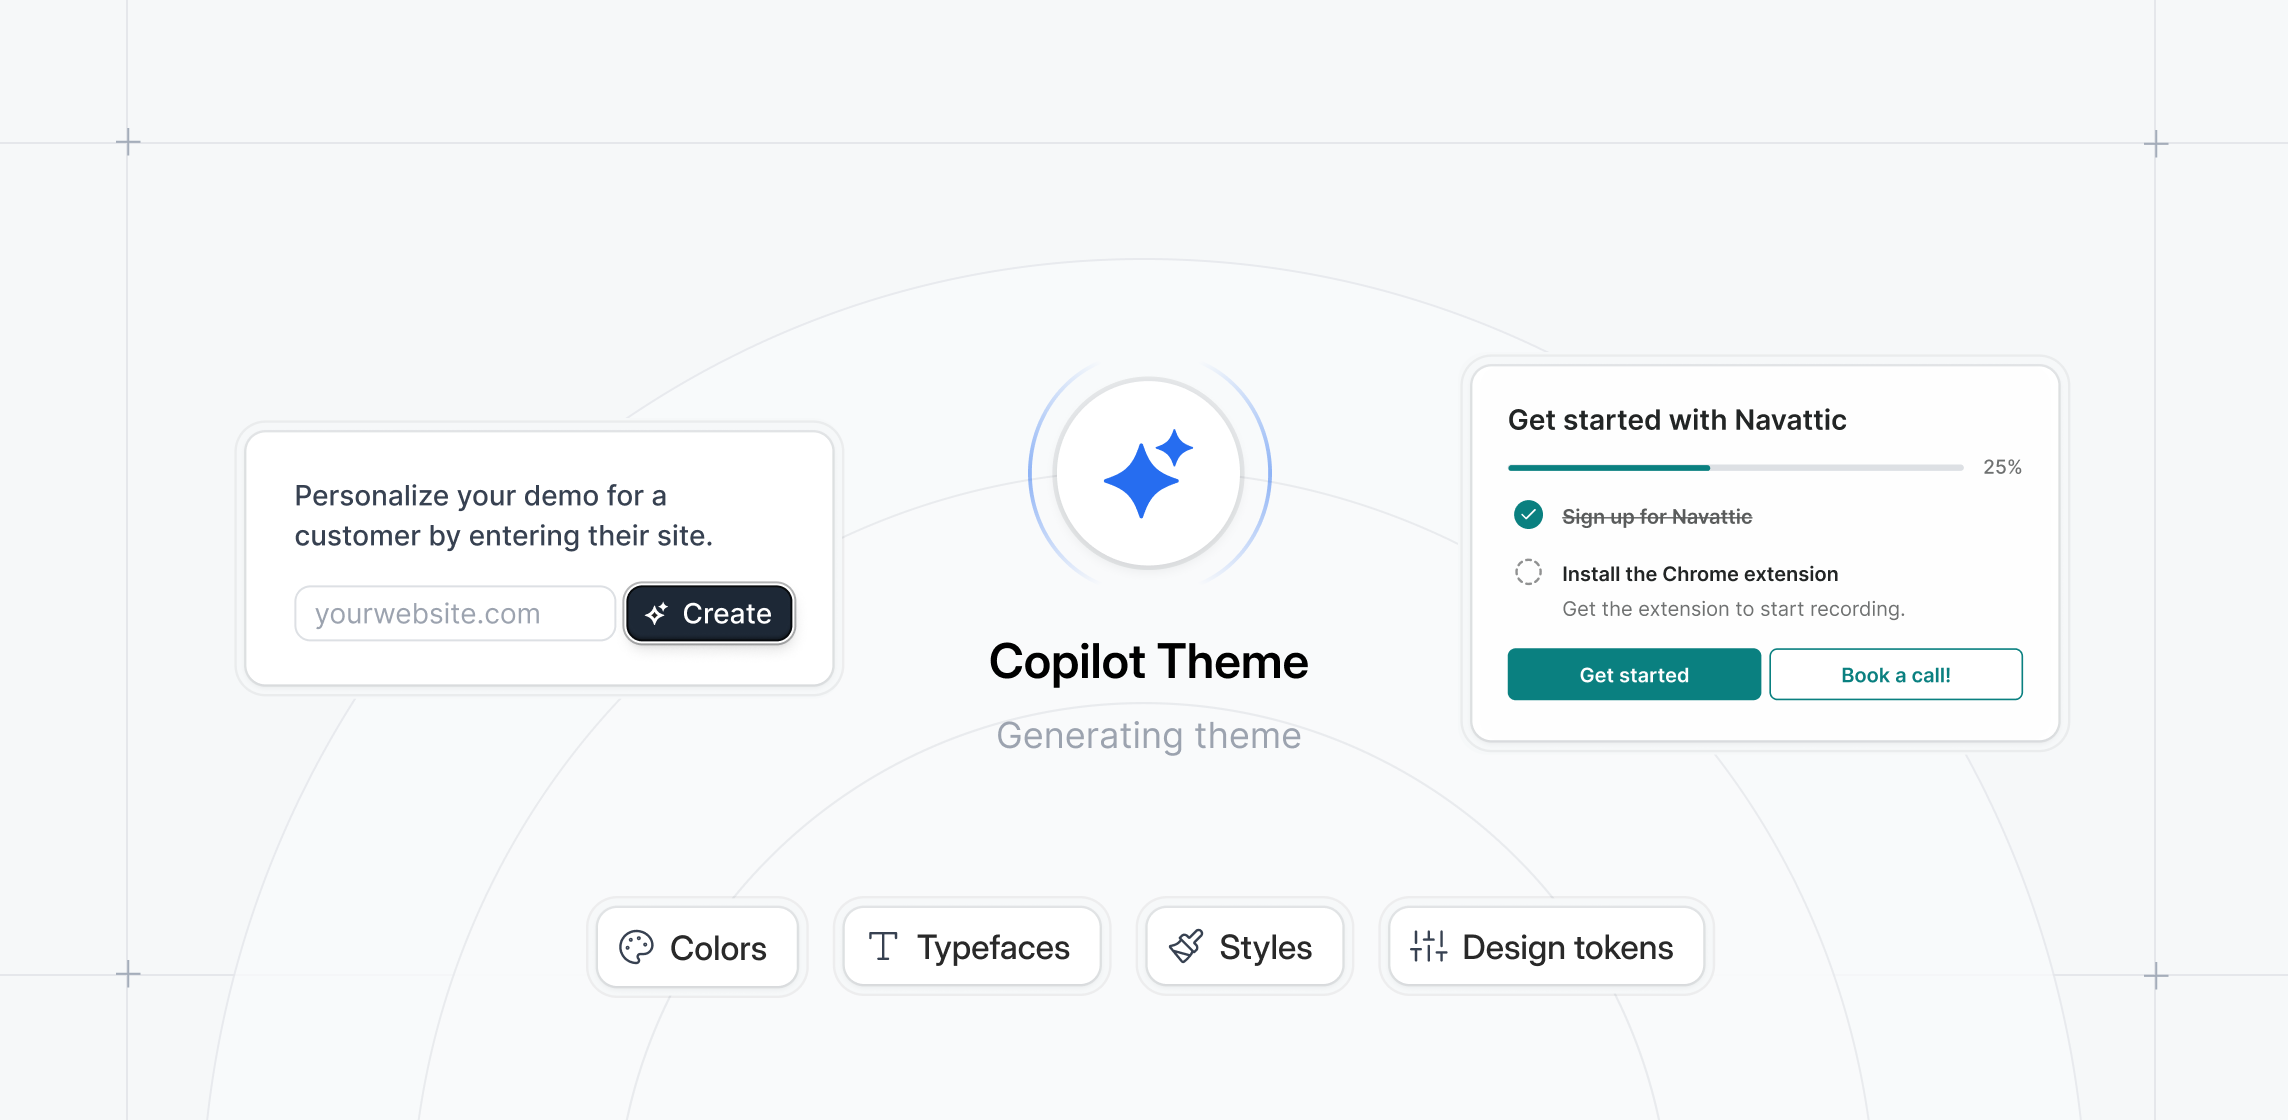
Edit SVG charts in Capture Editor
Edit SVG charts directly in the Capture Editor.Click to update values, labels, and data points in chart elements, no external tools needed.Perfect for customizing metrics in your demo to match specific scenarios or audiences.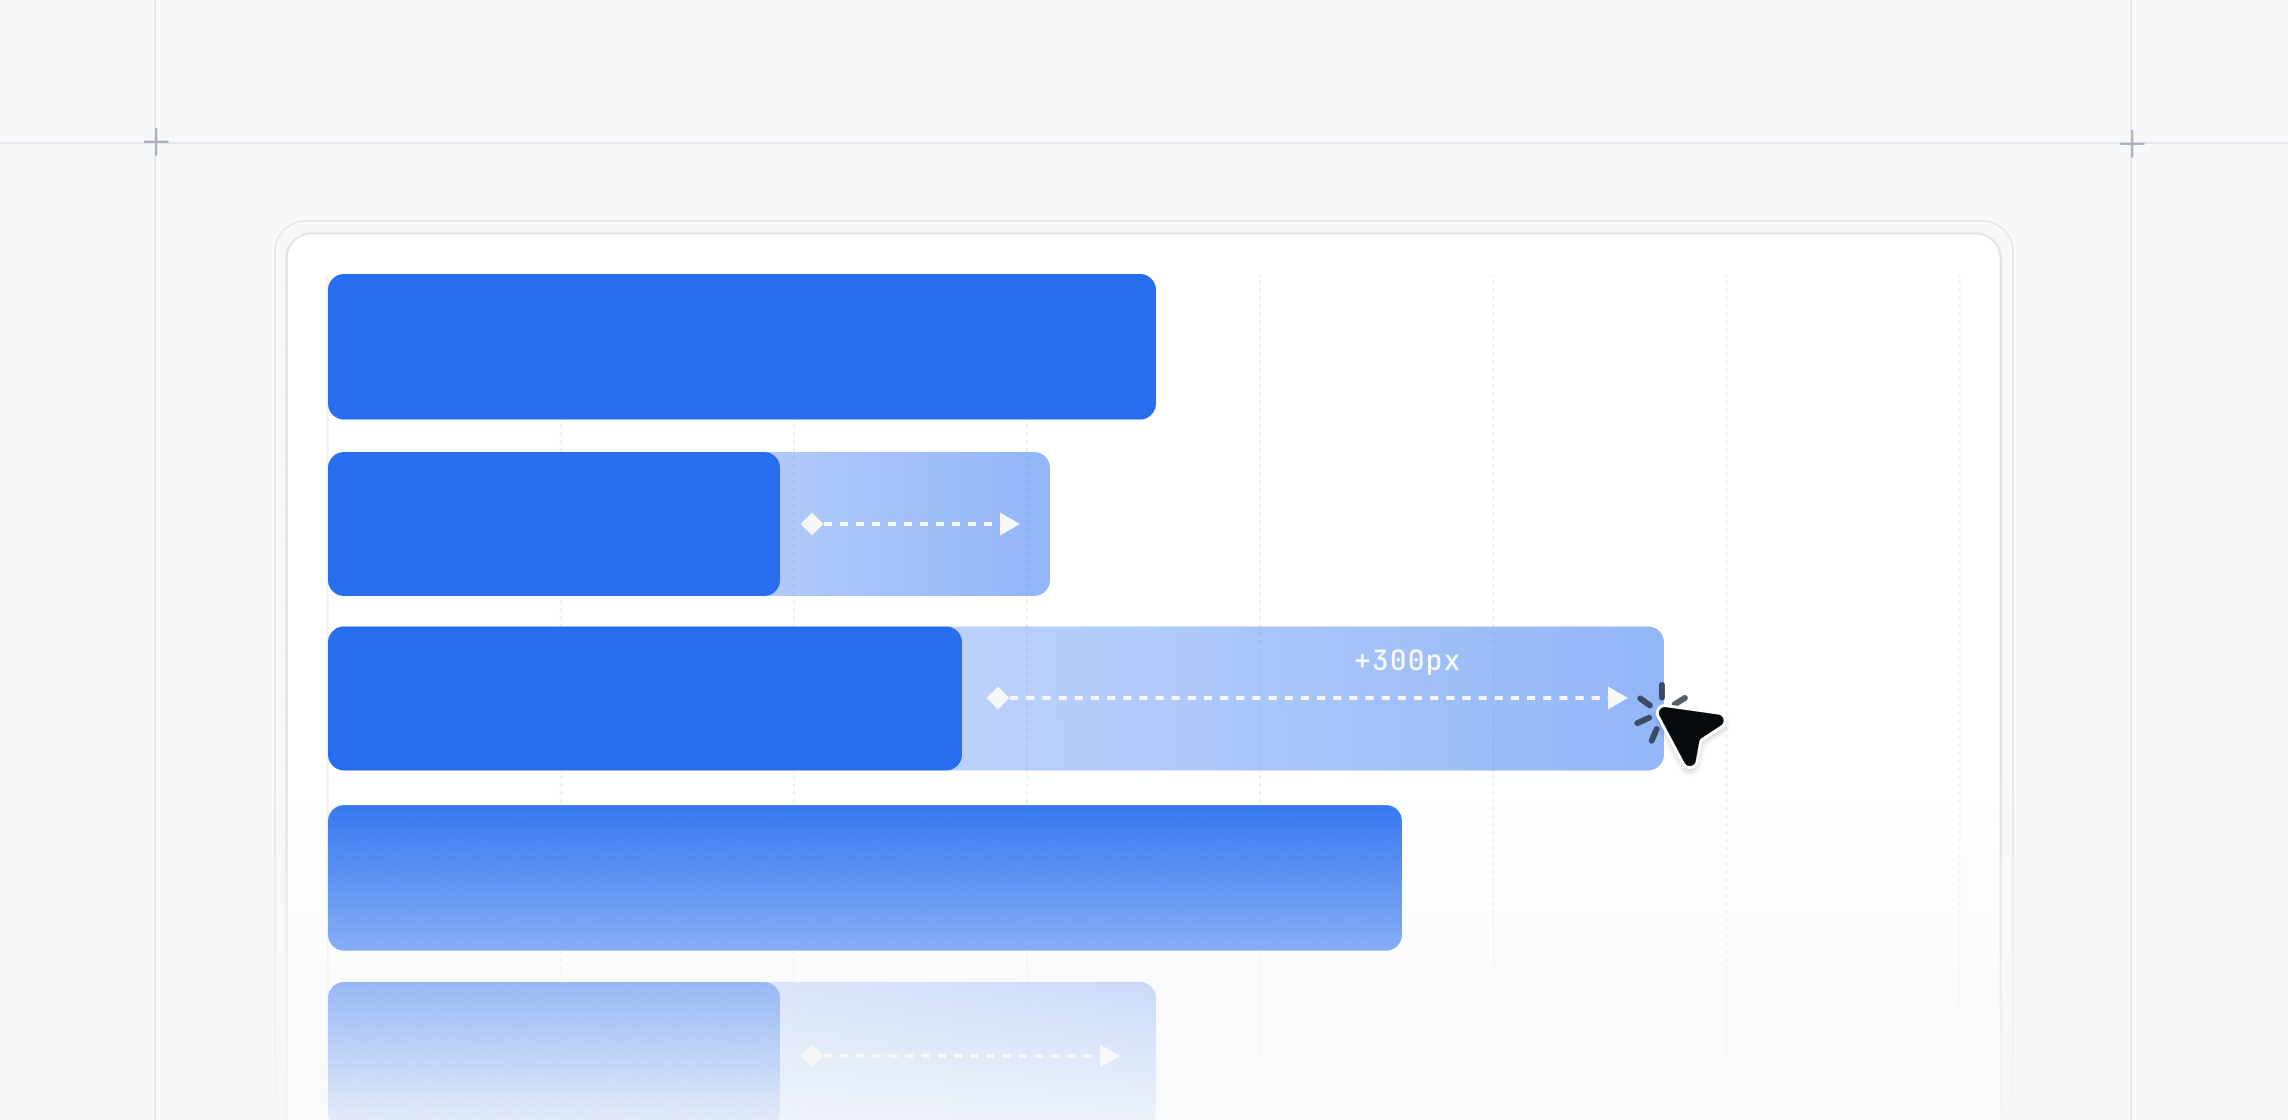
Video step engagement analytics
Analyze where viewers engage with your video steps.The new playback breakdown chart shows engagement at 5-second intervals so you can identify high-attention moments and drop-off points.Find it under Analyze → Step Breakdown.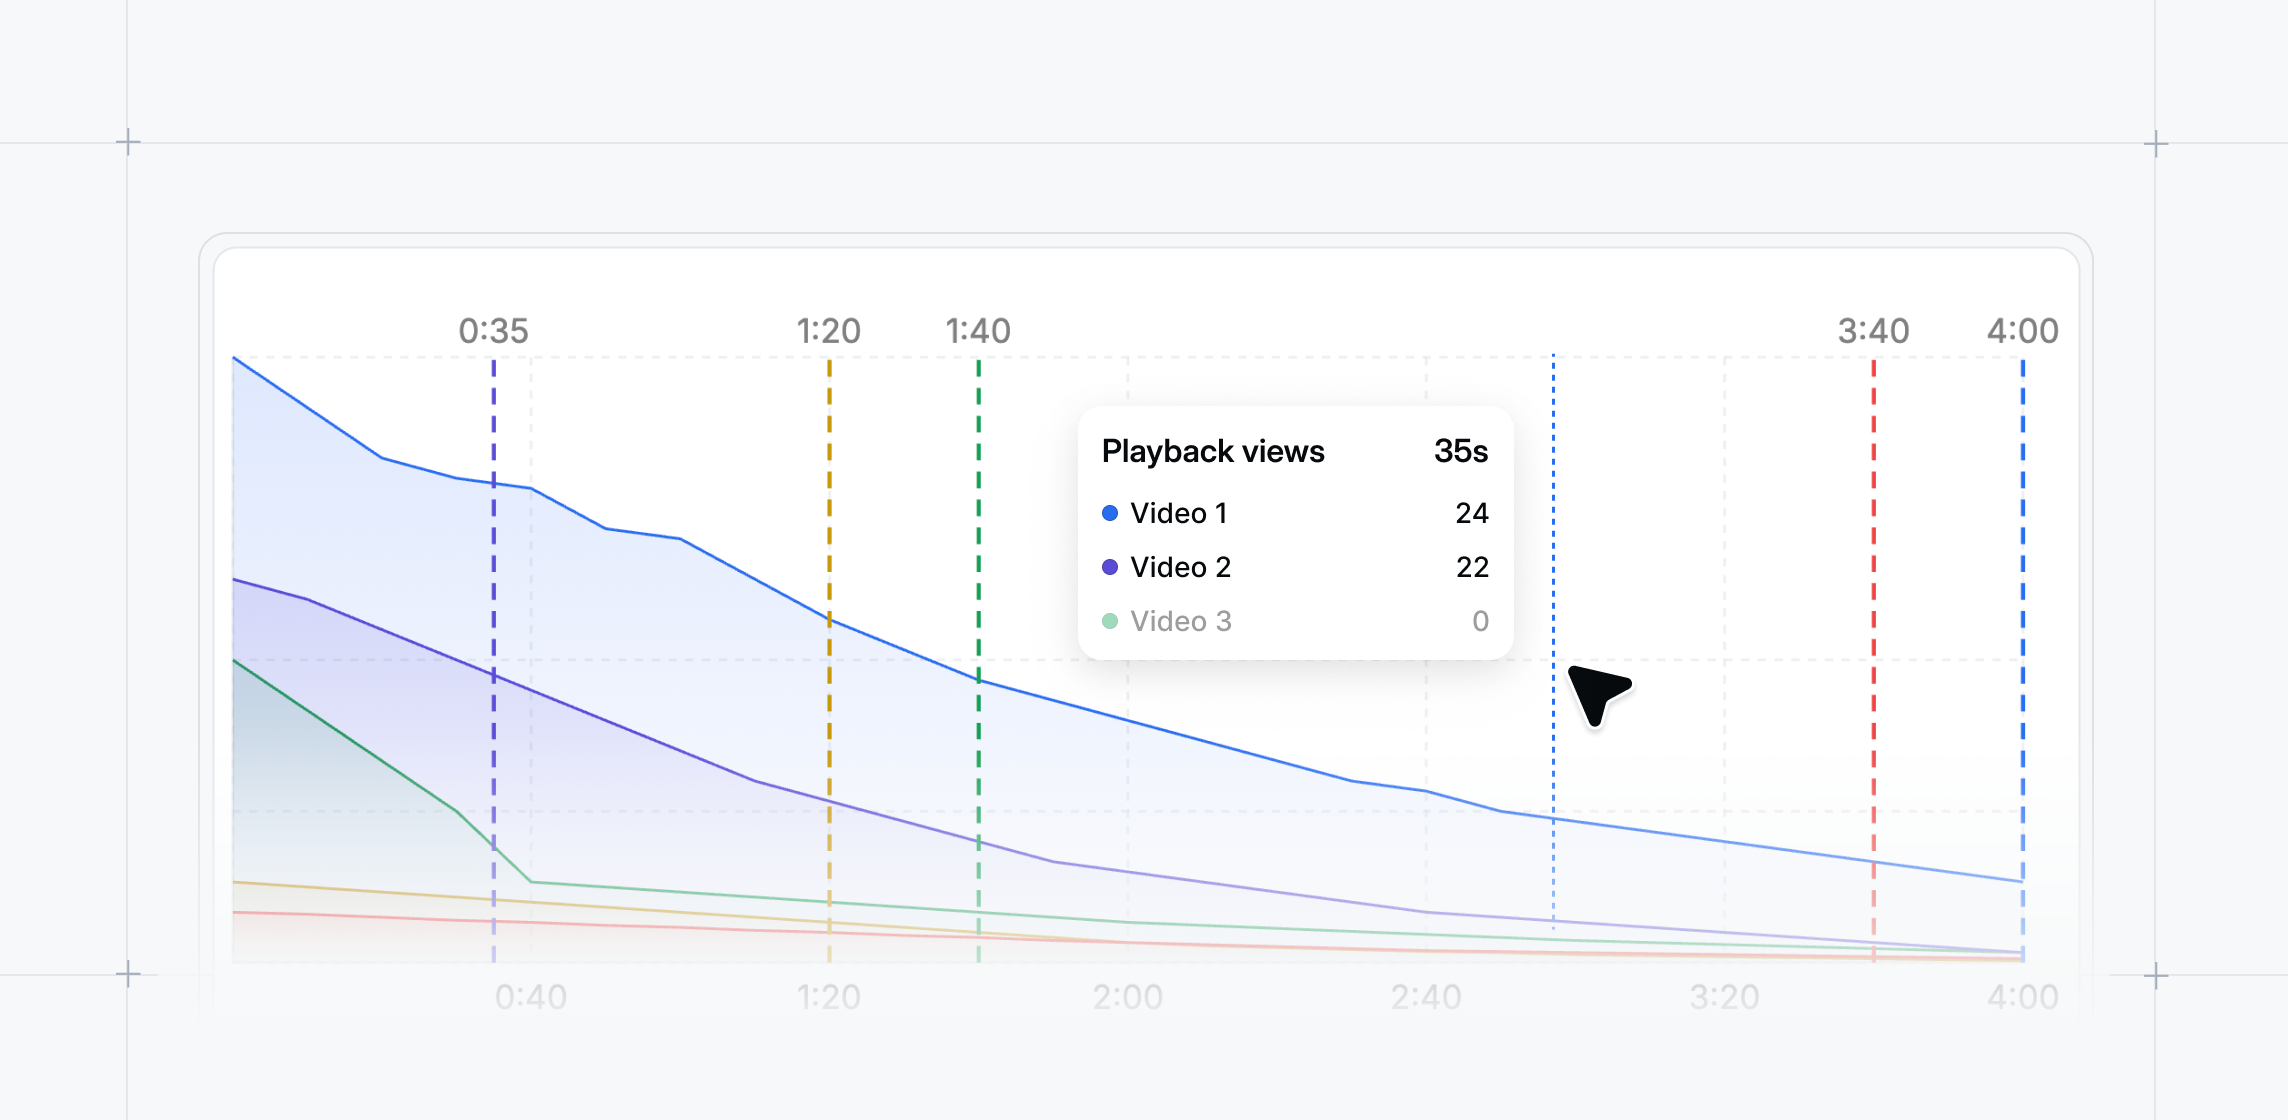
Record intro videos from Launchpad
Record personalized intro videos directly in Launchpad.Use the new Record Video option in your Personal Intro Video settings to capture webcam and microphone recordings on the spot.Add context or prospect-specific messaging or use-case explanations without needing pre-recorded files.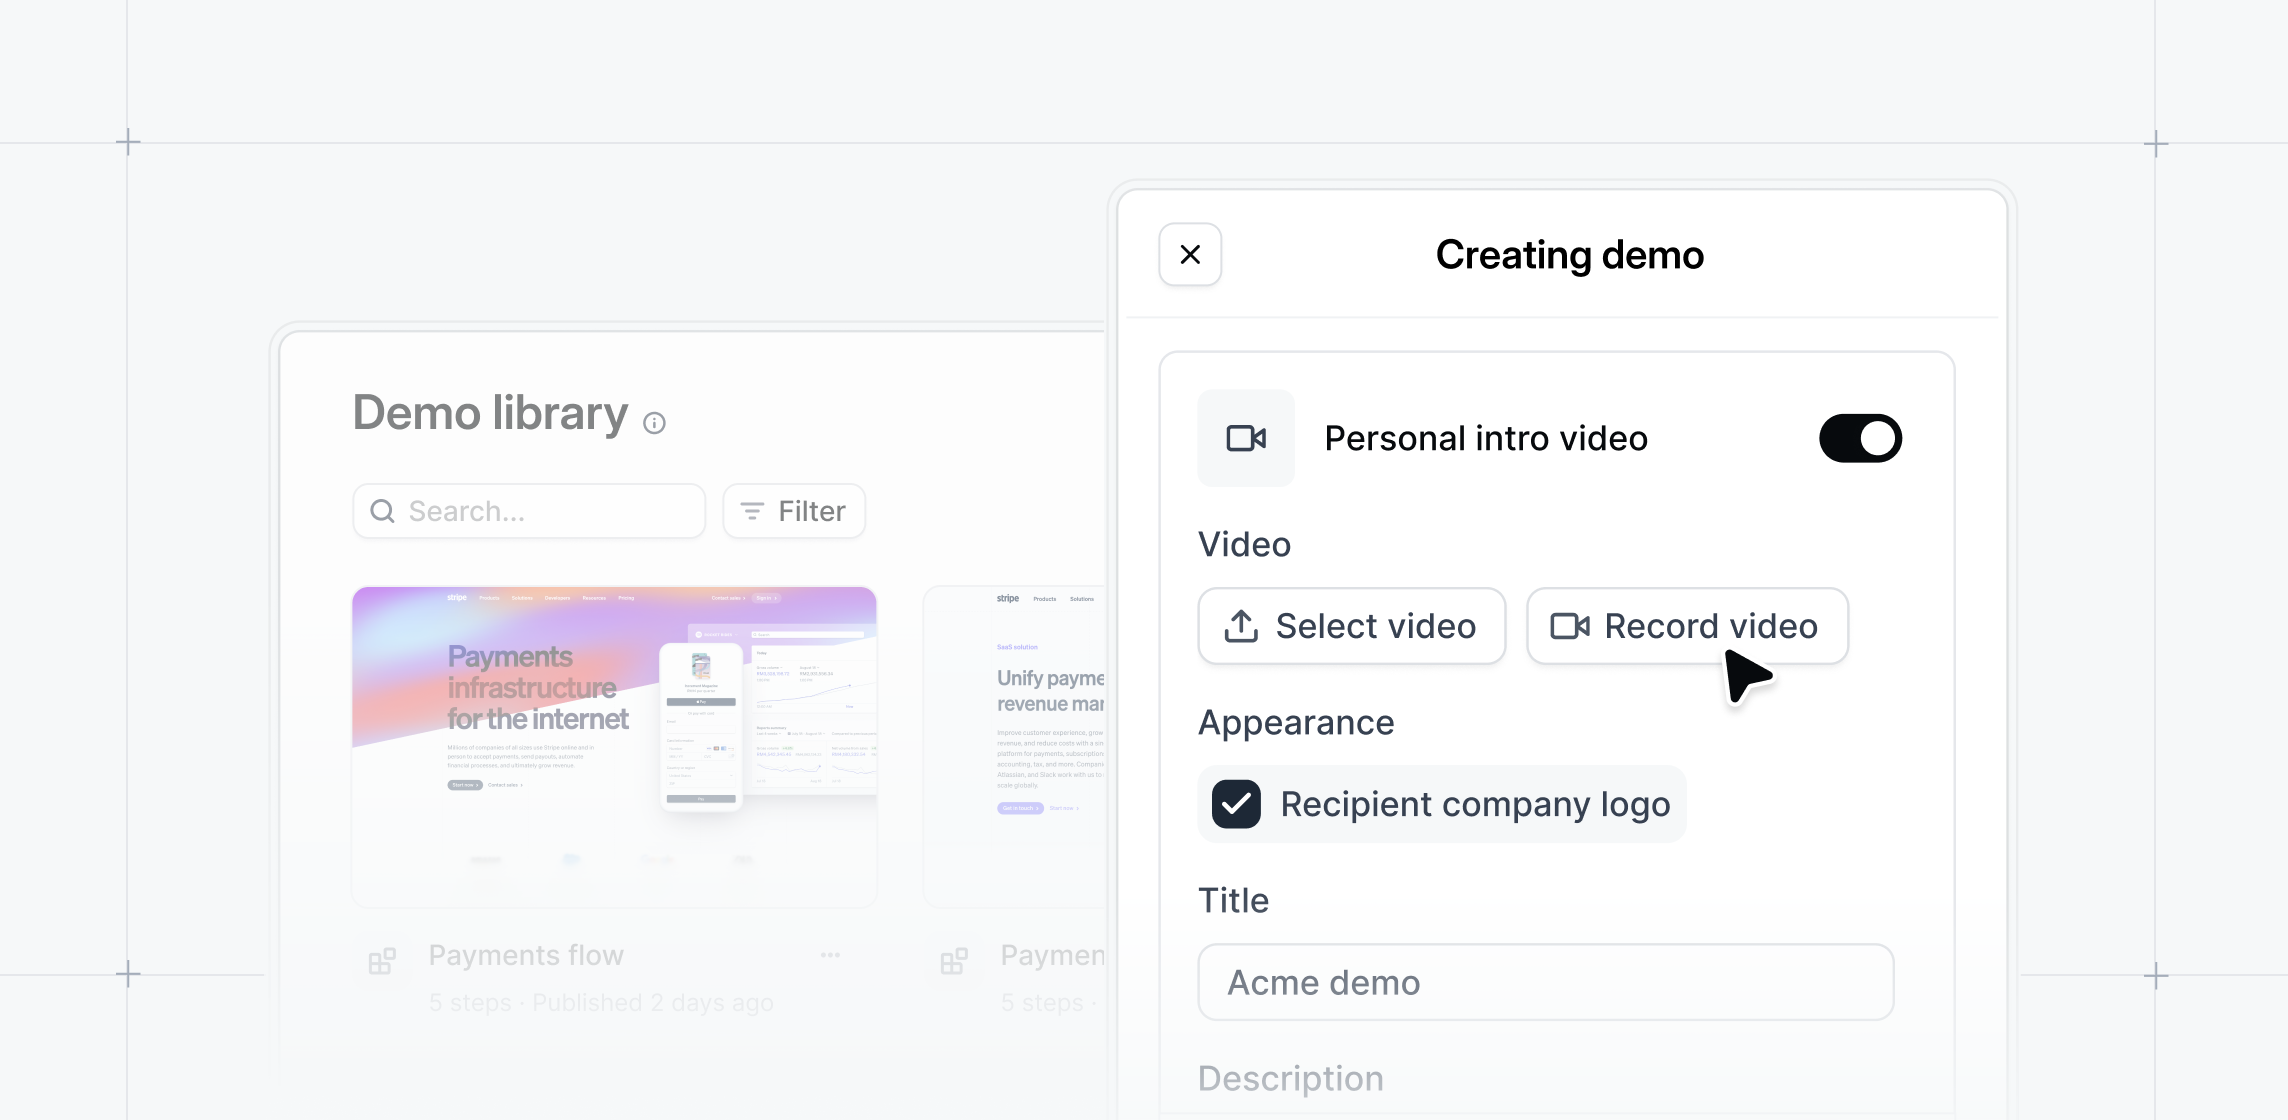
Filter audiences by email source
Target visitors with precision using the new email source filter.Build audiences based on how emails were collected: form fills, CRM syncs, manual uploads, or API imports.Use this in Audiences → Create Audience → Email Source to tailor demo experiences or refine analytics.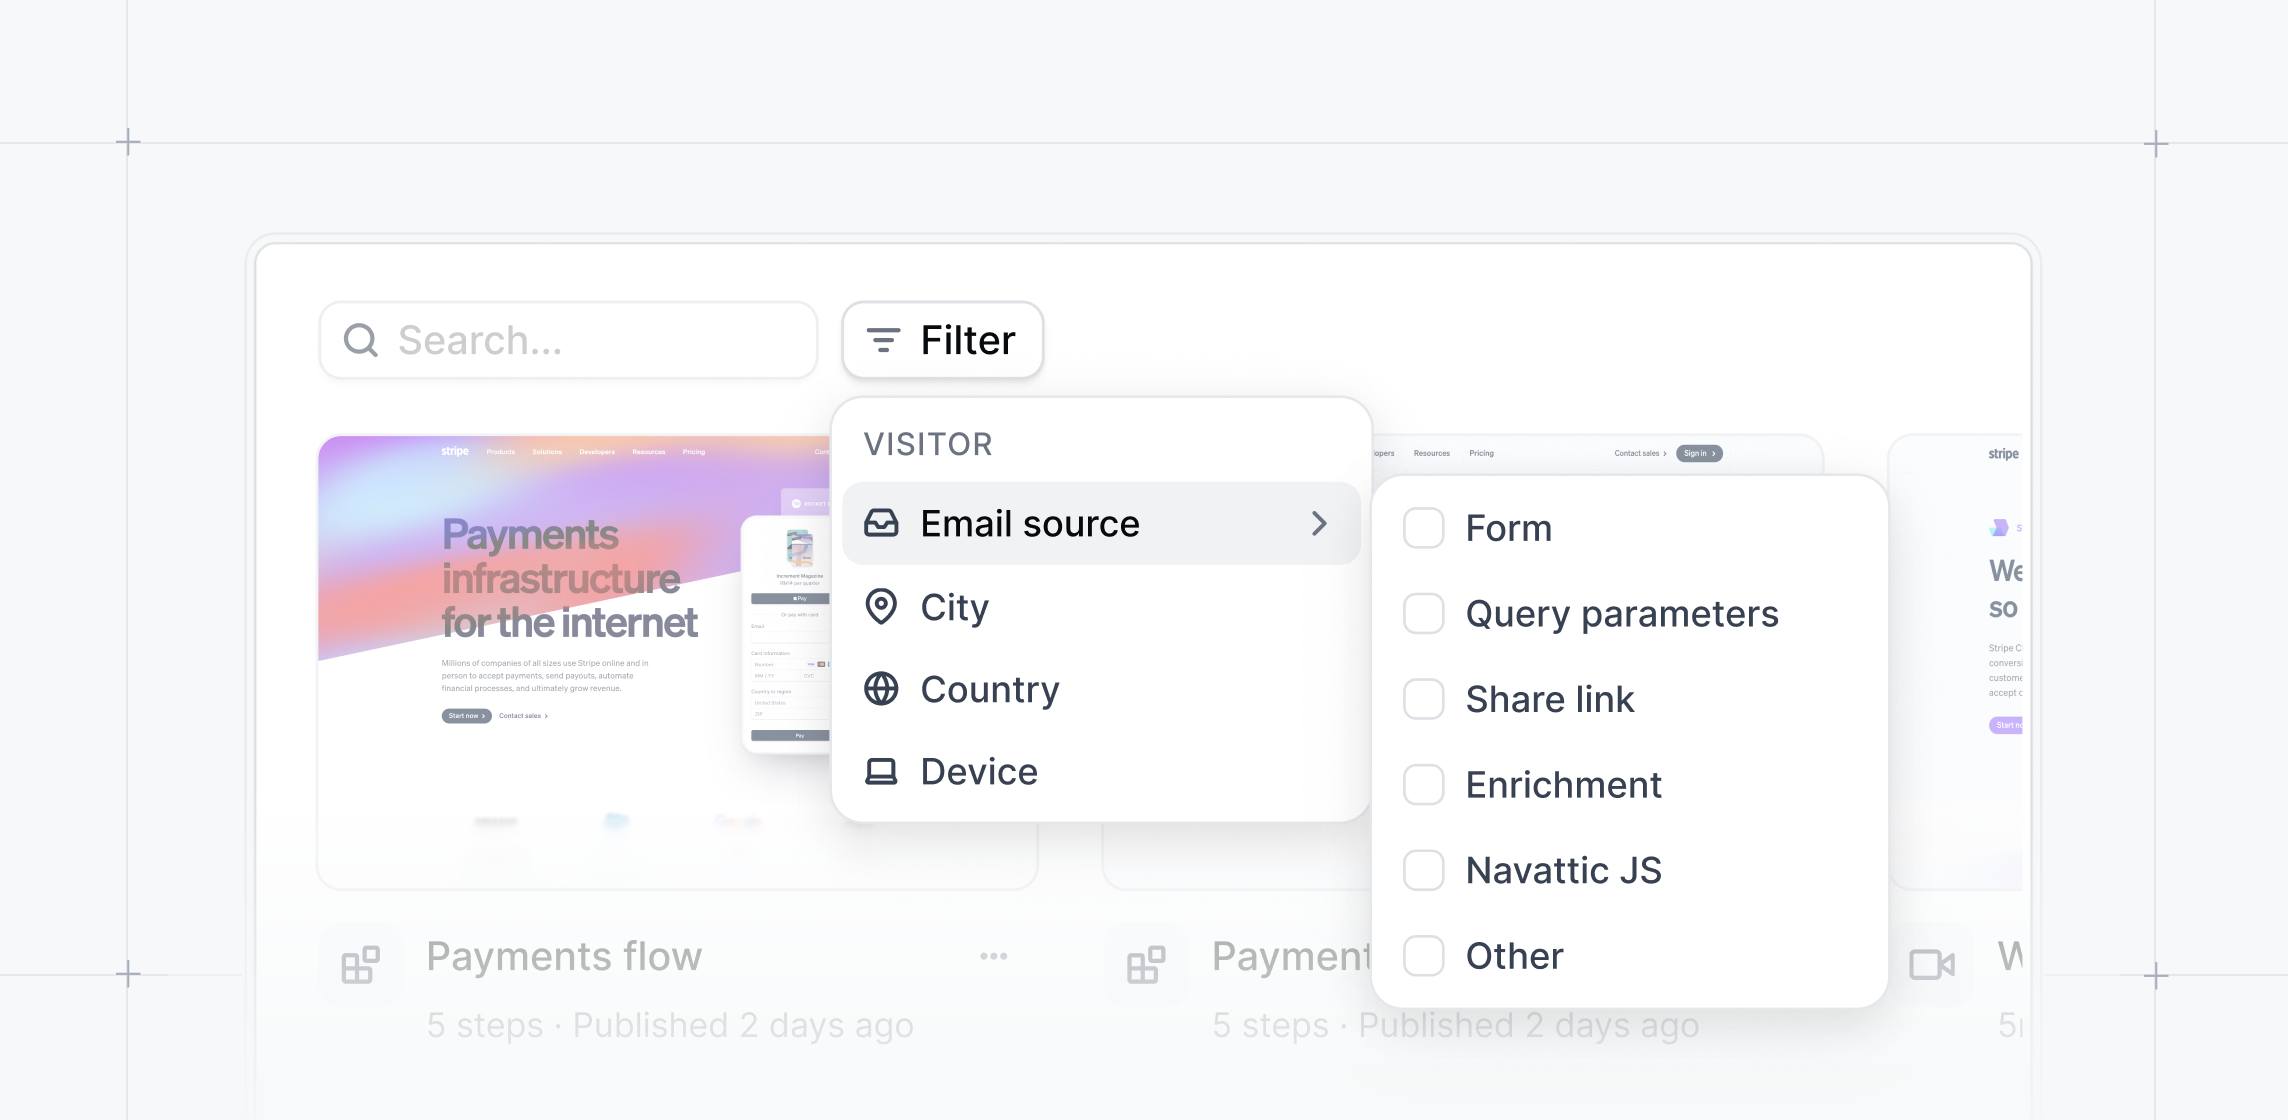
Expanded AI avatar library + avatar cloning
Choose from an expanded library of AI avatars with preview headshots and voice samples.Access beta features for avatar and voice cloning to match your brand tone or feature internal team members.Contact your account team to enable custom avatars or custom voiceovers.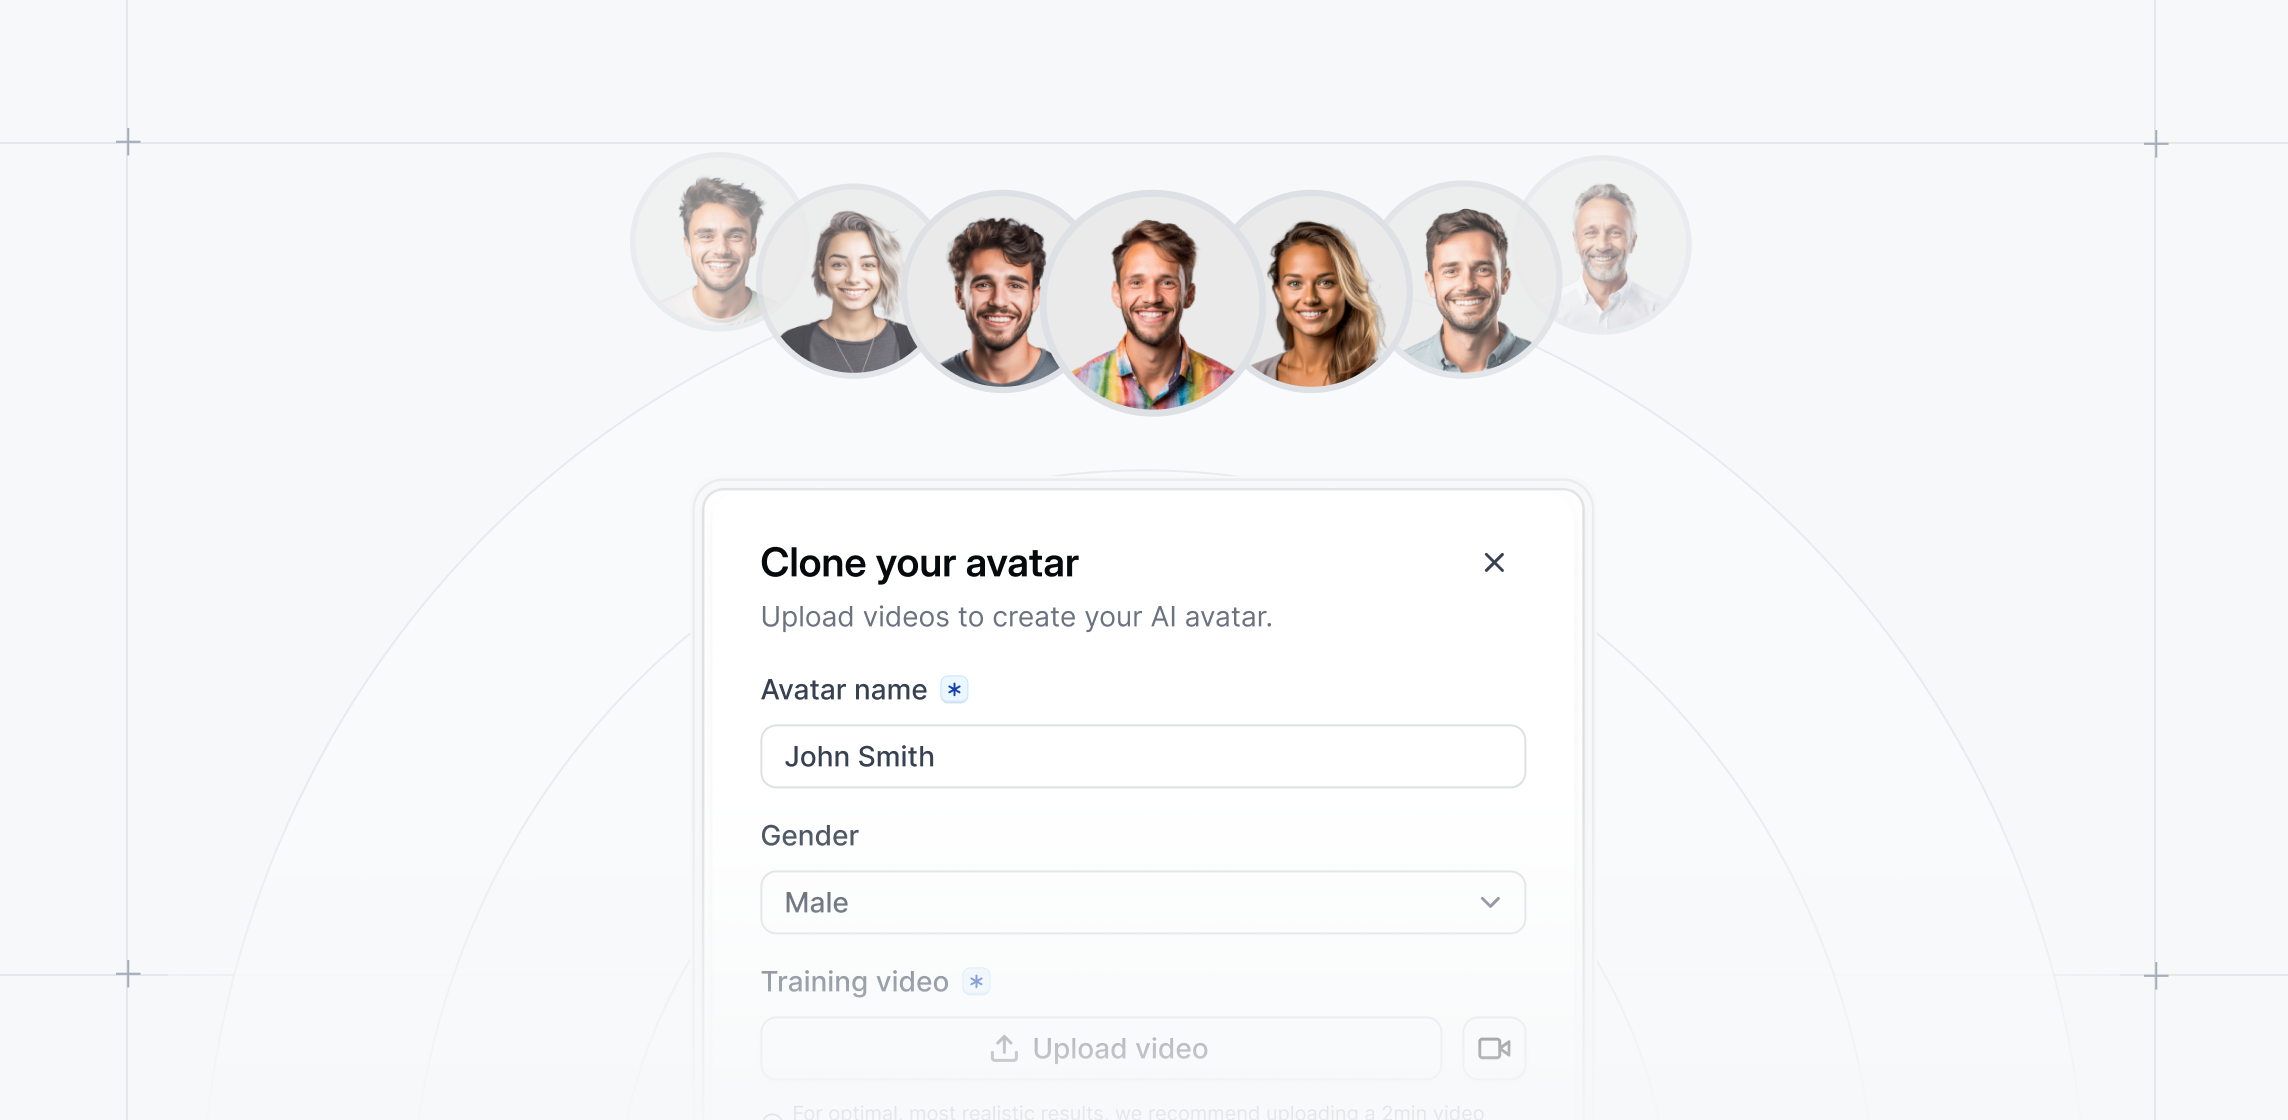
New in-app Sidebar
The sidebar has been redesigned to simplify navigation and provide dedicated views for Interactive Demos, Launchpad, and more.To open Launchpad, click on the Launchpad icon on the far left of the sidebar.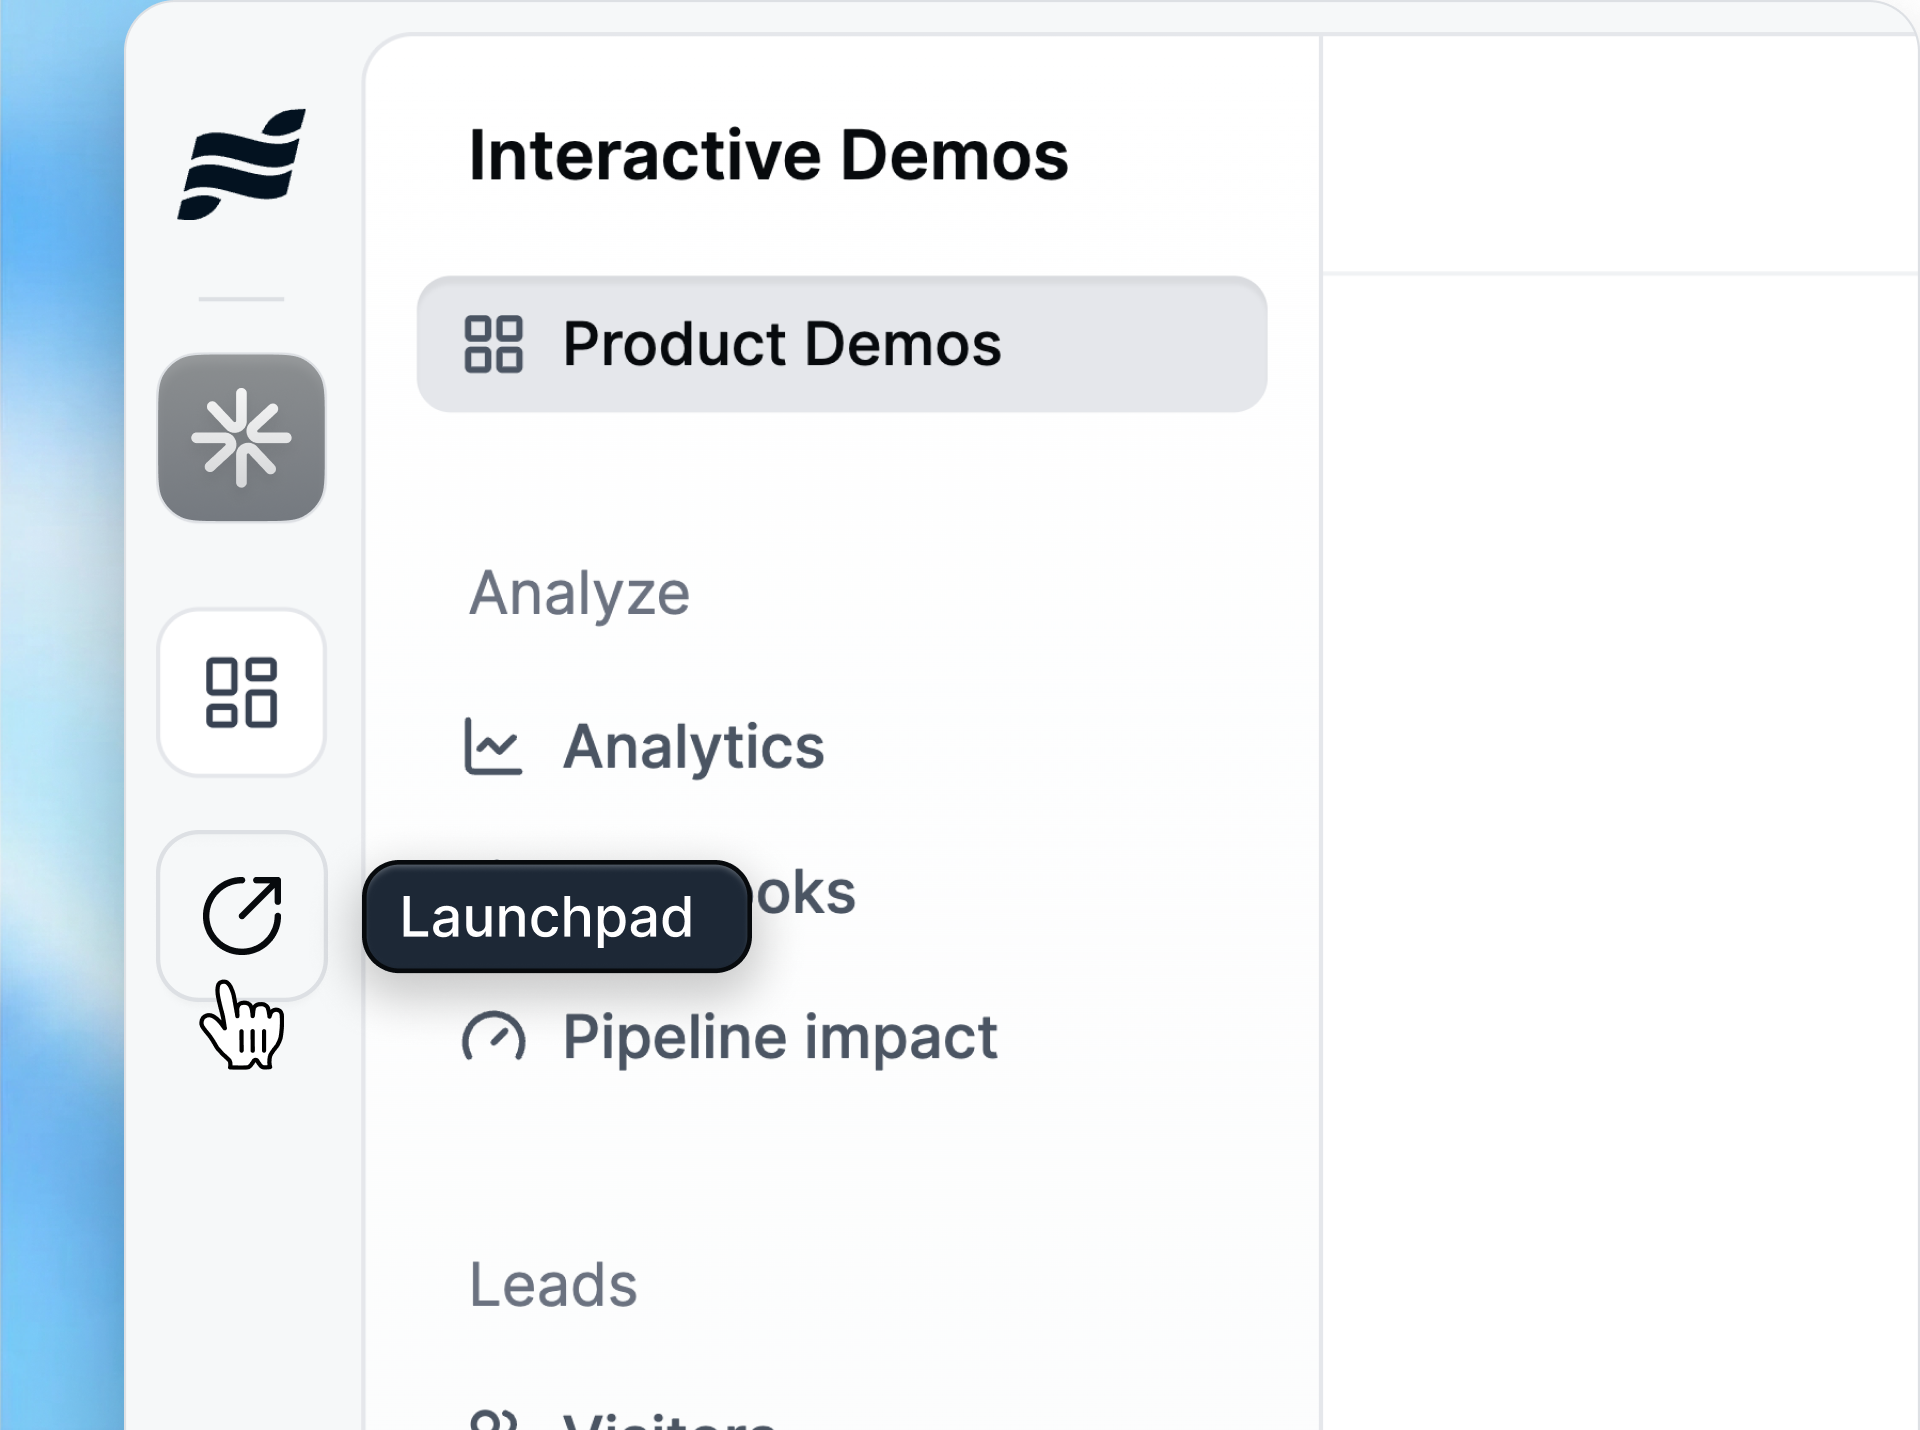
October 2025
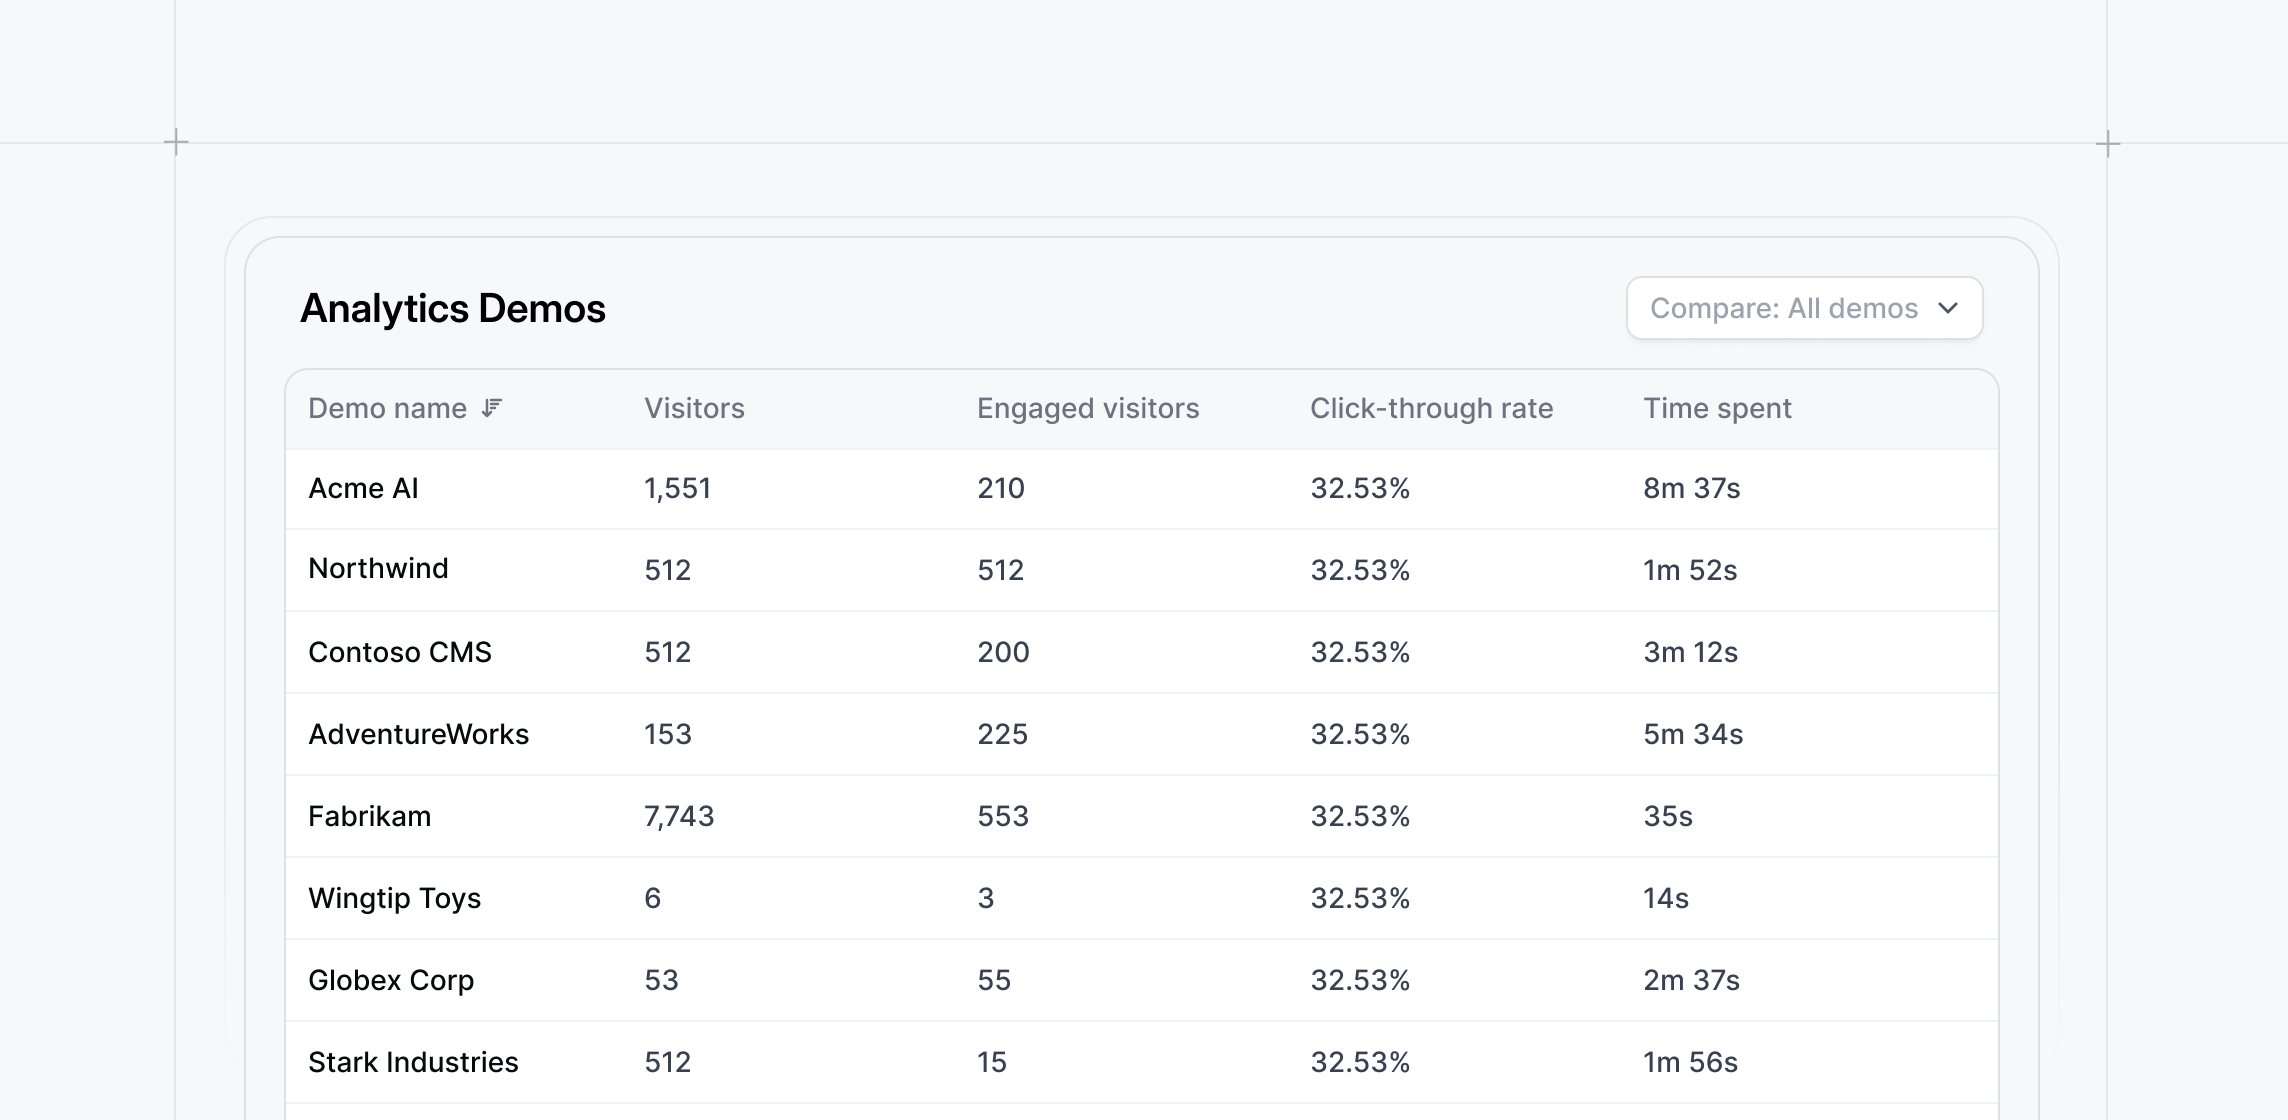
Analytics table view
Evaluate all your workspace demos in one simple table view.Go to Analytics → Compare → All Demos, you can now view and sort all your demo visitor data at once. Track key metrics like:
- Visitors
- Engaged visitors
- CTA clicks
- Click-through rate
- Time spent
- Total steps
Analyze all versions
Understand holistically how your demos have performed over time.Under the Analyze tab → Step breakdown toggle on “Aggregate versions” to see drop-off rates across every version of your demo.

Outreach integration
Add demos directly into Outreach templates and sequences to scale consistent product messaging.With the Navattic Outreach app, sellers can share personalized interactive demos with specific recipients or add to a general outbound campaign.
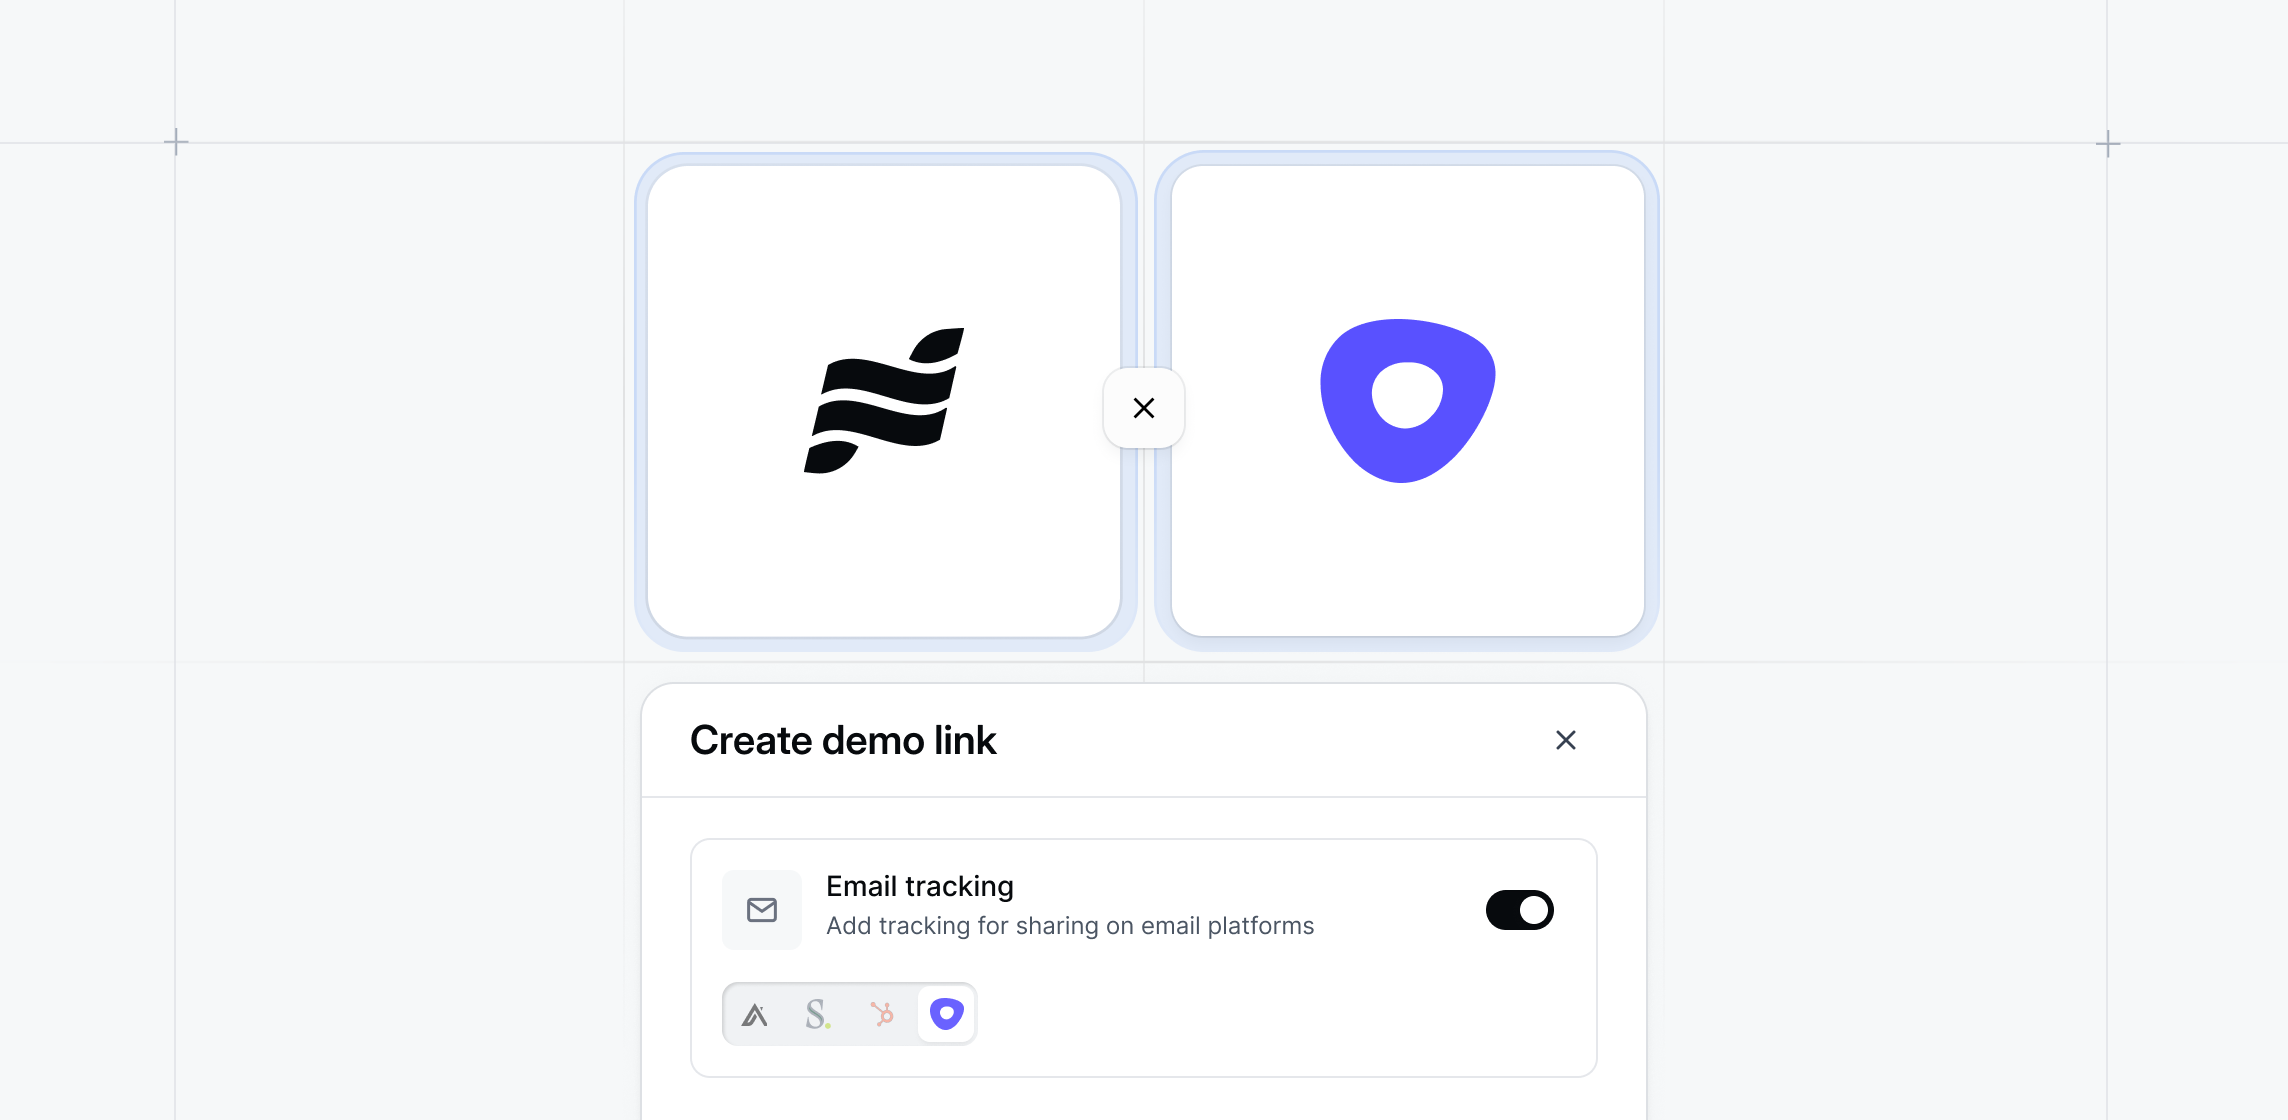
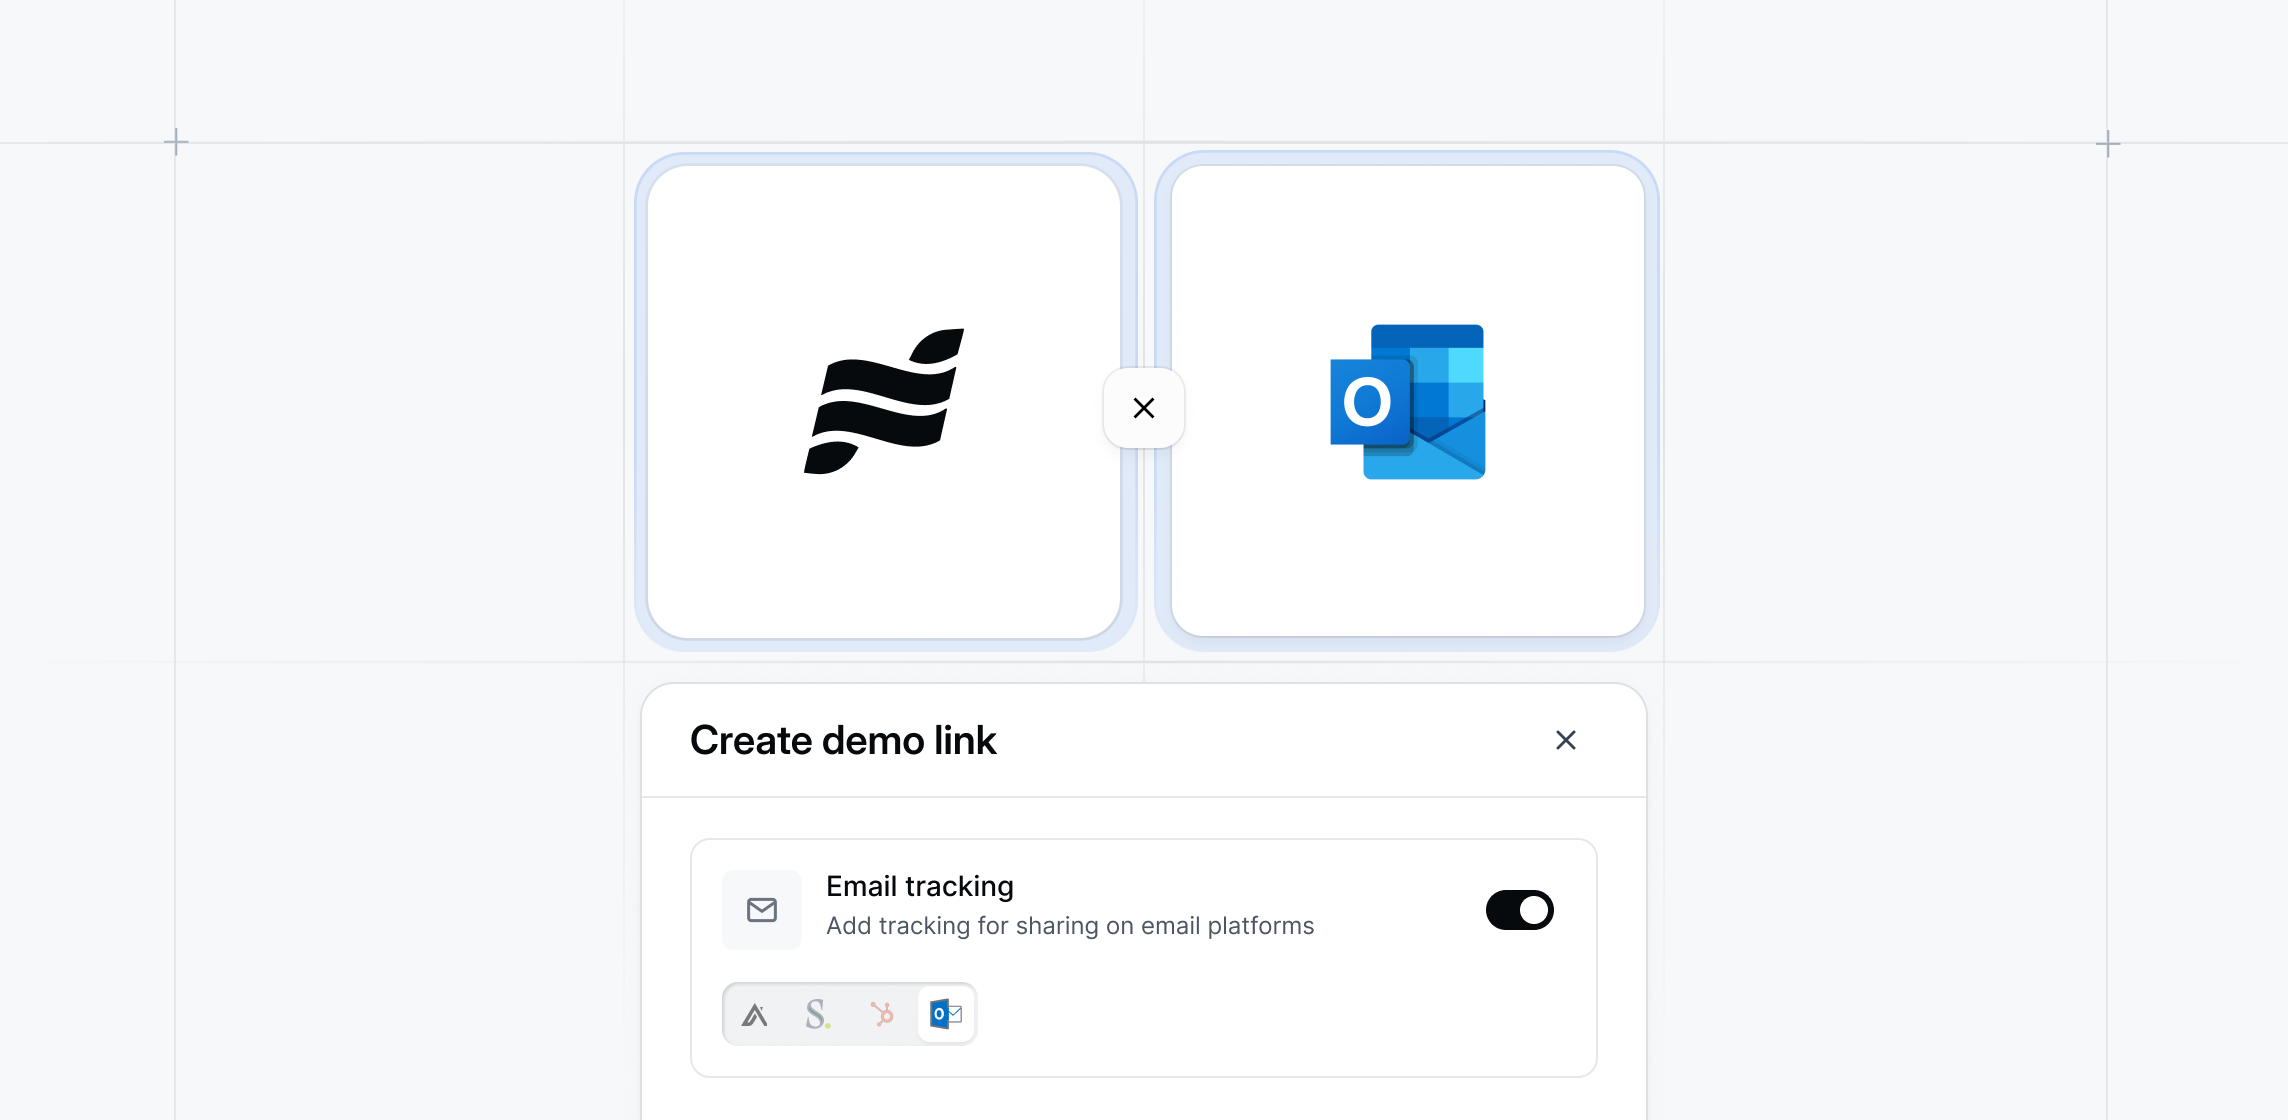
Outlook integration
Inject demo previews directly into your Outlook emails.With the new Navattic button in the Outlook toolbar, you can insert demos in one click and auto-detect recipients for personalization variables.
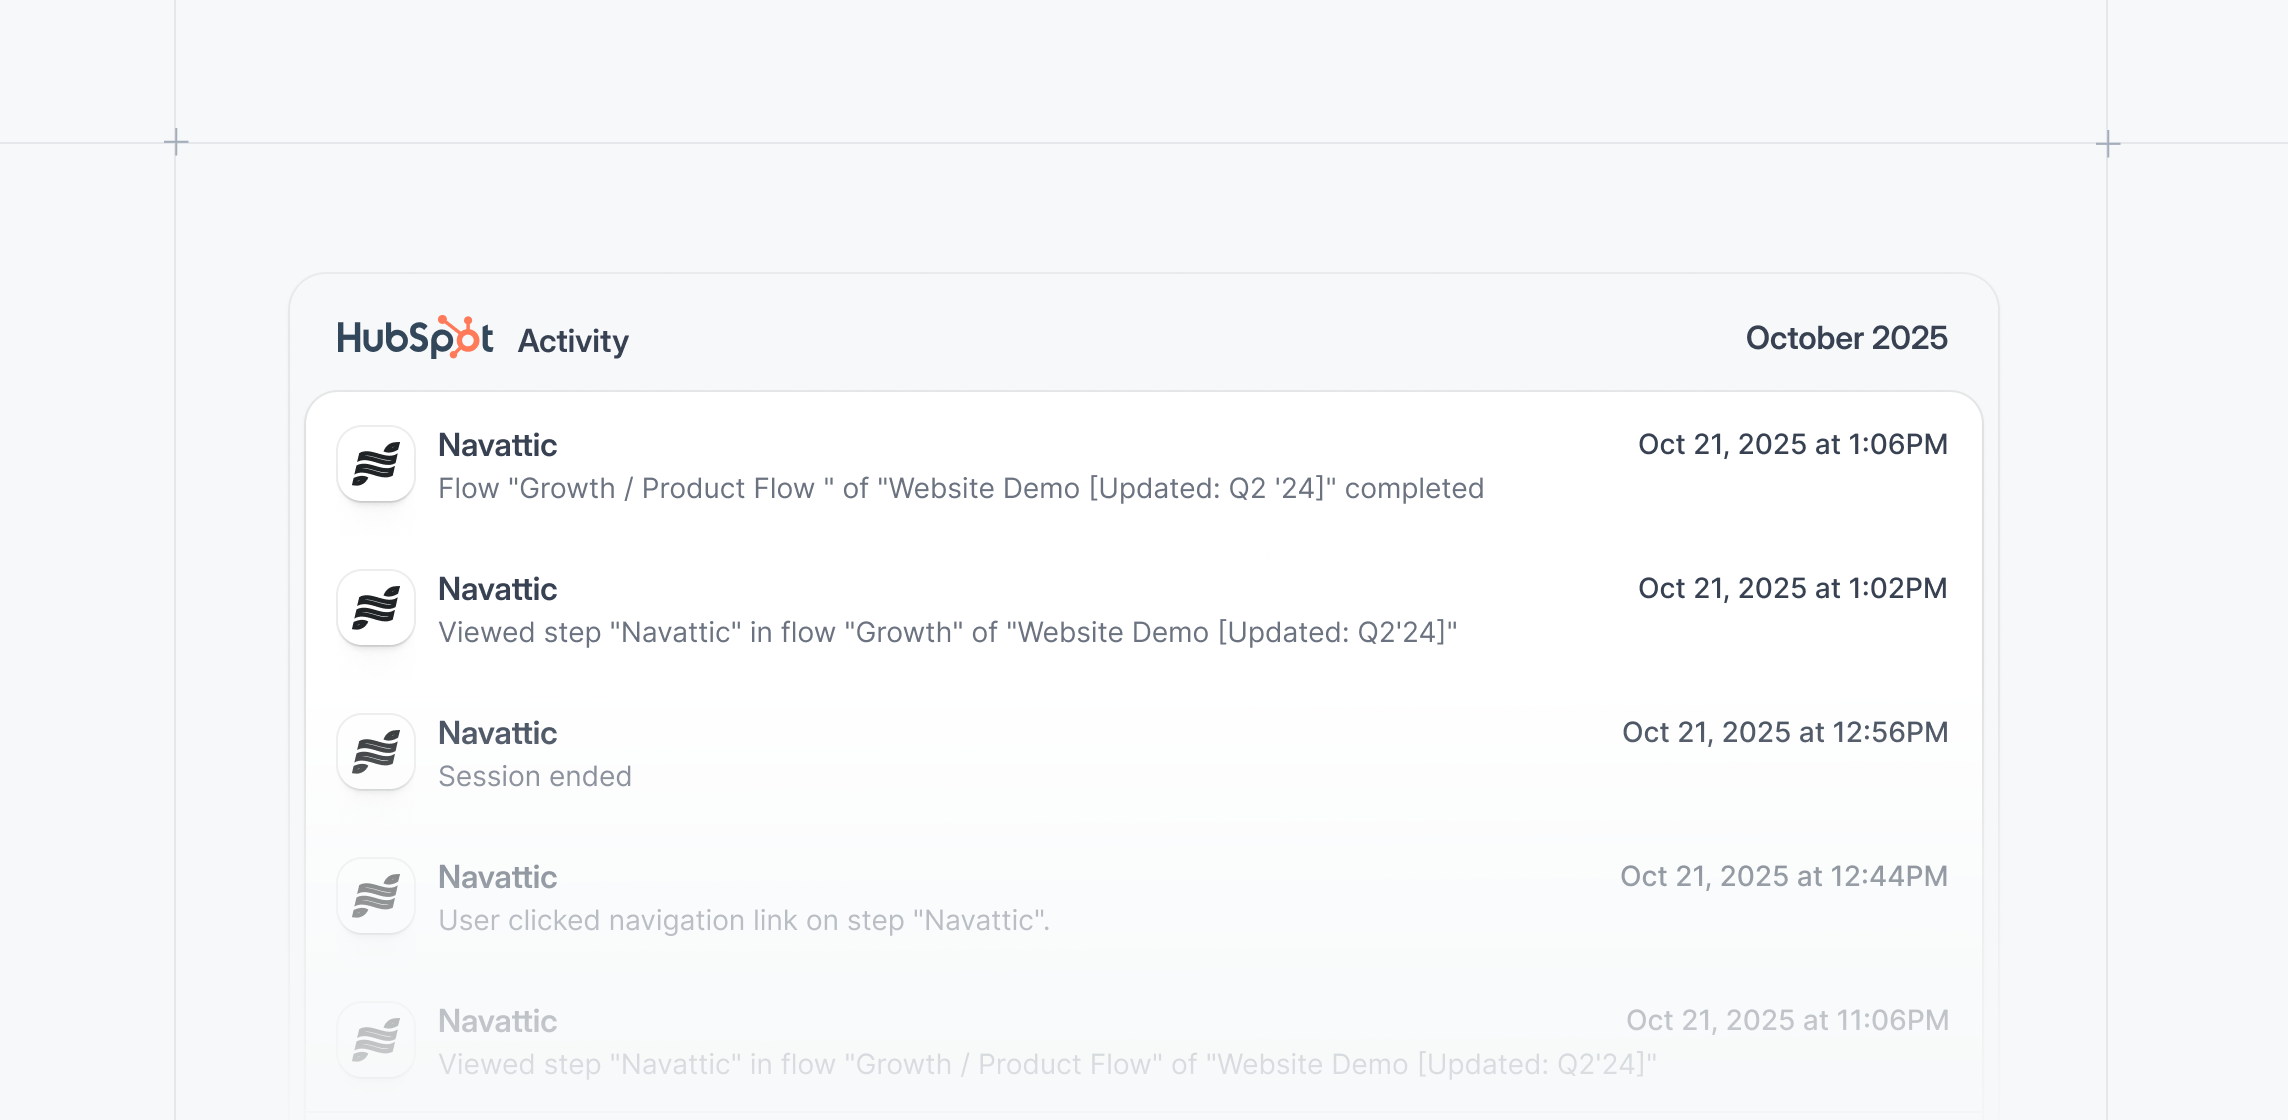
HubSpot account timeline events
See timeline events in HubSpot based on accounts or deals, not just contacts.Configure playbooks to track and segment your accounts by company-level engagement or ICP criteria.
Last edited history
Instantly see who’s editing what demo. On any demo, see edit history by hovering over the “Edited x days ago” label.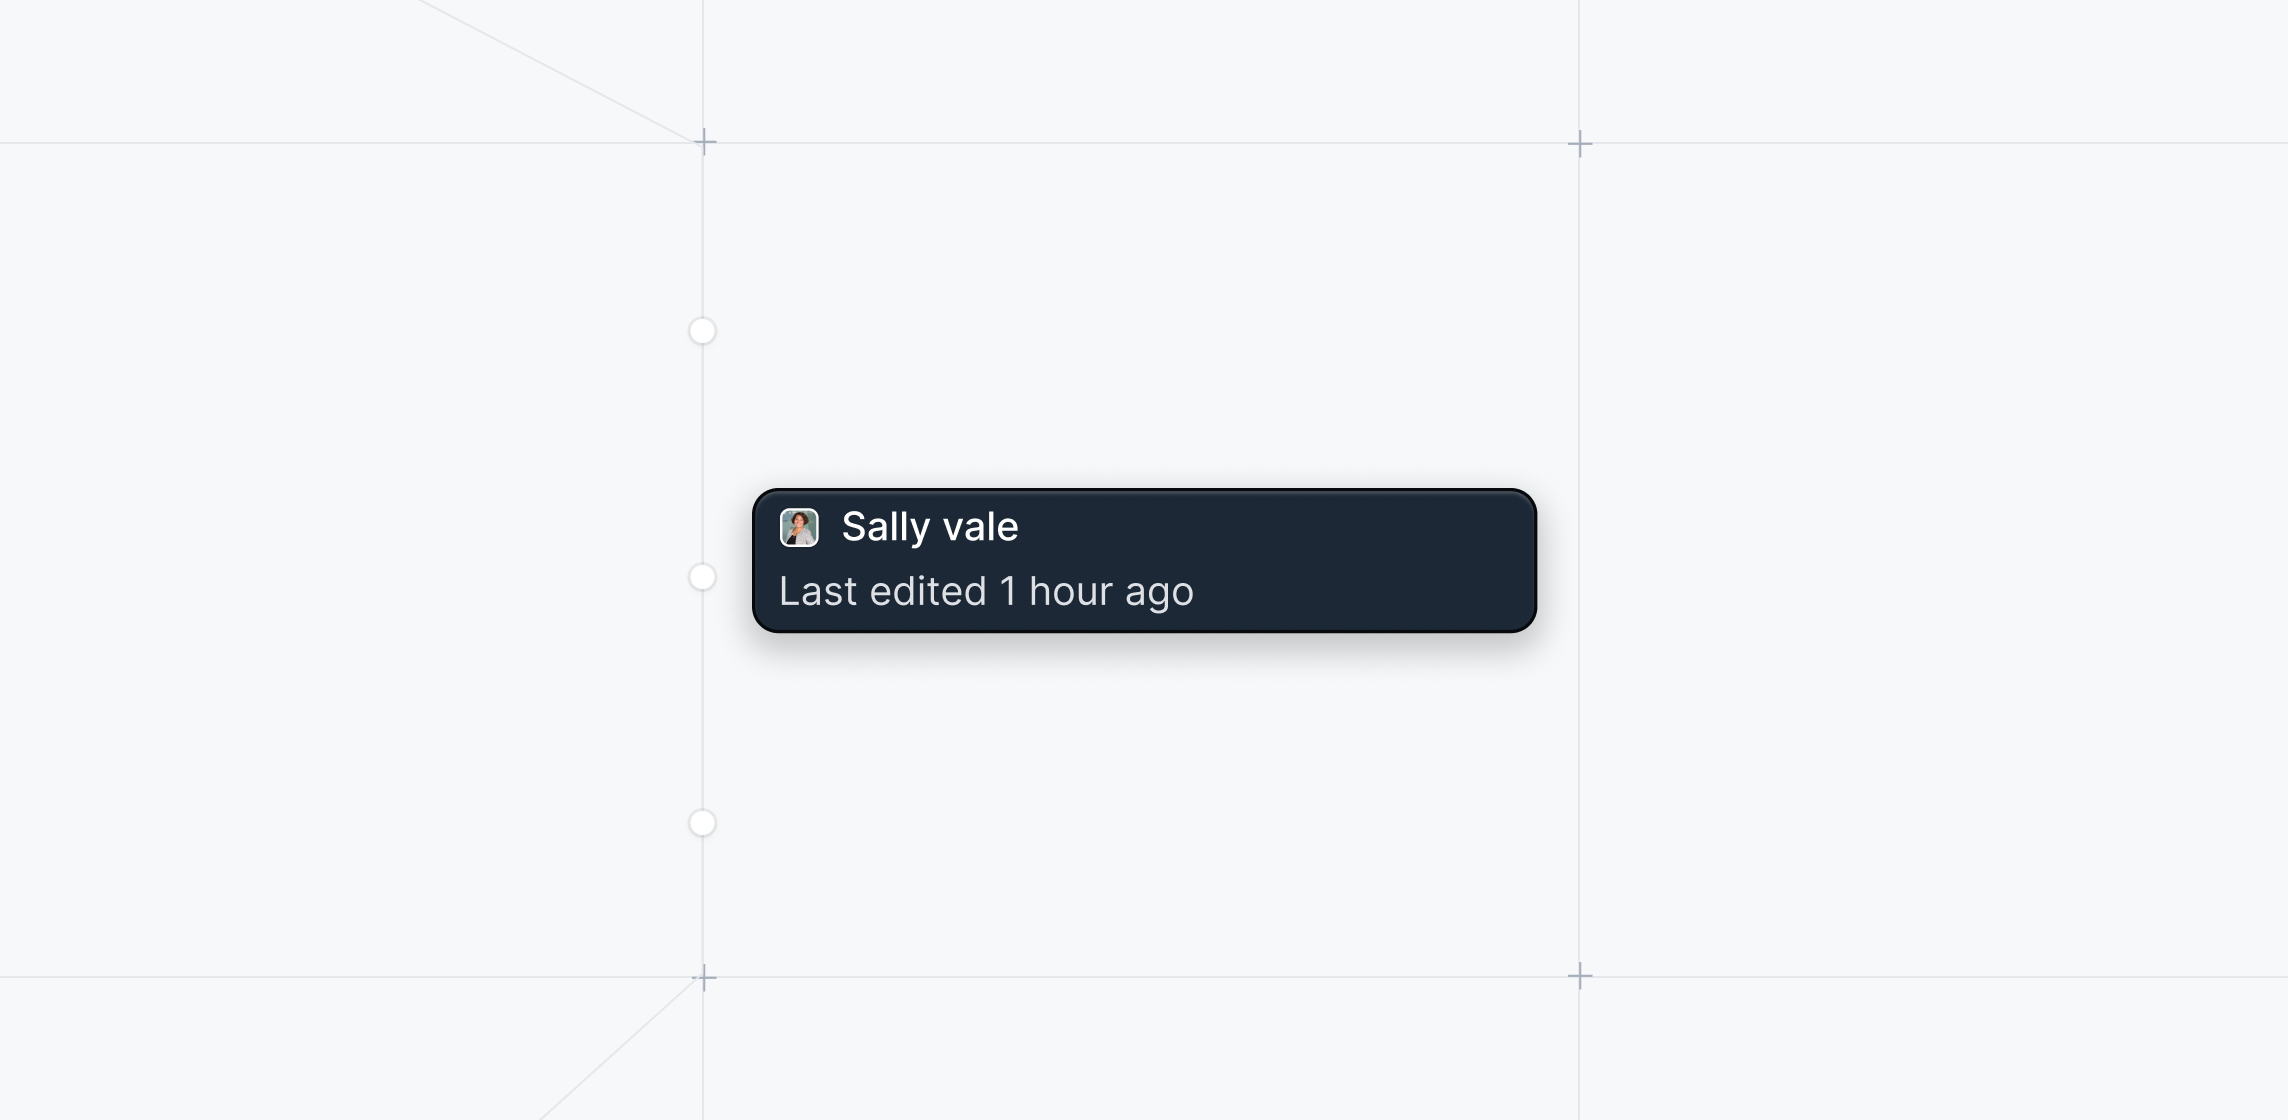
September 2025
Video fallback on mobile
Add a full-screen video as a fallback option for mobile users.In your mobile settings, upload or select a video to display when visitors view your demo on a phone.We automatically detect device type, so desktop users still see the full-screen interactive demo, while mobile users will see a video.
Media capture editing
Adjust how screenshots appear inside device frames.In the media capture editor, select “Position” to align content to the top, center, or bottom to better fill the screen. Tooltips and annotations will also follow your selected alignment.

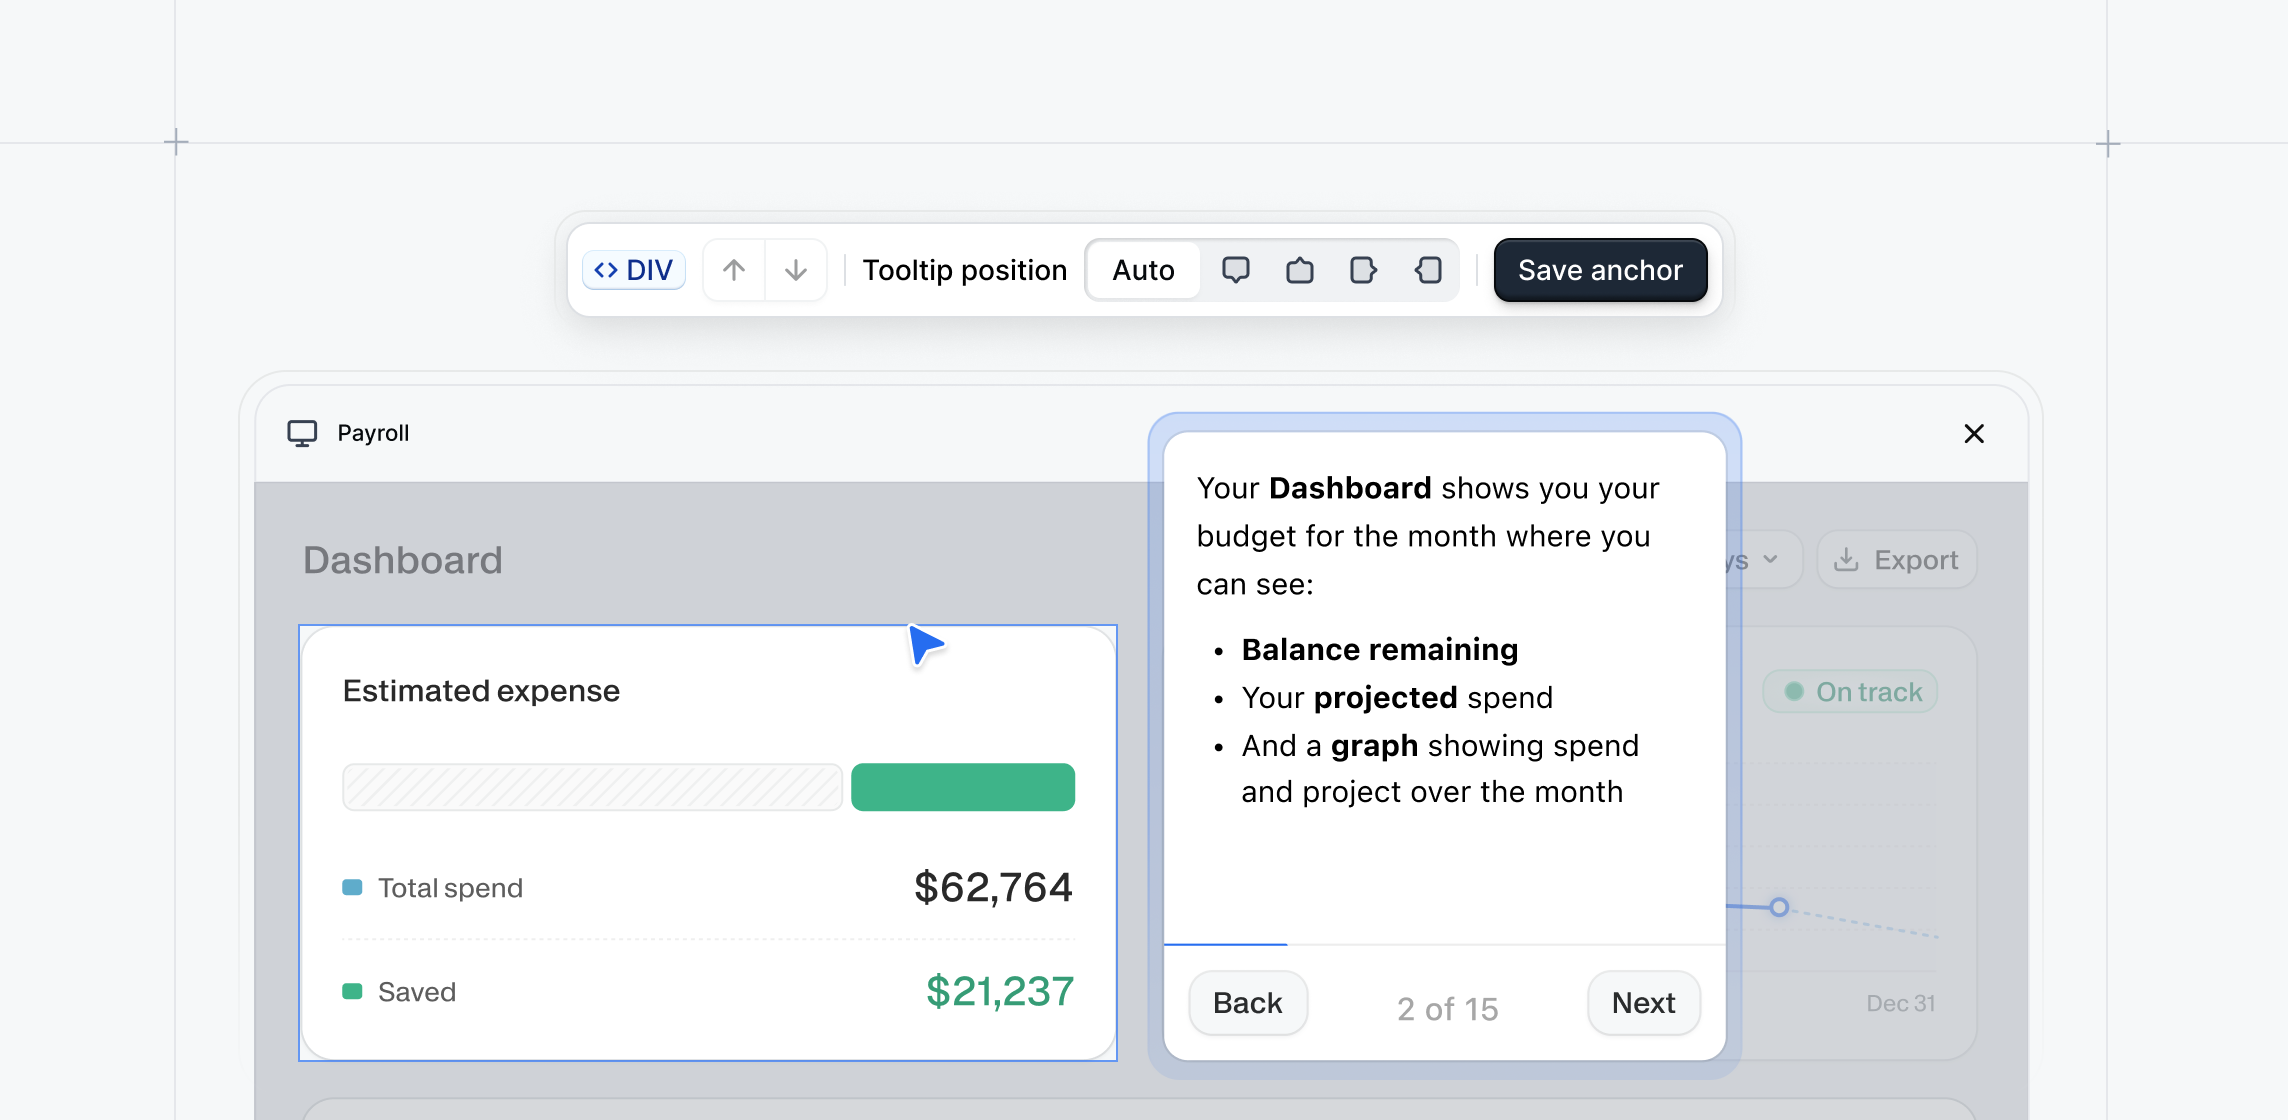
Tooltip selector preview
Preview tooltip step placement directly when building your demo.When you go to add a tooltip, you’ll now see a live preview of what your tooltip looks like in your demo. The builder automatically suggests a default position, which you can adjust directly from the editor.
Sandbox editing
Create and refine demos faster from directly within Sandbox mode.You can now re-capture individual steps without starting over or edit, delete, and reorder steps in the Sandbox builder.
Bulk editing for product demos
Clean up your demo workspace in a few clicks. Use the bulk editor to select multiple demos to mass publish, archive, or apply boards and labels.August 2025
Copilot: Generate
Copilot: Generate is now available for all workspaces. Generate builds on top of our existing AI writing assistant to help you create end-to-end demos based on Navattic best practices.To use Generate, select a Use Case the next time you take new Captures. After capturing, Copilot will add copy for each step, select step types, and anchor tooltips using relevant information from your Captures.Copilot is built with best practices from 30,000 demos built on Navattic, so you know each demo is out-of-the-box optimized.See an interactive demo of CopilotWe have more Copilot features coming - contact success@navattic.com if you have feedback or would like early access.

Copilot: Use Cases
Copilot comes with default prompts with built-in use-case-specific best practices.You also have the option to add on additional use case prompts or adjust prompts to match your exact brand messaging, voice, and tone.
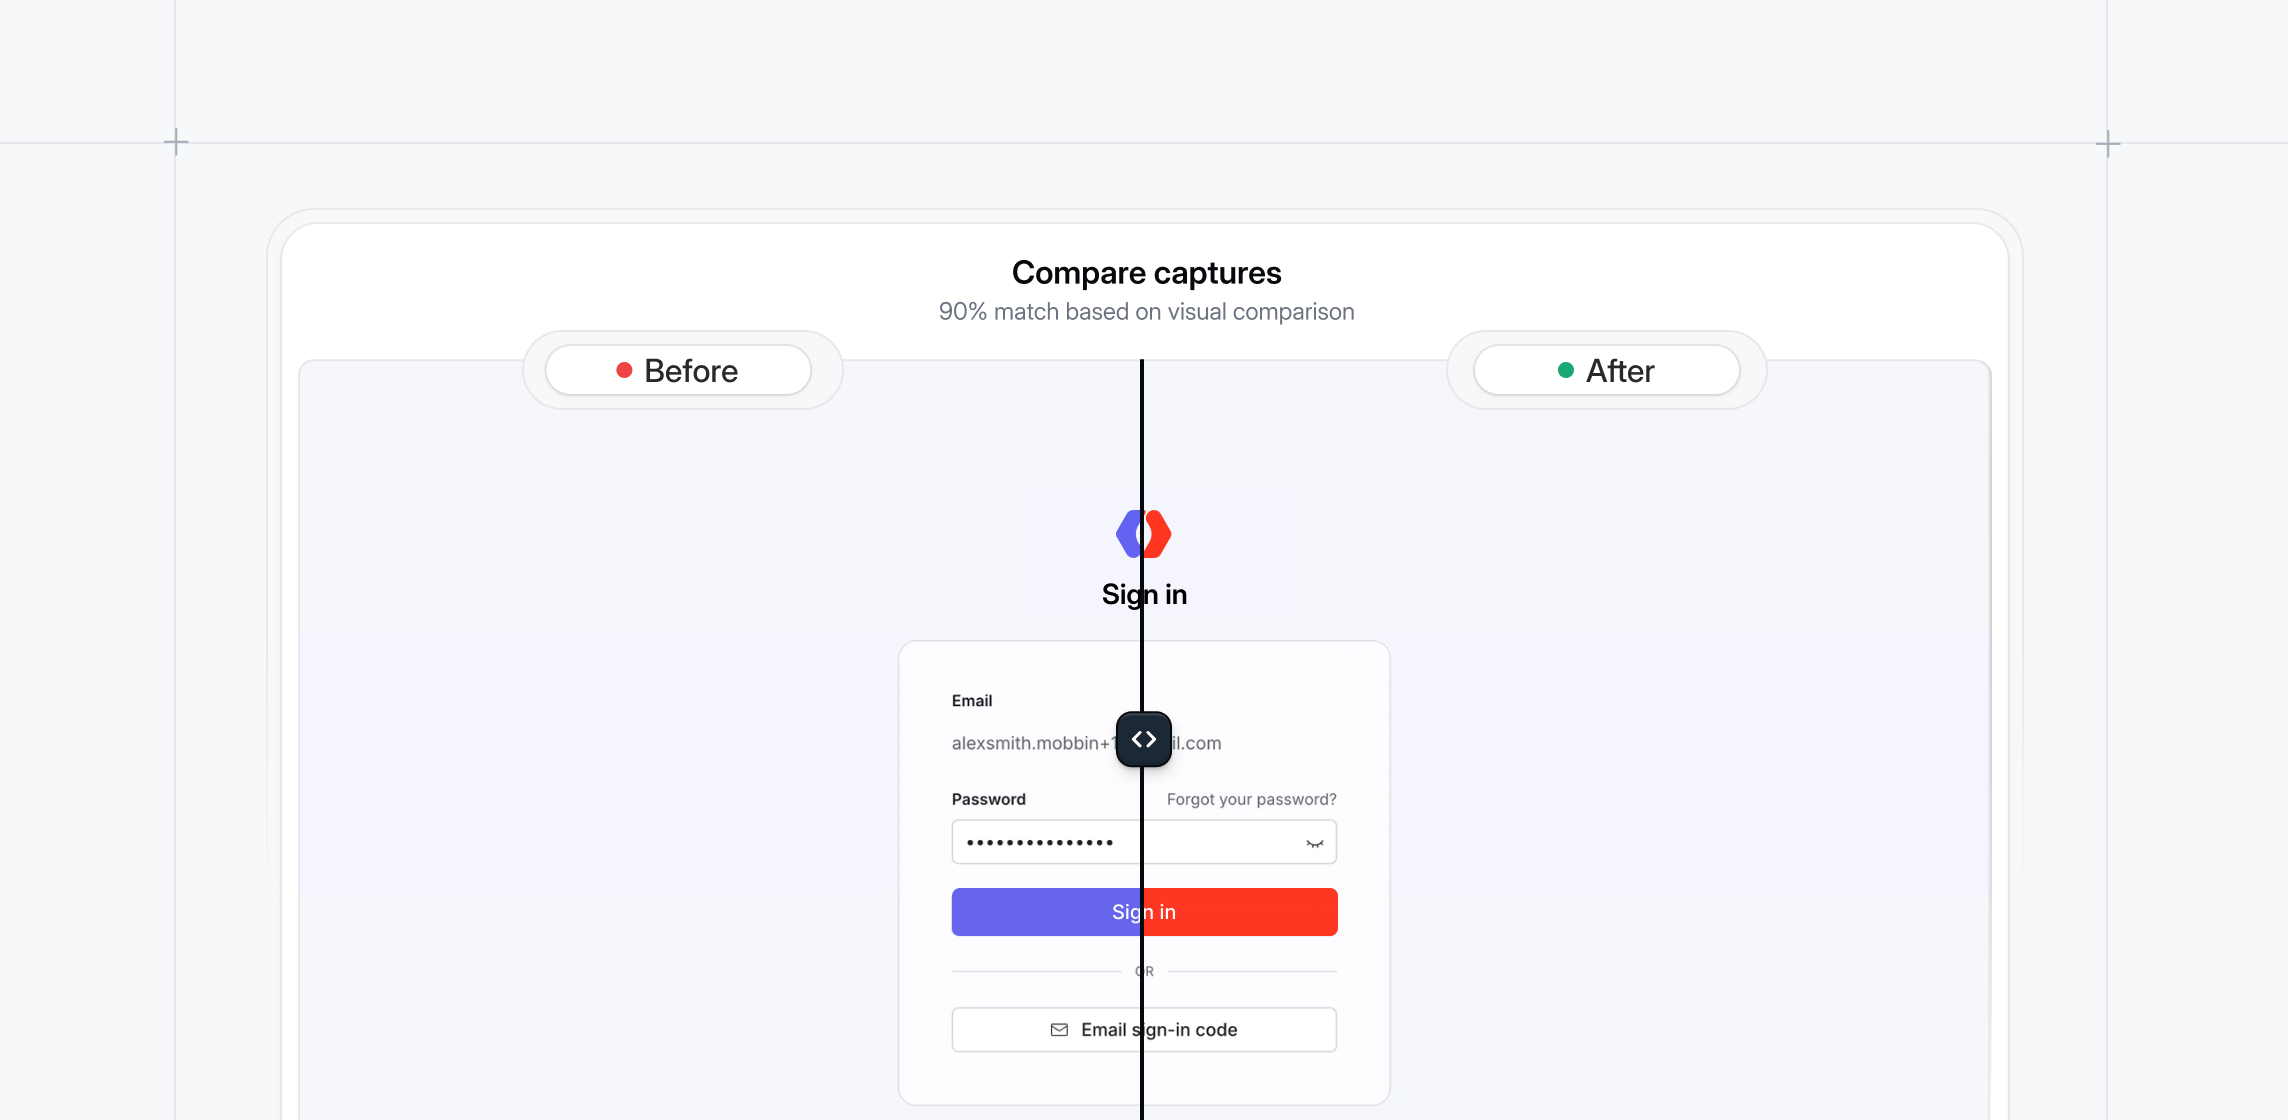
Recapture
Simplify how you replace Captures in existing demos. Select Recapture to automatically take you back to your original product page URL at the Capture or Collection level.While recapturing, preview the old vs the new Capture to see how your product has changed. Recapture will also preserve anchors from the original Capture.
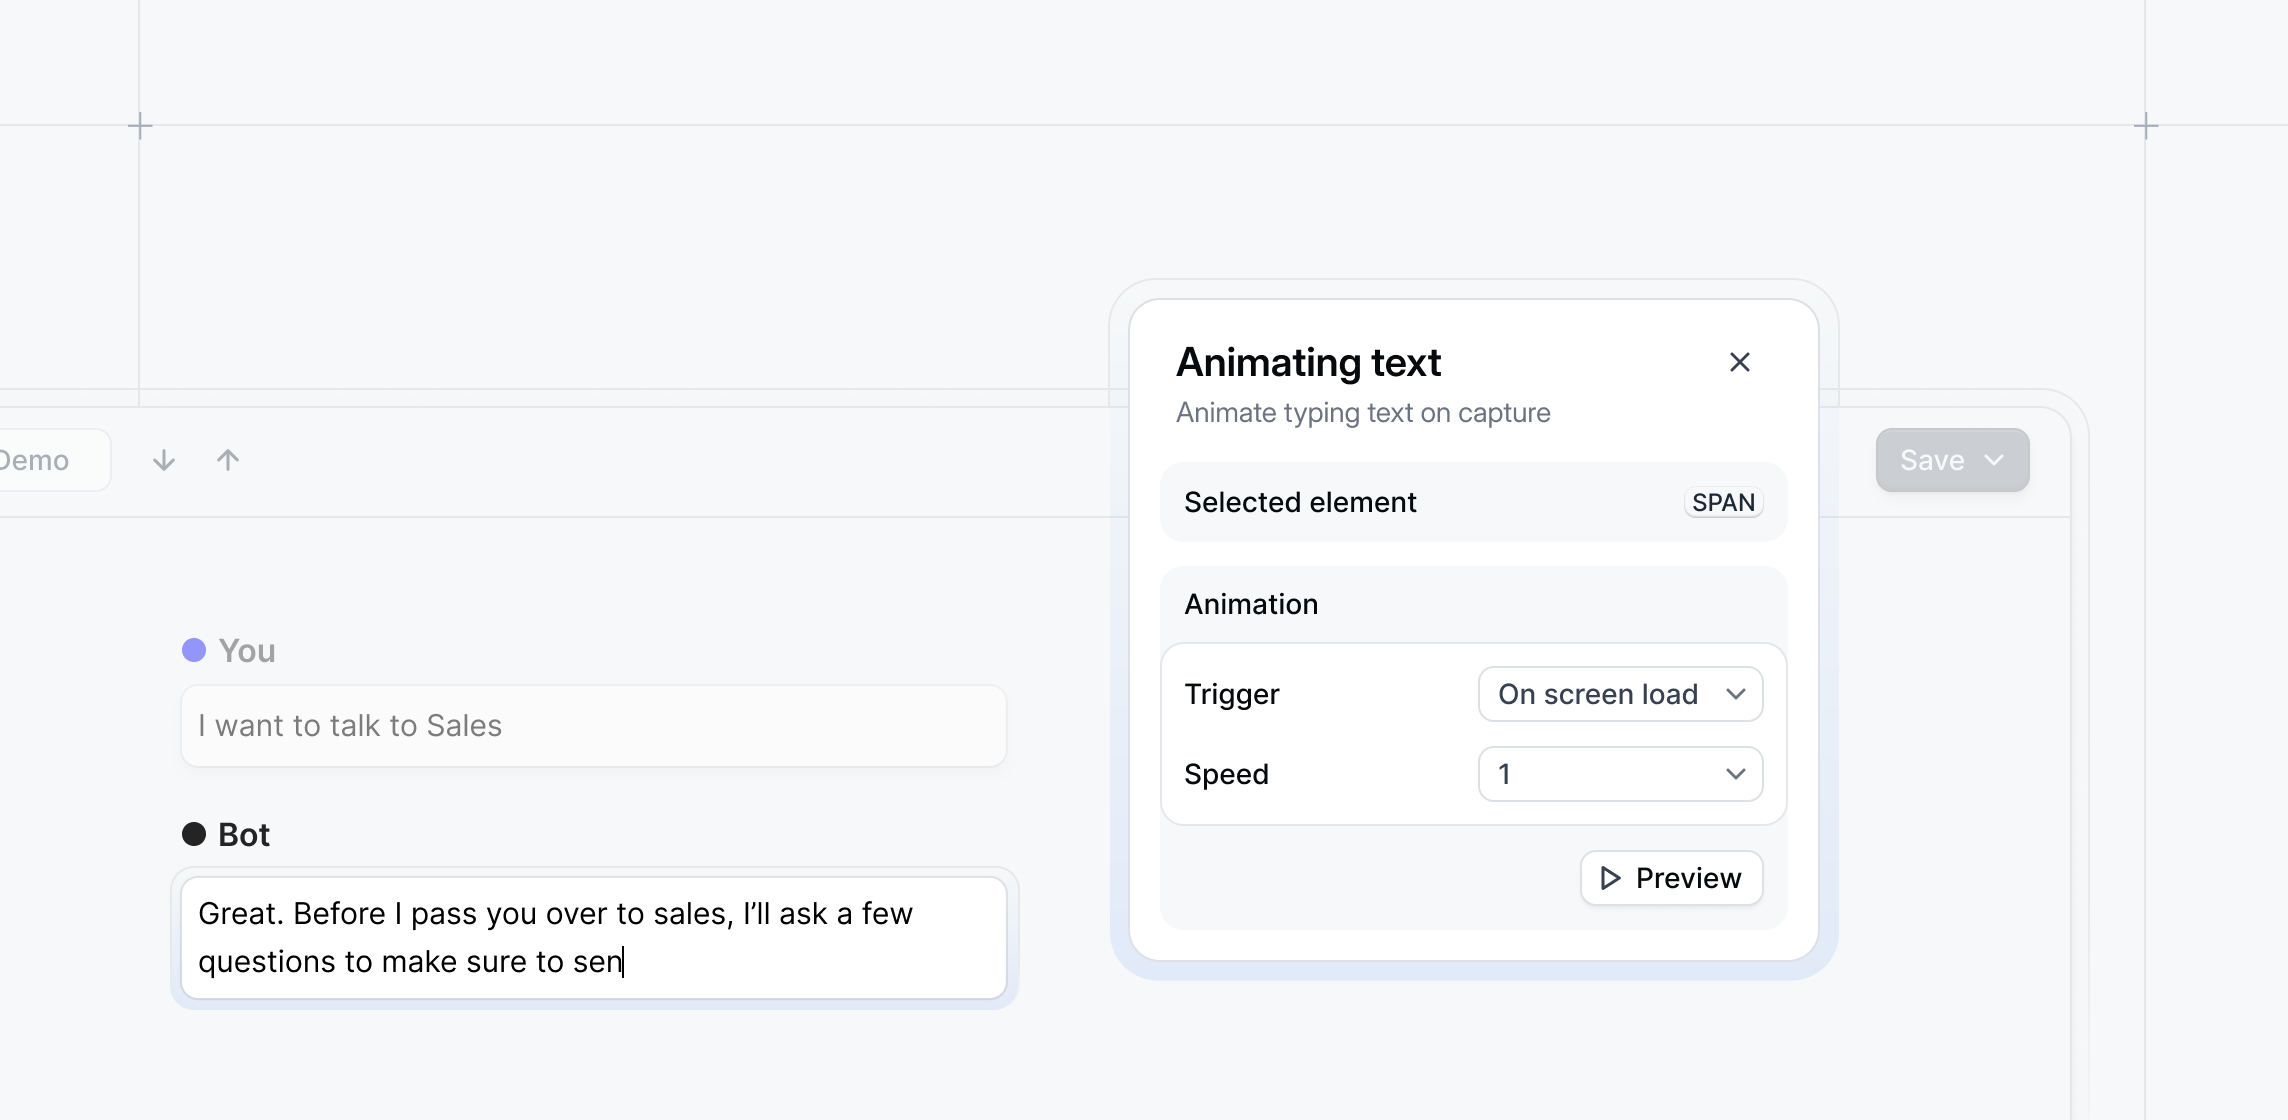
Animating Text with Magic Editor
Need to simulate an AI chat or mimic typing inside your demo? With our Animating Text Magic Editor, you can now show animated text within a Capture.In the demo, the Capture will show the text being typed out automatically to recreate live interactions like AI chatbots.
July 2025
Share demos from the Launchpad Chrome Extension
Empower reps to build and send demos directly from their existing workflow:- Access a library of pre-approved demos that reps can mix and match
- View prospect and account activity directly from the Chrome Extension
- Create custom demos to deliver tailored experiences for each prospect
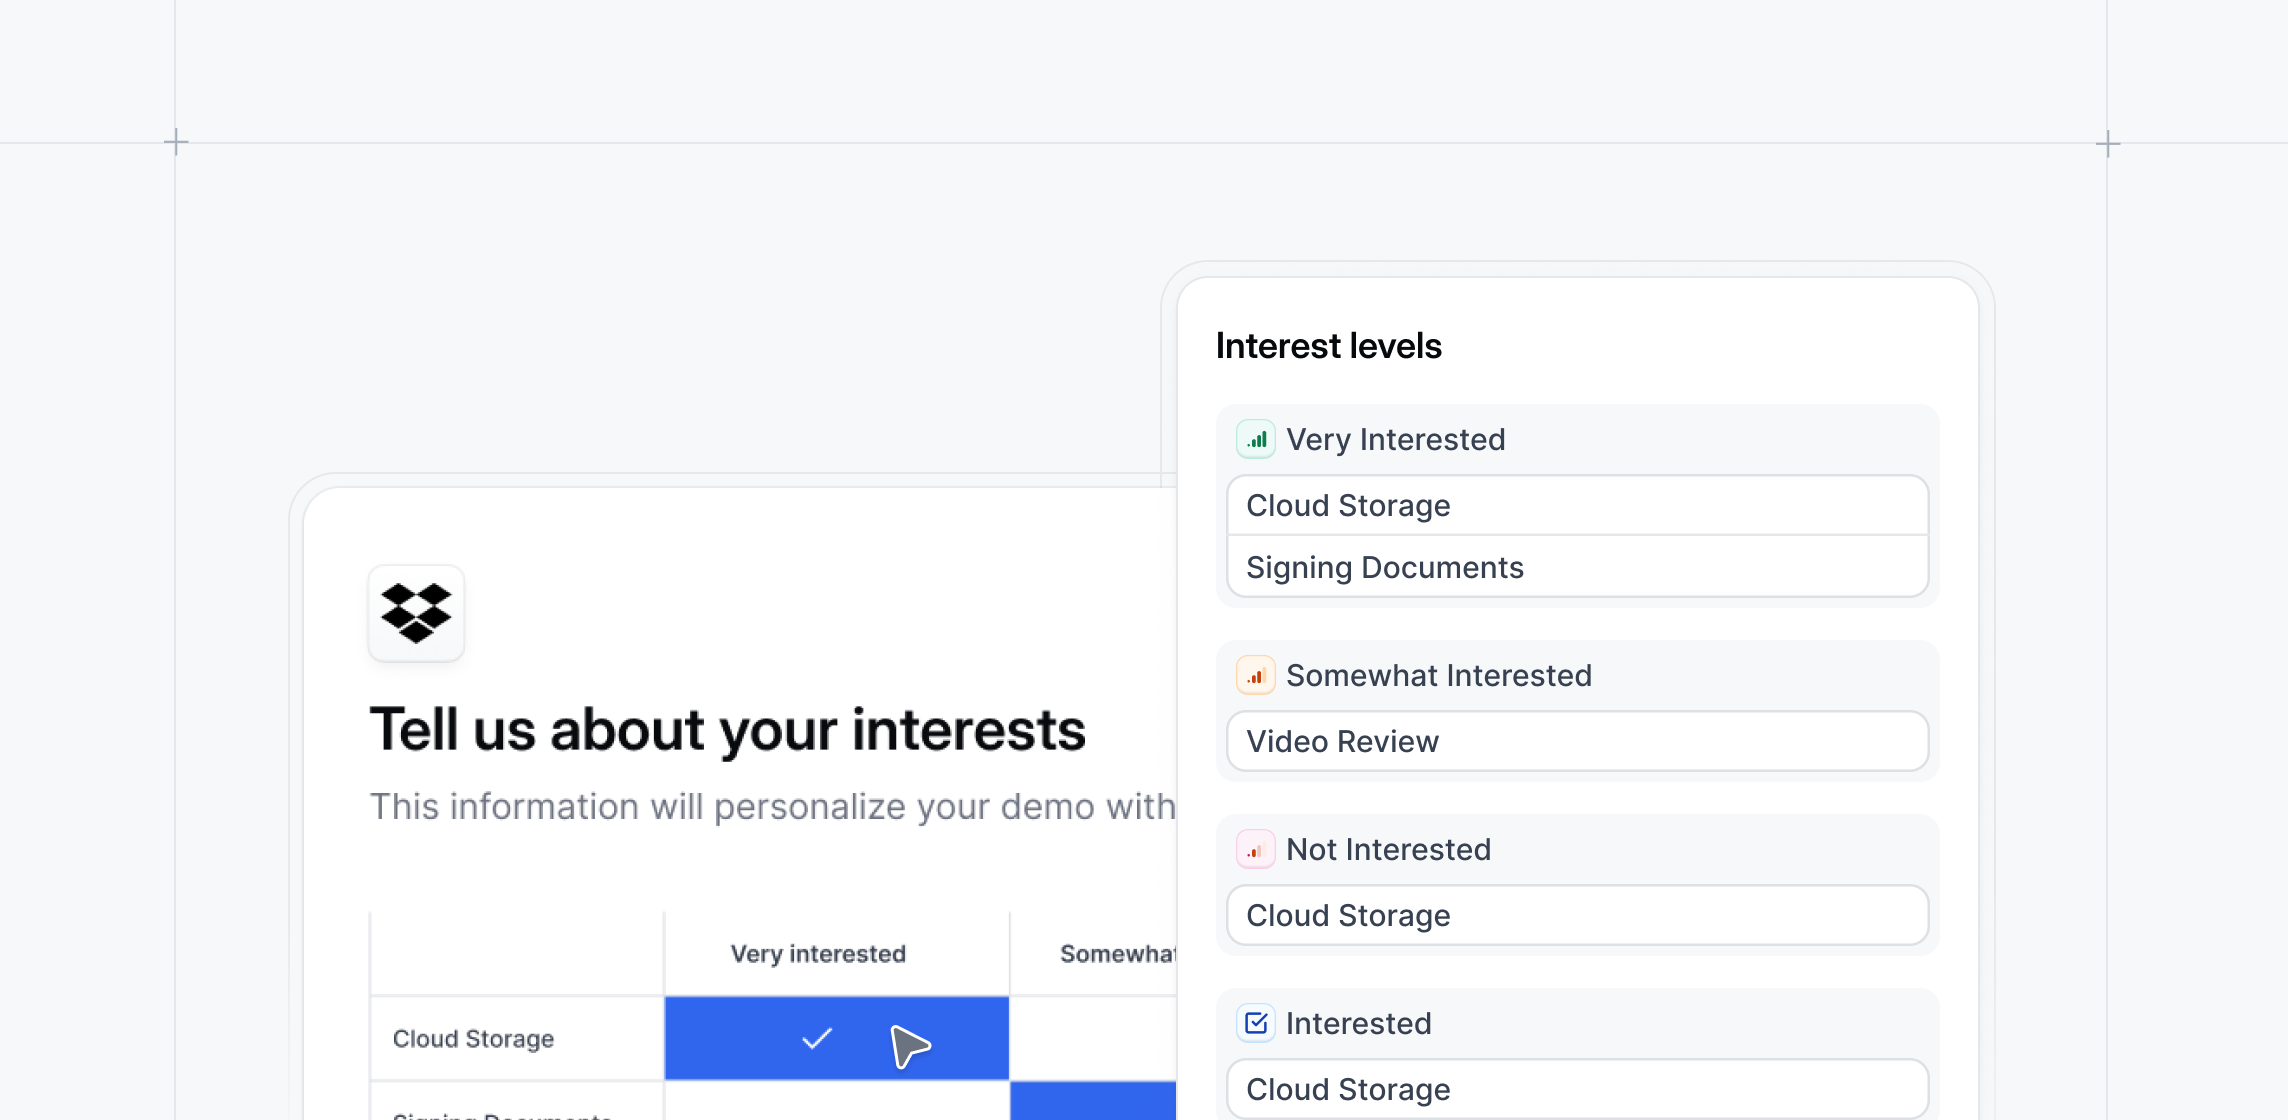
See interests and new stakeholders
Add interest levels to demos to understand buyer intent before your first call:- Get alerted via Slack or email when prospects go through your demos
- Track buyer interest to inform smarter, more strategic follow-ups
- Uncover new members of the buying circle when demos are shared internally
Create and present lightweight Sandbox demos
Quickly build Sandboxes with auto-linked screens that reps can use live on calls:- Personalize demo data to specific prospects, accounts, or verticals
- Present demos in a stable, standardized environment with confidence
- Stay on track with optional presenter notes or click guidance
June 2025
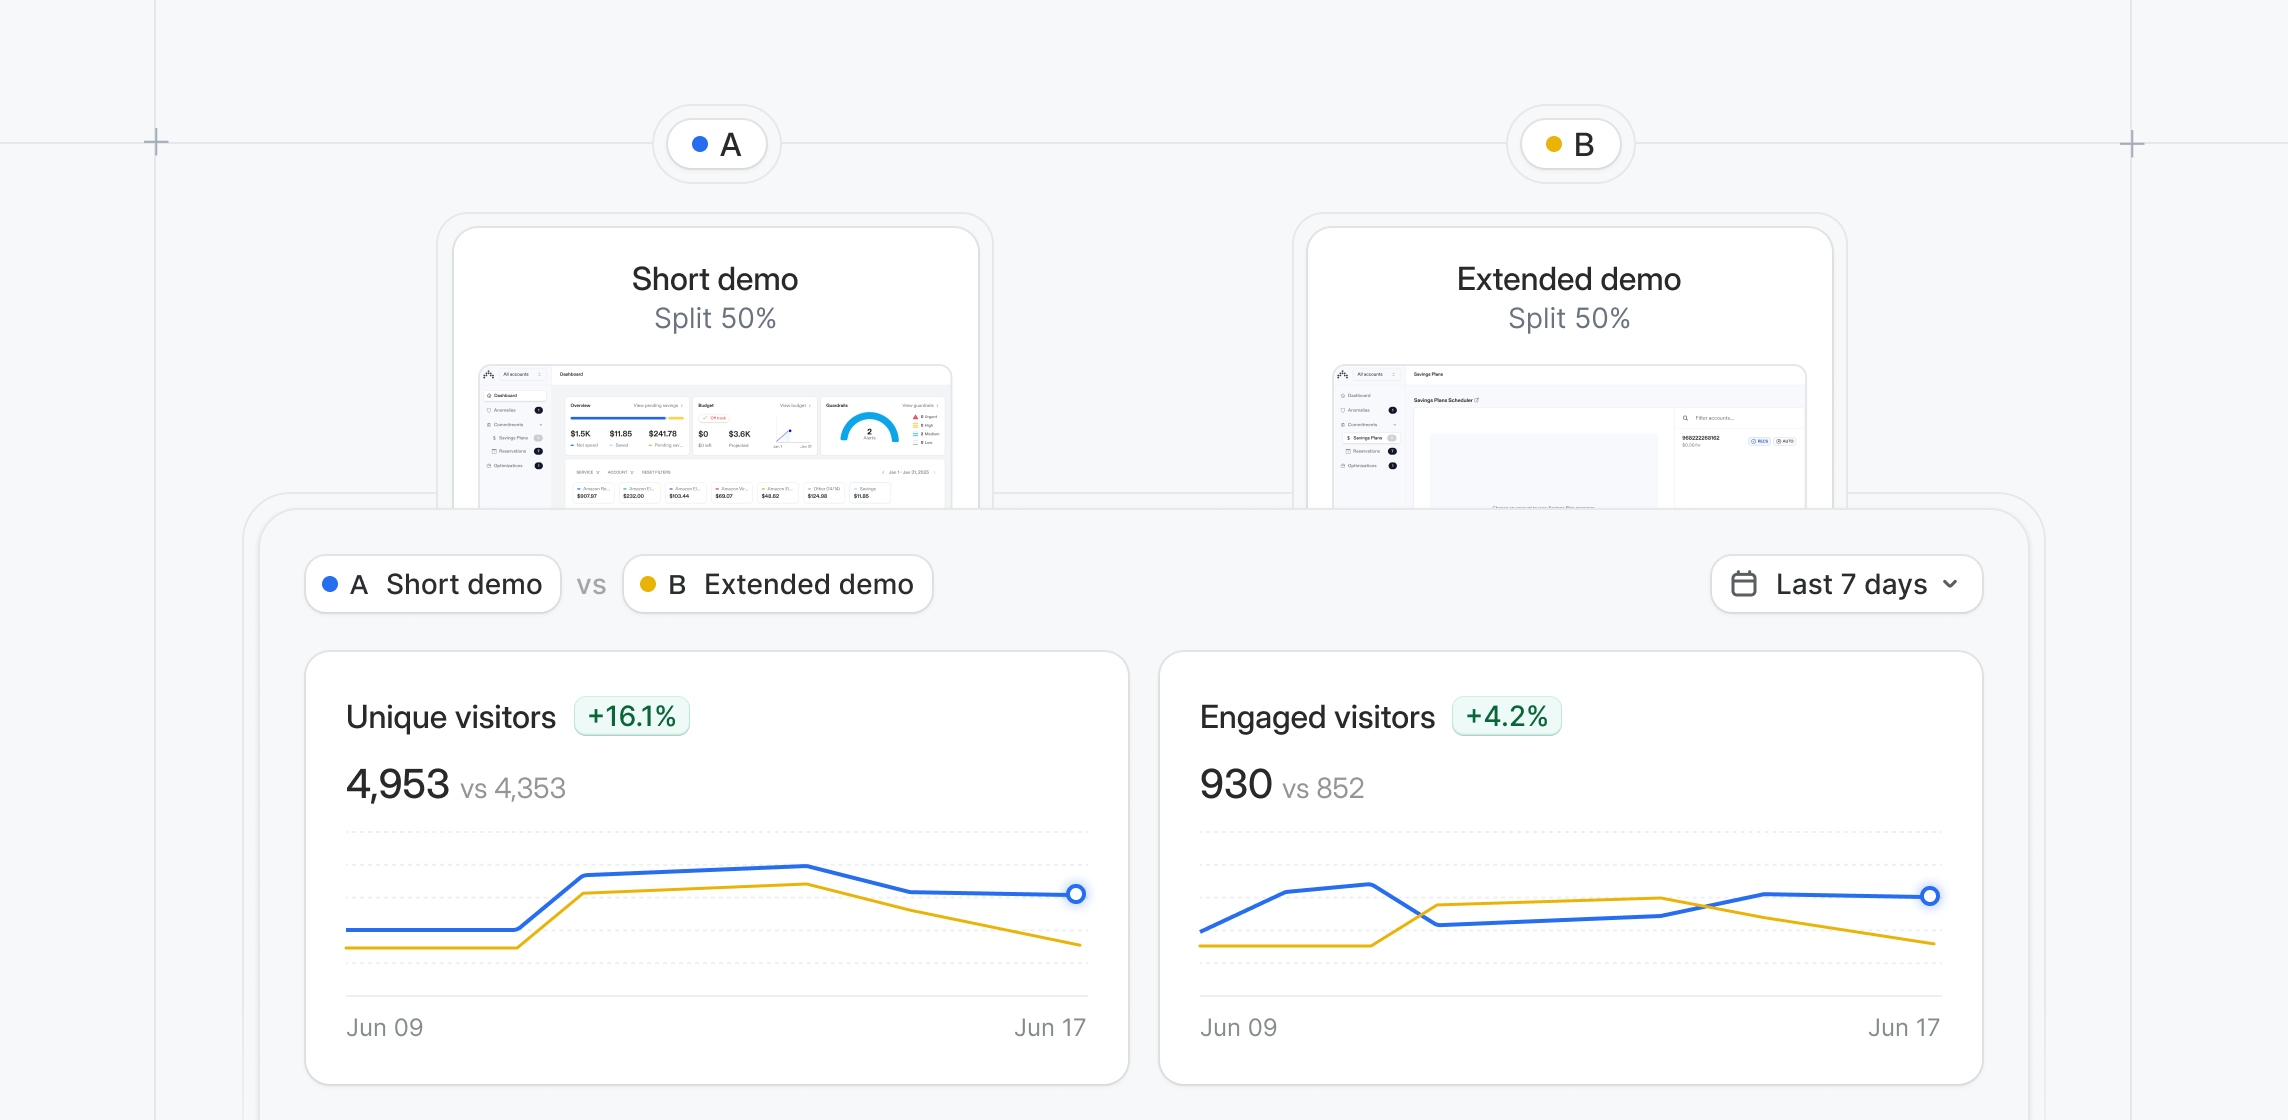
A/B Tests
Wondering which button copy drives more engagement? Or what opening message converts better? Now you can test it.With Navattic A/B Tests, you can experiment with:- Gated vs. ungated demos
- Which use cases to include in your demos
- CTA color, modal text, and step variations
Mobile Forms
Capture lead information from your Mobile Swipe Demos.For any step in your Mobile Swipe Demo, choose Form and select any existing form in your workspace.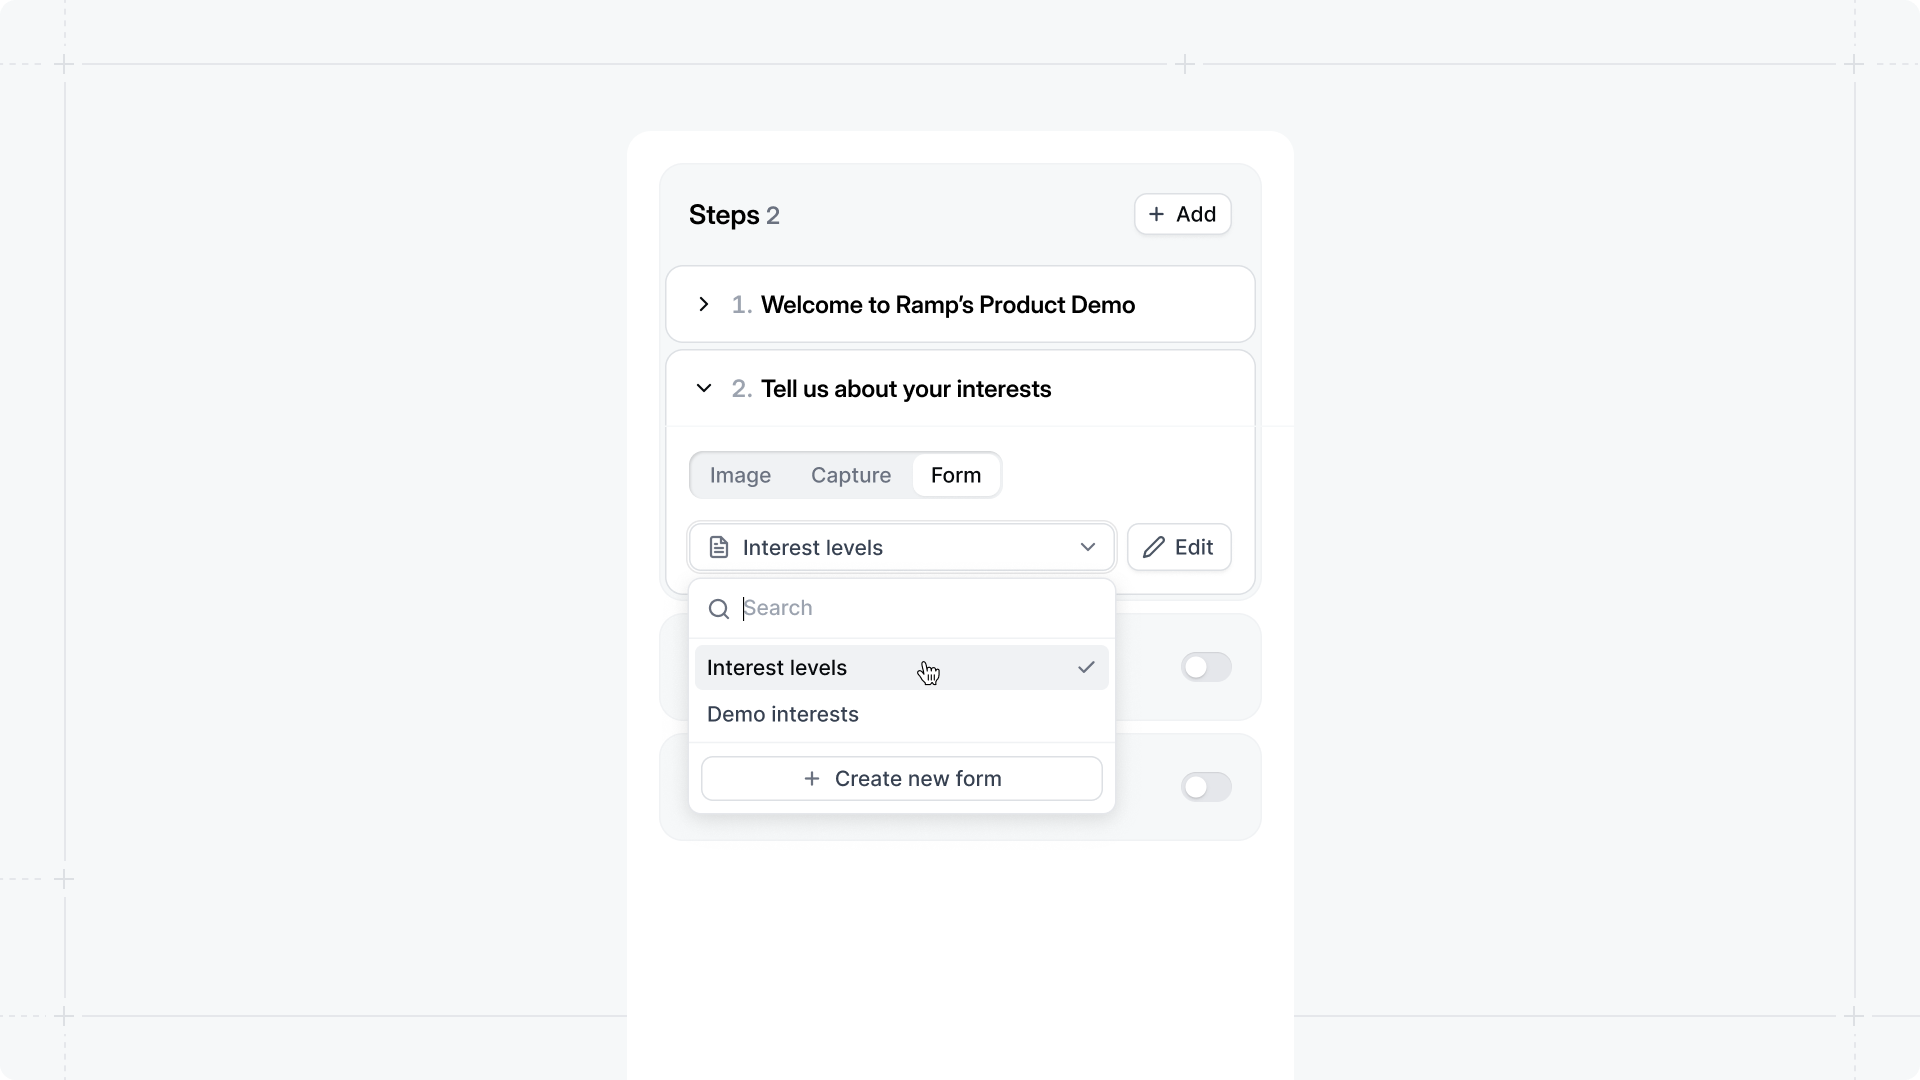
Export Form Submissions
View and export form submissions directly in our new Forms Table to see all leads that filled out that form and which demo they filled out the form on.If you’re using Interest-Level demos, you can also quickly see each submission’s level of interest.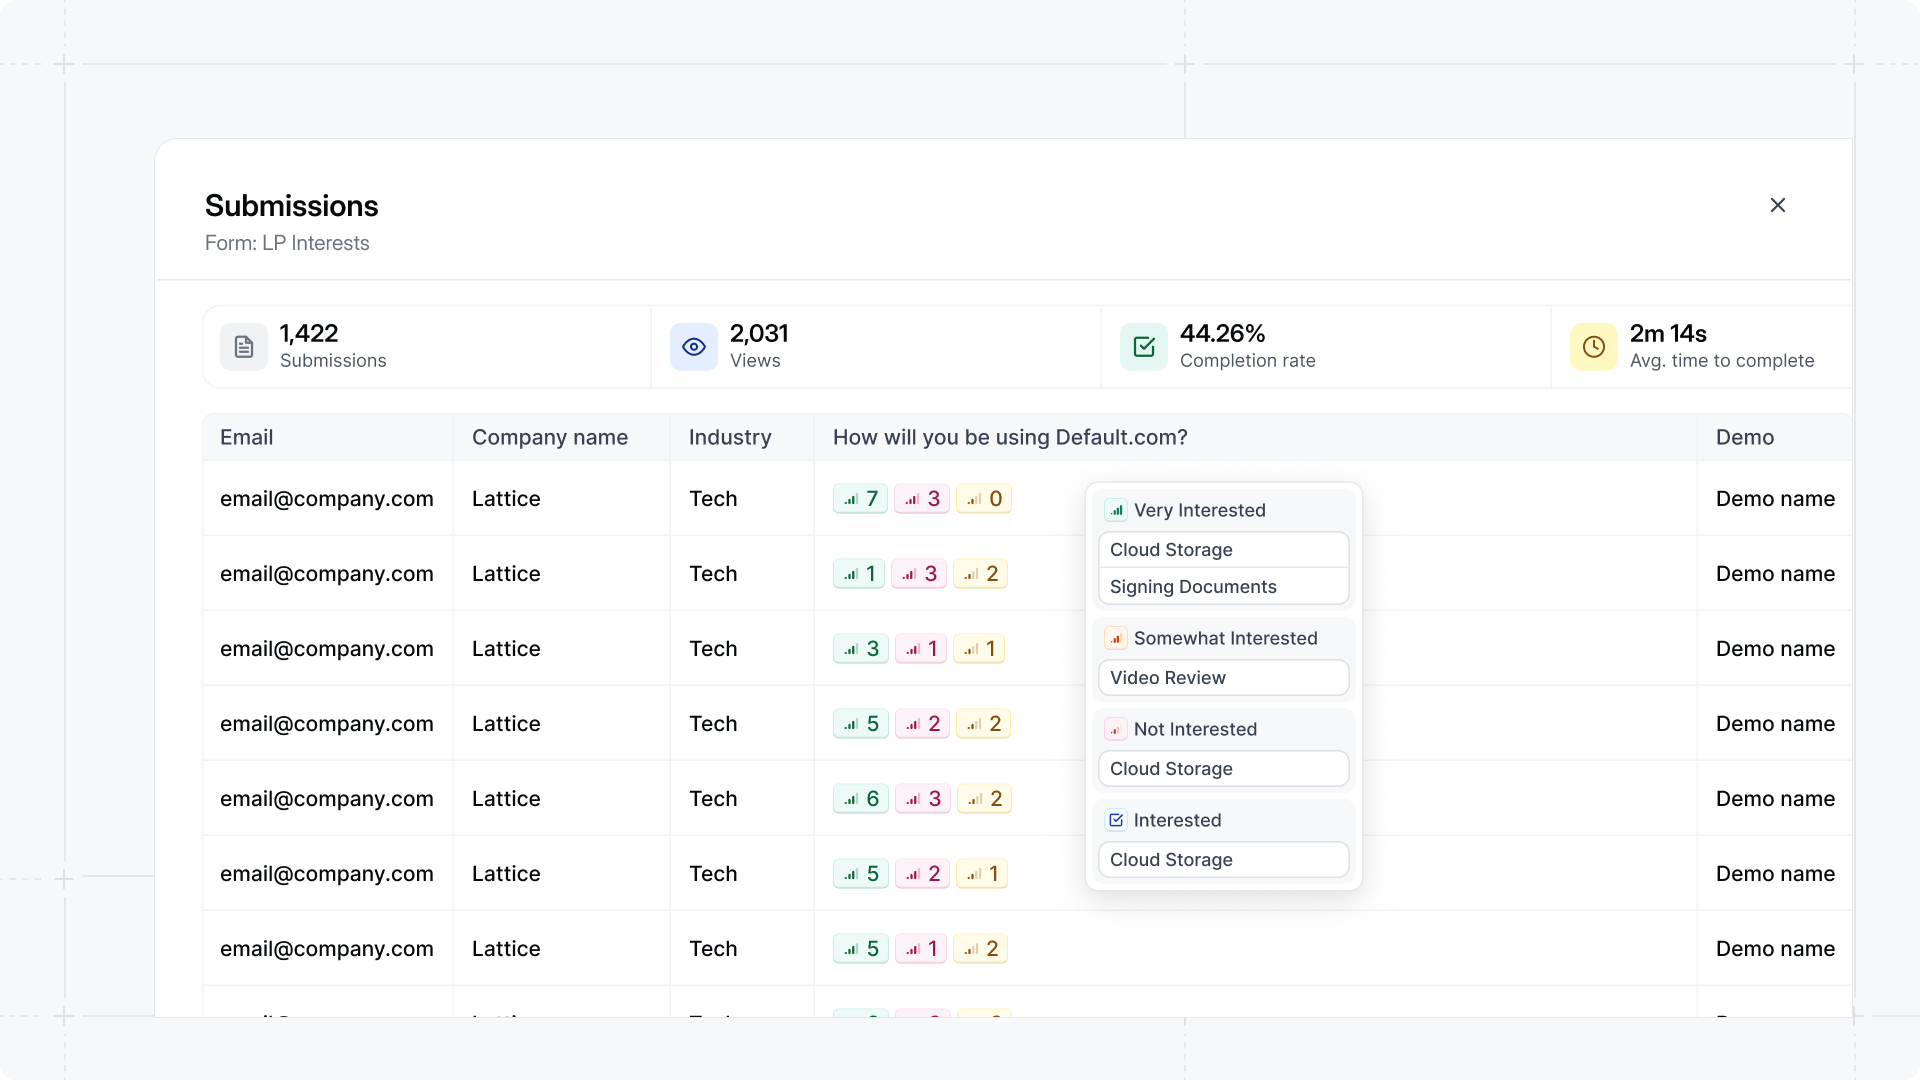
AI Up-to-Date
Keep demos current by updating dates in old captures with today’s date. Use AI Detection to help easily find and mass replace old dates hiding in your captures.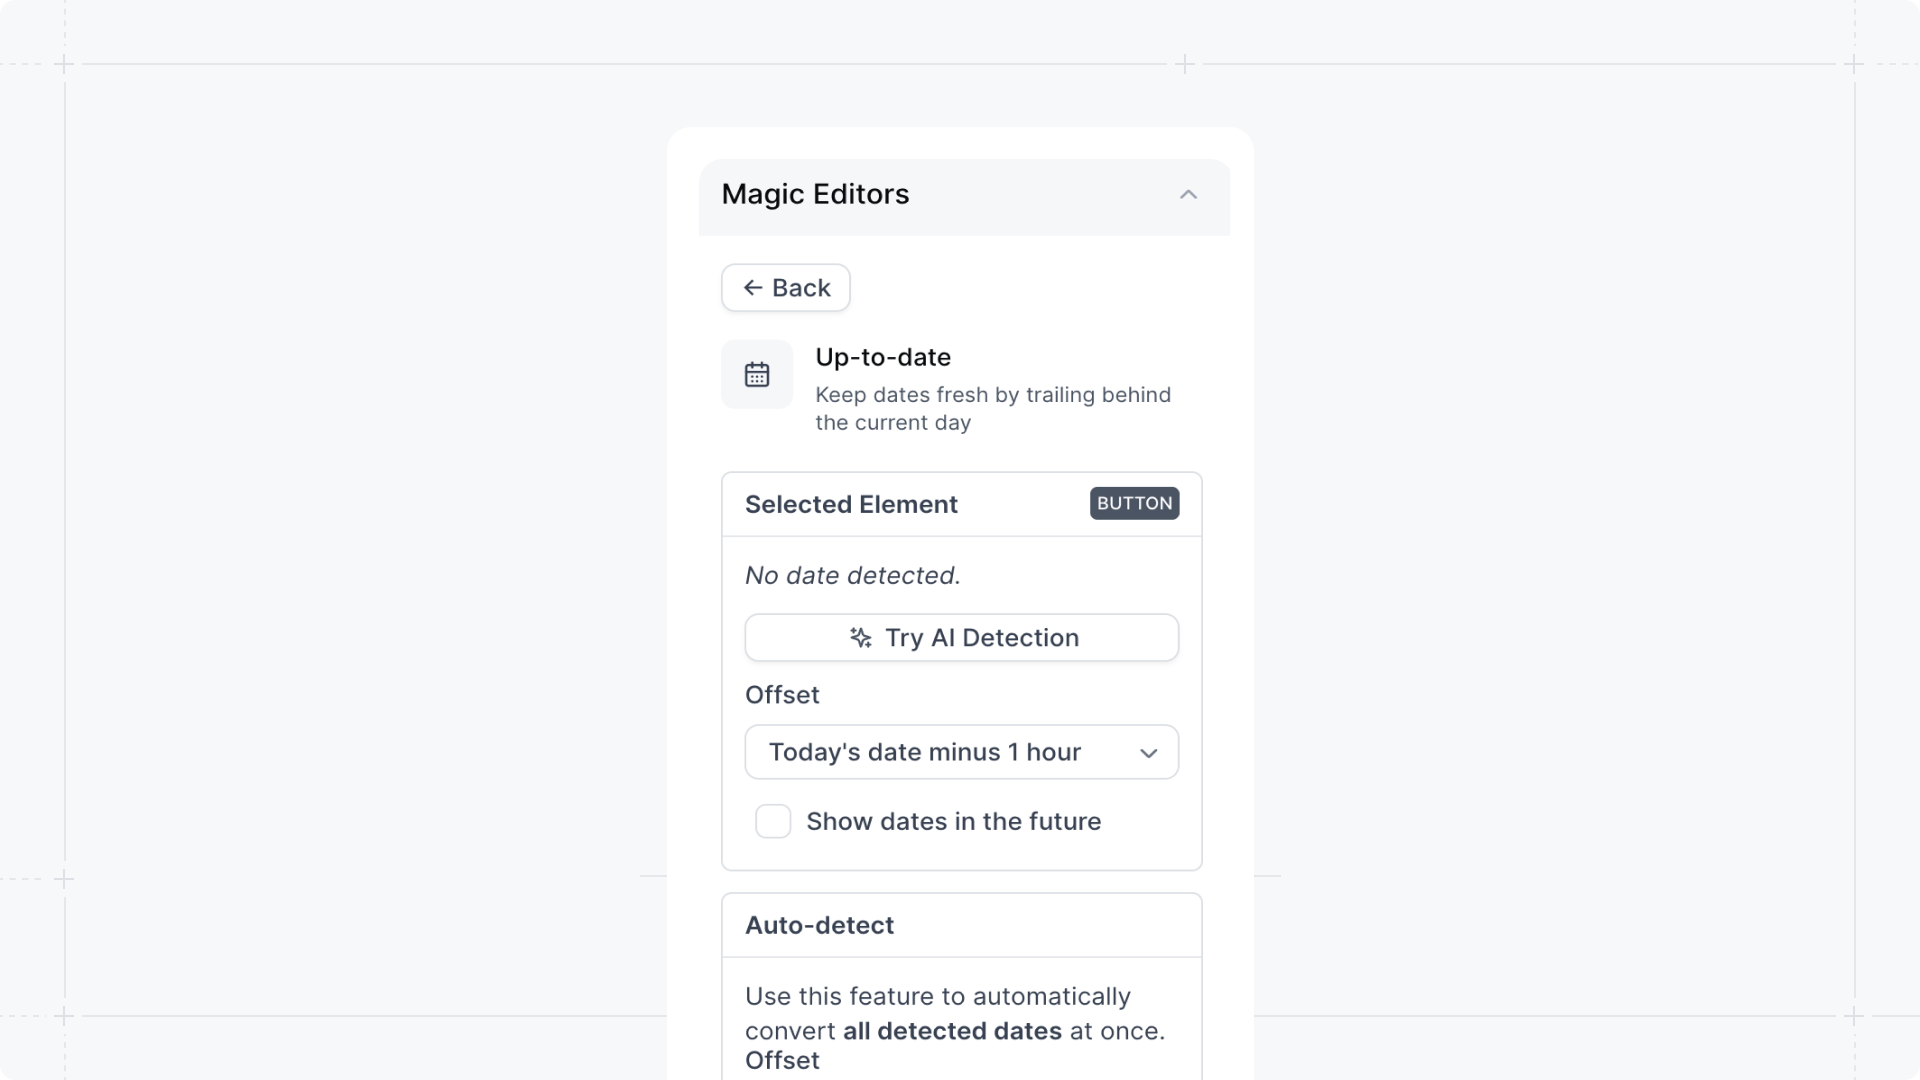
Custom Analytics Timeframes
Compare and analyze demo performance for custom date ranges within the Analytics, Visitors, and Accounts views.To access custom timeframes, click the Analytics, Visitors or Accounts tab > select the timeframe in the top right corner.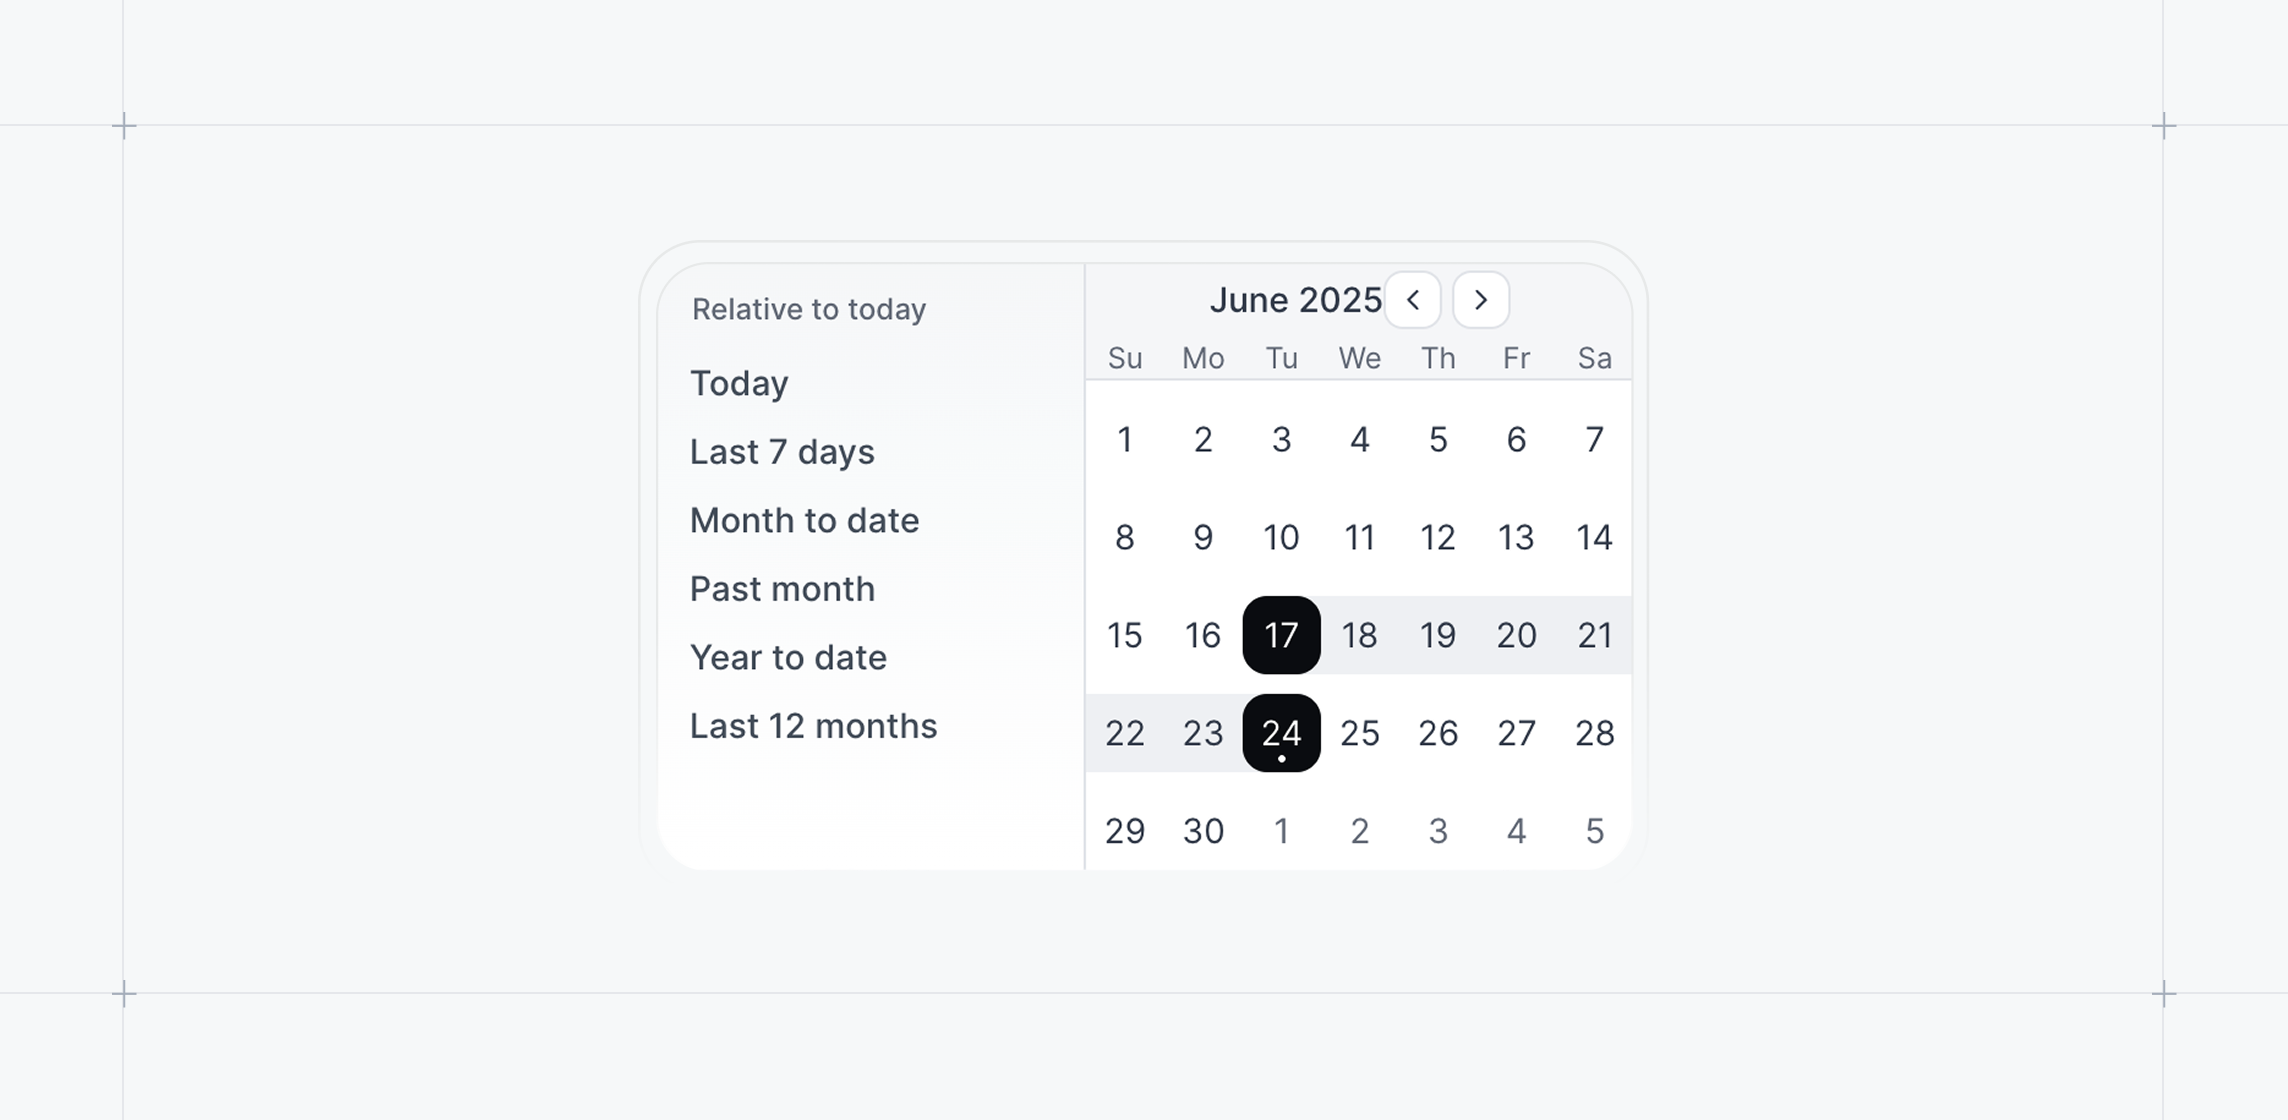
May 2025
AI Voiceover
Enhance your demos with dynamic narration through various options, including reading from the individual steps, custom text-to-speech, or uploaded audio.To add voiceover to specific steps in your demo, in the Flow Builder click Add element > Voiceover. From here, use the dropdown to select the option you want to use:- Read from text: Add in custom text to read from (_tip: use this with an _Invisible step)
- Read from step: Read directly from the text in the Modal or Tooltip
- Upload audio: Upload audio files from your local storage. Supported formats include MP3, M4A, WAV, and MIDI files.
Version Comparison
Track changes at a glance across your Product Demos.With Demo Version Comparison, easily see what’s changed between versions—whether text edits, step reordering, or updated captures—making it easier to review and approve updates.To view changes, you can either visit Versions or click the Publish button > View changes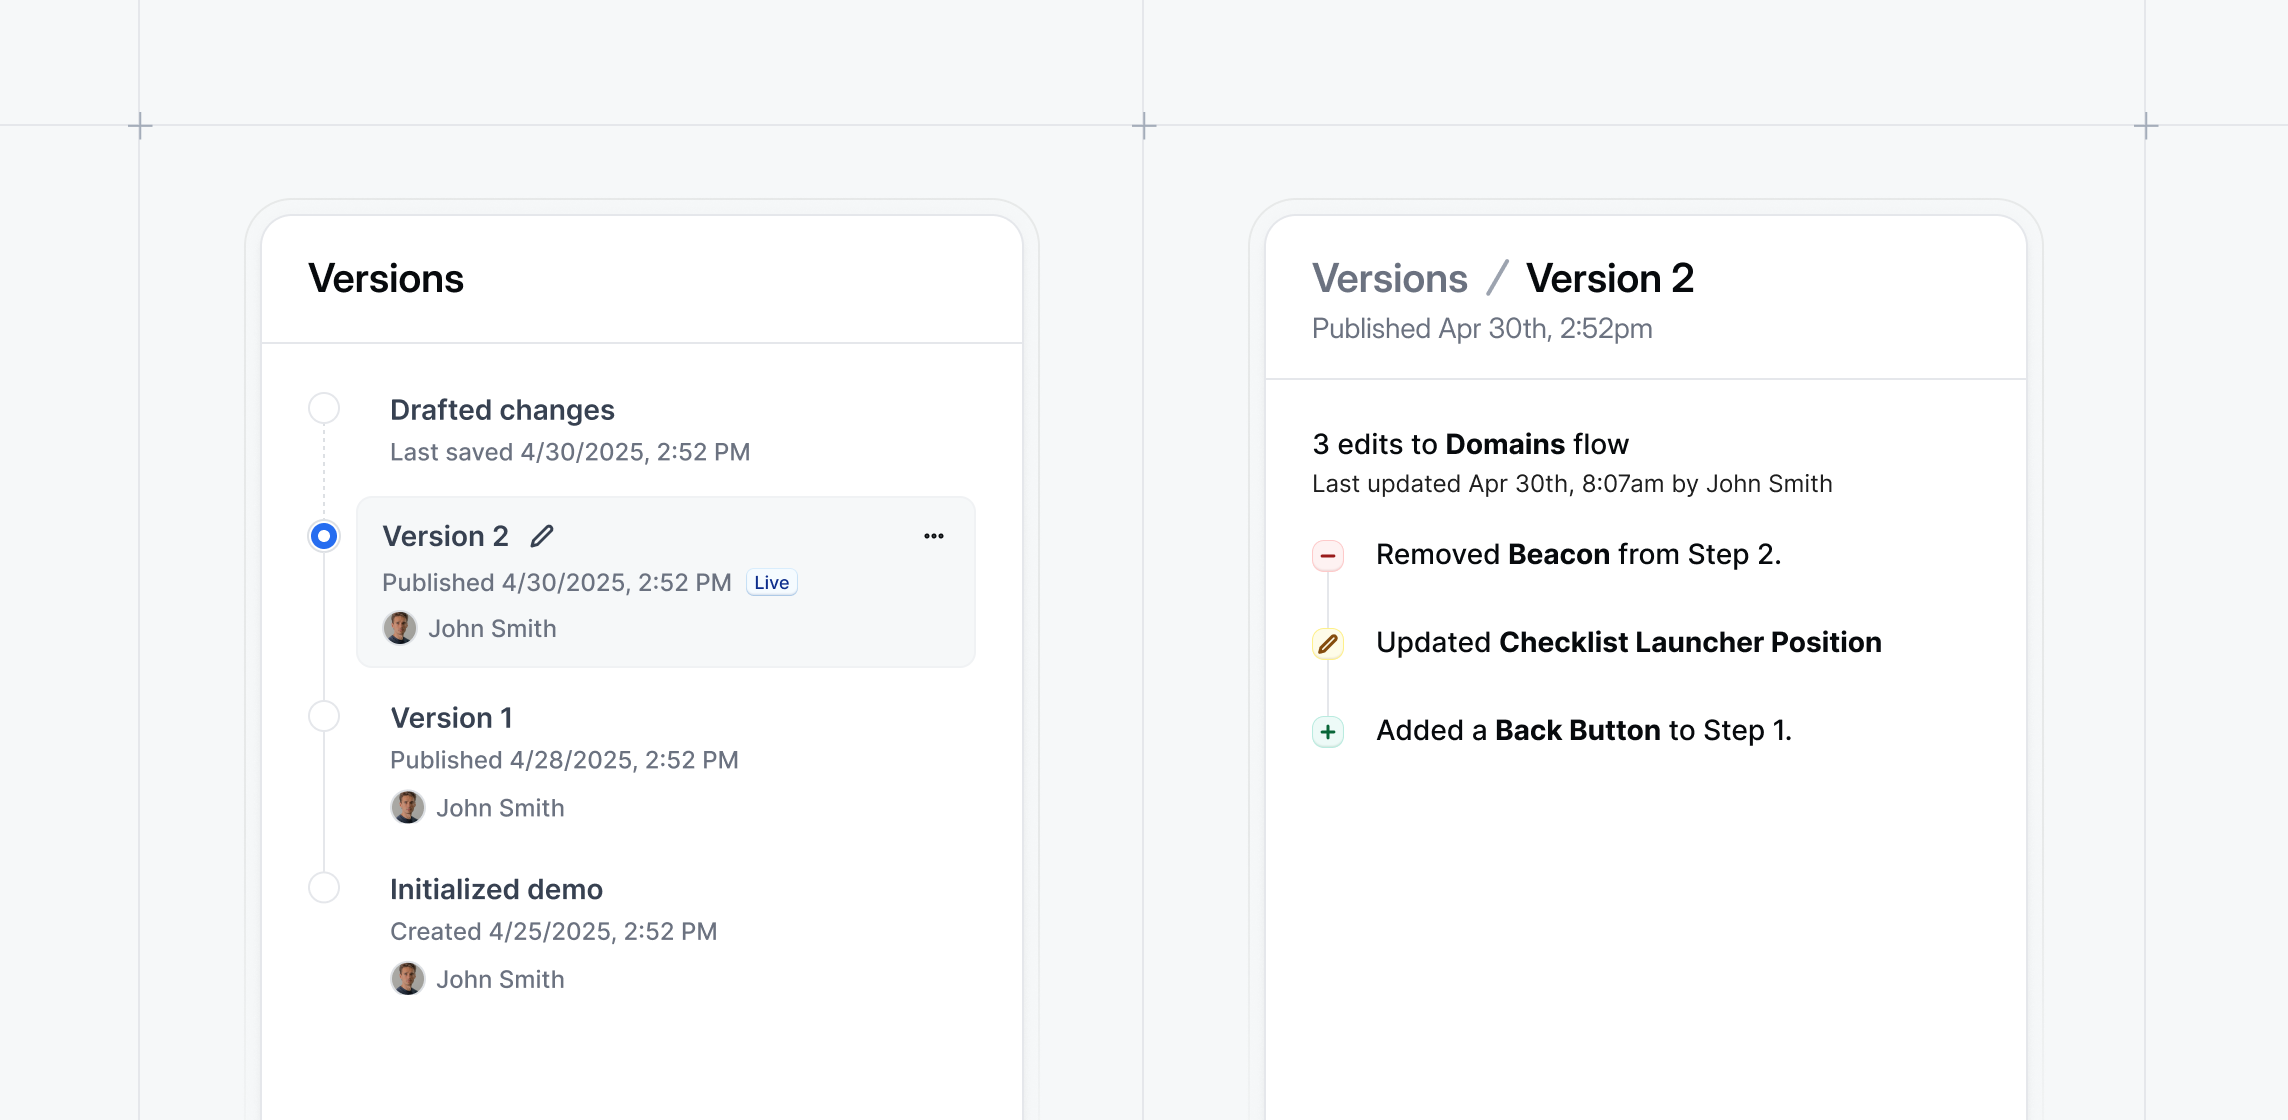
Email Blacklisting
Improve lead quality by blocking unwanted email domains from accessing your interactive demos.With Email Blacklisting, you can prevent Visitors with specified email domains from accessing gated demos or completing forms.To enable this feature, visit your Form Builder > select the email field > toggle on Blacklisted Domains > Add the domains you want to block.This feature is available for Growth and Enterprise workspaces.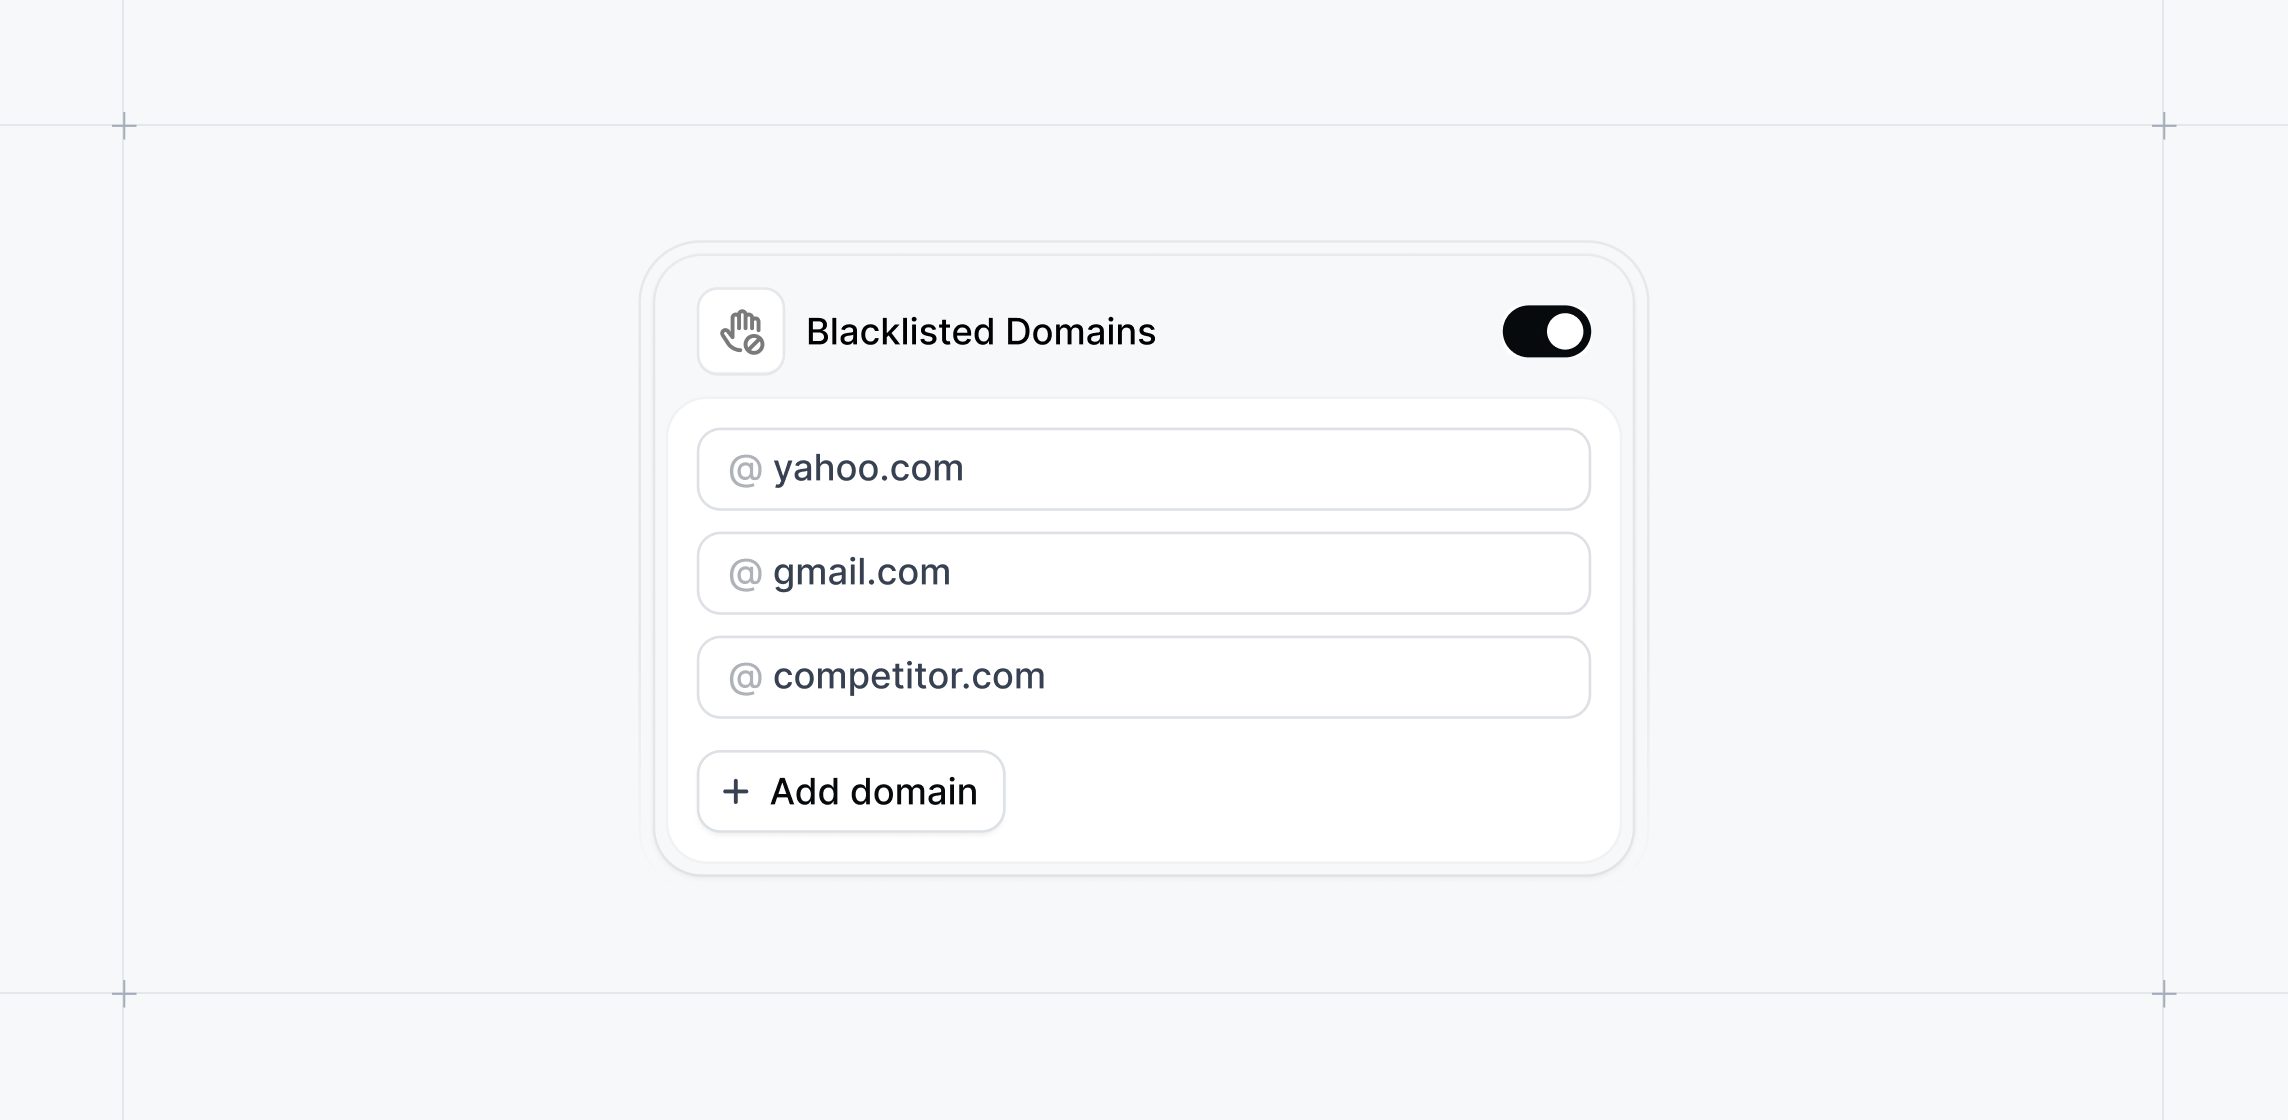
Combined Media and Web Capture Collections
Simplify your capture workflow with a unified Capture Collection system. All Captures, whether web-based or media uploads, now live together in a single, streamlined structure—making it easier to manage and edit your demos.No action required—your collections have already been updated.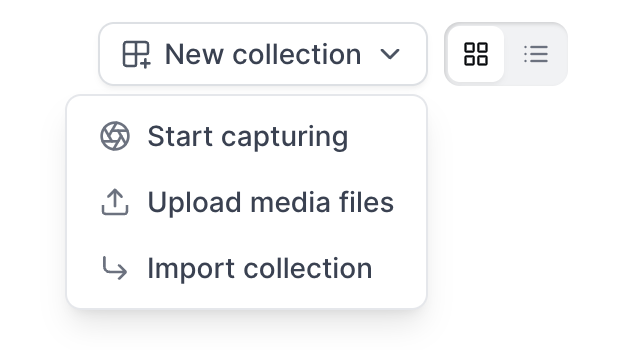
April 2025
HubSpot Meetings, Default, and RevenueHero Embed Step Types
Expand your scheduling and conversion options inside demos.Embed HubSpot Meetings links, set a Default Scheduler, or integrate RevenueHero meeting links directly within your demos to drive faster booking.To add an embed, create a new Embed Step > Choose HubSpot Meetings, Default, or RevenueHero > Insert your scheduling link.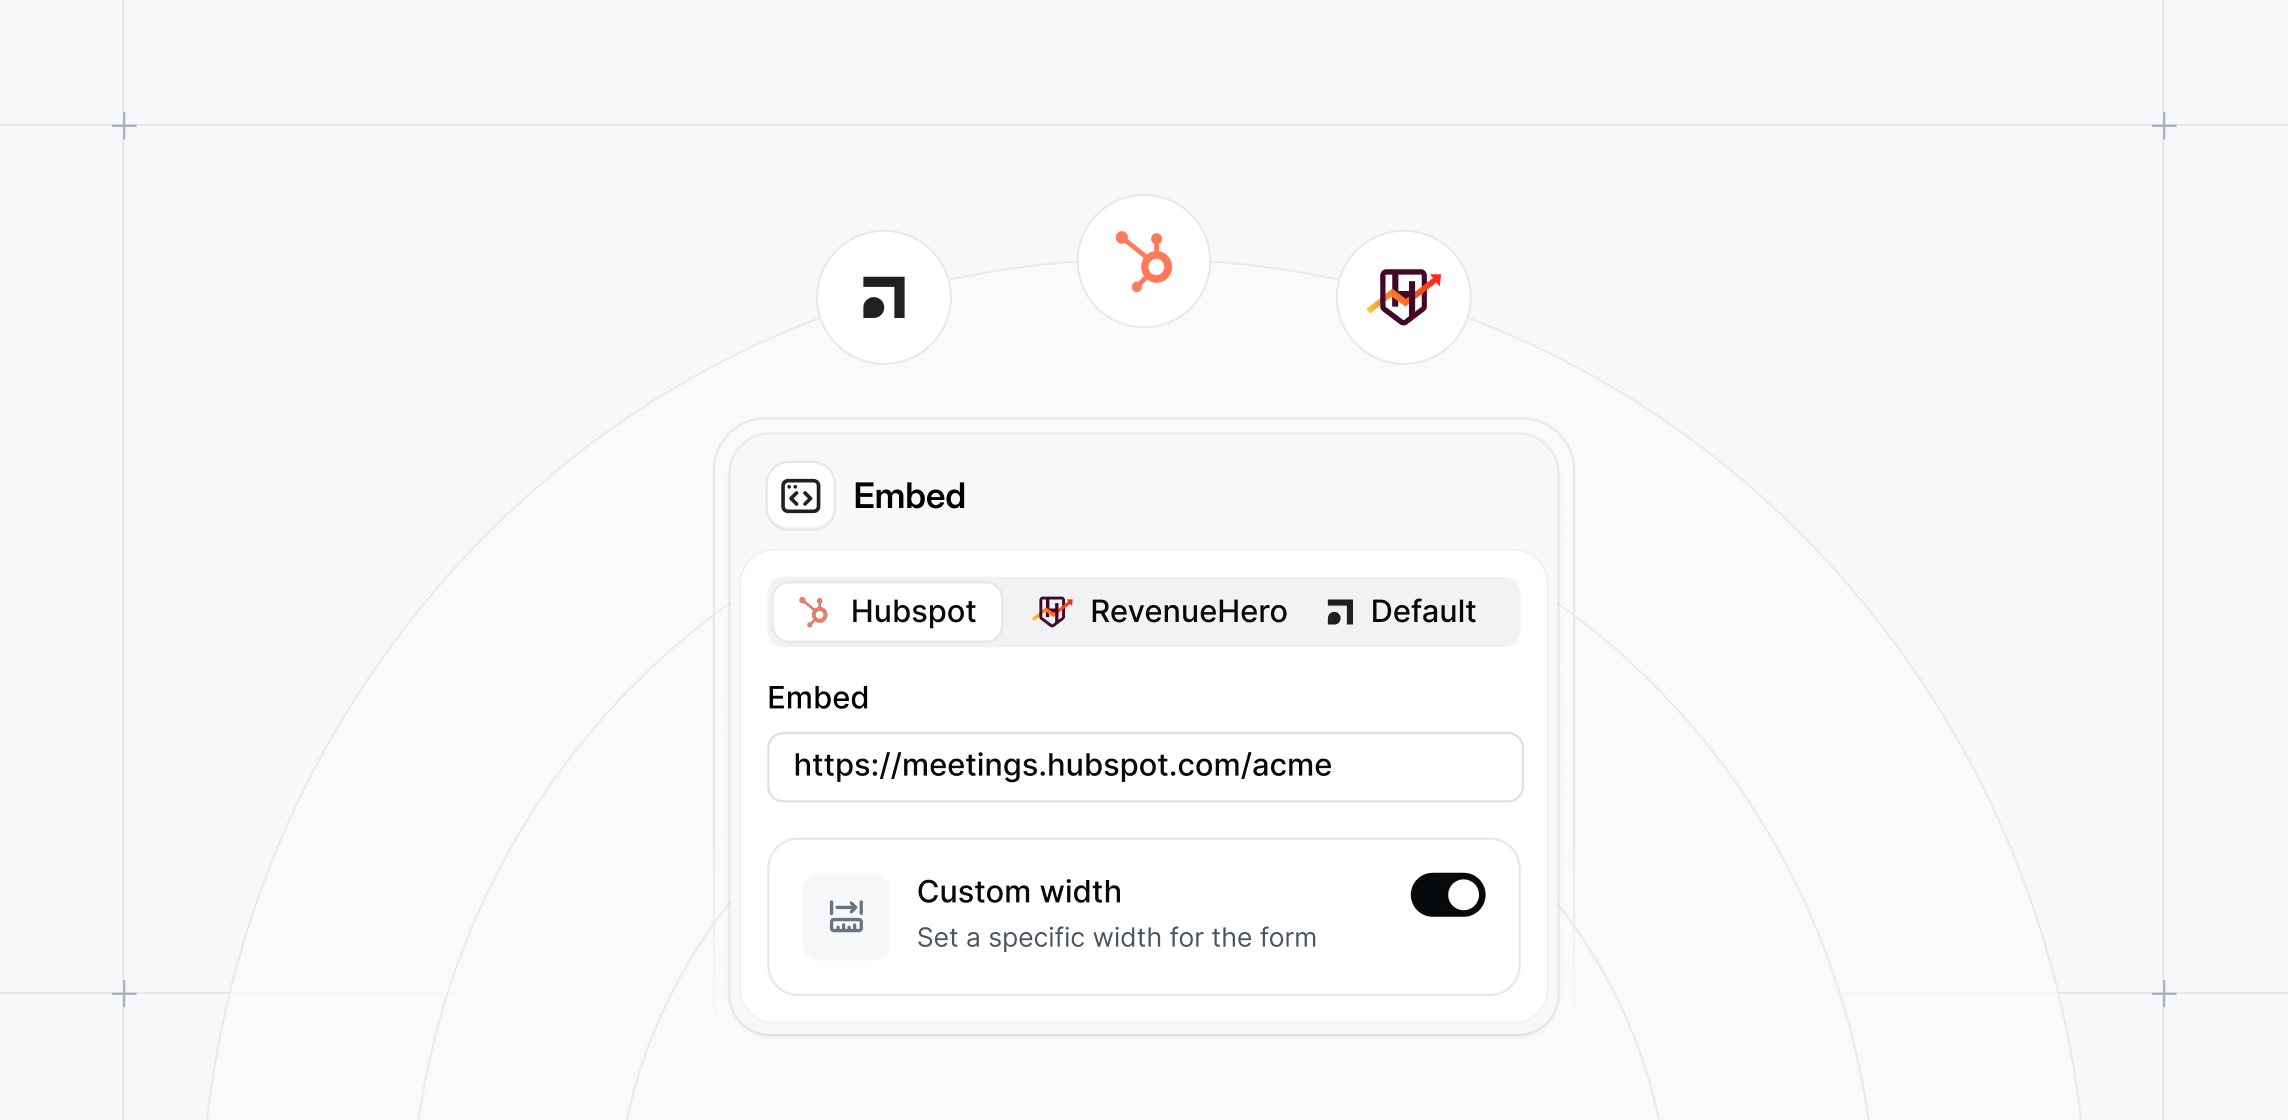
Estimated Completion Time
Set clear expectations for demo Visitors with estimated completion times.Automatically display how long a Flow or Checklist task will take, helping users plan and complete demos more efficiently.To enable estimated completion time, visit the Checklist builder > toggle on Estimated completion time under Advanced.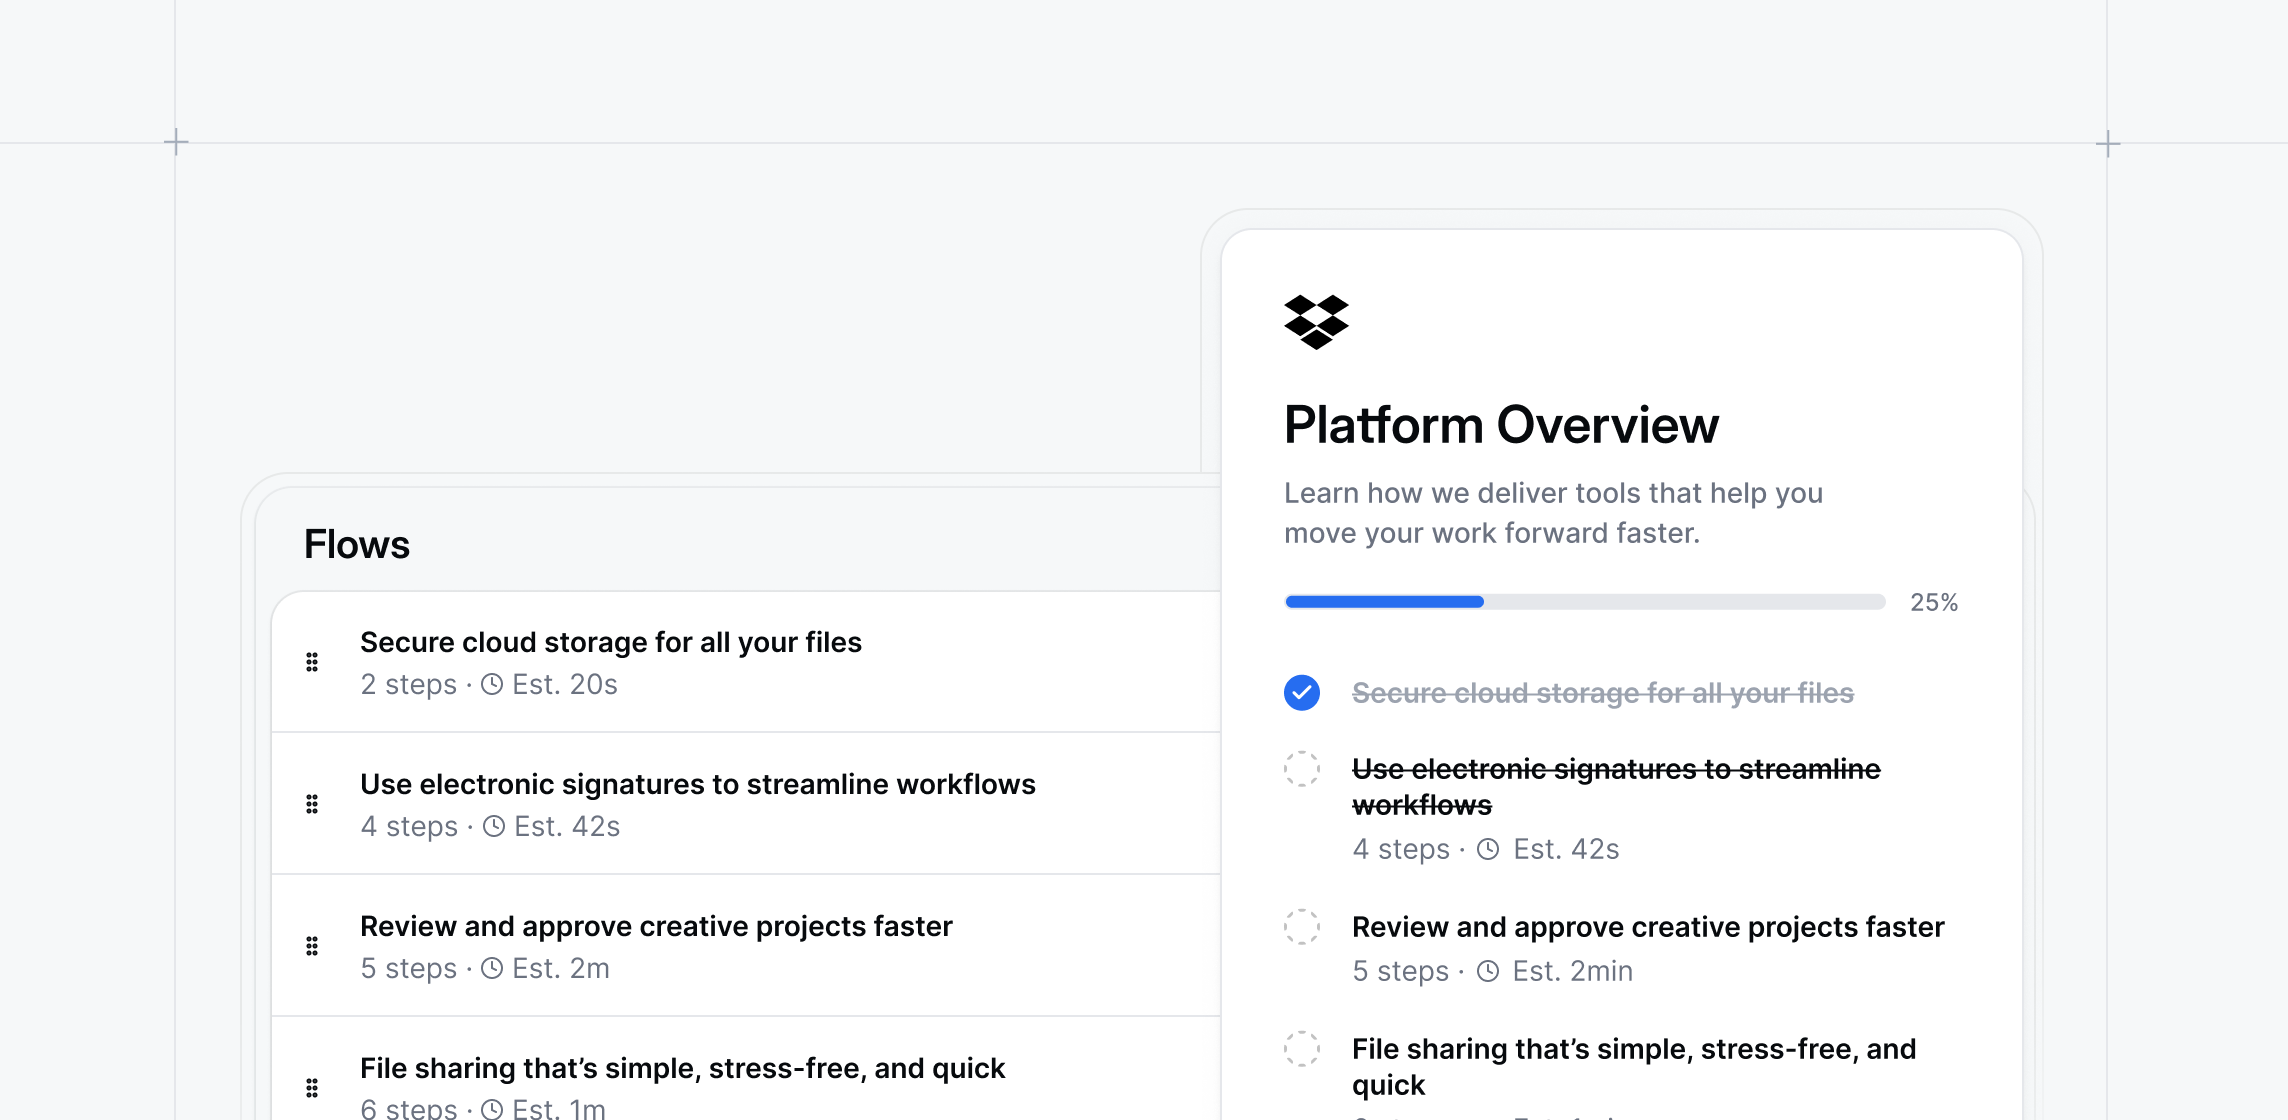
On Hover Tooltips
Use the On Hover Tooltip setting to display tooltips automatically when users hover over anchor elements. This feature provides optional context while maintaining a clean and readable interface.Learn more about the On Hover Tooltip Setting.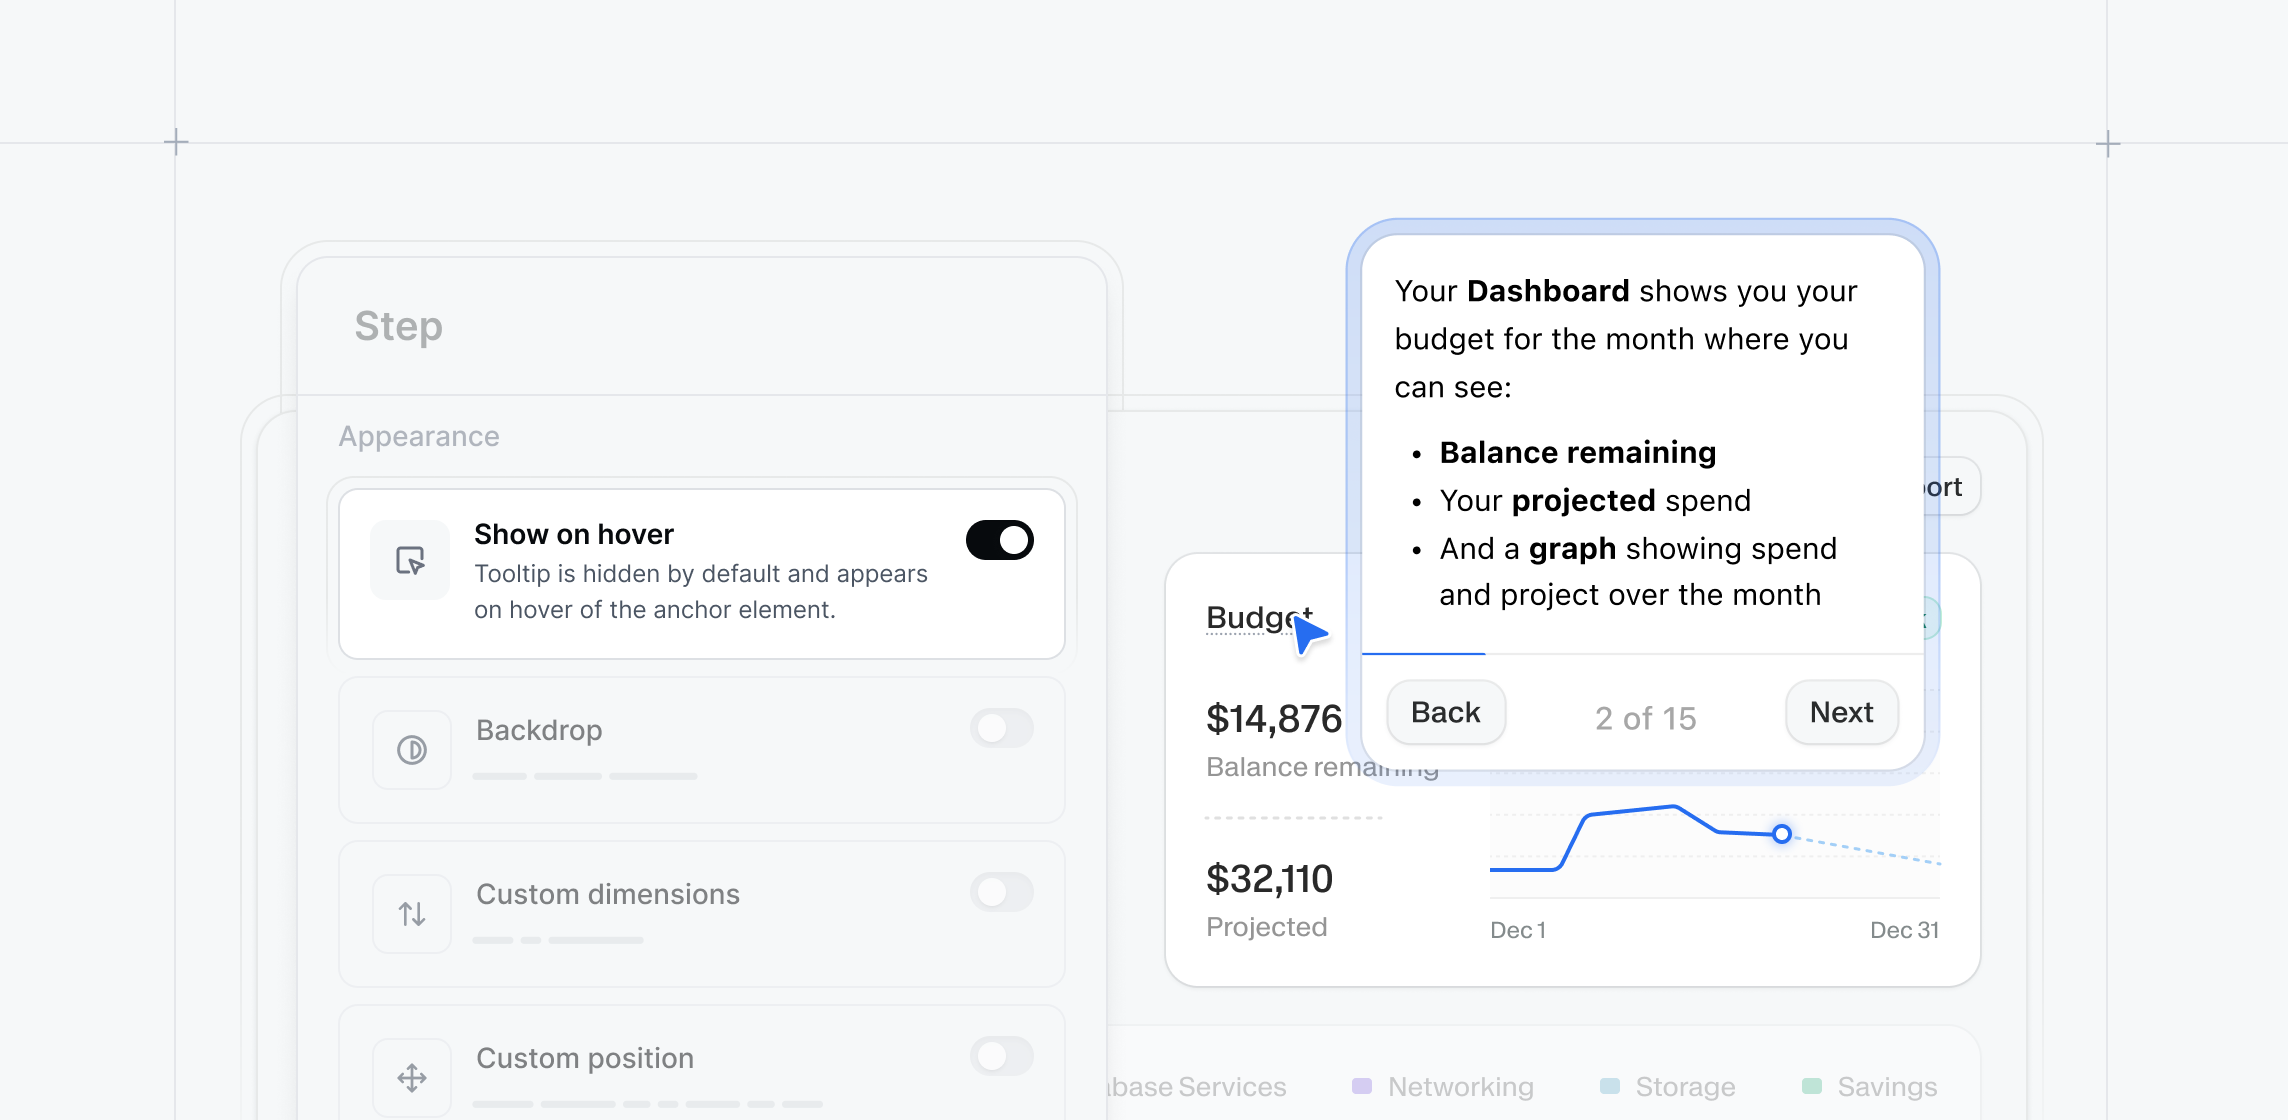
March 2025
Table AI
Instantly update table values in bulk using simple AI-powered prompts.No more manual adjustments—describe the changes you need to make large-scale data edits. Keep your data accurate and up to date in seconds.To use Table AI, edit a Capture with a table > select the table element > click Magic Editors > Table AI > Write a prompt and click Submit.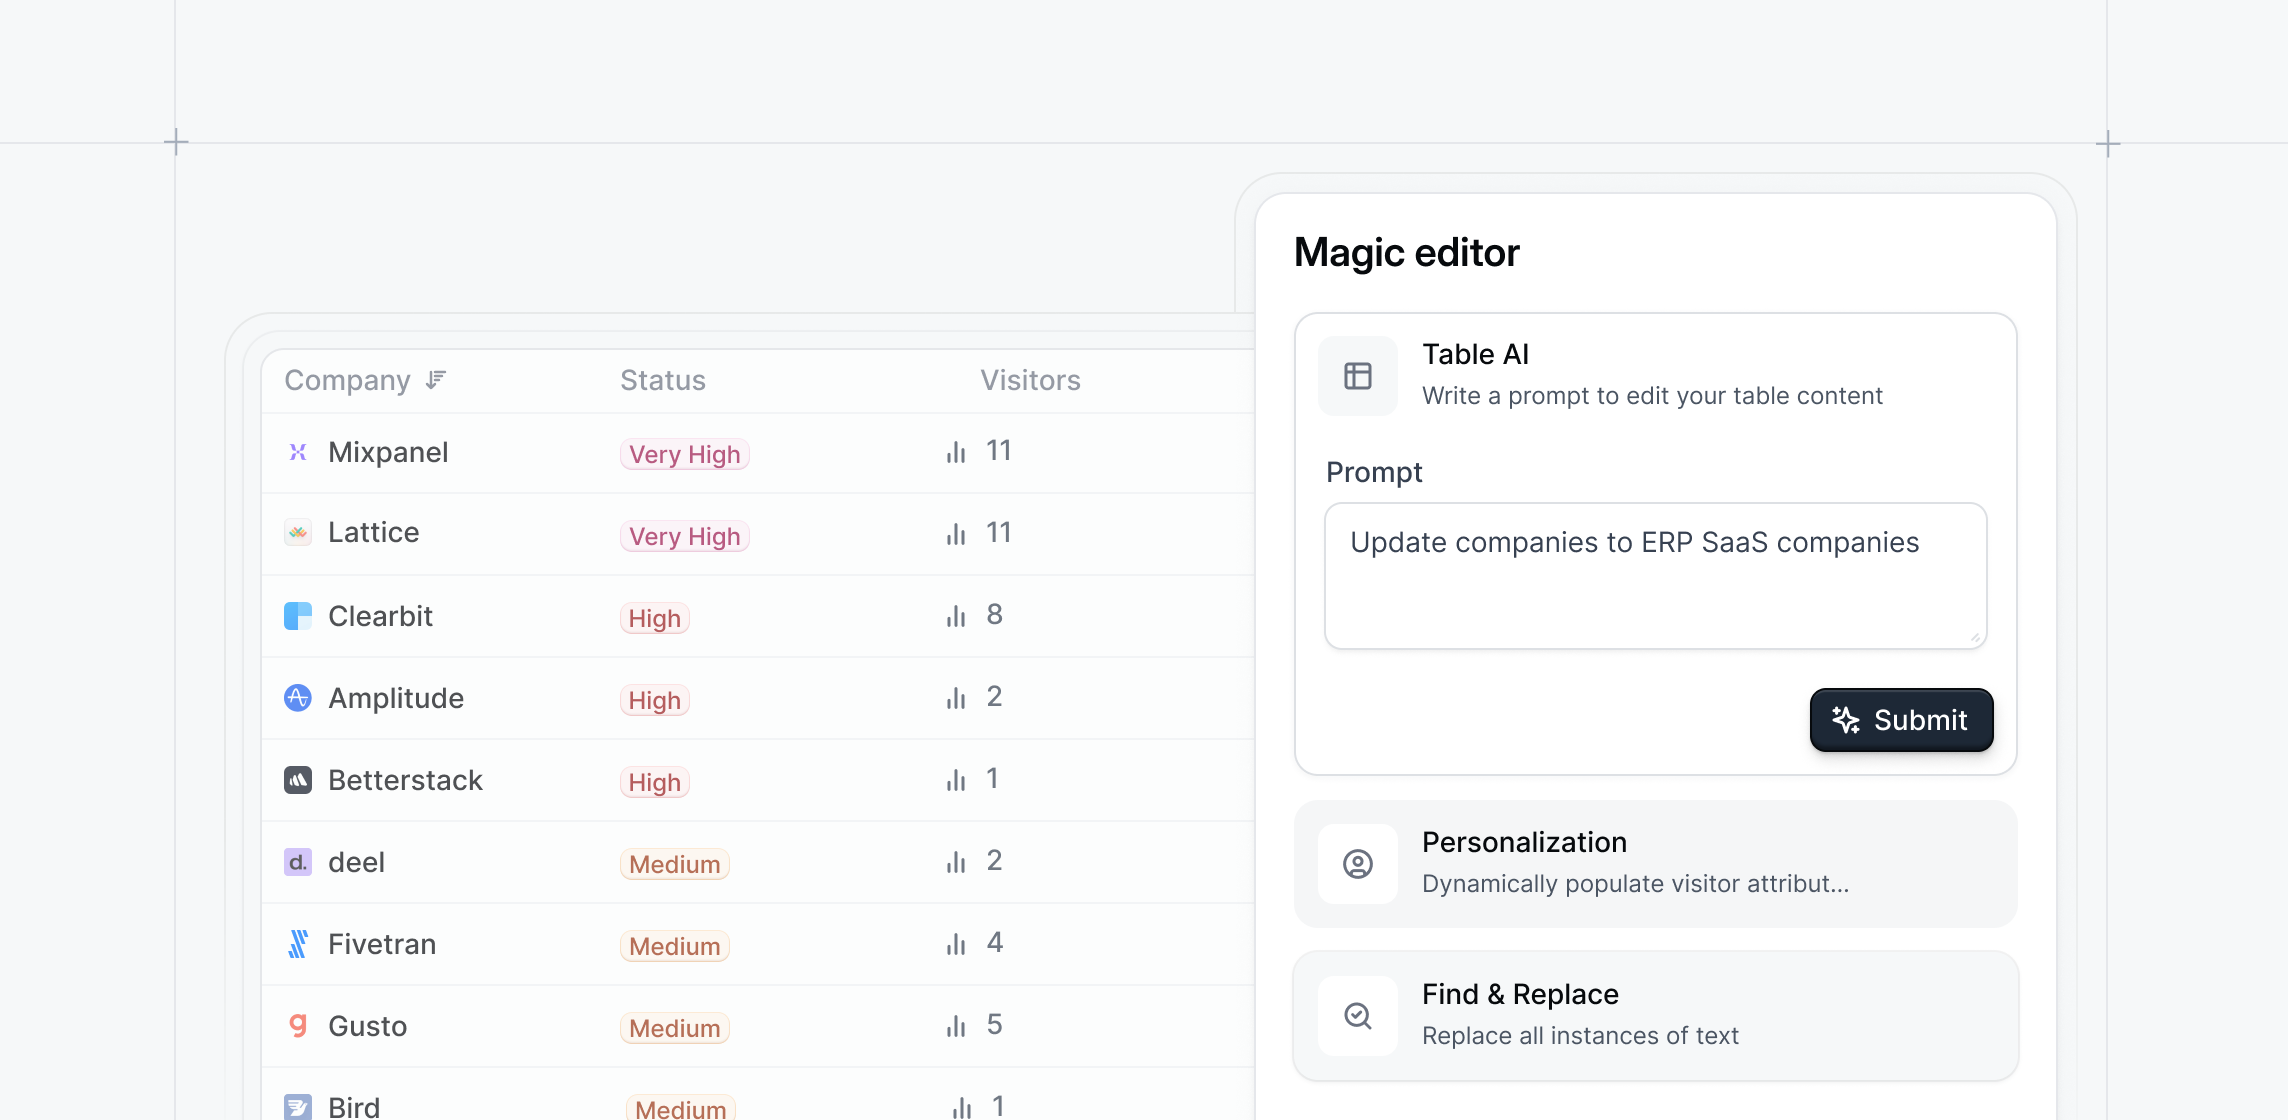
Preserve Anchors when Replacing Captures
Maintain anchor positions when replacing captures.Keep tooltips, beacons, and triggers precisely placed, simplifying demo updates when adding or replacing steps across your interactive demos.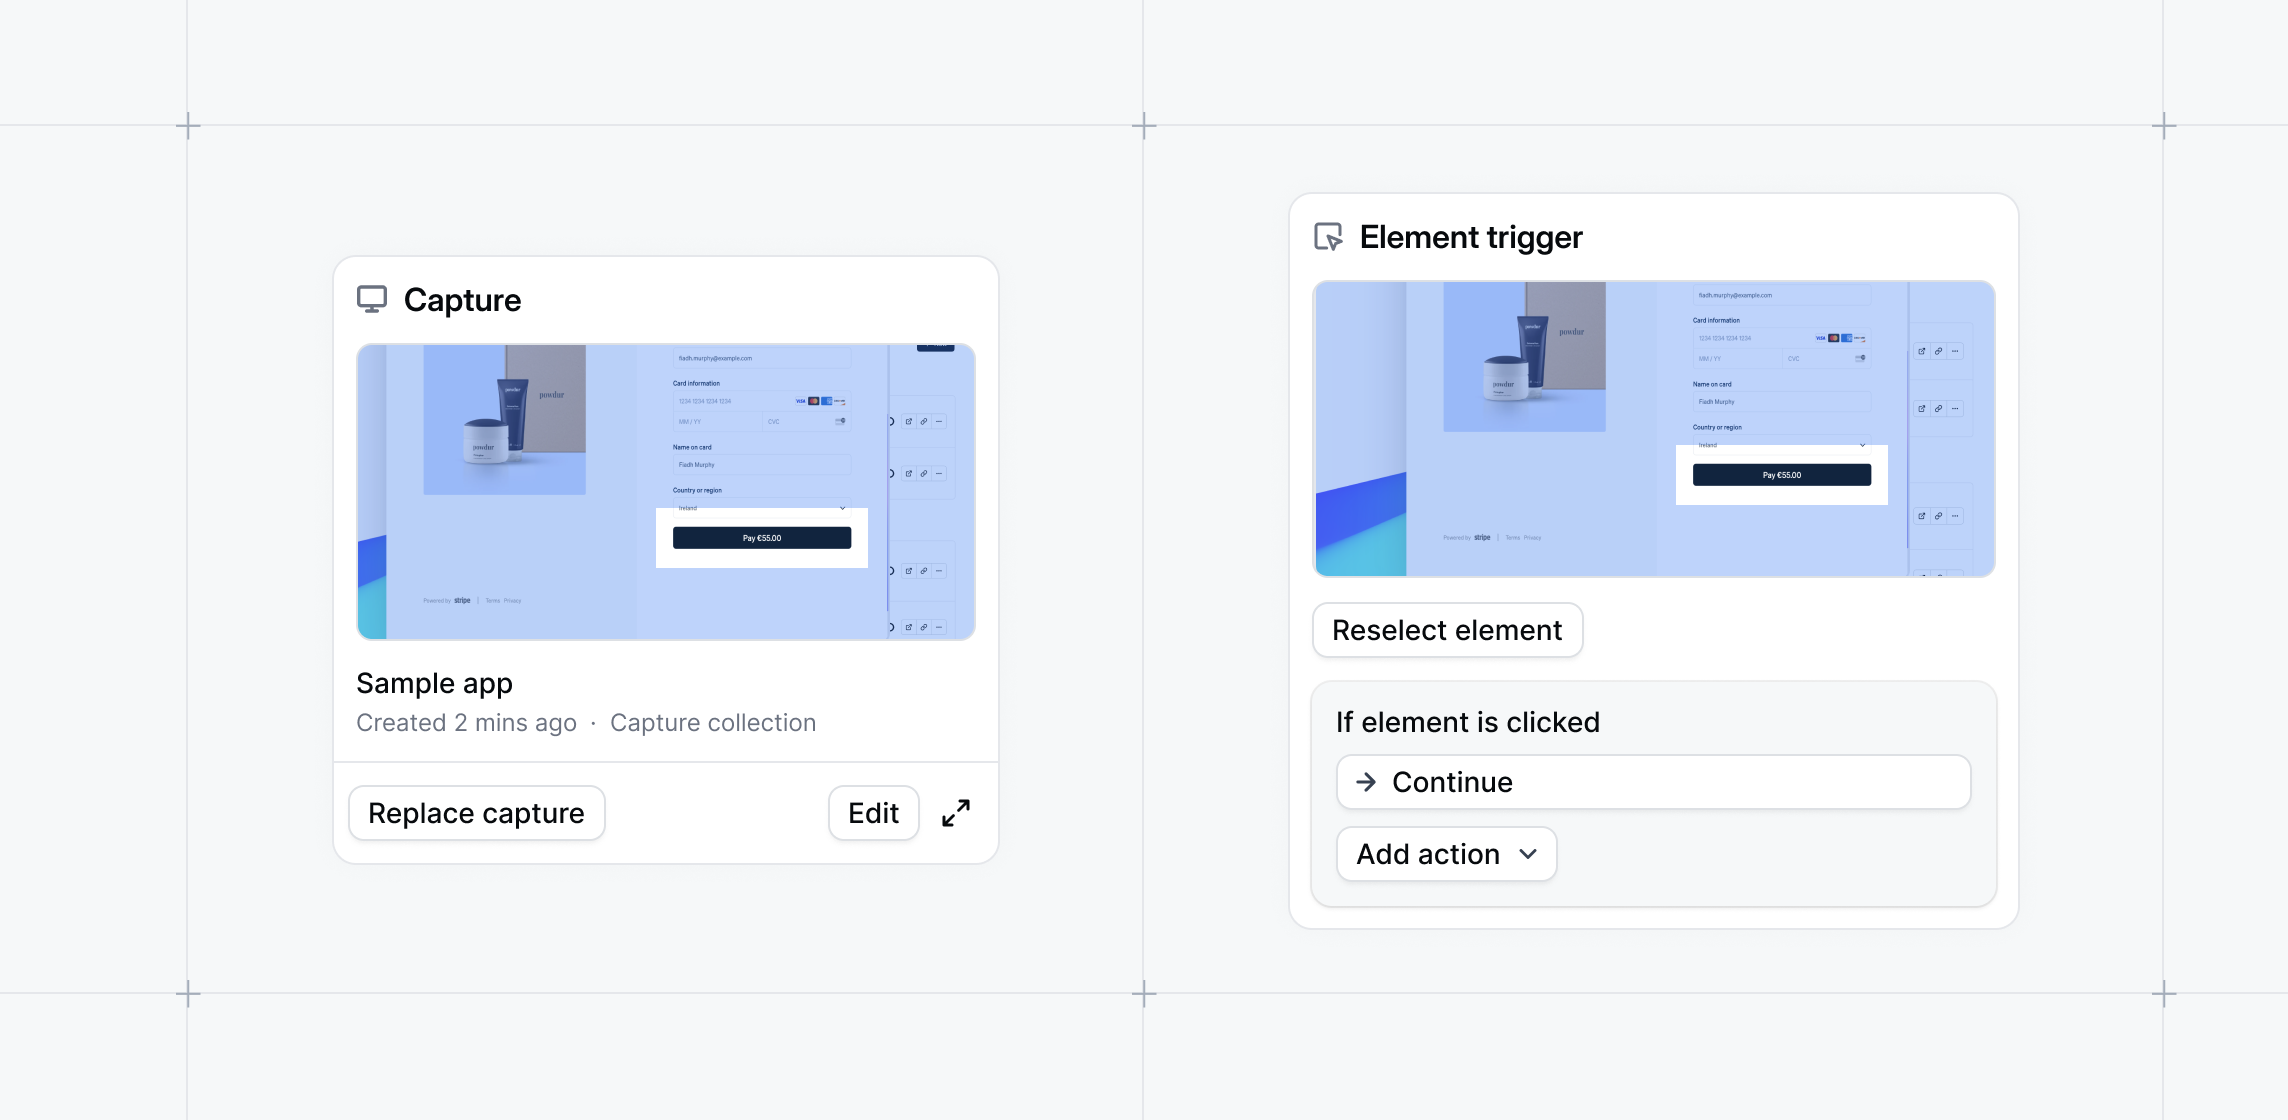
Collection Global Edits
Make edits once and automatically apply changes across all captures in a collection, quickly personalizing demos for different industries or personas.Whether updating text, images, or styling, keep demo styling and messaging consistent across all your captures.To apply bulk edits, open the Capture Editor > Make an edit to the Capture > Click Save > Select Apply edits to collection > Confirm.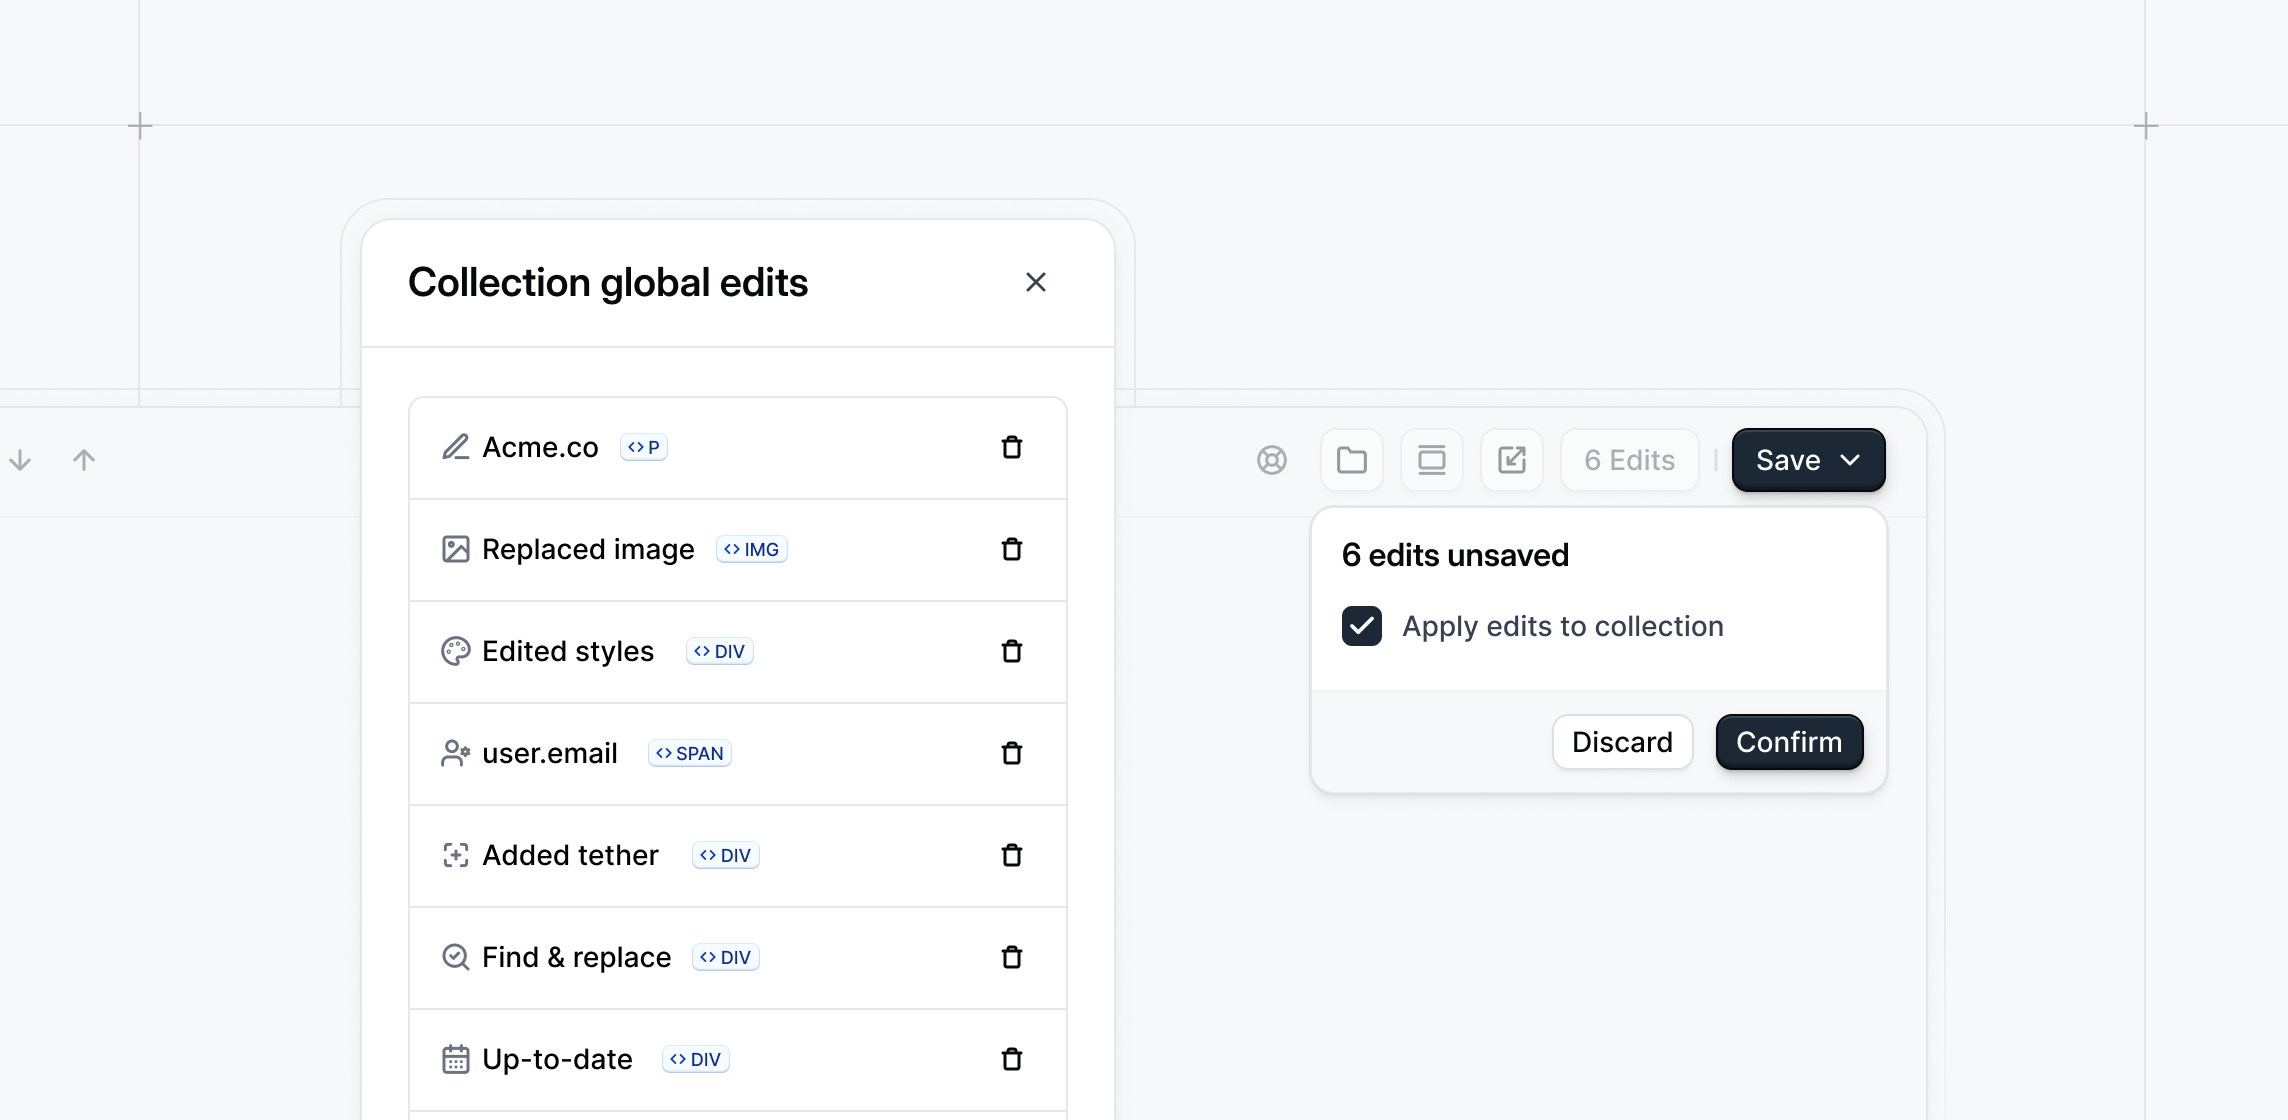
AI Writing Assistant
Create a first draft copy for your demo steps pulled directly from your captures.The AI Writing Assistant is trained on our interactive demo best practices to help you write an engaging and value-driven demo.To use the Writing Assistant, generate a Flow from a Capture Collection > Select Use Writing Assistant > Click Next > Enter a brief summary of what you’d like the demo to focus on > Generate Flow.Writing Assistant is an early-release feature. Contact success@navattic.com to enable this in your workspace.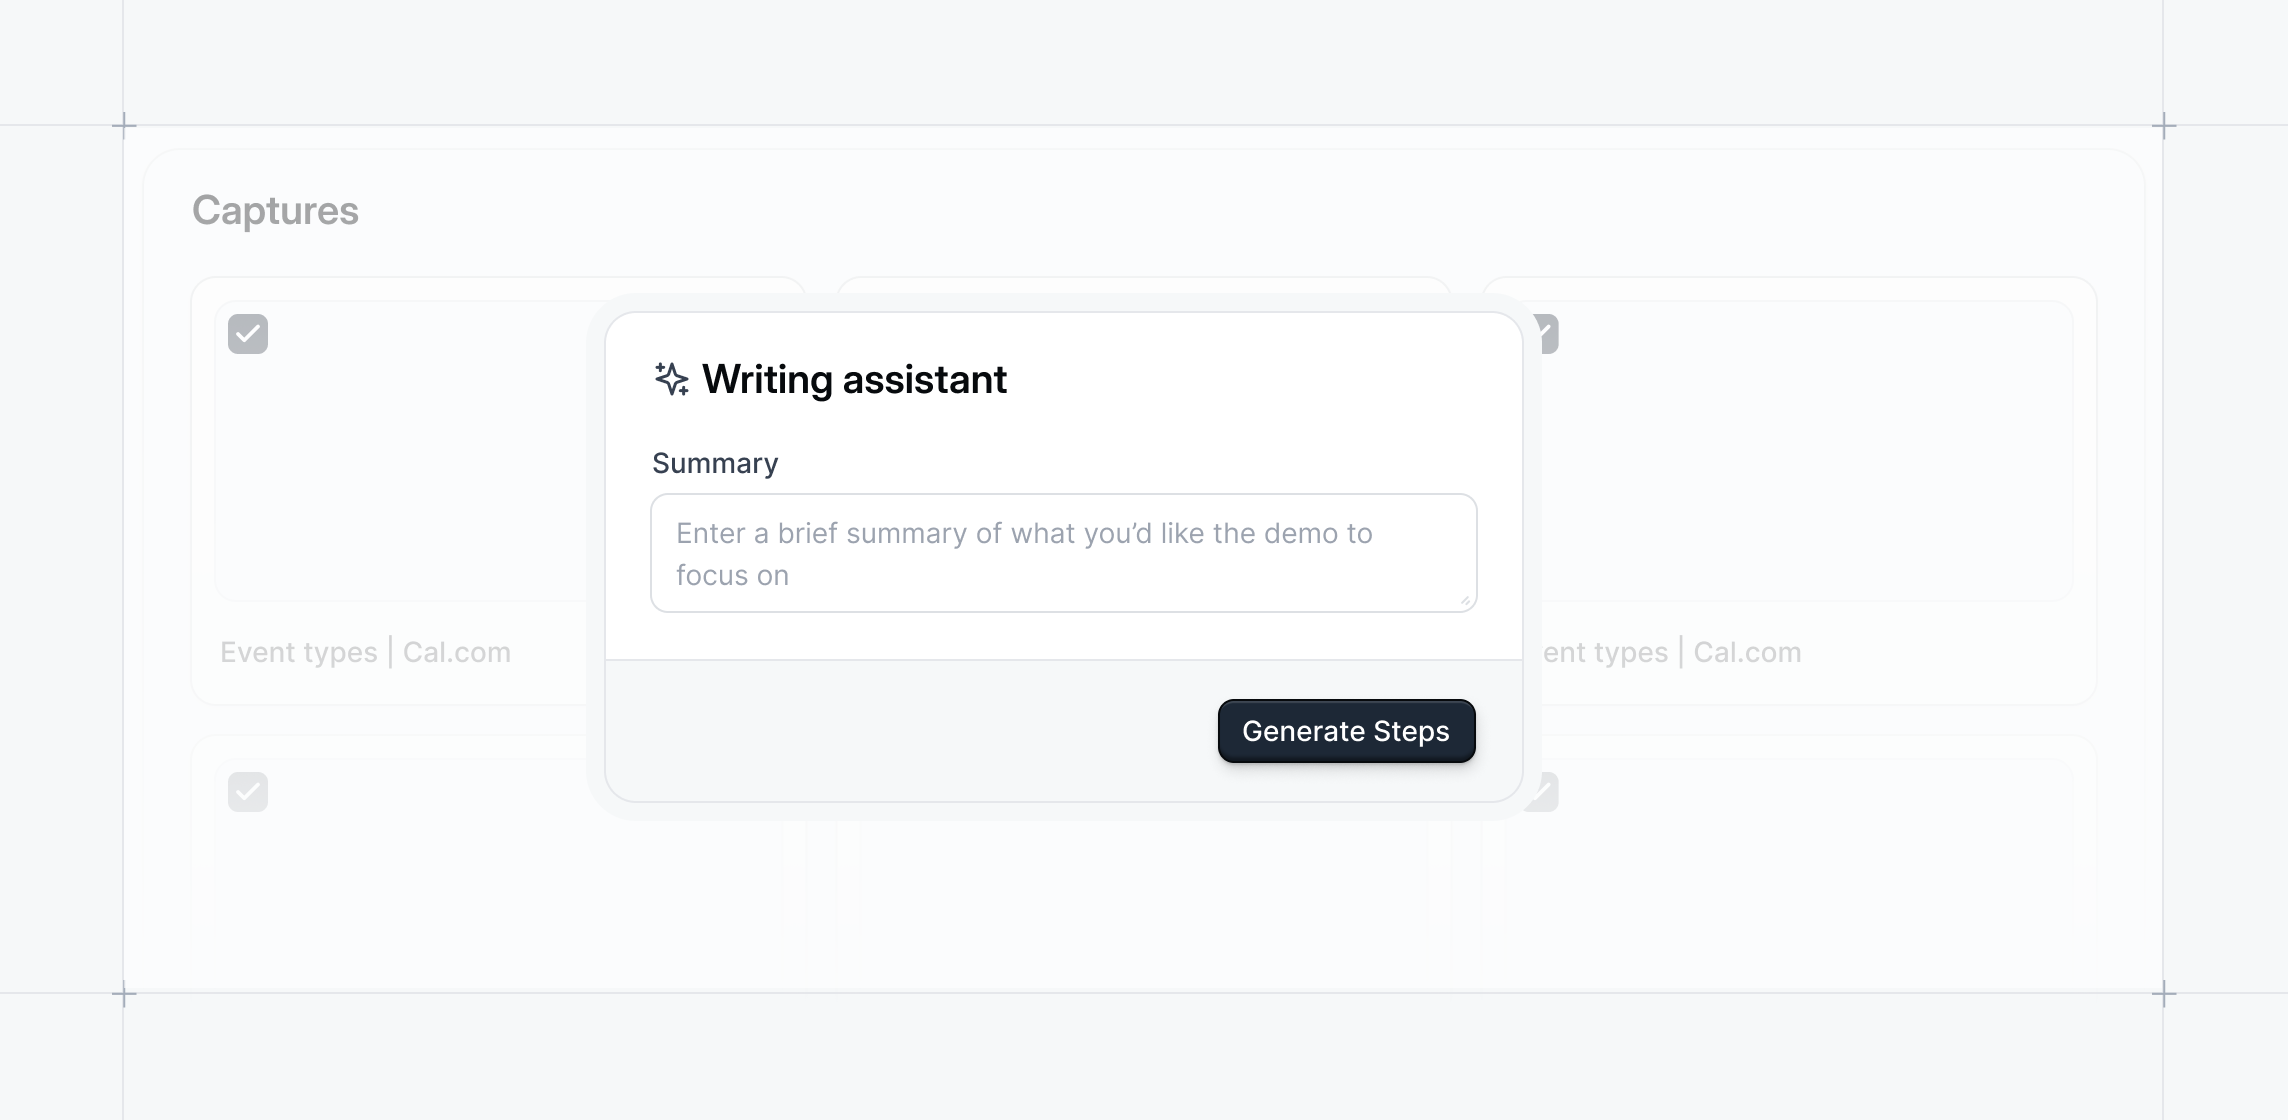
Click-and-Drag Flow Reordering
Get more flexibility with how you order flows within your demos.Rearrange demo flows by clicking and dragging steps directly on the Product Demo Flows page.Pair this with the Last step continue behavior in the Flow Settings to automatically continue to the next Flow.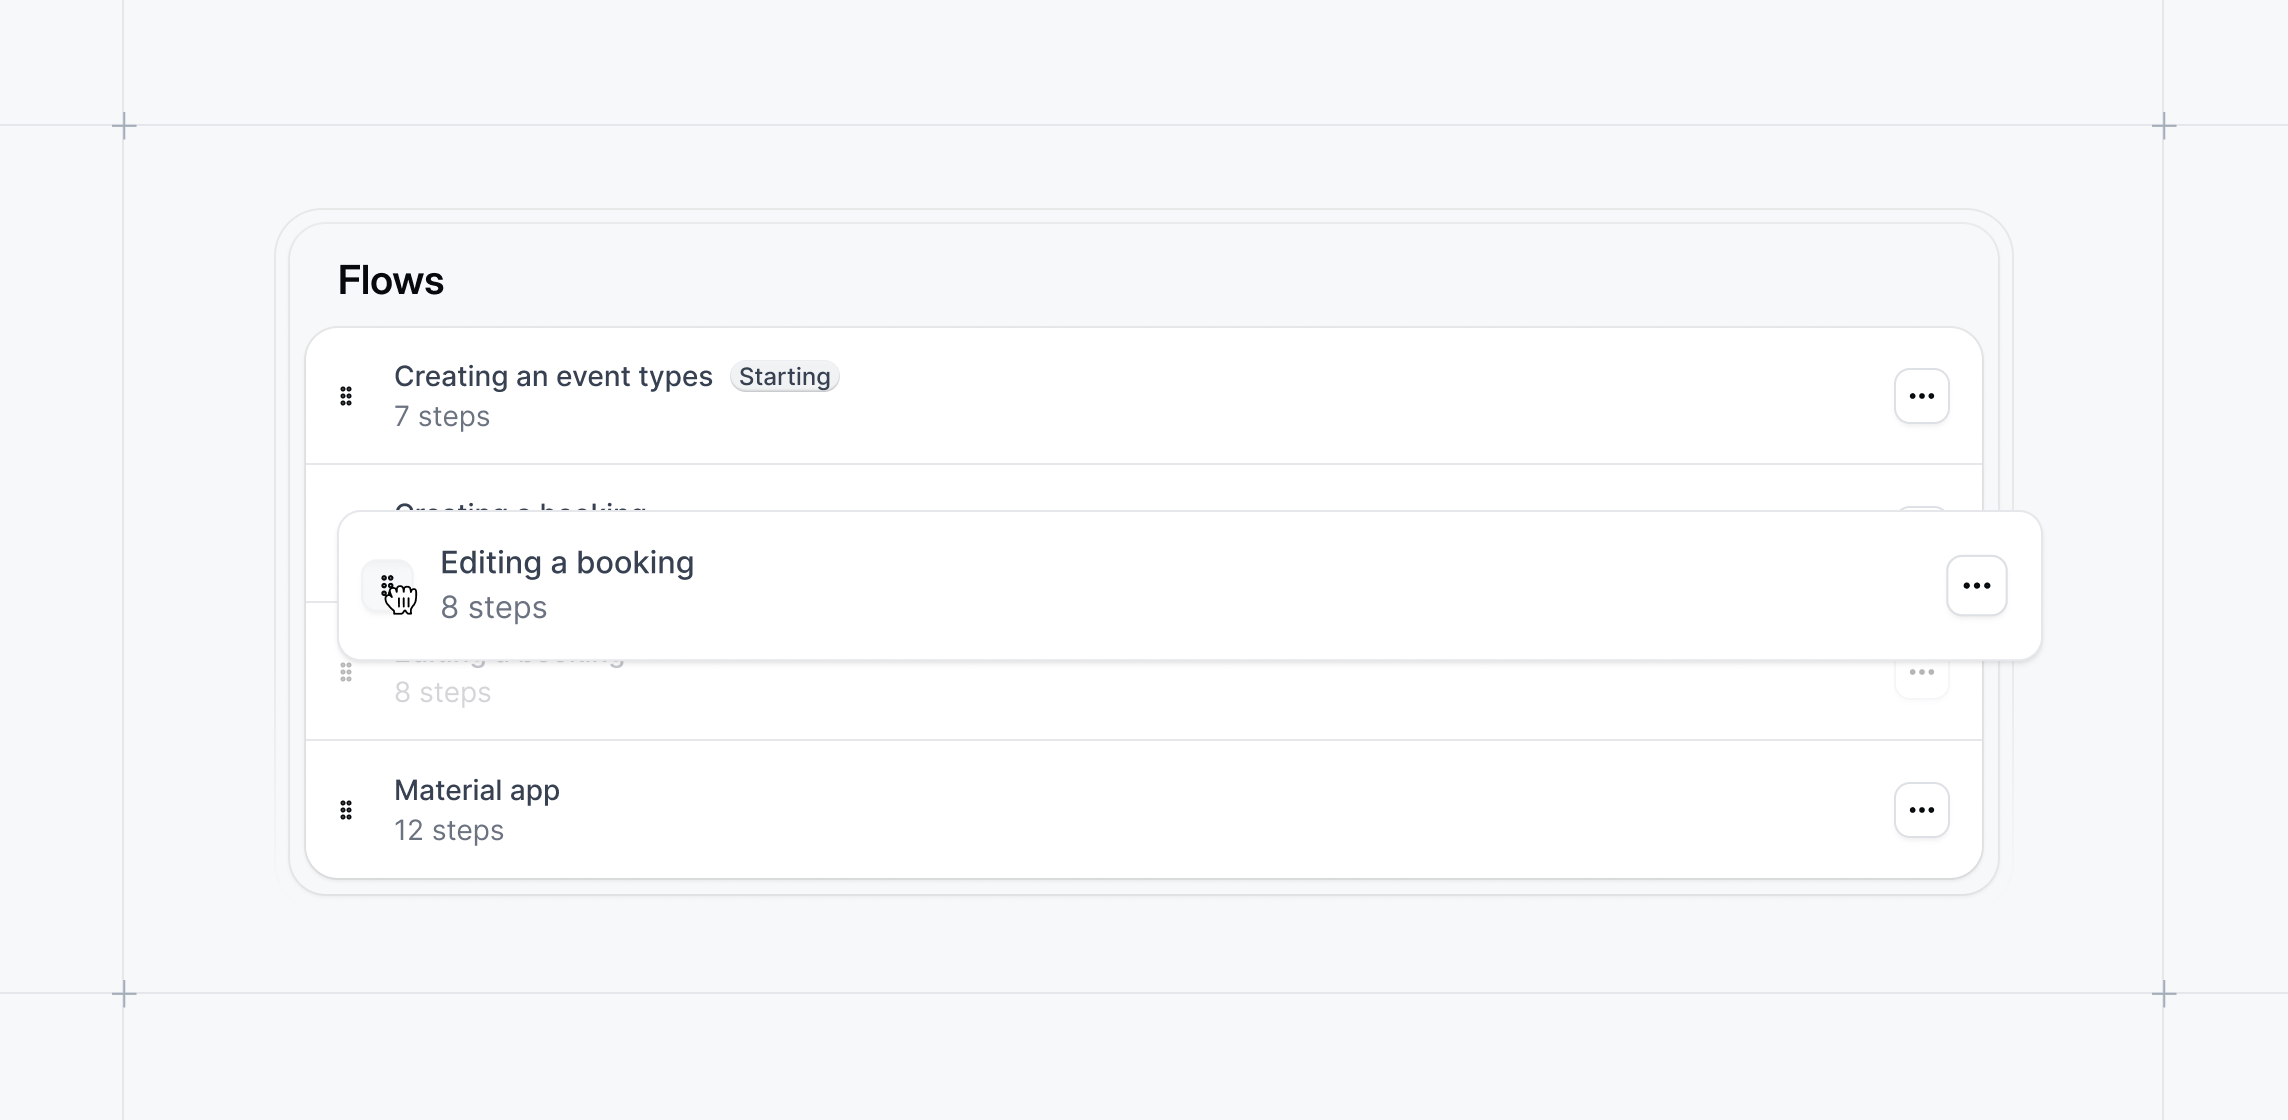
February 2025
Updated Navattic Extension
The updated Navattic extension streamlines the capture process, allowing you to see Capture snapshots, change step types, and edit step text in real-time.Sandbox Demos
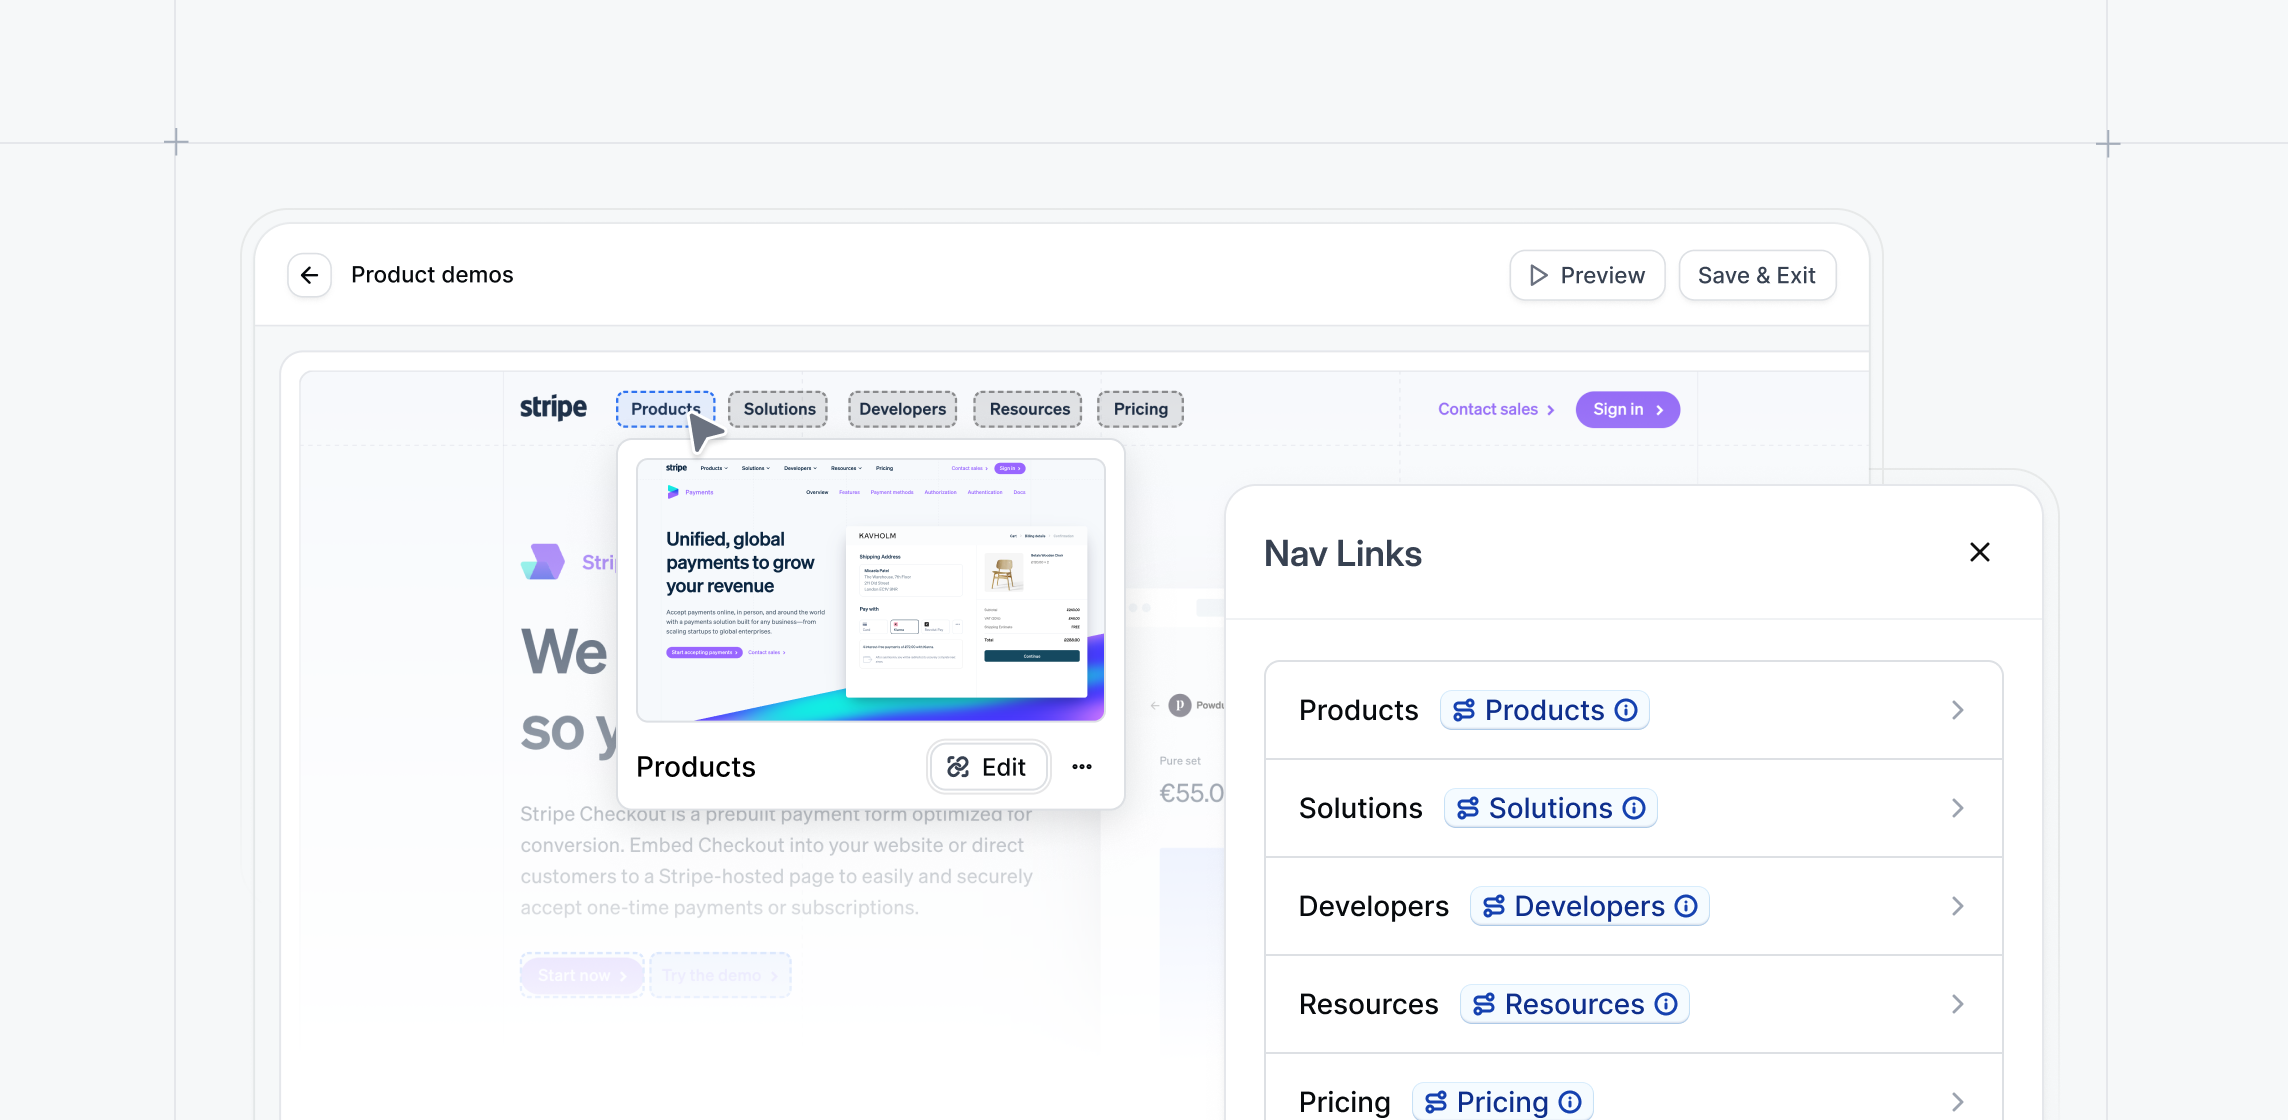
Nav Links allows you to apply the same Trigger or Beacon to identical elements across multiple steps, saving time and simplifying the process. Teams are using Nav Links to create lightweight sandbox environments for sales teams. Learn more about Sandbox Demos.Nav Links is an add-on feature. Contact success@navattic.com to enable this in your workspace.Navattic Academy
View our new Navattic Academy, a learning hub featuring introductory courses designed to turn you into a Navattic Power User. Each course takes 30-60 minutes and includes how-to videos, written guides, and (of course) interactive demos. You’ll learn the fundamentals of demo-building, best practices for various Navattic use cases, and how to integrate Navattic seamlessly with your tech stack.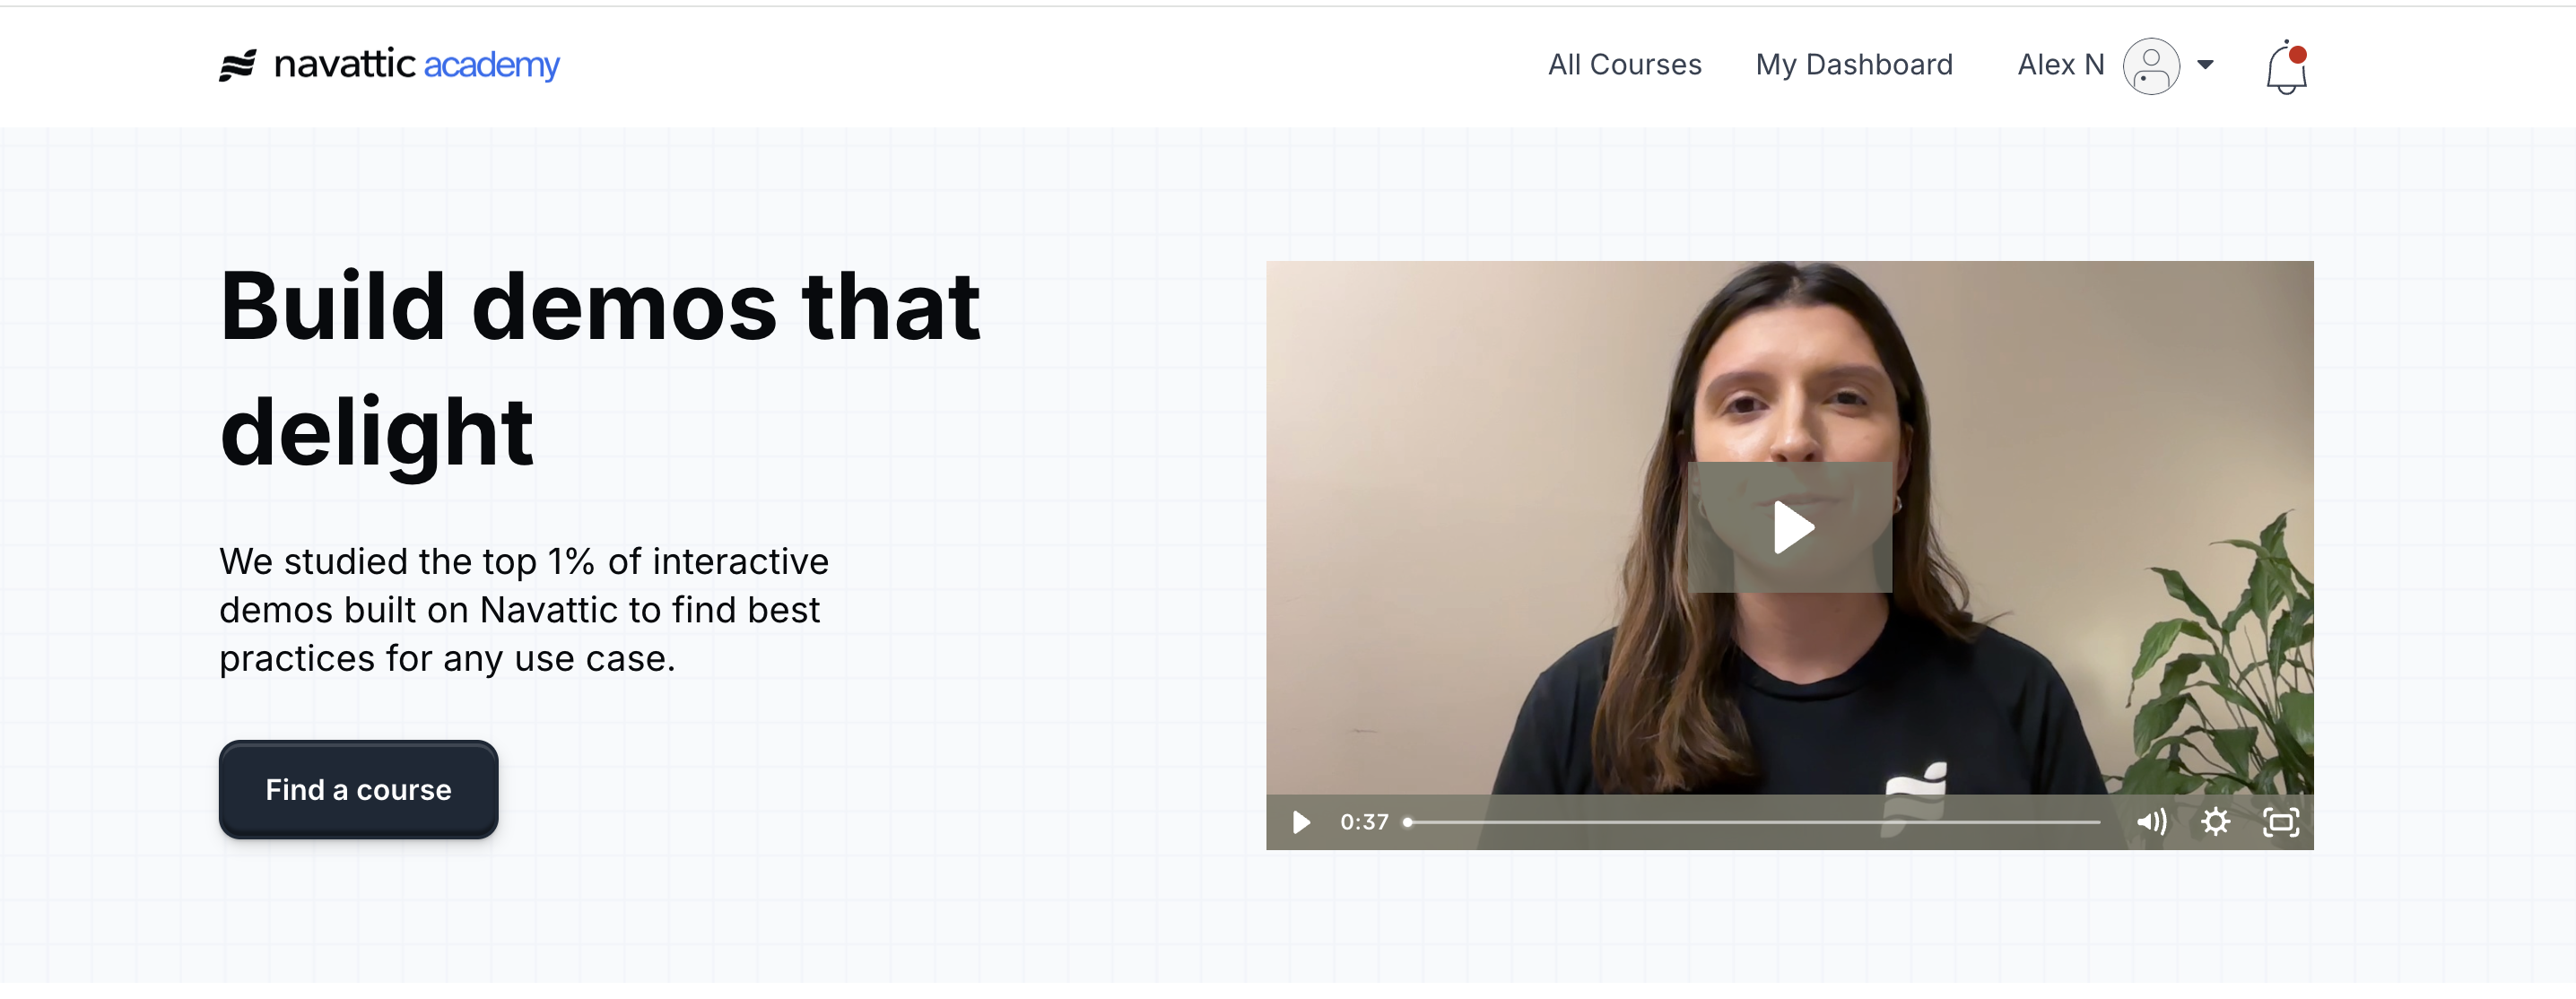
Skip Form Setting
Add an optional setting to bypass or pre-fill a Navattic Form if a demo Visitor has already been identified.Learn more about Form Settings.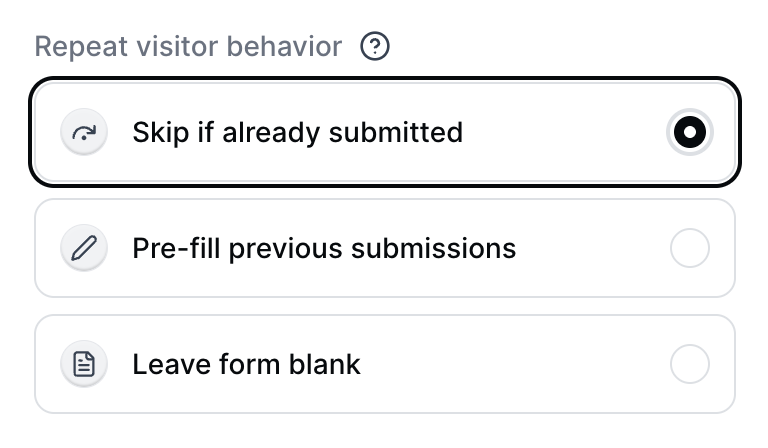
January 2025
Conditional Demos
Add Conditions to your demo to allow Visitors to build their own demo experiences based on what matters most to them. Select from one or more interest areas to create a bespoke demo path for every Visitor. Teams can quickly convert an existing interactive demo with multiple Flows into a branching Conditional Demo using the Conditional Demos generator.Sidebar Checklist
Using the sidebar layout, display your Checklist on the side of the demo to create a persistent guide for your Visitors. Also, keep your Visitors informed of other demo options or paths they can select from.Drive additional conversions directly from the Checklist with a CTA button in the Checklist footer.Learn more about Checklists.Generate Branded Theme
Automatically generate a branded Theme using your website domain that matches your brand guidelines to expedite the demo creation process.To create a branded theme, visit Themes > Generate branded theme > Add your website > Generate. You can also choose between a Light or Dark mode and set this as the default Theme.Hide Internal Visitor Activity
Use Hidden Accounts to exclude certain domains (including internal users) from Visitors, Accounts, and Analytics to declutter your workspace reporting.To set this up, visit Settings > Hidden Accounts > Add Domains to exclude.December 2024
Video Step Type
Create high-impact sales and marketing materials that resonate with your prospects by seamlessly combining video within interactive demos. With our new Video Step feature, you can easily incorporate videos into your demo experiences. Teams are leveraging this to showcase customer case studies, highlight key use cases, and present branded content.To add a video step, select Video from the Step type dropdown in the Flow Builder. Once you’ve added a Video step, you can click + Select video to either upload a video from your local storage or insert a link from YouTube, Vimeo, Loom, Wistia, or Vidyard.Demo Voiceover
Elevate your interactive demos by adding voiceovers to individual demo steps. Teams can now enhance their presentations with dynamic narration through various options, including reading from the individual steps, custom text-to-speech, or uploaded audio.To add a voiceover to specific steps in your demo, in the Flow Builder click Add element > Voiceover. From here, use the dropdown to select which option you want to use.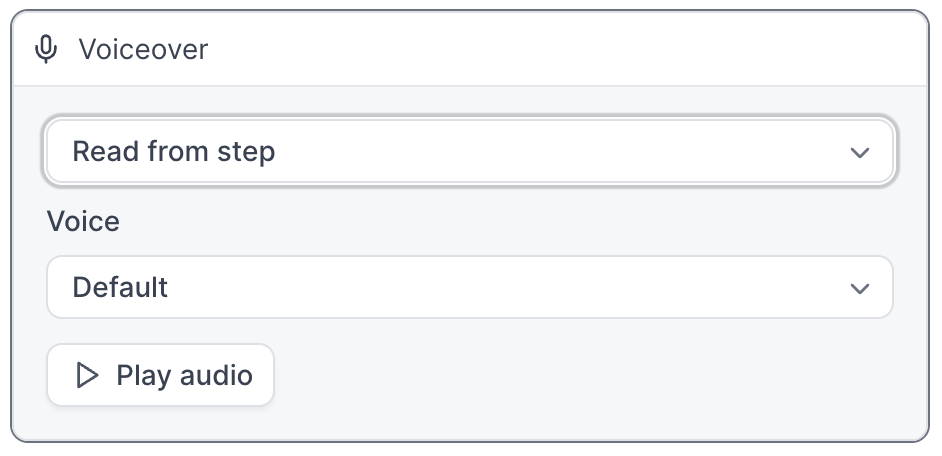
Add Guide Defaults in Workspace Settings
Set workspace defaults for Step type, Backdrop, Navigation Buttons, and Escape View to build a consistent starting point for your team to build off of.To set guide defaults, visit your Workspace > Settings > General > Flow Defaults.November 2024
Presenter Mode
Activate Presenter Mode to easily control the visibility of modals and tooltips when presenting an interactive demo. When enabled, dialog boxes can be hidden or shown by the presenter using the keyboard shortcut Ctrl + P.To enable Presenter Mode, go to Flow Settings and toggle on Presenter Mode.Keyboard Navigation
Keyboard navigation allows you to seamlessly progress through your interactive demo. When combined with Presenter Mode, it gives teams enhanced flexibility for live product demonstrations, providing presenters with greater control over the entire experience.To enable Keyboard Navigation, go to Flow Settings and toggle on Keyboard Navigation.Navattic JS
Navattic JS is a JavaScript widget that can be installed on your web properties to help identify visitors and integrate with event-based analytics platforms.Navattic JS will allow you to quickly set up tracking for:- Automatic third-party form submissions
- Domain-level Visitor tracking
- CRM Cookie Tracking
- Track Query Parameters
Video Capture Advanced Options
With Video Captures, you now have the ability to customize your video settings, including options to enable or disable autoplay, show playback controls, loop the video automatically, and toggle audio on or off.To access these settings, add your Video Capture to a Flow and click Advanced.October 2024
Form builder
The Navattic form builder allows teams to create custom lead capture forms with new field types and validation rules. Capture information like emails, names, titles, roles, etc. using new field types such as radio buttons, text input areas, and drop-down fields.Forms can now be re-used across Product Demos to standardize the lead capture process.Contact success@navattic.com if you don’t have access to the New Form Builder yet and would like to try it out.Export Demo as a Video or GIF
Export a preview of your Product Demo as a media file (video or GIF) to add to social channels and emails to drive engagement for a wider audience.To export your demo, click the three dots next to the Share button > Export Preview > Select Video or GIF and set the time per step > Click Export.
Launchpad
Launchpad is a view only portal to your Navattic interactive demos. Organizations are using Launchpad to give sellers, partners, and customer success teams easy access to a defined set of interactive demos.From Launchpad, teams can easily create targeted share links for specific Visitors and Accounts to track demo engagement. These insights can be used to monitor interest and create targeted followups throughout the buyer journey.Launchpad is an add-on feature. Contact success@navattic.com to enable this in your workspace.
September 2024
Playbooks
Playbooks are a combination of integration operations that are executed conditionally based on preconfigured Audiences. With Playbooks, you can now filter the Navattic Visitor and Account data that is sent to integrations by configuring different Audiences. For example, do you only want to send data for Repeat Visitors, Visitors who engage with specific demos, or Visitors from a specific industry?Learn more about Playbooks.
Audiences
Now you can create Audiences which are filtered views of Visitors and Accounts that view your demos. These include filters for Time spent, Total sessions to detect repeat Visitors, Total steps, and more. With Playbooks, you can decide which Visitors and Accounts to send to your CRM.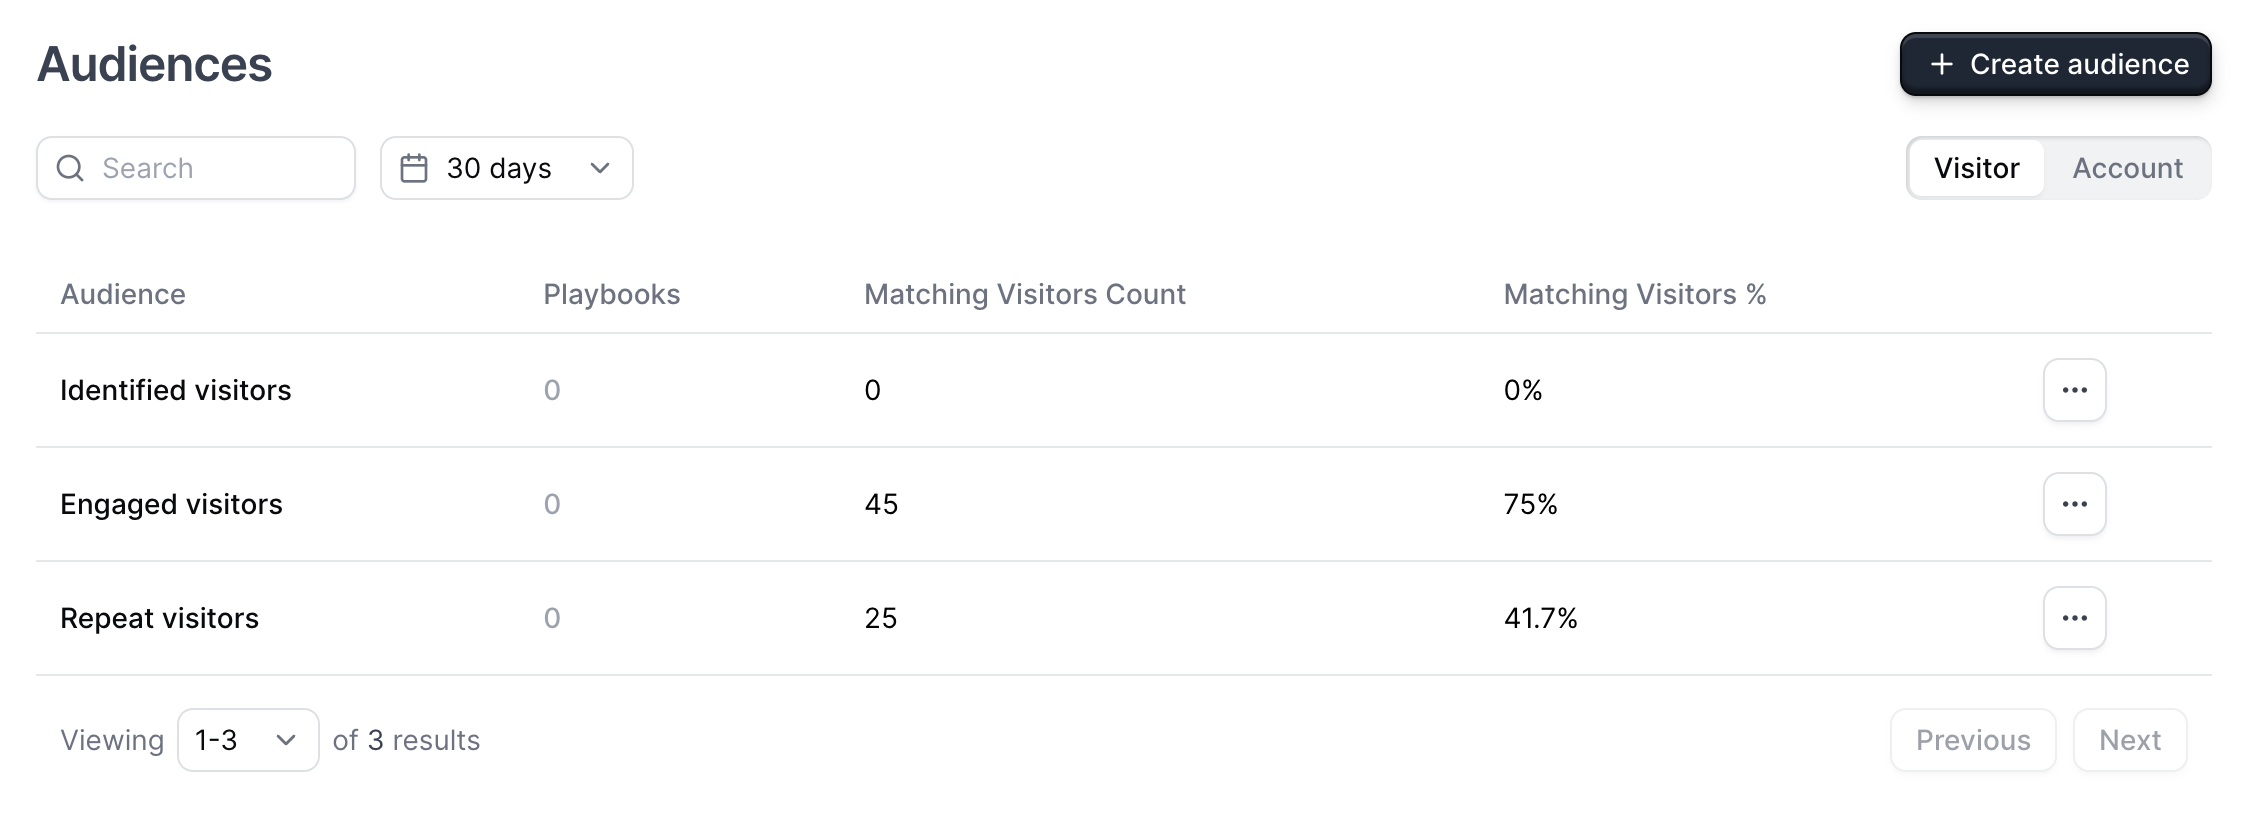
Advanced Filters
Advanced filters allow you to sort your Visitor and Account data using granular filters such as which share link they viewed, what city they are from, what year the company was founded and more. Pair Advanced Filters with Audiences and Playbooks to set up contact routing that matches your ICP.Advanced Filters are included in Navattic Growth and Enterprise plans. Contact success@navattic.com to enable this in your workspace.Share Link Email Notifications
Toggle on Email notifications when creating a link to receive an email when a Visitor visits the share link or set up notifications for all demos under Integrations.Visit Playbooks to learn how to setup routing rules to email specific sales reps when Accounts matching their ICP view your demos.August 2024
Build a Mobile Swipe Demo from a Flow
Quickly create a Mobile Swipe Demo using the content from an existing flow in your demo.To create a Mobile Swipe Demo from a flow, visit your demo > Mobile > Mobile swip demo > + Copy from flow. From here, select the steps you would like to include in the Mobile Swipe Demo and click Create.In-App Collaboration
Now you can add comments directly in Navattic and tag other team members to collaborate seamlessly on the demo creation process. To add a comment, simply click on the conversation bubble above a step. If there is an unresolved comment, the conversation bubble will display a small orange dot.Collaboration is included in Navattic Growth and Enterprise plans. Contact success@navattic.com to enable this in your workspace.Auto Identify Visitors from Embedded Forms
Navattic now automatically tracks submissions from embedded Hubspot and Marketo forms. These submissions can be found in Visitors. Learn how to add an embedded third-party form directly in Navattic.July 2024
New Product Demo Page Layout
We enhanced the product demo creation process by simplifying the page layout, making it easy to understand the necessary steps for building your demo.Add Annotations to Steps while Capturing
Speed up your demo building process by adding annotations and step settings as you take captures from the Navattic Chrome extension. We recommend using this with the On Click feature, which automatically anchors tooltips to selected elements, drastically speeding up the demo creation process.Enhanced Accessibility Upgrades
Add custom ARIA (used for accessibility and screen readers) descriptions for tooltips, beacons, and trigger elements. We also added additional accessibility settings from Themes to update focus selector color and width.
Add Tracking params to URL actions
We added optional tracking parameters to automatically add a UTM Source parameter to buttons using the “Navigate to URL” action.June 2024
Mobile on Mobile
Toggling on Fullscreen in the Mobile Swipe Editor allows images that are taller than they are wide to fill the entire screen. This feature now enables you to seamlessly create Mobile-on-Mobile demo experiences.Additionally, you can now enable Auto Progress for your Mobile Swipe Demo, which will automatically guide visitors through the demo. To turn on Auto Progess select Advanced Options > toggle on Auto Progress.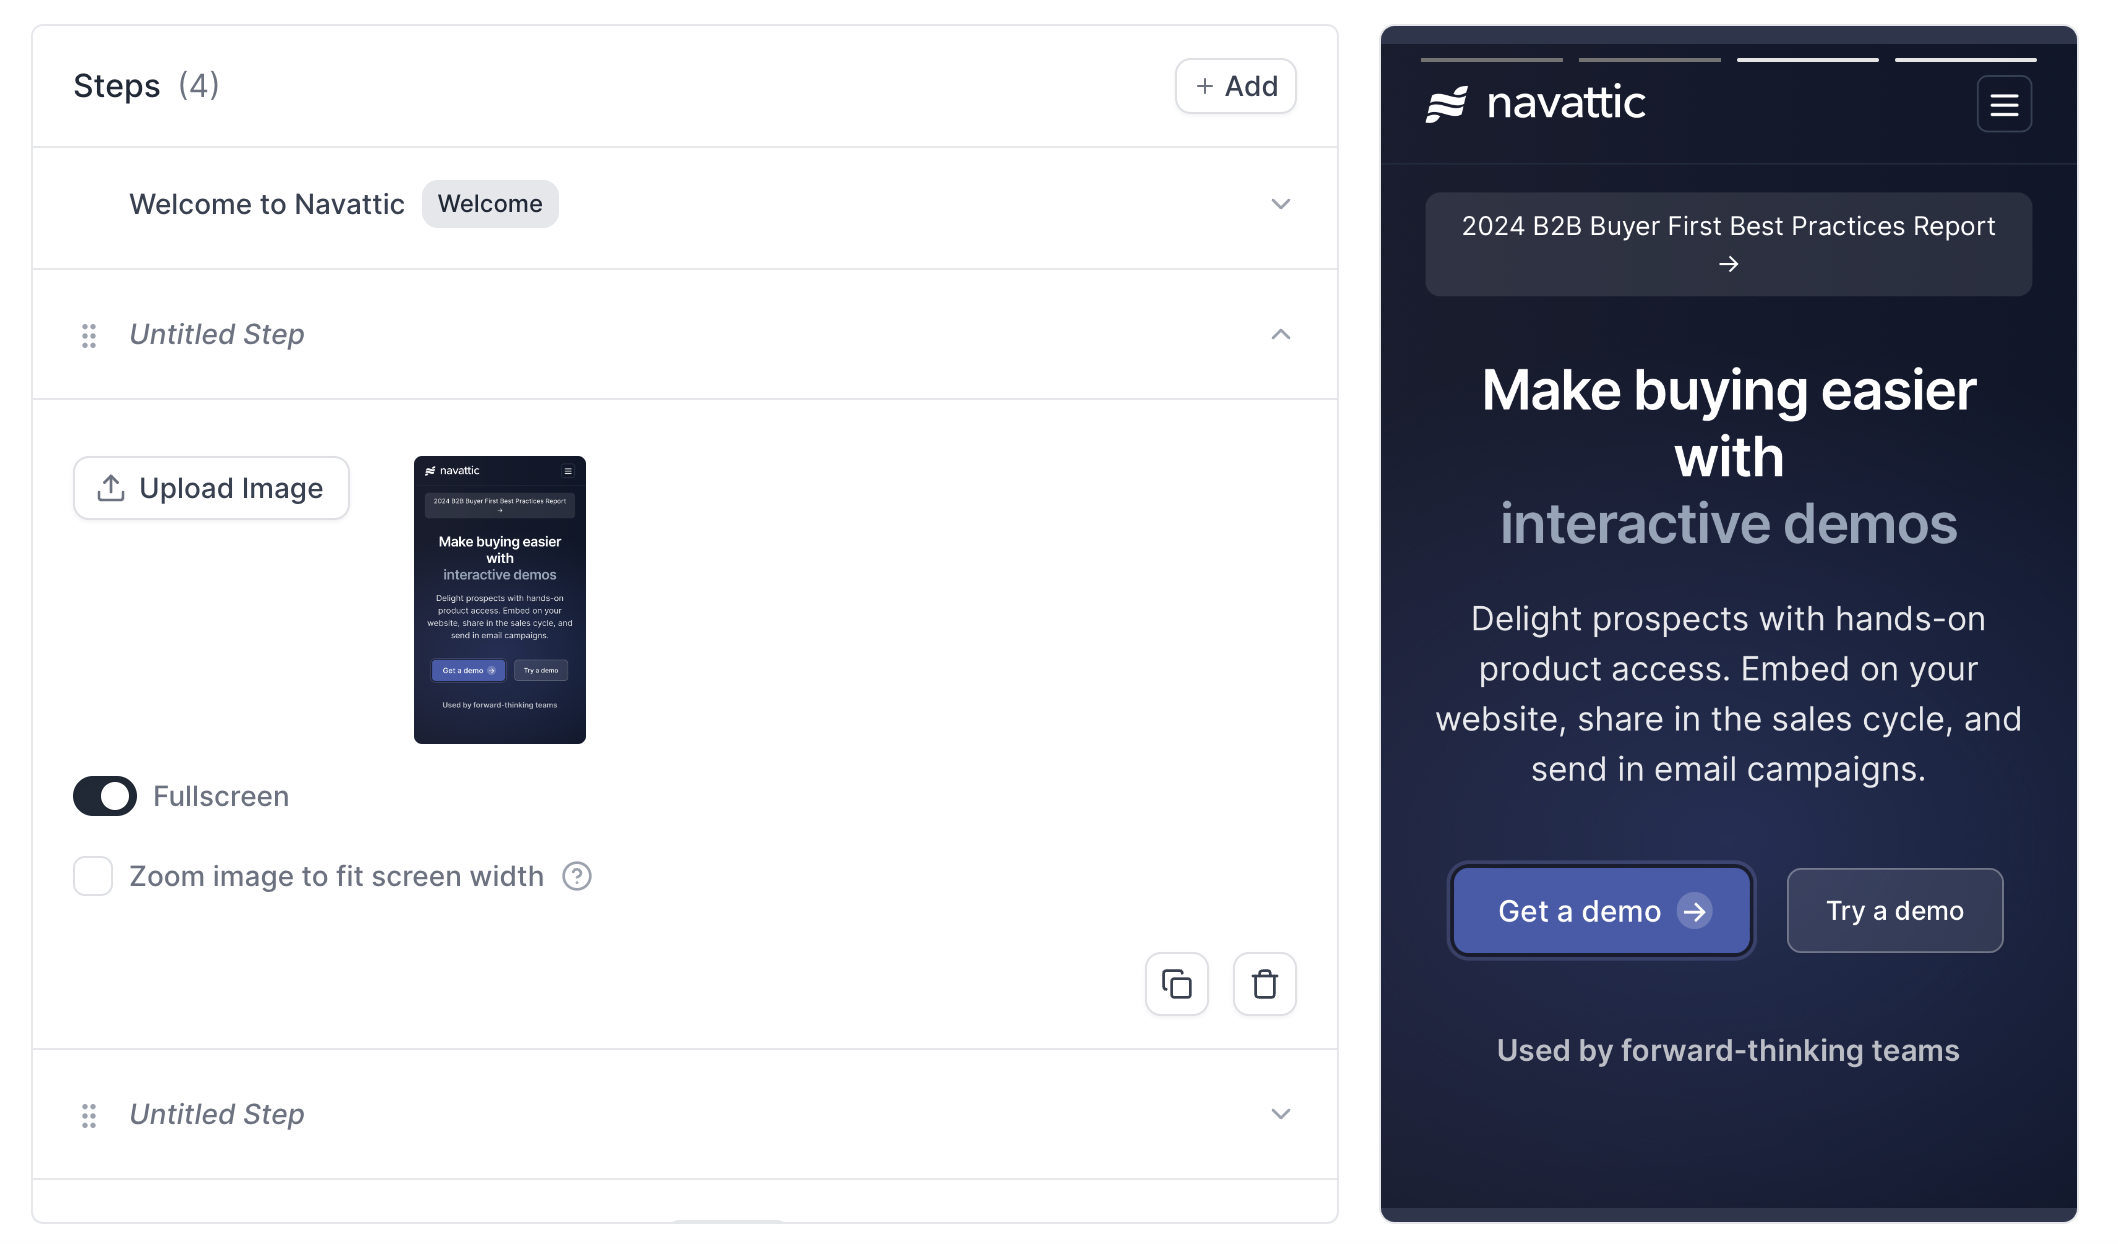
Pop up Embed Option
You can now embed your demo as a lightbox pop-up directly from Navattic. To embed a pop-up, visit your demo > Embed > Pop up > Get embed code.Highest Performing Demos
You can now identify your highest performing demos in Analytics. Simply visit Analytics and select “Compare: Highest Performing Demos” from the dropdown menu to view your top five demos for each section.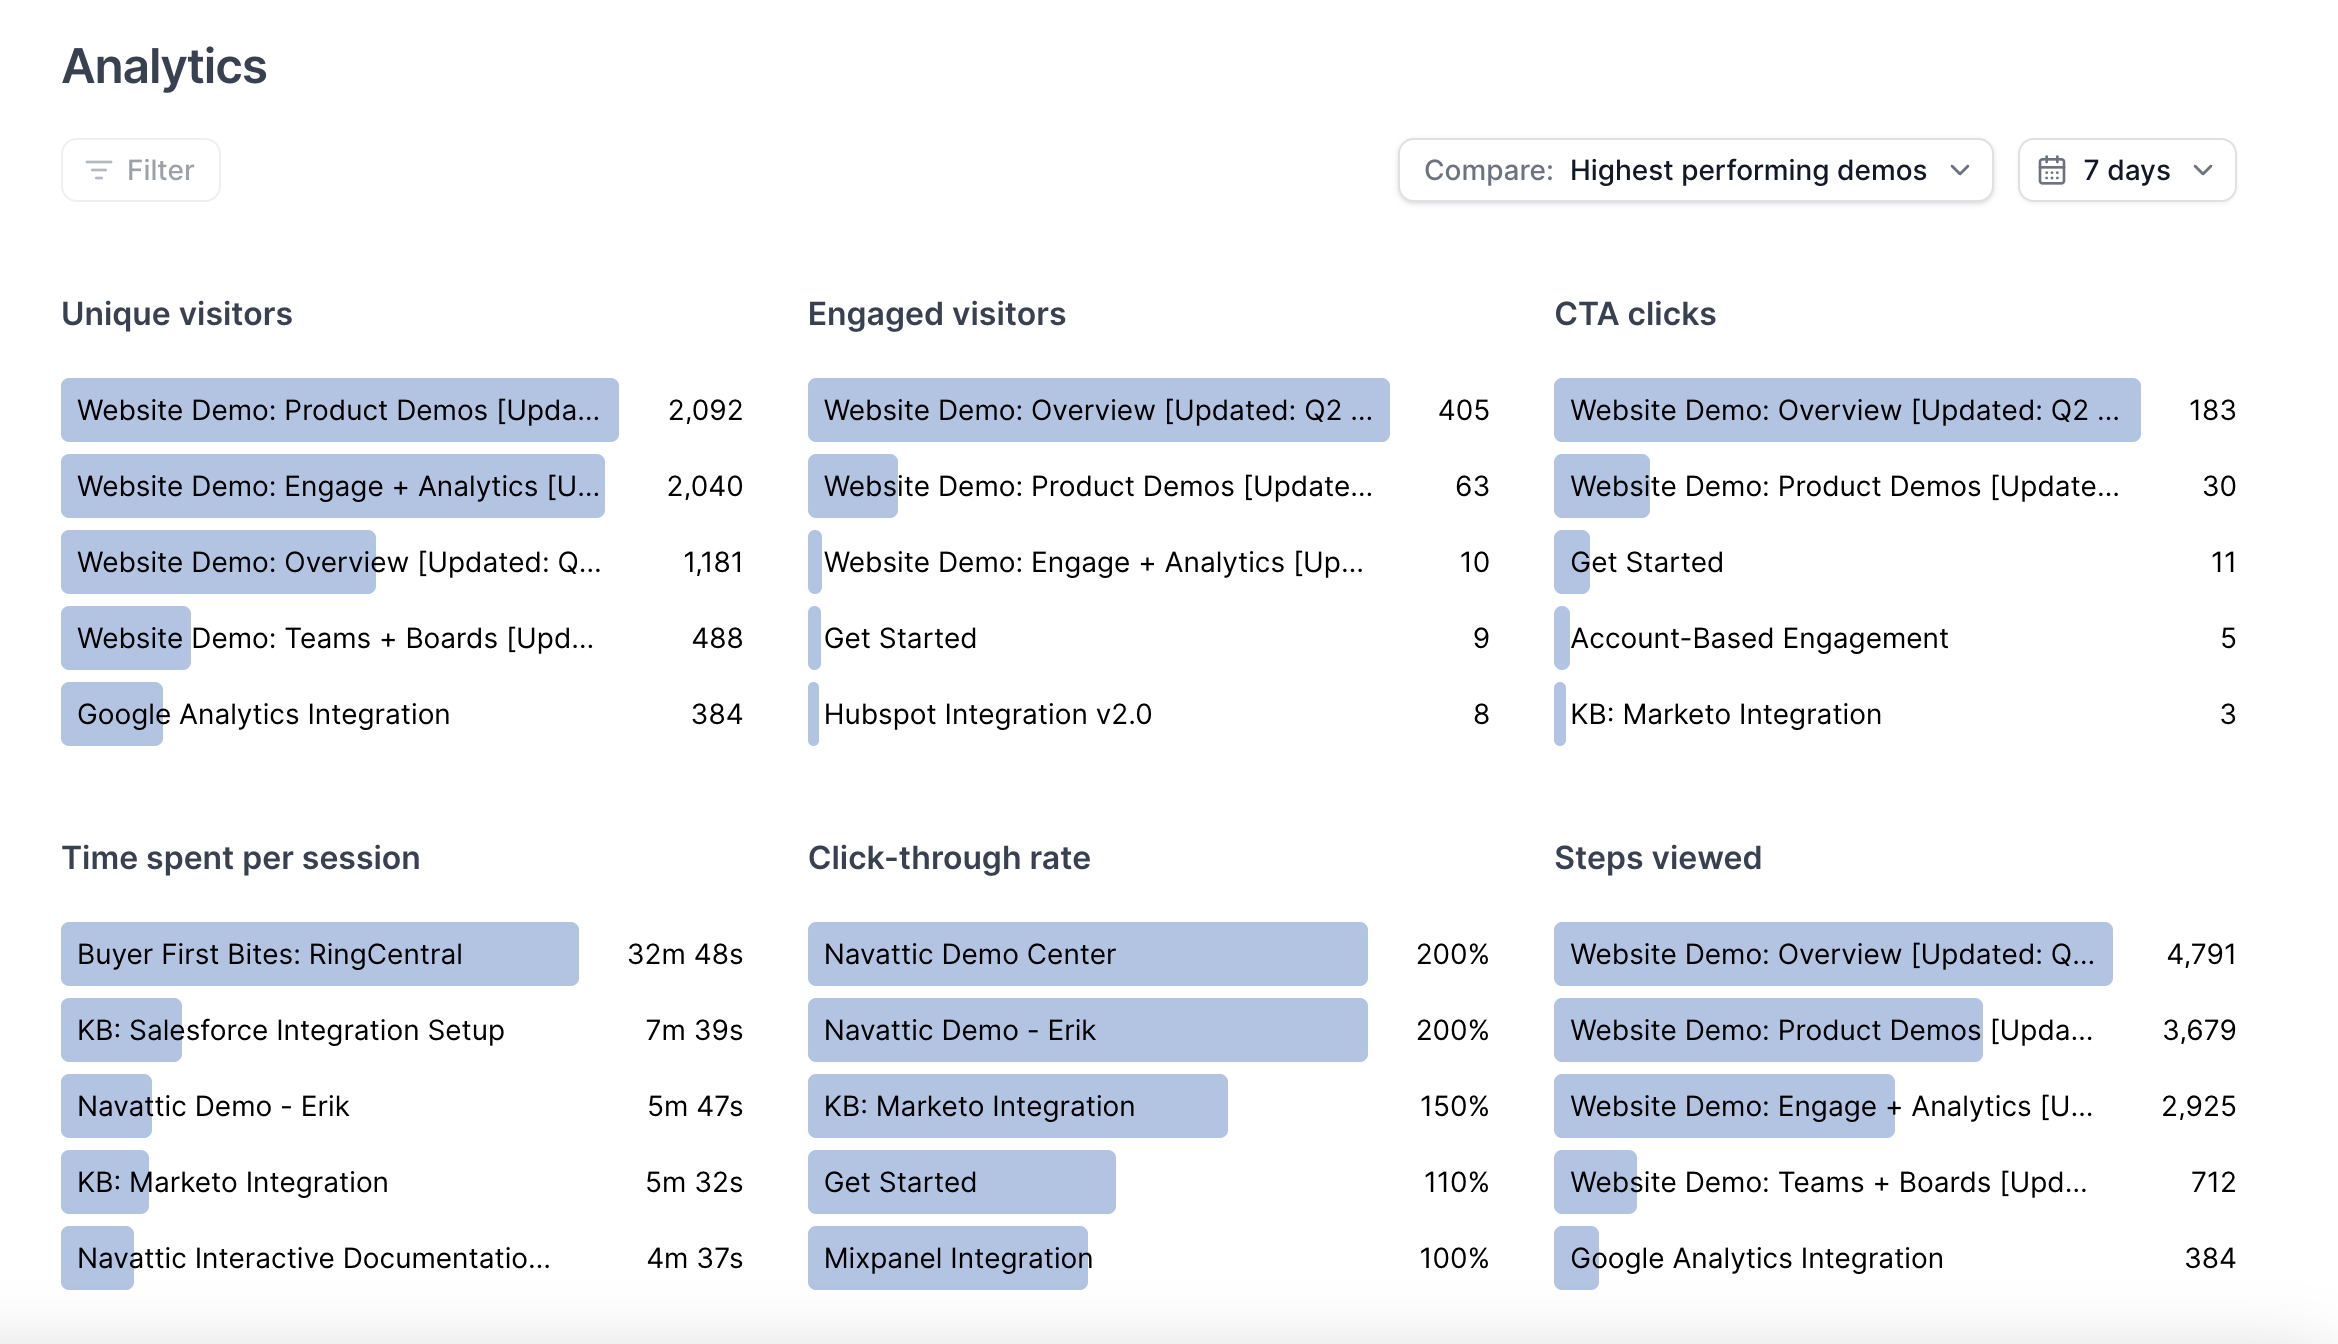
Offline Demos
The Offline feature lets you download demos into your local Navattic app, accessible on Windows/Linux, macOS, and iPad without an internet connection. This enables easy access to your demos at conferences, trade shows, on-site customer visits, and more.Offline Demos is an add-on feature. Reach out to success@navattic.com to learn more.May 2024
Mobile Swipe demos
The Mobile swipe demo is used to engage your mobile visitors with a short and visual experience they can swipe through. To create a mobile swipe experience visit your demo > Build > Mobile > Mobile swipe demo > Navigate to swipe editor.Check out this demo to learn more about Navattic’s mobile options, including how to build a mobile swipe experience.
Demo Suggestions
With more than 20,000 interactive demos built on our platform - we looked at the top 1% to understand what top-performing interactive demos had in common. Leveraging this research, our automated demo suggestions provide insights, allowing you to integrate best practices into your demo creation process.Set a Product Demo Theme
We recommend applying a single theme across your demo to maintain consistency.
Marketo Form Embed Step
You can now embed a Marketo form directly into your demo. To add a Marketo form select Embed as the step type > Marketo Form.April 2024
Pardot Integration
The Pardot integration is used to send real-time activity from visitors. Use this engagement data to create Pardot dashboards and automations.To set up your Pardot Integration, visit Integrations > Pardot > Connect. Visit this demo to learn more about setting up the Pardot Integration.Capture from the Chrome Extension
Streamline your capture workflow to create new Product Demos or update existing capture collections directly from the Navattic Chrome Extension.To capture from the Chrome Extension > Go to your app > Open the Navattic Chrome Extension > Select “New demo” or “Add to demo”.Hubspot Form Embed Step
You can now embed a Hubspot form directly into your demo. To add a Hubspot form select Embed as the step type > Hubspot Form.March 2024
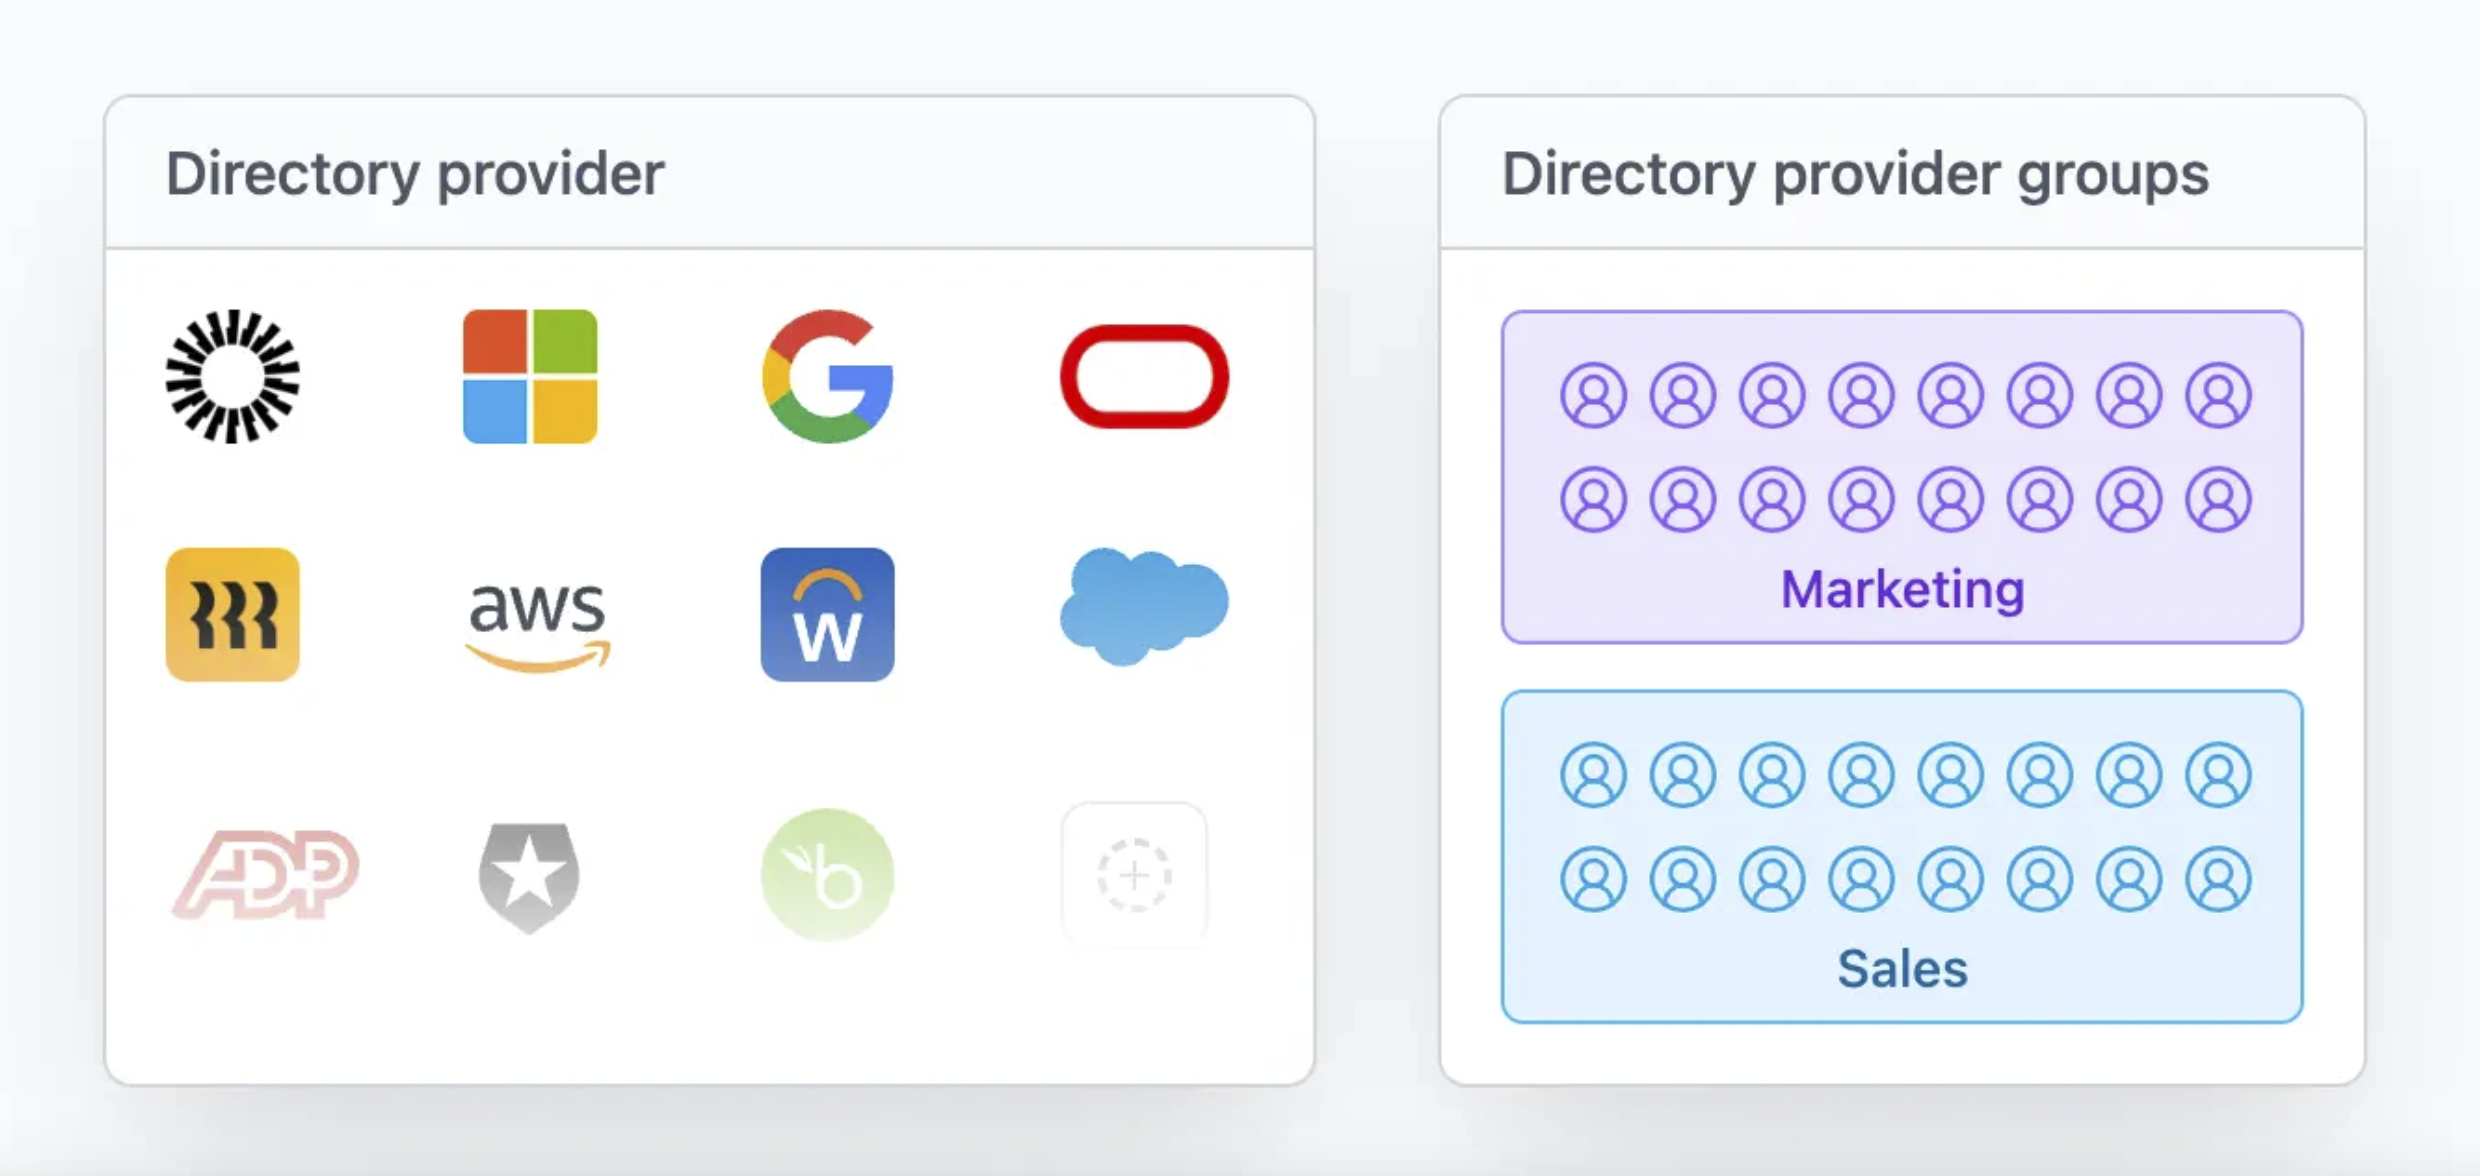
Directory Sync
Admins can now easily add and remove Navattic workspace members directly from a unified User Lifecycle Management process (a directory).Set up Directory Sync to automate:- Provisioning new users
- Updating user attributes such as name and email
- Deprovisioning users who leave your directory
Beacons Reveal Hotkey
Effortlessly create demos to assist sales-led presentations by combining Click to Capture with the Beacons reveal hotkey feature. When this is enabled, Beacons will be hidden in this demo by default and may only be revealed if a demo visitor or presenter presses Ctrl + B on the keyboard.To turn on the Beacons reveal hotkey, visit the Flow settings > Beacons reveal hotkey. Once enabled, toggle beacons on and off using “Ctrl + B”.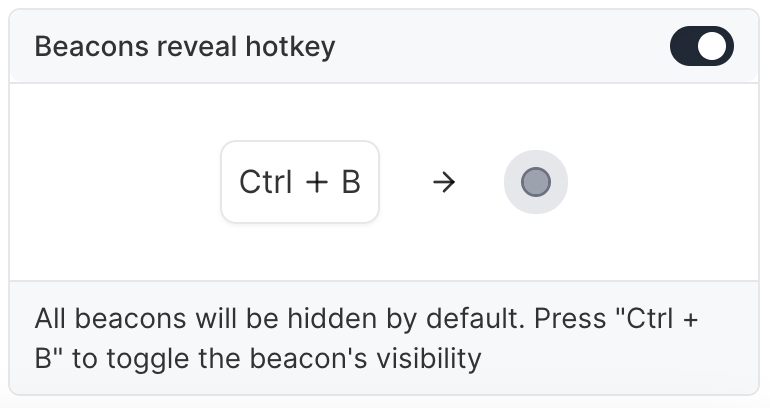
Bulk Editor
With the Bulk Editor, you can apply edits across multiple steps at once. Bulk edits include:- Updating all beacons to triggers
- Turning multiple modals into tooltips
- Changing all beacons to have a highlight appearance instead of pulse
- Deleting multipe beacons or triggers at the same time
- and more!
February 2024
Compare Product Demo Analytics
To compare the Analytics of two Product Demos, visit Analytics > Compare: > Product demos > Select project 1 and Select project 2. You can also adjust the time period you would like to view using the calendar drop down. One of your projects will have a blue dot and one will have a gray dot next to the title which is the graph key.
Pin Demos to the Top of a Board
To pin a demo to the top of a board, visit Product Demos > Select three dots (…) on the demo you want to pin > Pin to top. Your demo will now show up at the top of your board with a pin. To unpin a demo, select three dots (…) > Unpin.Video Captures
Media captures now include a video option. To upload a video as a capture, visit your Product Demo > Captures > New > Media > Create > Add to Collection > Add .MP4 video files up to 40MB. See an example of a demo that uses Video captures.January 2024
Jump to a Step Action
Add Jump to a step to any Beacon, Trigger, or Button in your flow to allow visitors to skip forwards or backward within your flow. Jump to a step can be paired with other click actions such as “Navigate to URL” or “Mark as Converted”.Time-Based Progression
Set a Timer Condition to any Trigger to have a step automatically progress to the next action. Adding a timer trigger can be useful in email outreach or conference use cases, where you want the demo to progress without requiring end-user interactions.A Timer condition can be used to perform any trigger action including “Go to next step”, “Go back a step”, “Navigate to url”, etc.To add a Timer Condition, select + Select trigger condition > + Add condition > TimerClick to Capture
Use Click to Capture to combine the Capturing and Flow-building process into just one step (tutorial). When this feature is activated, you will see the note “Shift + click an element to Capture” present as you take Captures using the Navattic Chrome Extension.Adobe Analytics Integration
Navattic now supports sending demo engagement data (ex. “step viewed”, “flow started”) to Adobe Analytics. Learn more about embed events here.December 2023
Edit Captures with Up-to-Date
Change the date and time on your capture to be today’s exact date minus a set amount. Visit your capture > Edit > Select element > Magic Editors > Up-to-date > Offset > Make up-to-date. To automatically convert all detected dates at once visit your capture > Edit > Select element > Magic Editors > Auto-detect > Offset > Convert all dates.Update Demo Version Titles and Descriptions
Keep track of the versions of your Product Demo by editing the title and adding a description. To update the version titles and descriptions visit your Product Demo > Versions > 3 dots (…) > Edit details.Embed Step Type
Product demos now support embedded calendar links. From the Flow Builder, set your last step to be an Embed and simply include your Calendly or Chili Piper URL. When the scheduling form is completed, visitors will advance to the next step.Lazy Load Overlay
Turn on a “lazy load overlay” for any demos that are embedded on your website to reduce page load times and speed up landing performance. This is an optional setting that may be found within your demos > Share > Website Embed > “Lazy load overlay”.October 2023
Product Demos
We are excited to release a new user interface that makes building and maintaining your interactive demos easier than ever. Contact** success@navattic.com** to request early access and visit the setup guide for more information.For existing Navattic customers, this upgraded user interface provides: * A quicker way to build new demos- Fewer workspace assets to label and organize
- Easy access to the relevant Flows and Checklists for published demos
- Ability to Preview and Restore previous versions of your demo
- Search for any workspace asset with the keyboard shortcut Ctrl + K
- New customization options in the Flow builder (resizing Beacons and Tooltips!)
Slack Integration
Visit Navattic > Integrations to find the new Slack integration option! Use this to notify a designated Slack channel of new Leads or Accounts that are created in your Navattic workspace. * Leads are created when visitors fill out a form- Accounts are created with Navattic’s Account-Based Engagement feature
Add a Watermark to Themes
Add a custom Watermark to all Tooltips and Modals within your demo. Visit Themes > Watermark to upload an image to be used in Modals and Tooltips, and set your watermark’s position, CTA link, and opacity.Add a CTA Banner to Themes
First, use our in-app chat or contact success@navattic.com to request early access to this feature. Then, visit Themes > Banner to create a custom CTA Banner for your demos. Customize the banner’s colors, text, and linked resources. Publish & Exit to add your banner to existing projects.September 2023
Upload Custom Fonts
Themes now supports custom font uploads. Within Navattic > Themes > Font, you may now select from our existing library, add a CSS URL, or upload a font file up to 5MB.Visitors Engagement Details
View more engagement details for your demo visitors including UTM tracking attributes. Export your data as a CSV or send leads directly to a CRM using Navattic integrations.August 2023
HubSpot Event Timeline
View all demo events directly in your HubSpot timeline. Track form fills, flows started, step views, and conversion events as part of the larger customer journey within HubSpot. To activate this view, simply re-authenticate your HubSpot integration from the in-app Integrations menu and re-connect your projects.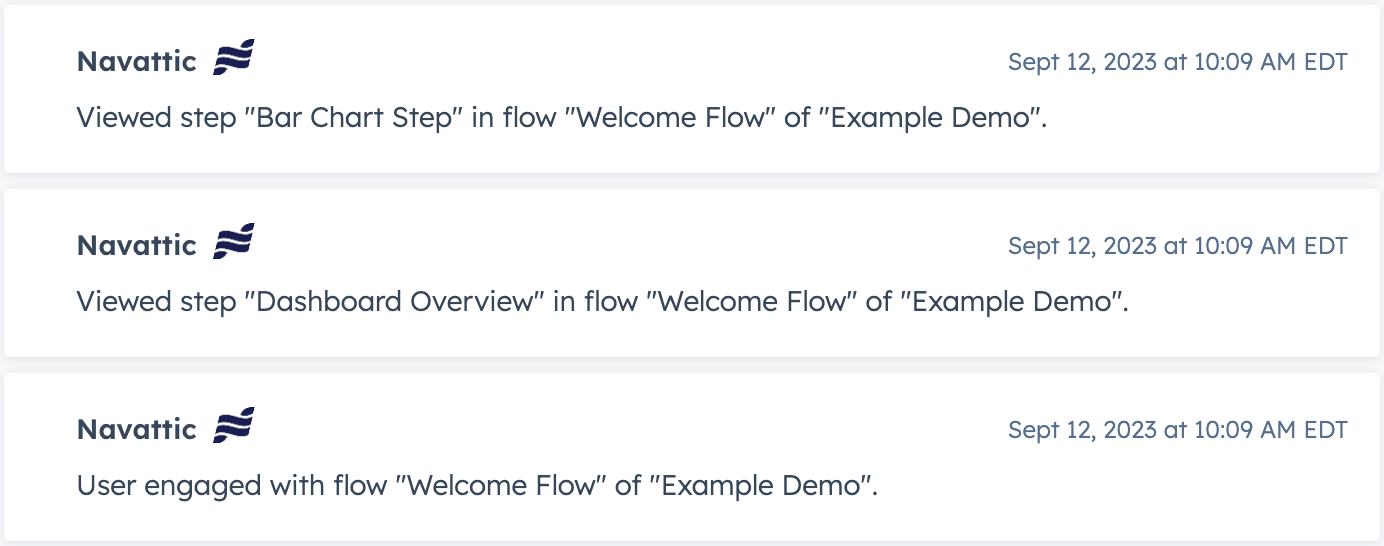
July 2023
Text and Image Find and Replace
Make mass text or image updates to a single capture or across an entire collection. Visit the Navattic Capture Editor —> Magic Editors —> Find and Replace to apply text or image updates throughout a single Capture. Toggle on “Global” to apply these changes across all Captures in the current Collection.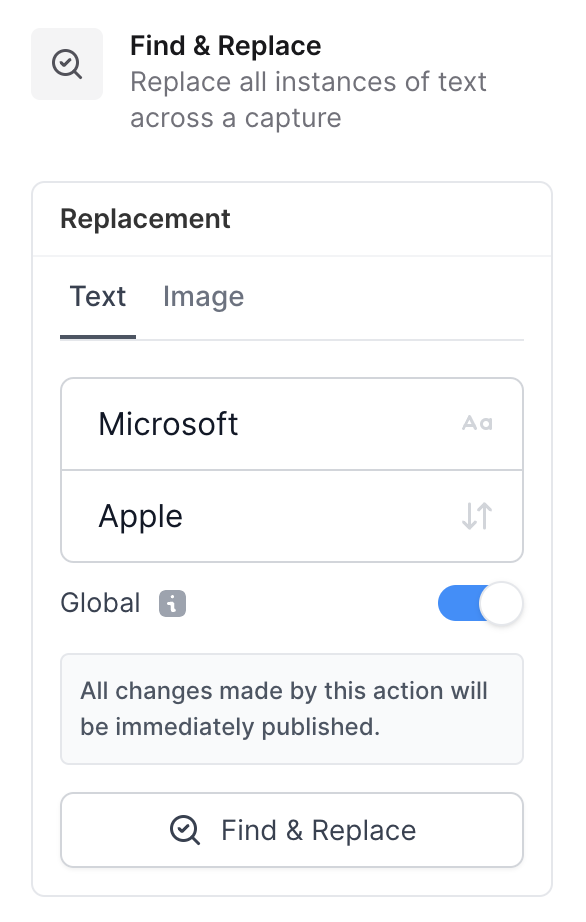
June 2023
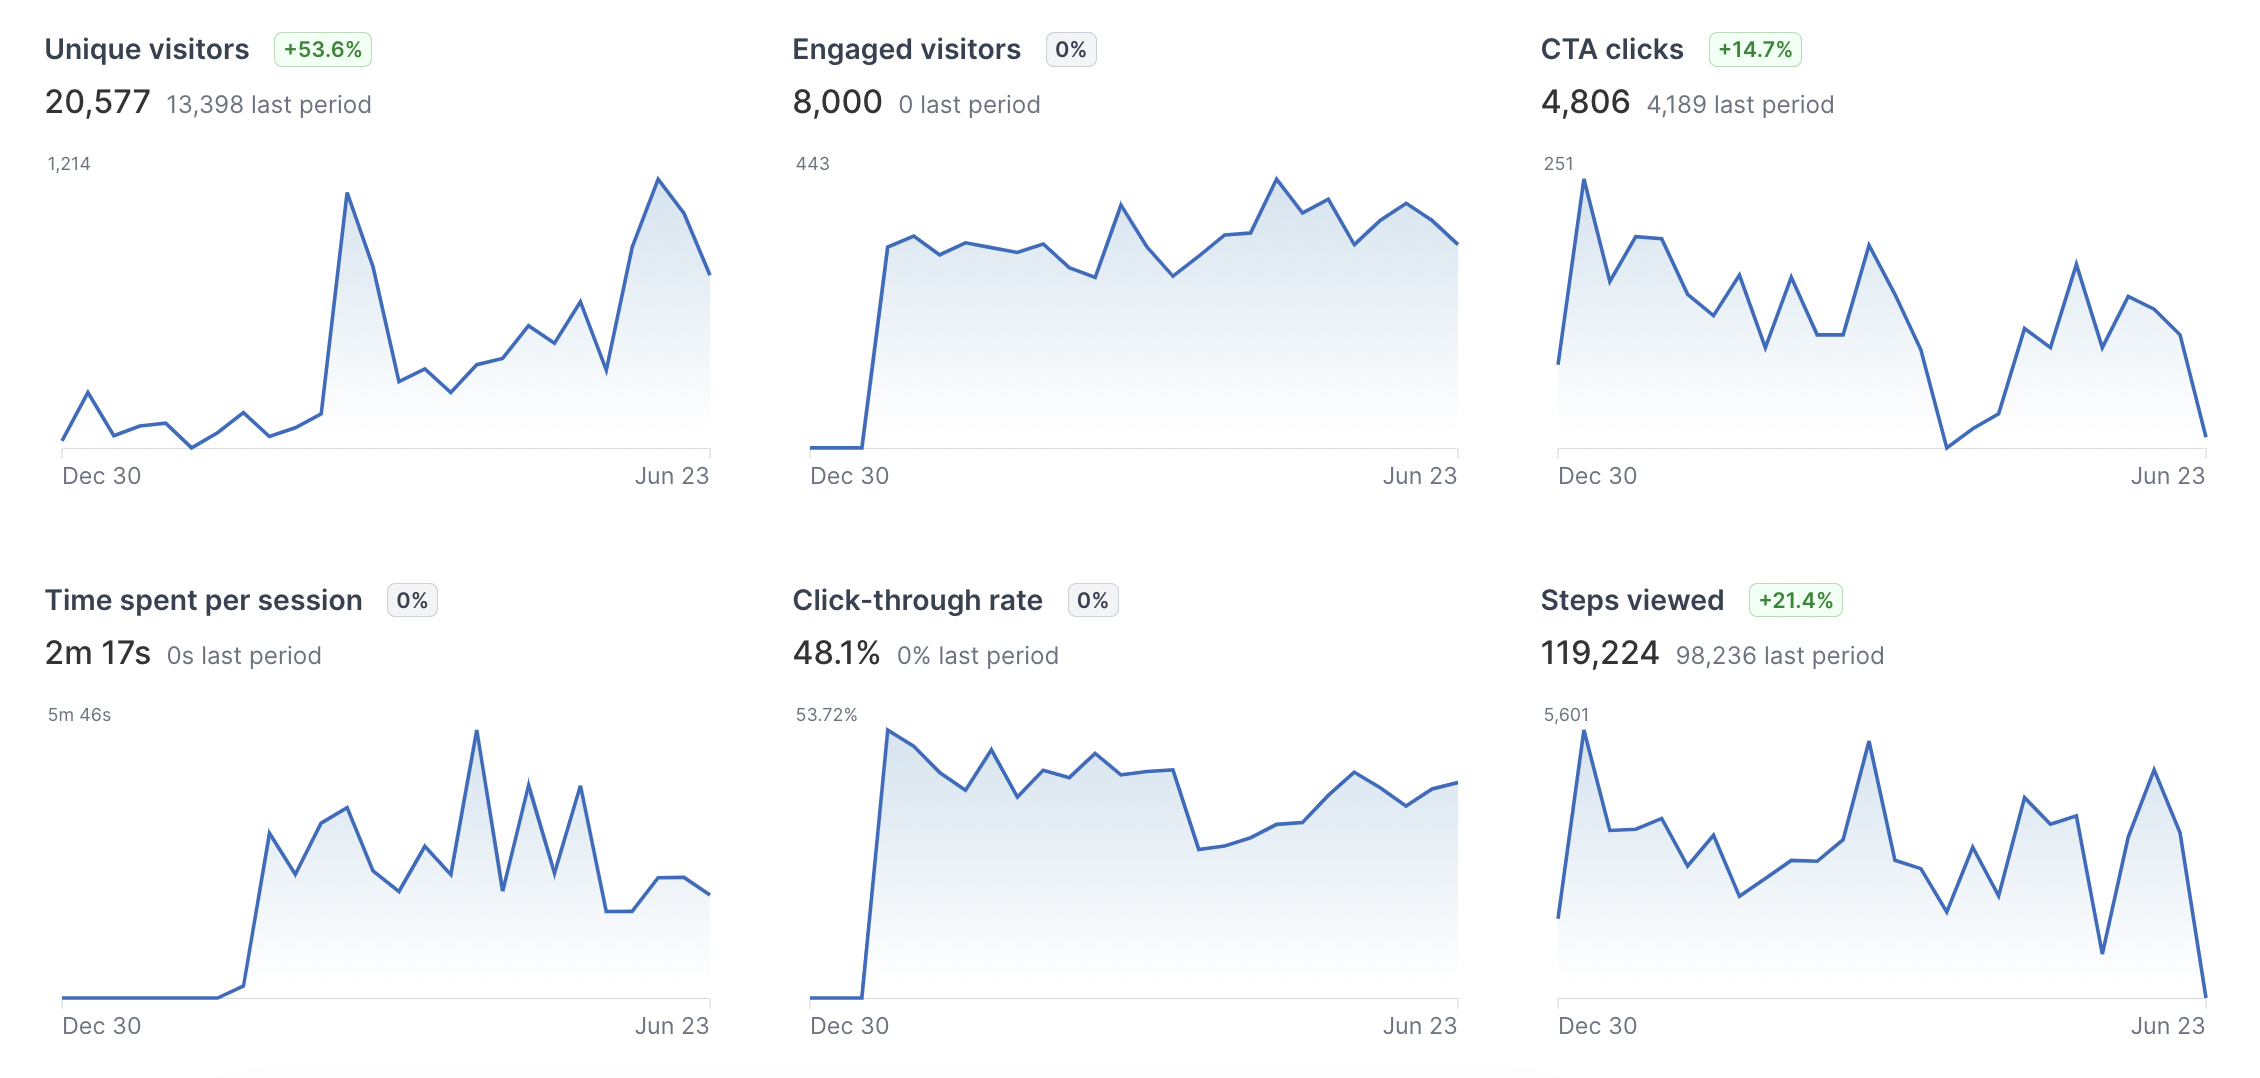
Analytics Dashboard
Visit the Analytics tab in your Navattic workspace to view demo engagement trends over time. Filter the dashboard by Project or Timeframe to see: * Total unique visitors, Engaged visitors (i.e., visitors who advance 1+ steps in your demo), and Converted visitors (i.e., visitors who click a CTA button in your demo)- Time spent per session, click-through rates, and total steps viewed
May 2023
Send Navattic Embed Events to any event-based platform
Customers may now send Navattic event data to any event-based analytics platform like Amplitude, PostHog, and Mixpanel.Background: Navattic events include when a visitor views a step, starts a new flow, clicks a CTA, and more.Event-based analytics platforms are used to analyze how users interact with your website, and may receive Navattic events similar to how they receive other website events.Event-based platform may help answer questions like:- How many users or sessions engage with my Navattic demo?
- Where in my website flow do users engage with my Navattic demos?
- Which of my Navattic projects lead to the most conversions?
Sync Leads to Salesforce Contacts
Our Salesforce integration users now have the option of syncing Lead engagement data to the associated Contact if a matching email is found. Engagement data can be pushed to pre-created Salesforce fields.April 2023
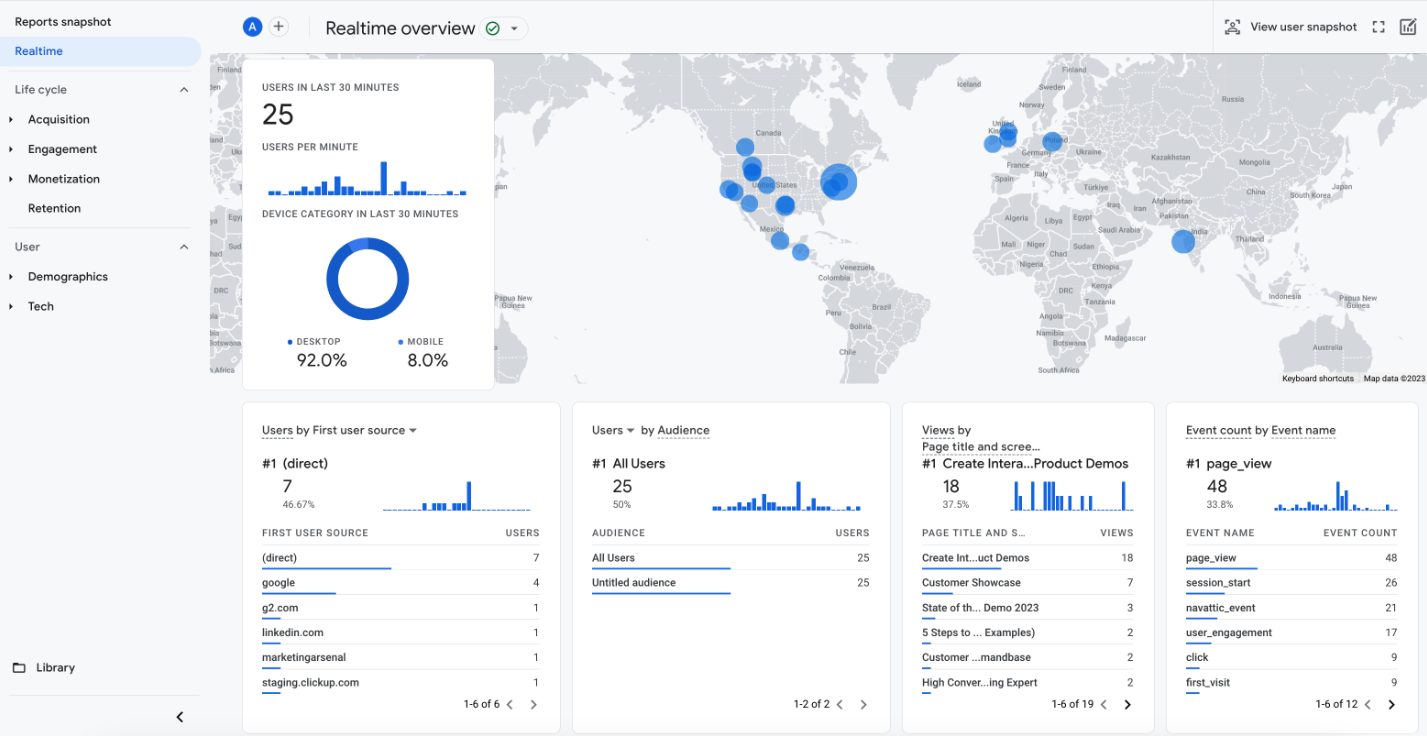
Google Analytics 4 Integration
Use our new GA4 integration to combine demo engagement data with your other website event data. Read the Google Analytics (GA4) integration guide to set this up.Use this to answer questions like:- How many users or sessions engage with my demo?
- Where in my website flow do users engage with my demos?
- Which of my projects lead to the most conversions?
Overlay Detection
When editing a capture, ignore an overlay to edit content in the background of the capture.Canvas Element Freeselector
Set a target anchor element on canvas graphics (ex. an interactive map area or graph). Freely select the desired area and size to target a specific hotspot for user attention or in-demo action.March 2023
Share Link Identification and Personalization
Track how a specific prospect interacts with your demo without needing a form fill. Apply personalization variables to a demo Share Link to identify the user accessing the product demo URL. These identification traits will get passed into Visitor Analytics. Learn more about Personalization.Expire Project Share Links
Set an expiration date for project share links. Provide viewers access for a limited time frame to help accelerate deal timelines.Identify Visitors with Project Share Links
Add your recipient’s name, company, and/or email to a project share link to help identify their Visitor data in Navattic (no formgates needed). Use Personalization to reference these variables throughout the demo as well (ex. “Hi, firstname!”)Add Audio Clips in Flows
Add audio files to Modals and Tooltips to help walk your prospects through your interactive demo. To activate this feature in your workspace, please reach out to your Navattic CSM.February 2023
Visitor Time Tracking
See how much time Visitors actively spend in a demo, within a Flow, or on an individual Step. Time tracking excludes idle time spent away from the demo tab. The Visitors page also includes information on device dimensions, completed Flows, and key actions like navigating to a URL during the demo.Anchor Element Traversal
When building a Flow, use anchor element traversal to anchor Tooltips, Triggers, and Beacons with greater precision.Embed on G2 or TrustRadius
Meet your prospects where they are and embed your Navattic demo on TrustRadius. Increase buyer engagement and showcase your solution without the friction of a demo call or trial setup.G2 embed demos will be automatically optimized for the G2 embed profile. G2 Essentials plan members and all TrustRadius members can embed a Navattic product tour on their profile. See more in our recent blog post here.January 2023
Drag and Drop Images
Drag and drop images into a Modal or Tooltip, or upload an image directly from your desktop. Resize and realign images directly within the Navattic Flow Builder.Set Guide Defaults in Themes
Frequently changing Modals to Tooltips or adding Navigation Buttons in Flow Settings? Now you can set Guide Defaults via Themes. Determine if your Theme will automatically include:* Modals, Tooltips, Forms, or Invisible Steps- Backdrops
- Navigation buttons and Step Progress
- Escape View