Audiences
Audiences are filtered views of Visitors and Accounts that view your demos. These include filters for Time spent, Total sessions to detect repeat visitors, Total steps, and more. Create an Audience by adding Filters to your Visitors or Accounts tab and selecting Save.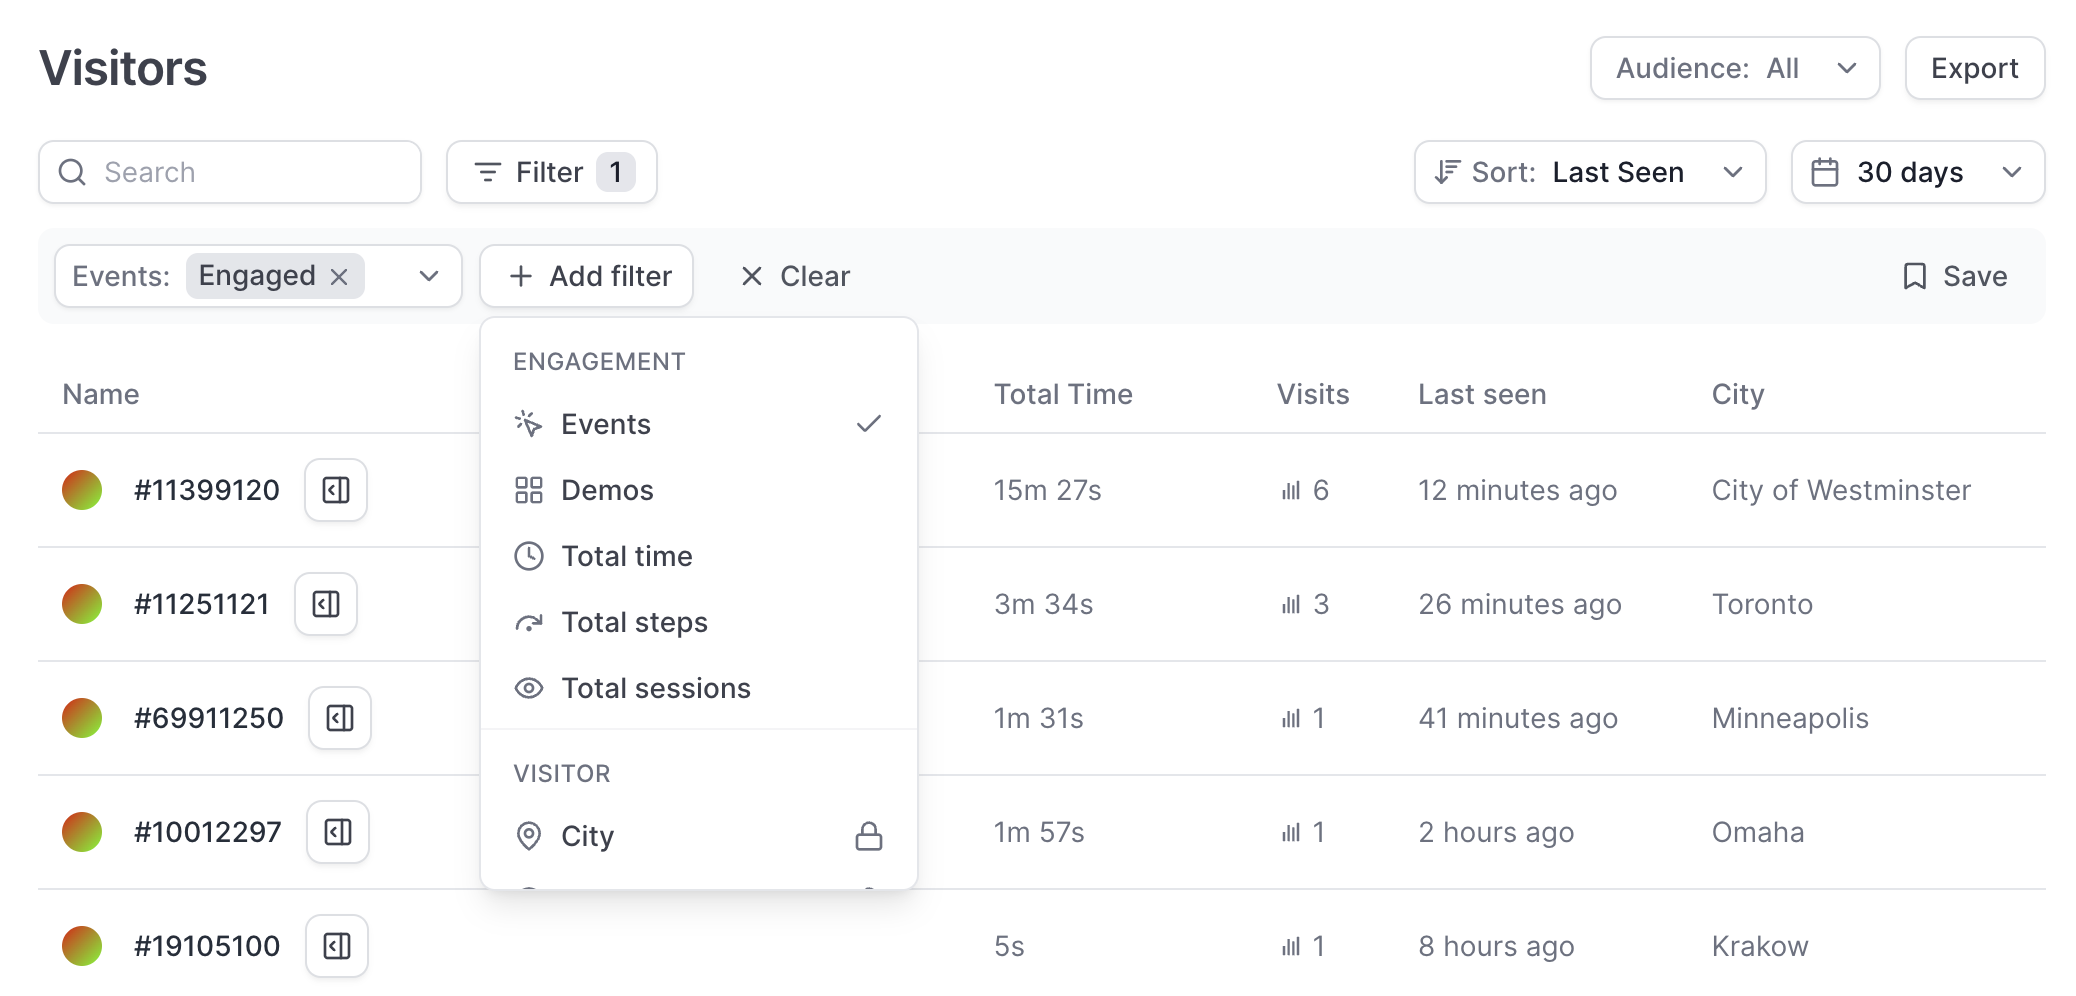
Default Visitors audiences
| Audience | Description |
|---|---|
| Identified visitors | Visitors that have an email associated with them |
| Engaged visitors | Visitors who advance 1+ steps in your demo |
| Repeat visitors | Visitors with at least 2 unique sessions |
Default Accounts audiences
| Audience | Description |
|---|---|
| Engaged accounts | Companies with at least 1 engaged visitor |
| Accounts with multiple visitors | Companies with >1 unique visitor |
Create a custom audience
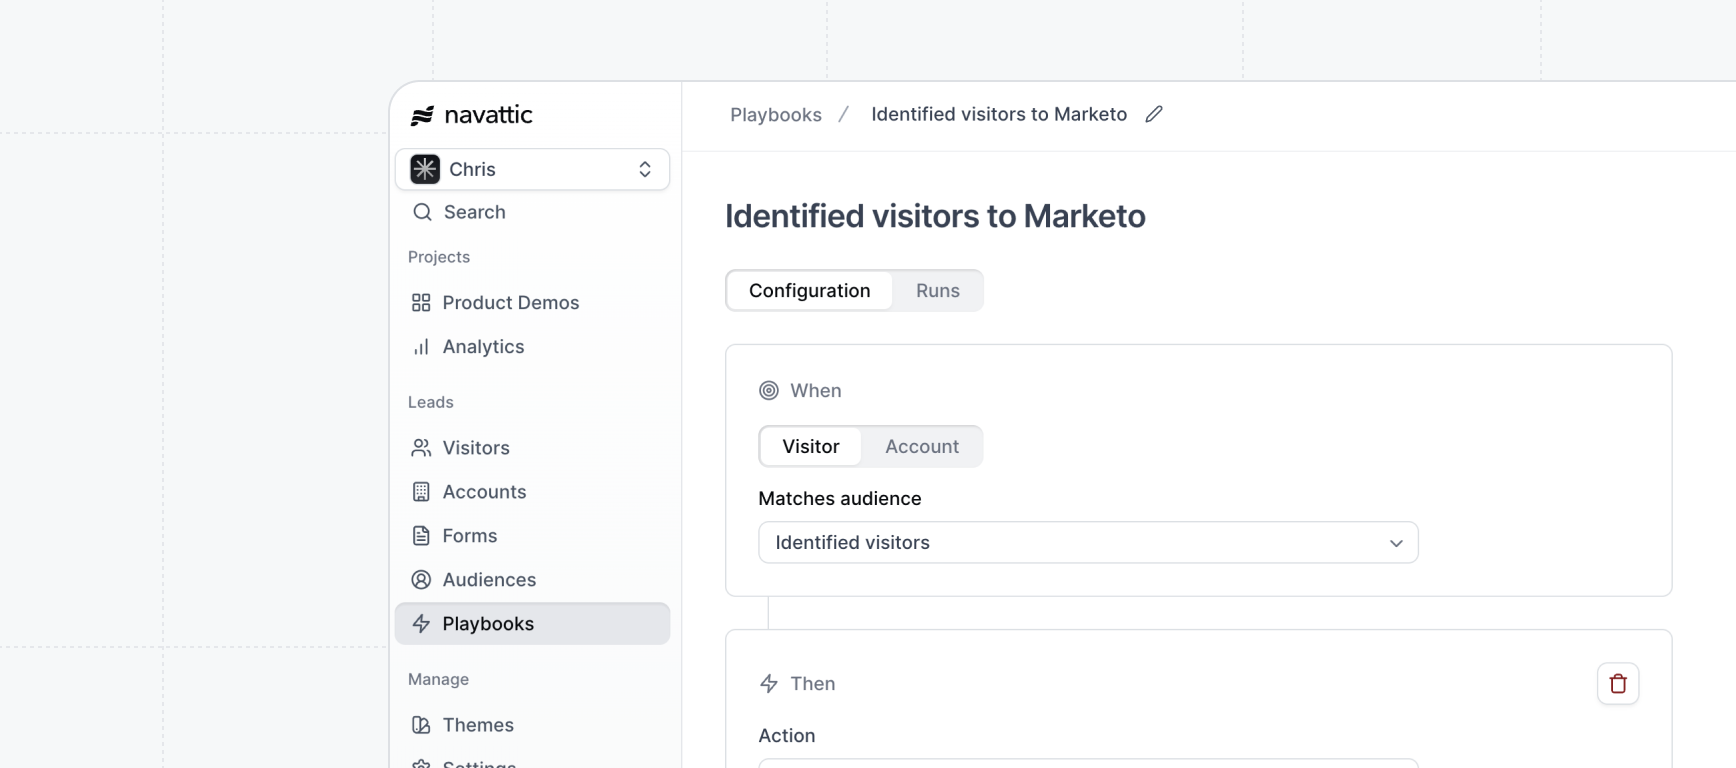
To create an Audience, visit the Visitors tab to create contact-based audiences or the Accounts tab to create account-based audiences. Use Filters to select the Audience you’d like to create. Once you have added the necessary Filters click **Save **> Name your audience > Save. Now, when you create a Playbook, you will see this Audience appear in the dropdown under When visitor: Matches audience.If you have created Audiences in the past, these Audience will already be available to use with
Playbooks.
Actions
We currently support 13 playbook actions outlined below. These actions are used to send visitor or account level data to the listed third-party tools. Playbook actions are run for individual visitor sessions when the session ends (i.e. when a visitor closes the page containing the demo or after 30 minutes of inactivity).Visitor-based actions
| Integrations | Playbook Action(s) |
|---|---|
| Hubspot | Sync contact, Timeline events |
| Salesforce | Sync contact, Sync lead, Submit session object |
| Pardot | Sync lead |
| Marketo | Sync visitor |
| Slack | Send visitor message |
| Segment | Segment event |
| Webhook | Webhook event |
| Send visitor message |
Account-based actions
Account-based actions are available if you have Account Based Engagement enabled. Contact success@navattic.com if you would like to learn more about Account Based Engagement.| Integrations | Playbook Action(s) |
|---|---|
| Hubspot | Sync company, Timeline events |
| Salesforce | Sync account, Send notification to Opportunity Owner |
| Pardot | Sync account |
| Slack | Send account message |
| Segment | Segment event |
| Webhook | Webhook event |
| Send account message |
Adding Marketo to a Playbook will allow you to choose which Marketo Program Visitors will sync to.
Similarly, adding Slack to a Playbook will allow you to select the Slack channel to send visitors
and/or account messages to.
Sync mode
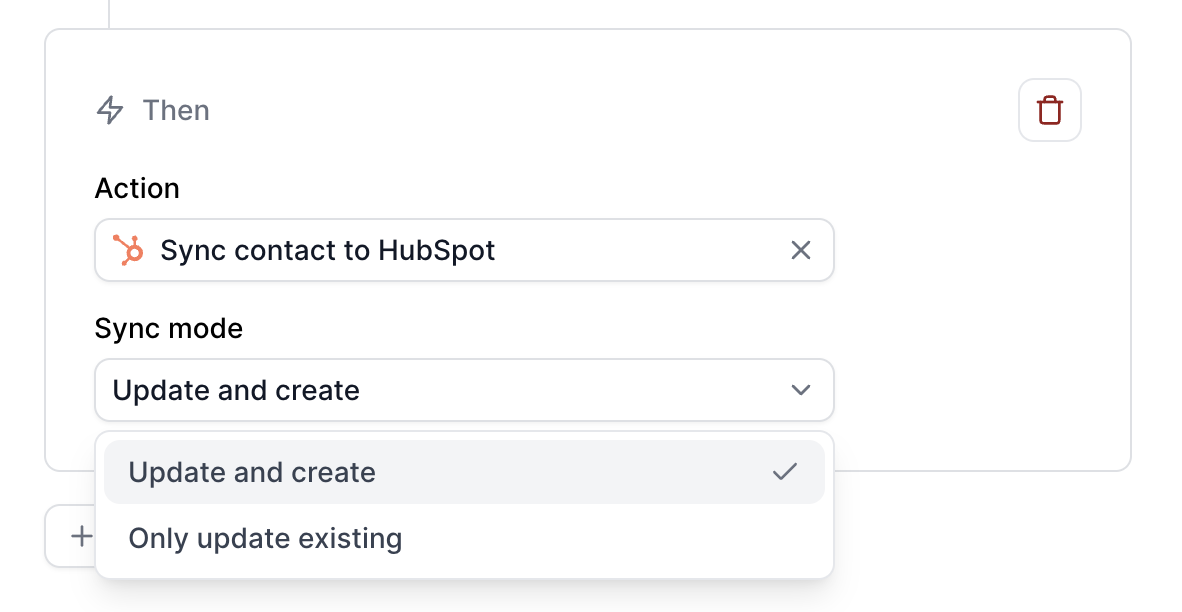
Update and create
Update and create includes full sync functionality and will create new Visitor and/or Account records. It will also update existing ones if they exist for each matching session that triggers the Playbook.Only update existing
Only update existing will not create any net new Visitor and/or Account records, but will update existing ones for each matching session that triggers the Playbook.Only first session
When enabled, this action will only be triggered for the first session for that Visitor or Account.Timeline events contact sync mode
The HubSpot Timeline events action has an additional Contact sync mode option, separate from the sync modes above. When associating timeline events with contacts, you can control whether Navattic creates new HubSpot contacts:- All visitors (create contacts) — Default. Timeline events are attached to the visitor’s contact record, creating the contact if one doesn’t already exist.
- Only existing contacts — Timeline events are only sent for visitors who already have a matching contact in HubSpot. No new contacts are created.
FAQs
How do Playbooks differ from existing Navattic integrations?
How do Playbooks differ from existing Navattic integrations?
Playbooks allow you to filter the Navattic Visitor and Account data that is sent to HubSpot, Salesforce, Marketo, and Slack by configuring different Audiences. For example, do you only want to send data for Repeat Visitors, Visitors who engage with specific demos, or Visitors from a specific industry?Playbooks also include detailed error logs to support thorough debugging of any failed Runs, which are sent whenever a Visitor or Account is detected viewing your demo. For example: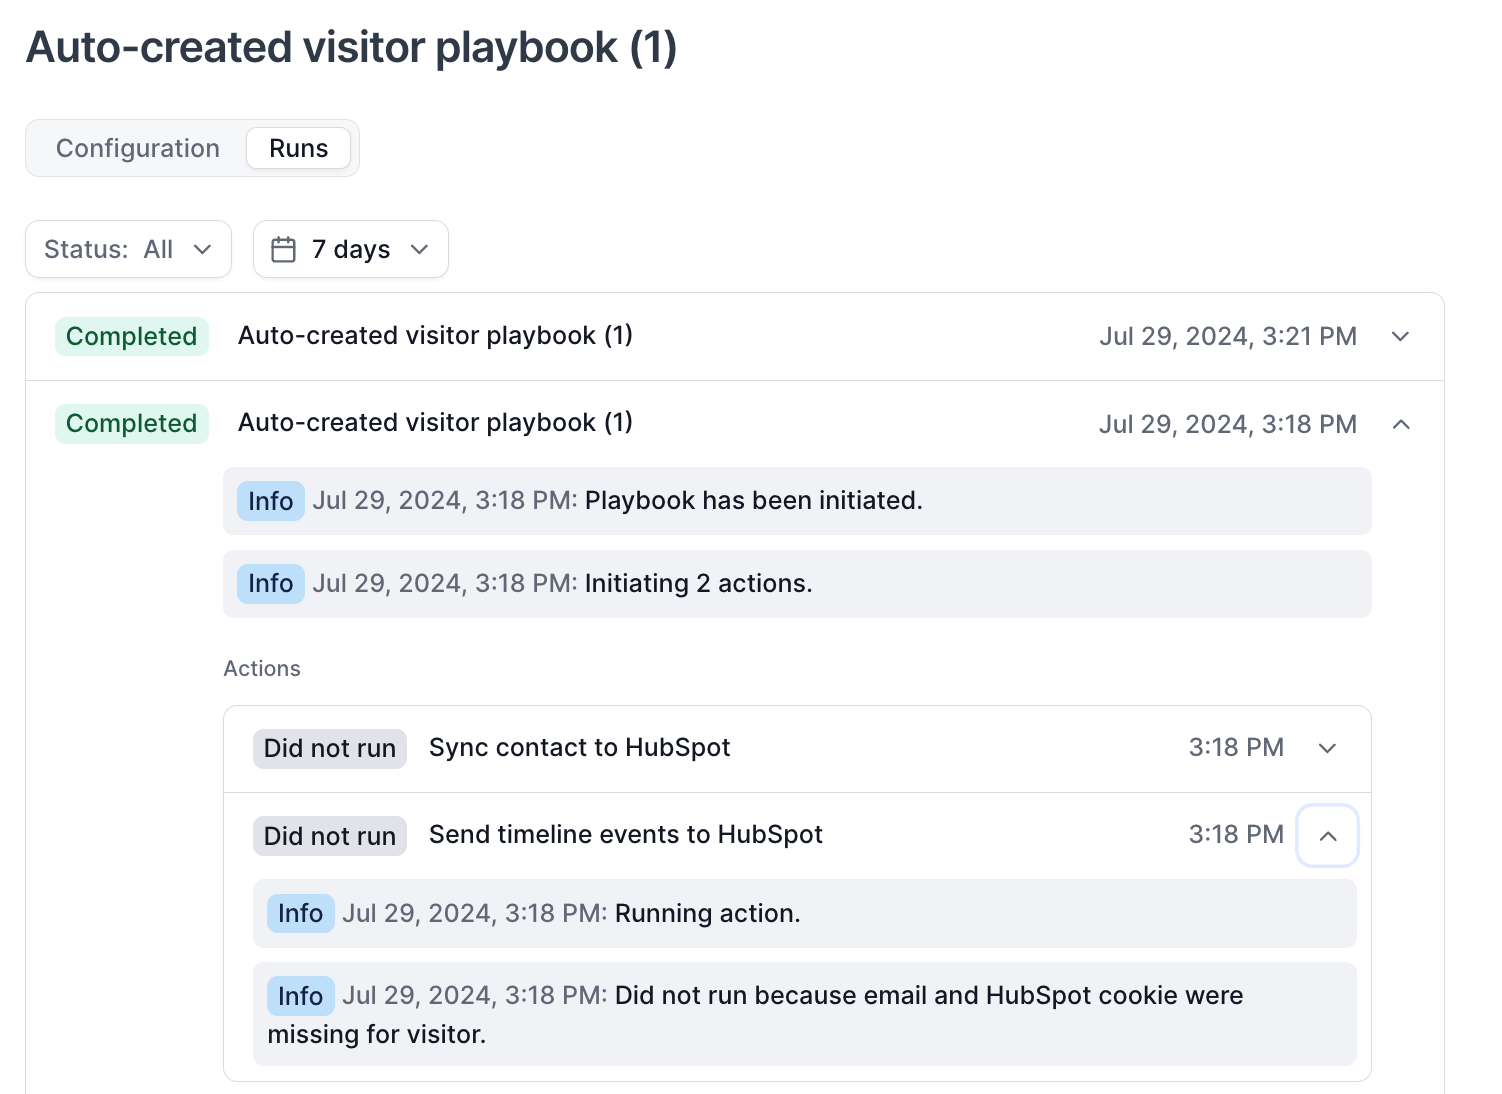
What happens to my workspace's existing integrations?
What happens to my workspace's existing integrations?
All existing field mappings to HubSpot, Salesforce, Marketo, and Slack will continue as-is (here are all available field mappings as a refresher). You may configure field mappings in your Navattic workspace > Settings > Integrations tab (no changes).All existing integrations will now have a corresponding “Playbook” visible in your Playbooks tab, which gives you visibility to the status of each integration. For example, if you were already sending identified Visitors and Accounts to HubSpot, you will see two corresponding Playbooks like this:
Why does my new Playbook show 0 Runs?
Why does my new Playbook show 0 Runs?
Playbook runs are not documented retroactively and will show “0 Runs” if your Playbook was created
recently (i.e., around the time of this message). However, your integrations have been
continuously syncing, and your new Playbooks will show more Runs soon as new Visitor or Account
sessions are detected in your demos.
Can I retroactively run a Playbook?
Can I retroactively run a Playbook?
Yes, you can replay a Playbook to send past Visitor and/or Account data to your integrations. To
retroactively run a Playbook, visit your Playbook in your Workspace > click the three dots next to
the save button > Replay. Set the delay between sessions and the start and end
dates for which you want to replay the playbook. See how to Replay a
Playbook.
How do I create new Playbooks?
How do I create new Playbooks?
Use these steps to create new Playbooks and visit our Template Playbooks for inspiration!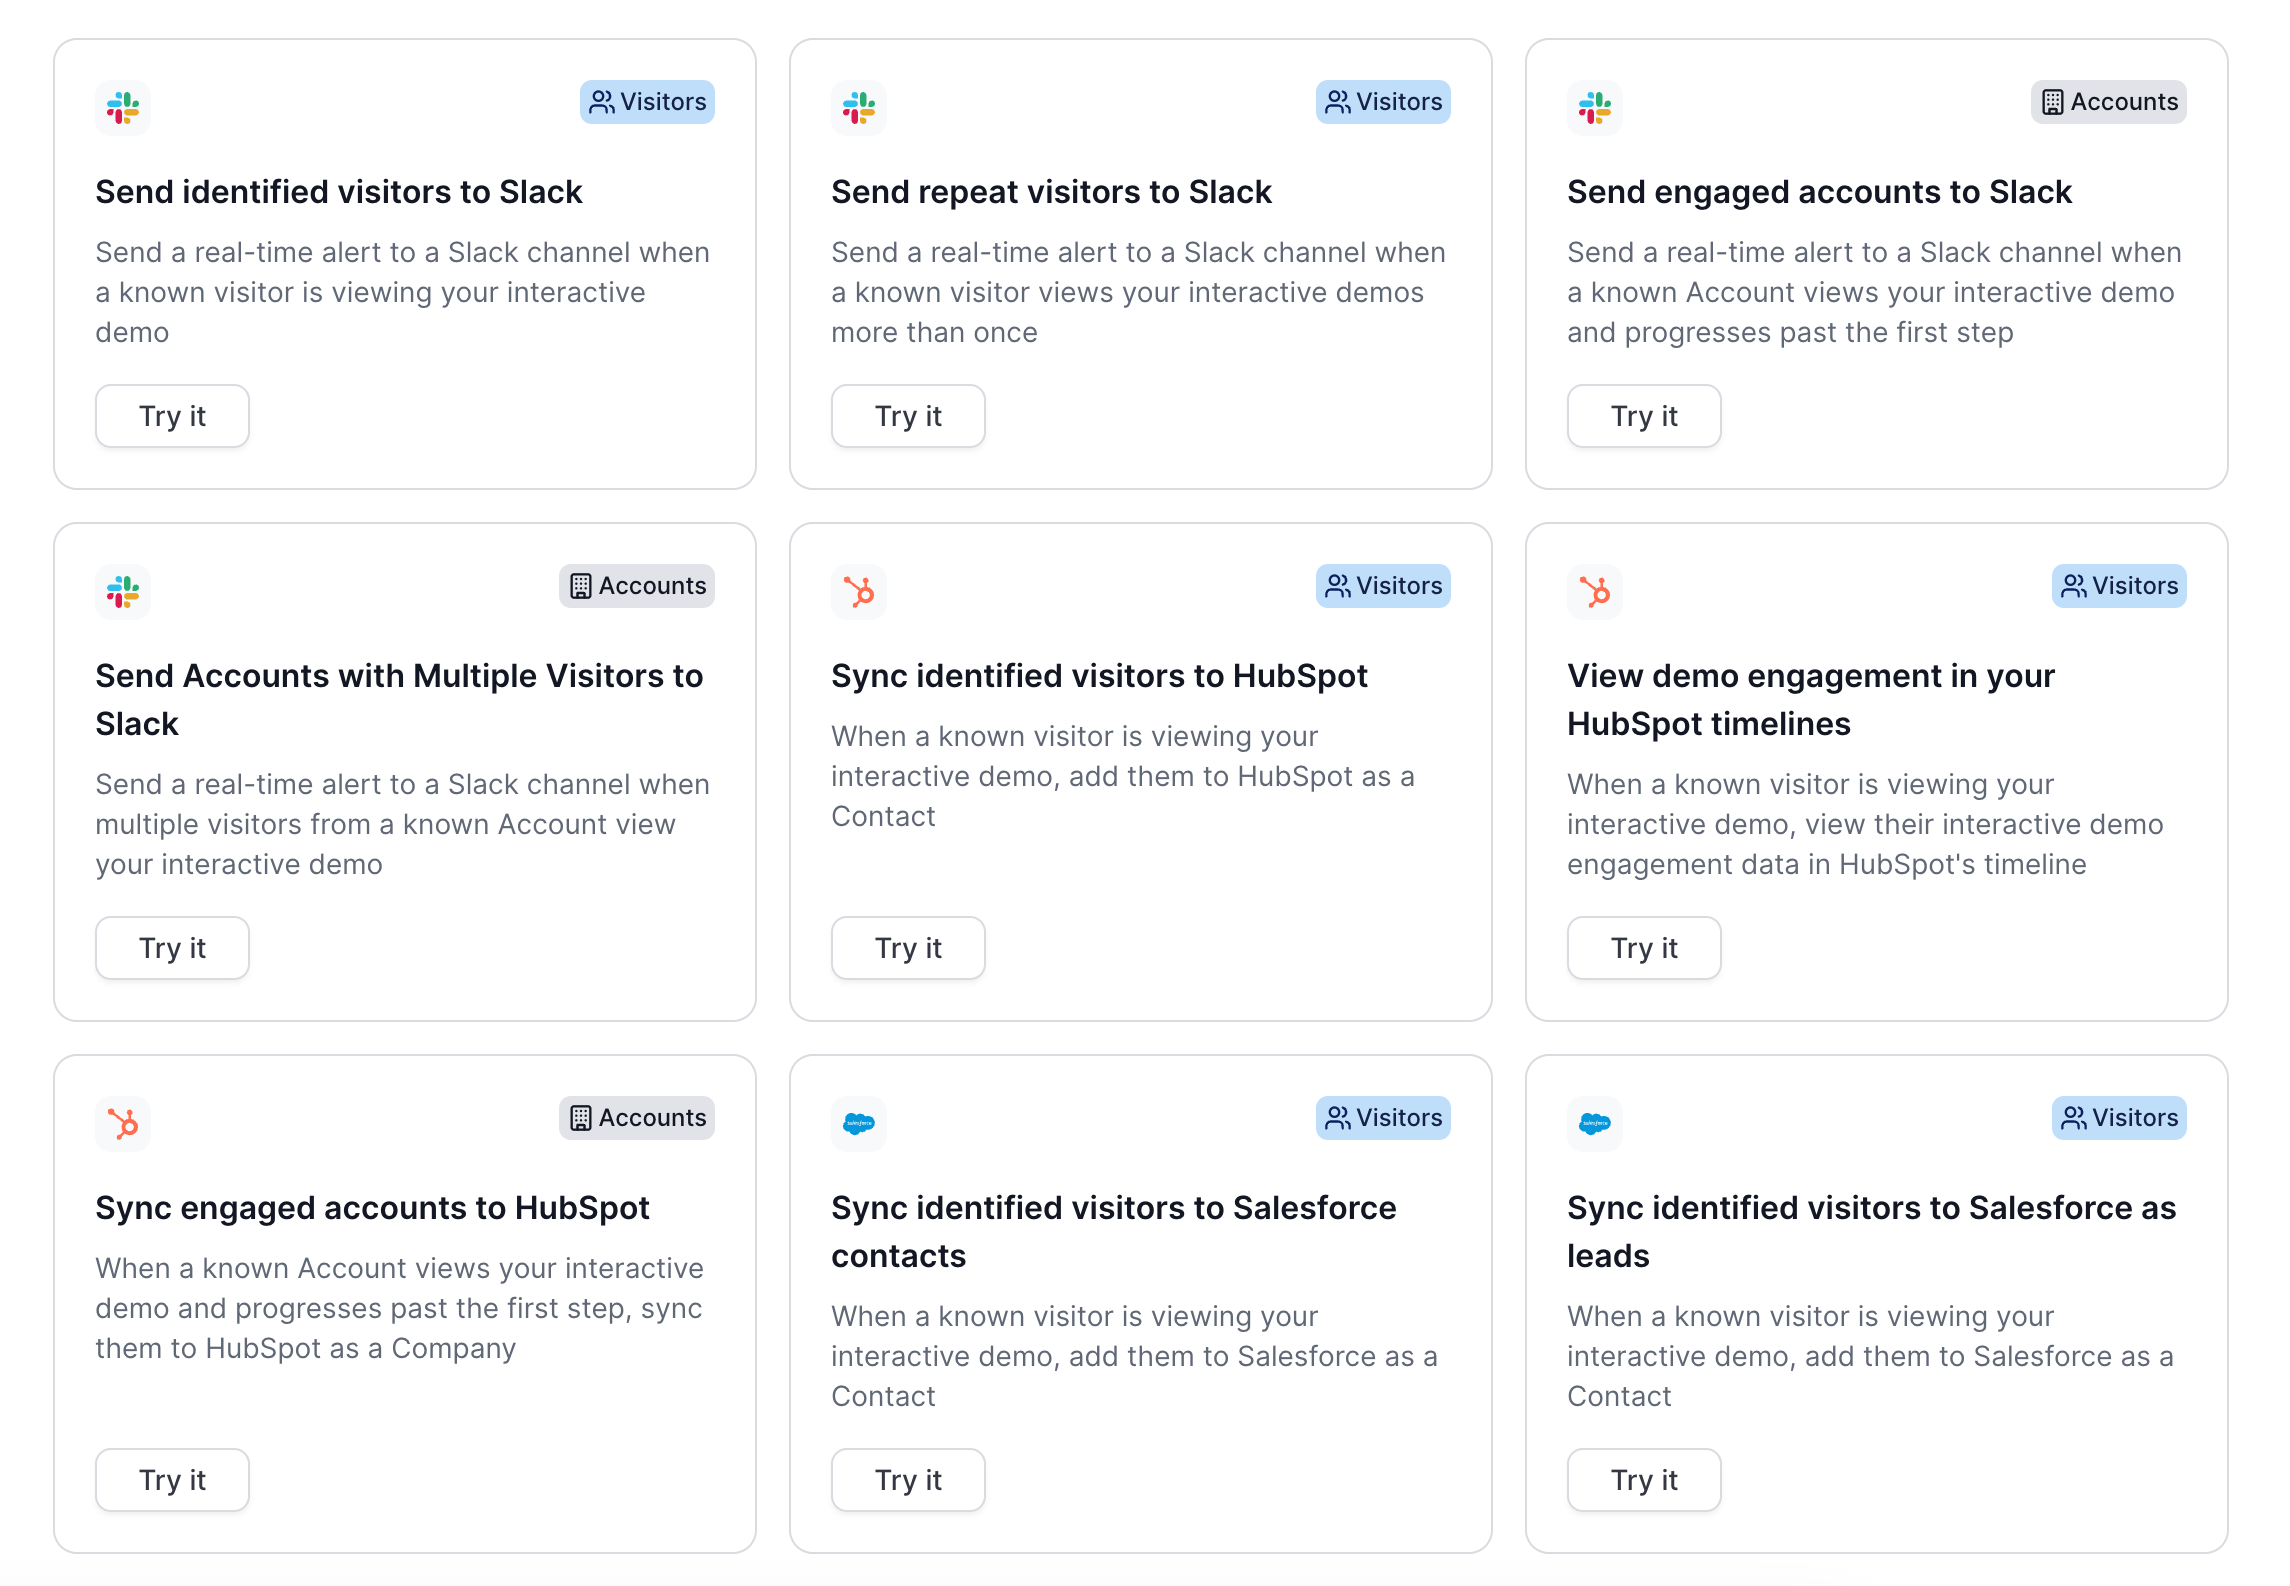
Where do I go to connect new Integrations?
Where do I go to connect new Integrations?
You may continue connecting integrations in your Navattic workspace > Settings > Integrations tab. You can also navigate here by clicking the “Integrations” button in the Playbooks tab (shown below).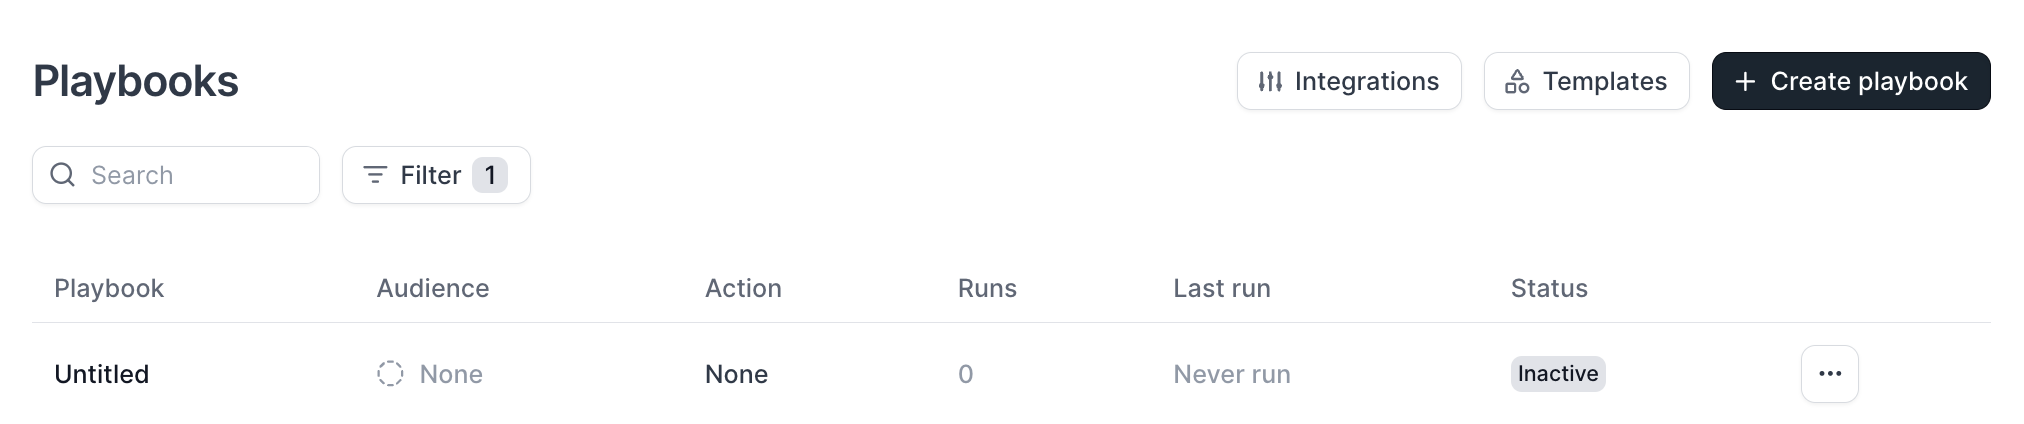
How do I setup routing rules to email specific sales reps?
How do I setup routing rules to email specific sales reps?
You can create a Playbook to setup routing rules to email specific sales reps by connecting the Email integration to your workspace. To setup the Email Integration, visit Playbooks > Integrations > Email > Connect. Once the Email Integration is connected, create a Playbook, select the Audience you would like to receive notifications for and choose Send visitor message to Email as the Action. You can then select the email you would like notifications to be sent to.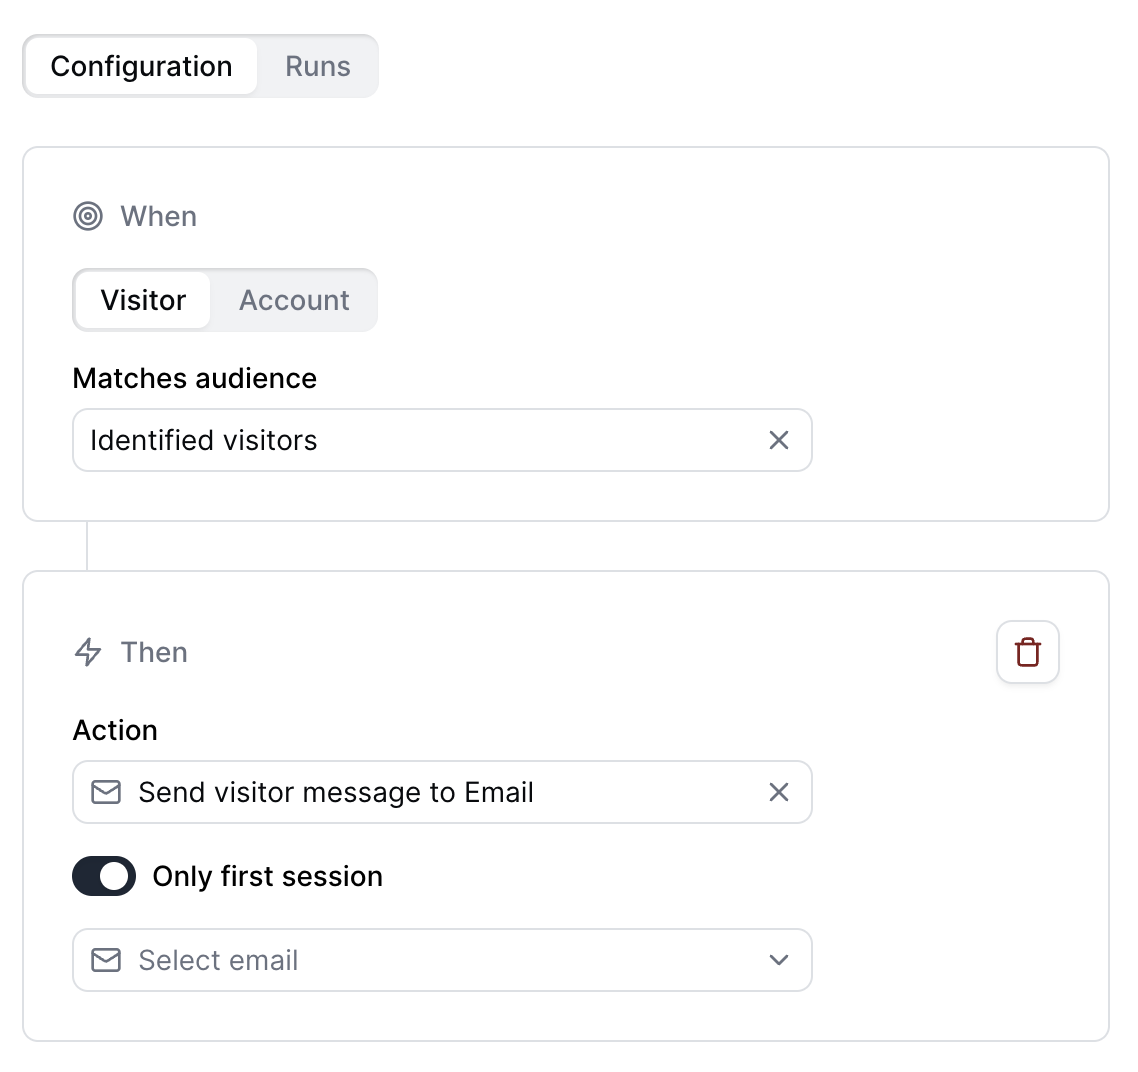
Tip: Create a custom audience using the advanced filters so that sales reps receive notifications for companies that match their ICP.
How can I prevent duplicate messages in Slack?
How can I prevent duplicate messages in Slack?
To avoid duplicate messages in Slack, toggle on Only first session after selecting Send
visitor message to Slack as the Action.
When does a session end?
When does a session end?
A session ends and is marked as closed when a user navigates away from the demo or closes the
page. Once a session is closed, the Navattic fields will be sent to the Integrations that are set
up with the Playbook. In some instances, Navattic is not able to perfectly capture when a user
leaves a demo, so there is a secondary condition based on user activity. Every 15 minutes Navattic
checks all ongoing sessions, and if any of them have not had activity within the last 30 minutes
(defined by having any activity events), they are marked as closed with the closing time equaling
the time of the session’s most recent activity event.
I'm not seeing my Slack Channel populate when creating a Slack Playbook?
I'm not seeing my Slack Channel populate when creating a Slack Playbook?
If you’re unable to select the Slack channel while creating a Playbook, please ensure that the
Navattic bot has been added to the channel. You can do this by sending the message @navattic in
the Slack channel. Additionally, verify that you are a Slack Admin and that the channel is set to
public. If needed, try searching for the channel using the “Use ID” toggle to locate it more
easily.
How can I use Webhooks to send data to Zapier?
How can I use Webhooks to send data to Zapier?
Use the Webhook integration to integrate with a Zapier
workflow by using a Zap URL. Learn more about triggering Zaps from
webhooks.
Why isn't internal traffic generating a Playbook run?
Why isn't internal traffic generating a Playbook run?
If you are testing out your Playbook on a live demo and do not see a Playbook run come through,
you likely have Hidden Accounts set up to exclude your domain. Instead, we recommend sending a
test run by clicking the three dots in the top right corner next to Save > Test run. To confirm if
Hidden Accounts is set up, visit your Workspace Settings > Hidden Accounts > Add Domains
to exclude.