1
Select elements to personalize
Determine which elements you want to personalize. For example, you might want to personalize the
Name, Role, and Company Logo of the visitor.2
Personalize your captures
Open the 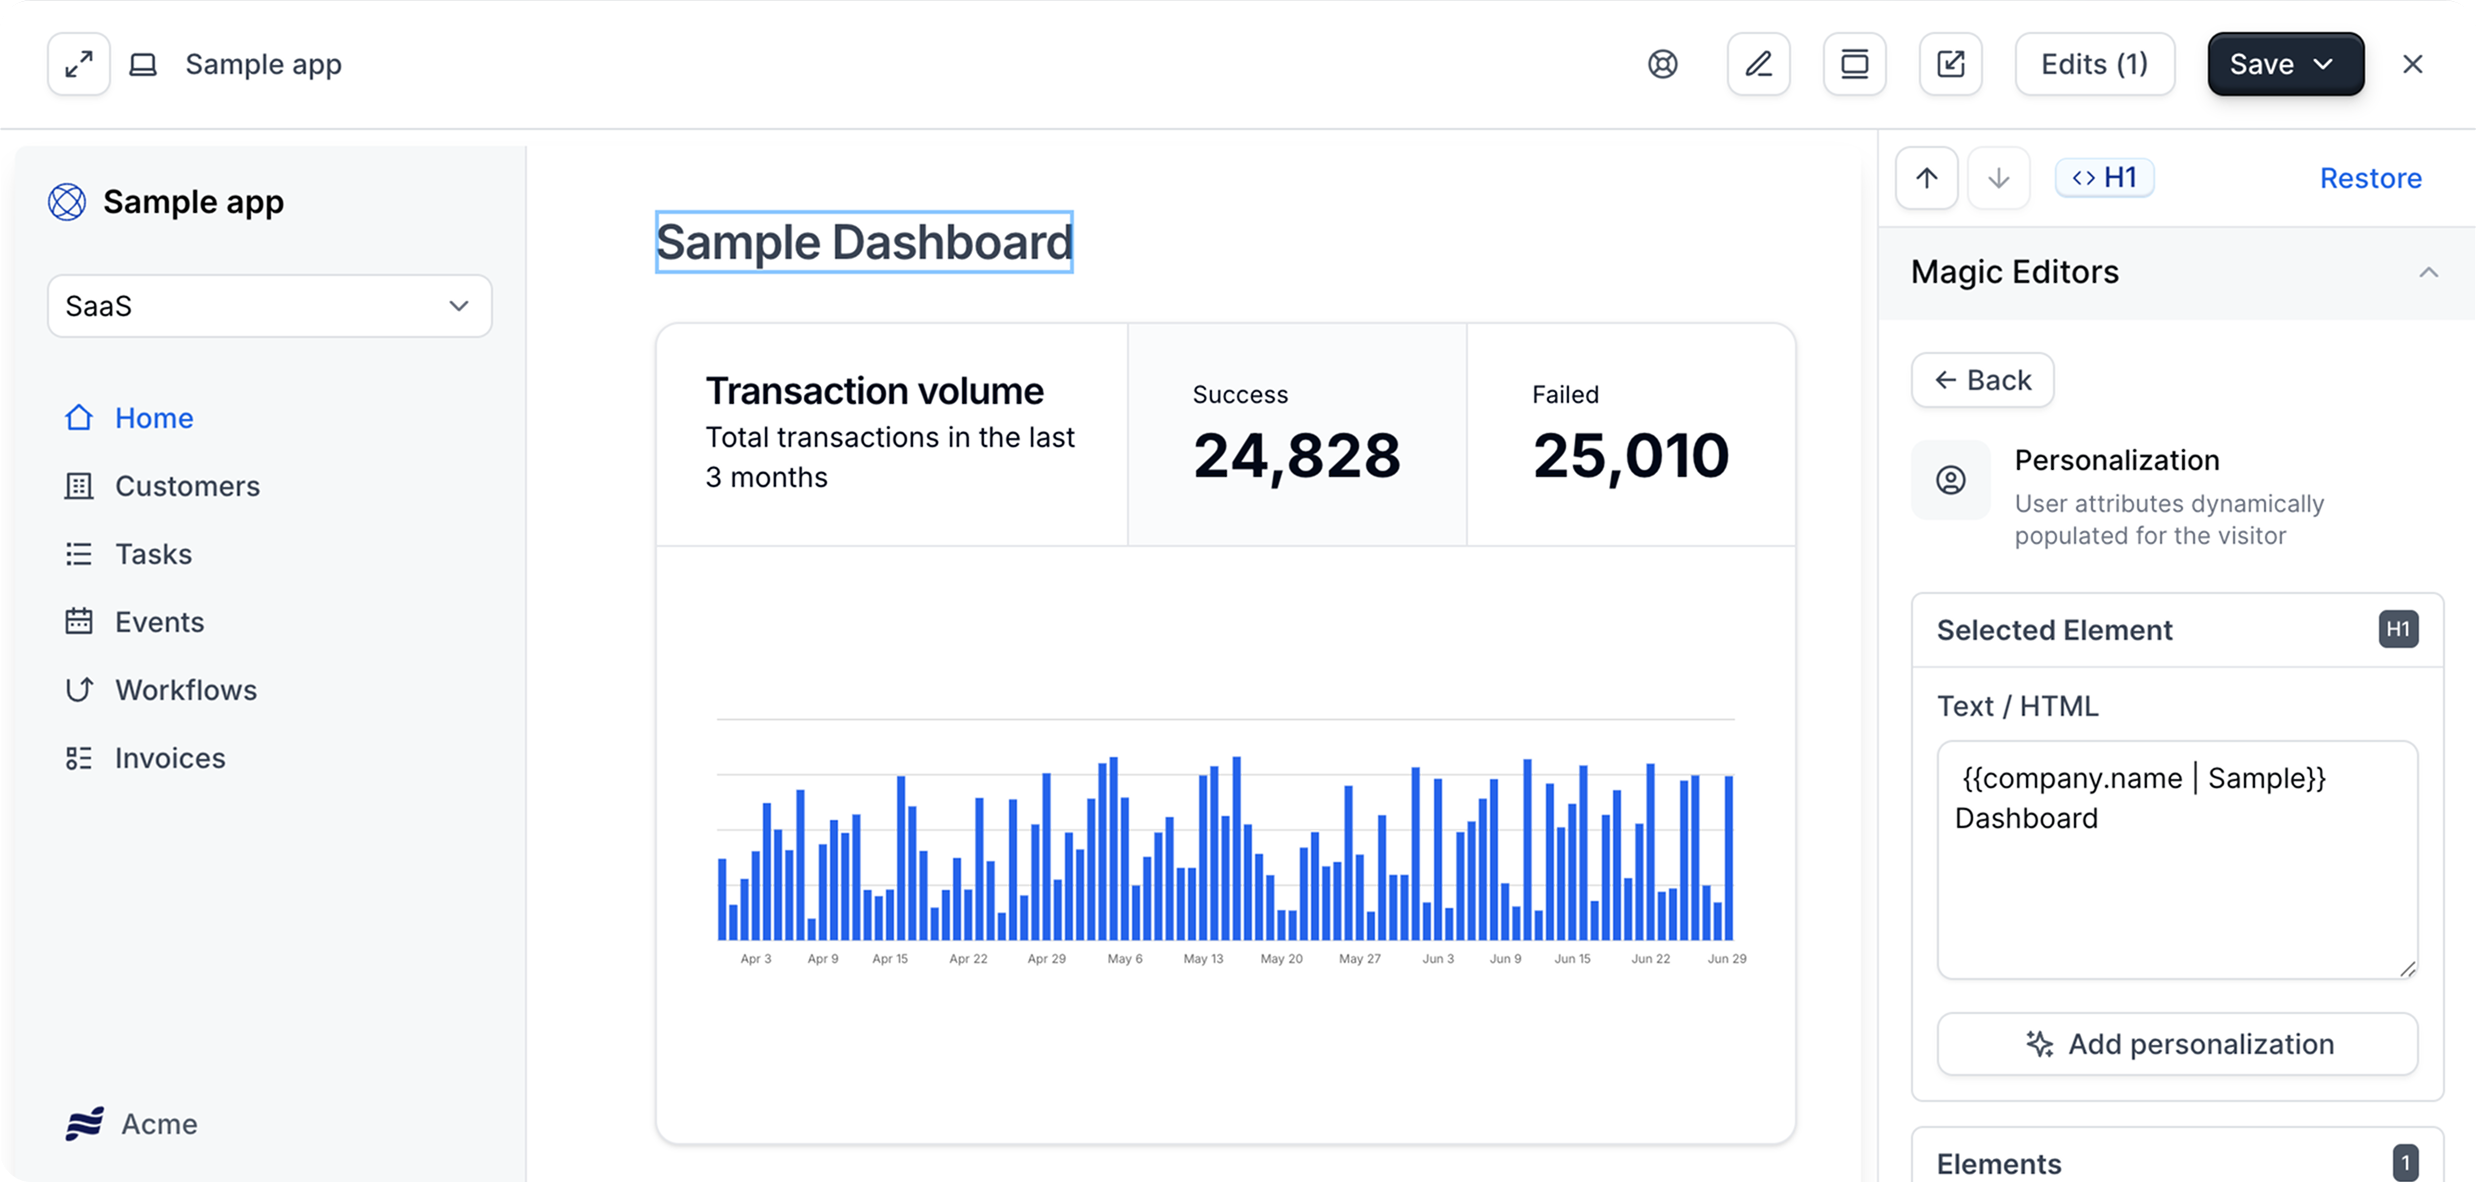
Capture Editor and select the element(s) you want to personalize. Open Personalization in the Magic Editors.
Click + Add Personalization and select a property.You can add a fallback for the text using the format: {{ property || fallback }}.3
Personalize company logo
Select the logo that you would like to personalize in your capture, Click 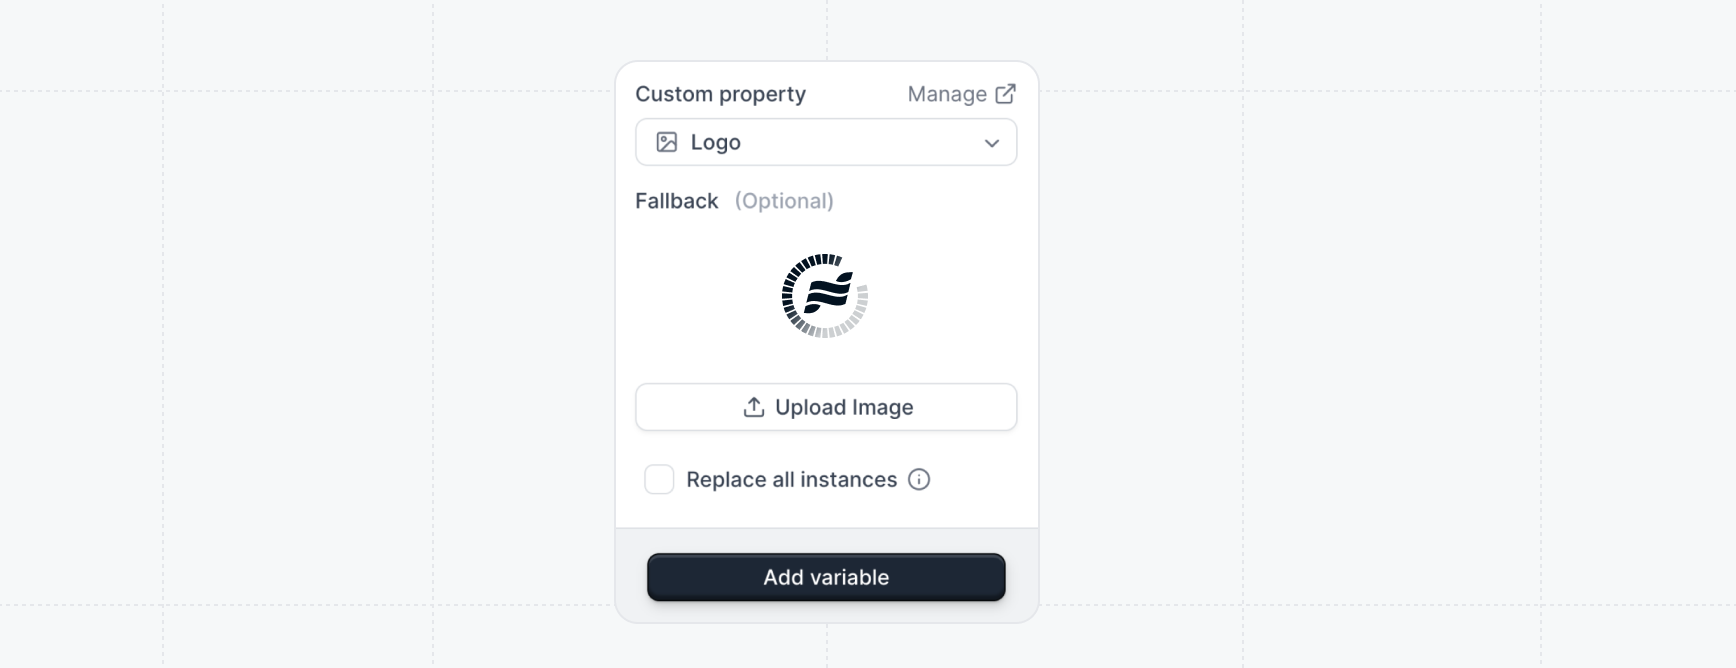
Add Personalization and select Company Logo for the property.The Company Logo will be personalized with the Navattic Logo API anytime the Company Domain or the Visitor email is populated.4
Personalize flows
Any text in your flows can also be personalized. In the 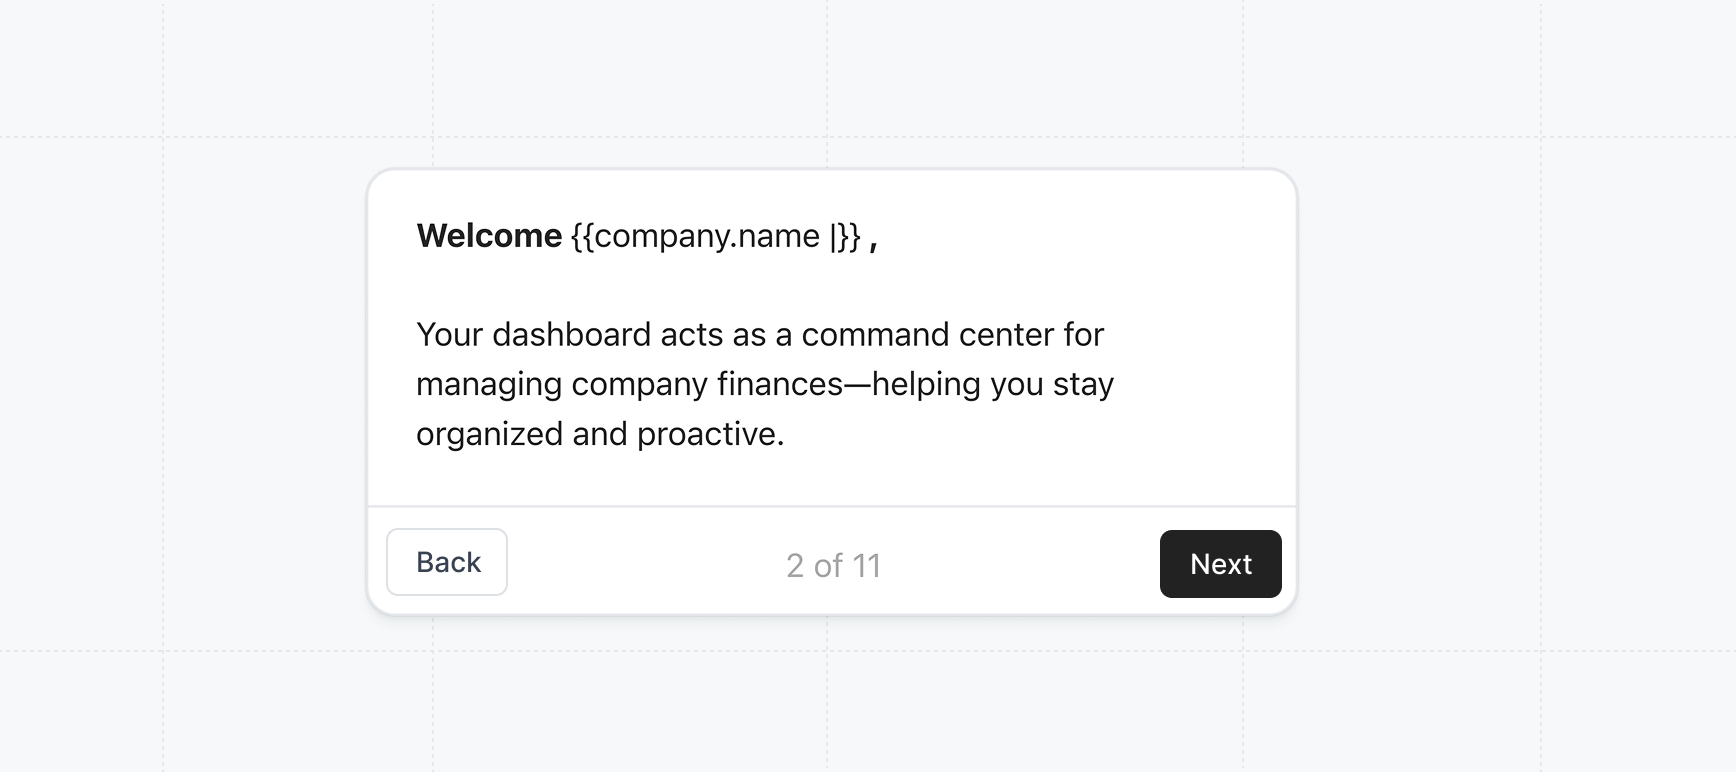
Flow Builder, click Personalization in the More Action menu of the rich text editor for a step.5
Sharing personalized links
Once you’ve personalized your demo, you can share personalized share links with prospects. By specifying the recipient of a share link, the company logo will automatically be personalized. Within Share link settings you can override this logo or add any other personalized property.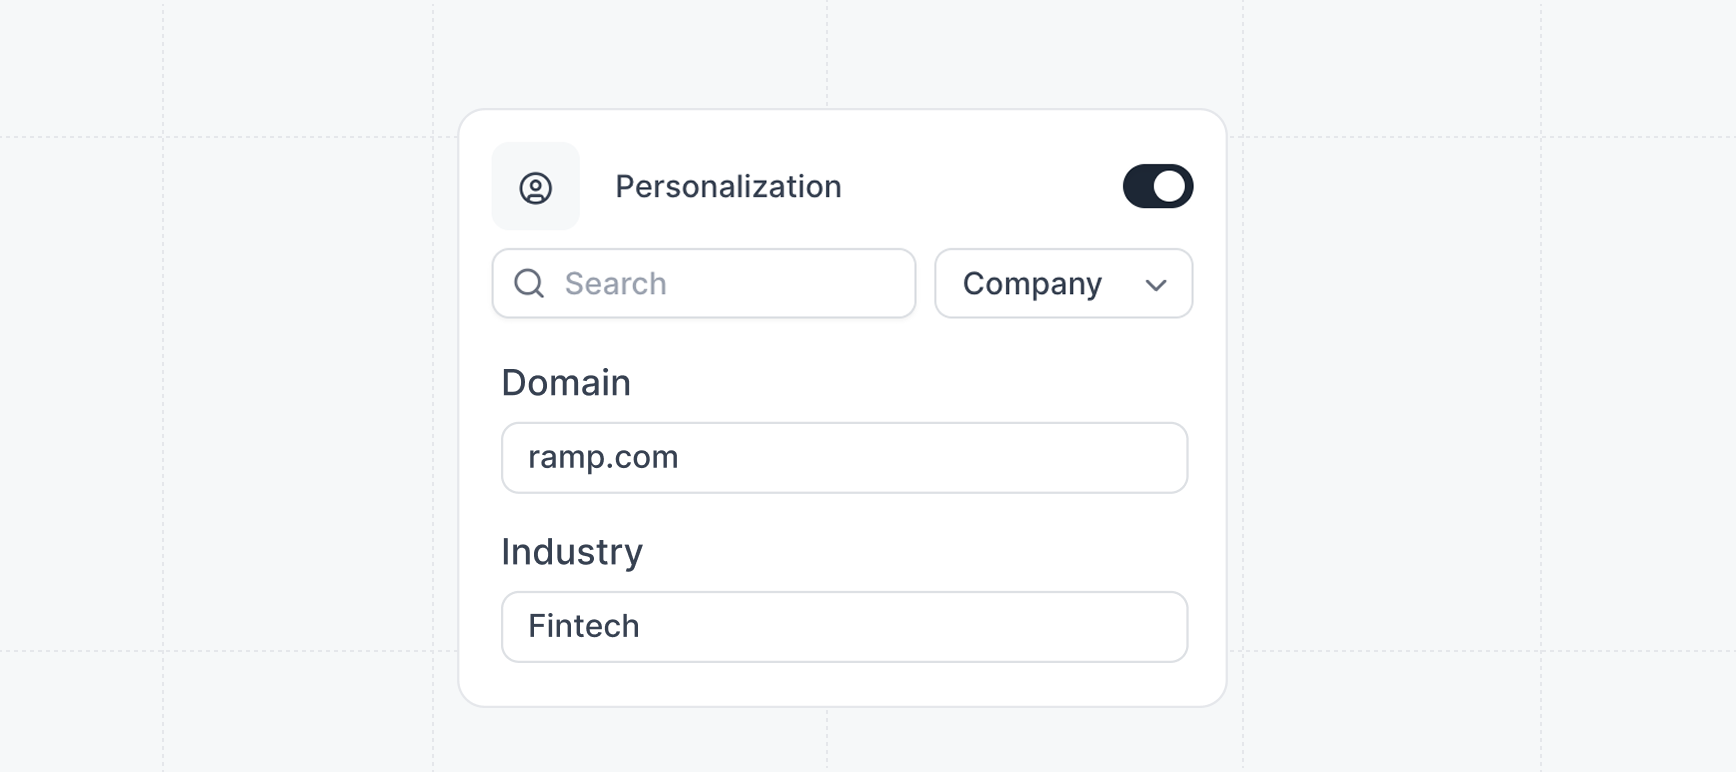
Already have a list of prospects or accounts in mind? Use CONCATENATE within Google
Sheets
or
Excel
to create personalized project share links in bulk.