> ## Documentation Index
> Fetch the complete documentation index at: https://docs.navattic.com/llms.txt
> Use this file to discover all available pages before exploring further.
# Media captures
> Images, videos, and GIFs of your desktop or mobile app.
export const MediaCard = ({title = '', url, type = 'demo'}) => {
const attributes = type === 'demo' ? {
'data-navattic-open': url,
'data-navattic-title': title
} : {
'data-video': url
};
return
{type === 'video' ? 'Watch video' : 'Try a demo'}
{title}
;
};
Navattic makes it easy to create demos of Desktop or Mobile native apps by uploading any screenshots, videos or GIFS you already have.
## Taking Media Captures
Follow these instructions for taking media captures across different platforms:
The **Navattic Capture Extension** can be used to **Capture** screenshots and video of any application that can be opened in a browser. When capturing with the extension, select `Screenshot` or `Video`.
If you already have screenshots, videos or GIFS, of your application, you can **Upload** them to Navattic. When creating a demo, select `Uploading media` and drag and drop the files from your computer.
If your application can be opened in a browser, use the Capture method instead.
For applications that can only be accessed as a native desktop app, use the [Navattic Desktop app](#desktop-capture). Download links and setup instructions are in the Desktop Capture section below.
Follow these instructions for [exporting designs from Figma](https://help.figma.com/hc/en-us/articles/360040028114-Export-from-Figma-Design)
. Make sure to export as `PNG`. After you've taken all of the screenshots, send them to your desktop computer and add them to a folder. When creating a new demo, select `Upload media`, and drag and drop the screenshots from the folder.
Follow these instructions for [taking a screenshot of your iPhone app](https://support.apple.com/en-us/102616)
on your mobile device. After you've taken all of the screenshots, send them to your desktop computer and add them to a folder. When creating a new demo, select `Upload media`, and drag and drop the screenshots from the folder.
Follow these instructions for [taking a screenshot or recording of your Android app](https://support.google.com/android/answer/9075928) on your mobile device. After you've taken all of the screenshots, send them to your desktop computer and add them to a folder. When creating a new demo, select `Upload media`, and drag and drop the screenshots from the folder.
## Desktop Capture
The **Navattic Desktop app** lets you capture screenshots of applications that can't be opened in a browser, including native Windows and macOS apps.
Download the app for your platform:
| Platform | Download |
| ------------------- | ------------------------------------------------------------------------------------------------ |
| Mac (Apple Silicon) | [Navattic.dmg](https://downloads.navattic.com/desktop/production/arm64/Navattic.dmg) |
| Mac (Intel) | [Navattic.dmg](https://downloads.navattic.com/desktop/production/x64/Navattic.dmg) |
| Windows | [Navattic Setup.exe](https://downloads.navattic.com/desktop/production/x64/Navattic%20Setup.exe) |
After installing, open the app and sign in with your Navattic account. Choose a capture mode:
* **Display** — captures your full screen
* **Window** — hover over a window to highlight it, then click to confirm your selection
* **Area** — drag to define a capture region on your screen
* **Device** — captures a connected iOS or Android device via a screen mirroring app
Click **Start recording**, then click through your application. Each click captures a screenshot. When done, click **Stop recording** in the floating toolbar — your captures are automatically saved to a new project in your Navattic workspace.
### Recovering missing captures
If a capture session fails to start, screenshots and recordings may be saved to a temporary folder without being uploaded. You can recover these files from the app's Troubleshooting screen.
In the Desktop app, click the settings icon to open **Settings**.
Click **Troubleshooting** at the bottom of the Settings screen.
The **Recover missing captures** tool shows how many files are waiting. Click **Recover** to upload them.
If recovery succeeds, the captures open automatically in your browser as a new demo.
Click the refresh icon next to the file count to re-check for missing captures at any time.
## Edit Media Captures
**Media Captures** can be edited to tell the perfect story for your demo. Open a **Media Capture** and click `Edit` to open the **Media Capture Editor**.
The **Media Capture Editor** gives you controls for editing any of the following:
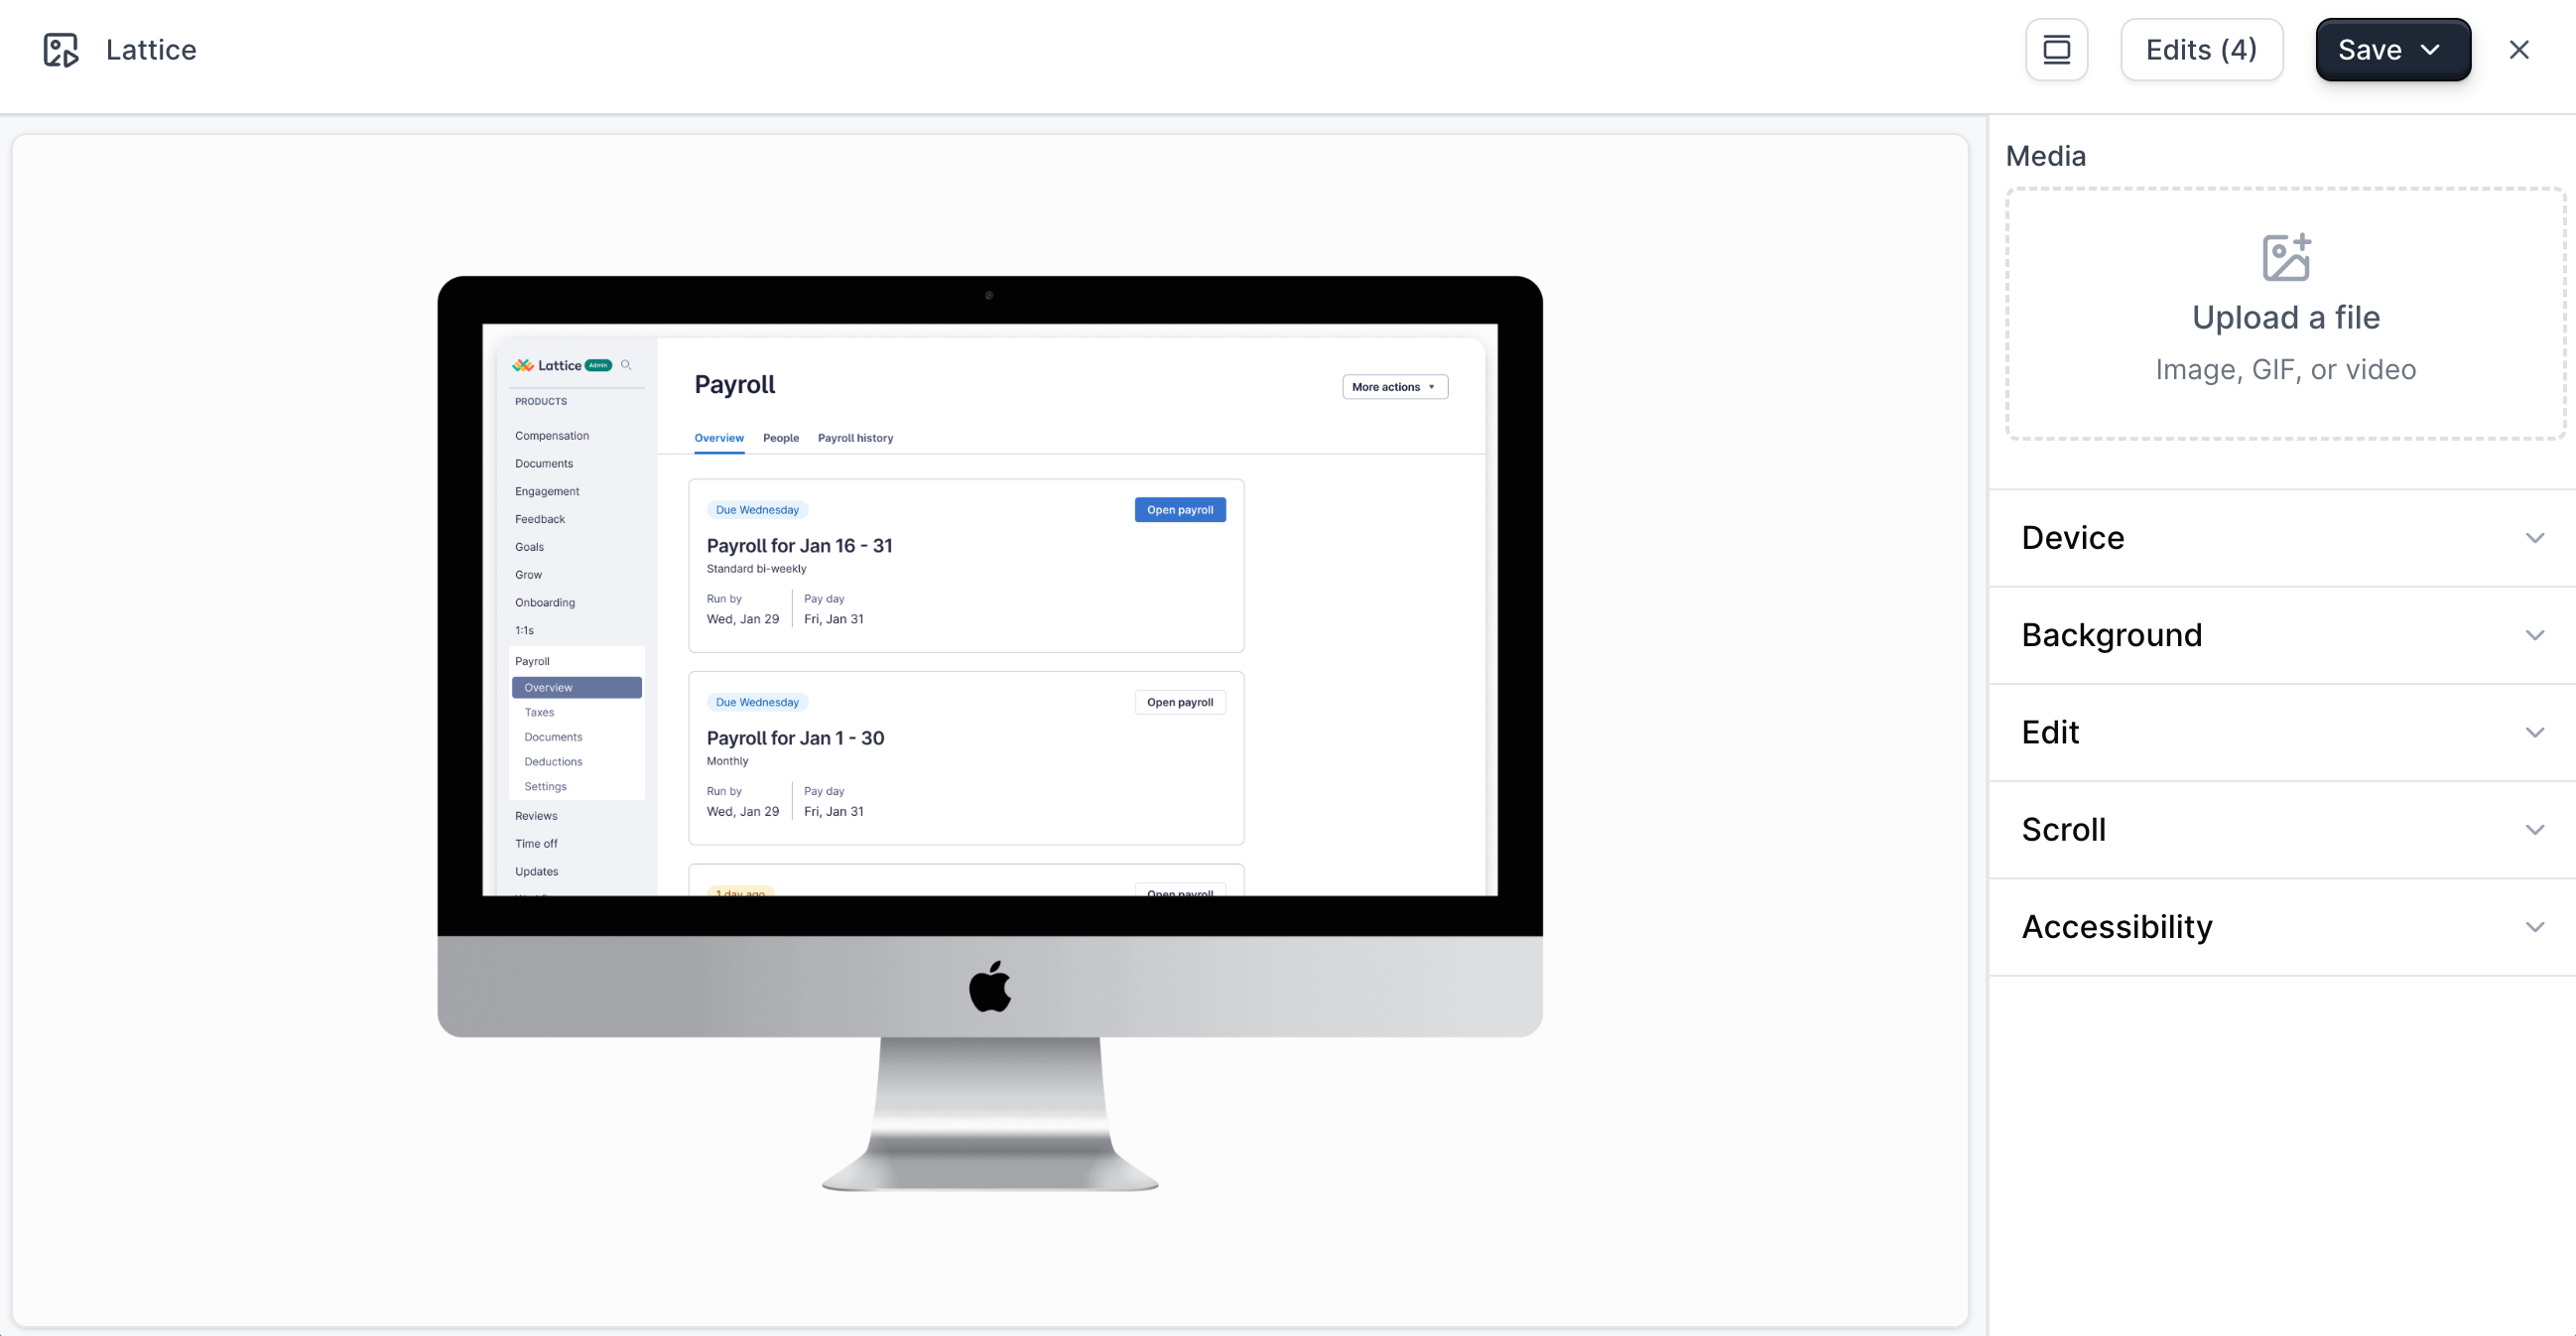
Display your demo inside a realistic **Device frame**, such as a **Mobile**, **Desktop**, or **Tablet**, to match the application's platform. This helps visitors imagine using your product on their own device and adds visual polish. You can also switch orientations and device types to best suit the flow of your demo.
See how Mobile Device Frames look in action by viewing [Calm's demo](https://info.calm.com/WR-Calm-Partner-Portal-Tour.html).
For the best results, use images that match the aspect ratio of the device frame you plan to use. Images that don't match will either be letterboxed or require scrolling.
**Mobile frames (portrait)**
| Device frame | Recommended aspect ratio |
| ----------------------- | ------------------------ |
| Apple iPhone 16 Pro Max | 9:19.5 |
| Apple iPhone 16 Pro | 9:19.5 |
| Apple iPhone 11 Pro Max | 9:19.5 |
| Samsung Galaxy S25 | 9:20 |
| Samsung Galaxy S9 | 9:18.5 |
| Google Pixel 9 | 9:19.5 |
| Google Pixel 3 | 9:18 |
| Nexus 6P | 9:16 |
**Tablet frames (portrait)**
| Device frame | Recommended aspect ratio |
| ------------------ | ------------------------ |
| Apple iPad Pro 13 | 3:4 |
| Apple iPad Silver | 3:4 |
| Samsung Galaxy Tab | 2:3 |
**Desktop frames**
| Device frame | Recommended aspect ratio |
| ----------------- | ------------------------ |
| Apple iMac Pro | 16:9 |
| Apple iMac Retina | 16:9 |
| Apple MacBook Pro | 16:10 |
| Dell XPS 13 | 16:9 |
| PC Laptop 15 | 16:9 |
The plain **Mobile**, **Tablet**, and **Desktop** shadow frames scale to fill the available space and don't require a specific aspect ratio.
Set a custom background color behind your capture to match your brand or make your demo stand out. This is especially useful when embedding your demo on a webpage where the background should blend seamlessly. Consistent branding helps keep the viewing experience professional and cohesive.
Use blur, crop, or draw tools to clean up and annotate your capture. This allows you to hide sensitive data, focus attention on specific areas, or add callouts for clarity. Quick edits like these make your demo look polished without leaving the editor.
Lock vertical or horizontal scrolling to control how viewers navigate your demo. This ensures users focus on the intended content without accidentally moving off-screen. It's especially useful when demonstrating fixed interfaces or static layouts.
Add alt-text that make your demo usable for all viewers, including those with assistive technologies. Accessibility settings ensure your content is readable, navigable, and inclusive.
## Video Editor
For video captures, Navattic includes a built-in **Video Editor** that lets you trim and crop your footage before it's added to your demo -- no external tools required.
To open the Video Editor, upload a video file and click **Edit** before finalizing the upload. You can trim and crop in any order, then save when you're ready.
### Trim
Trimming lets you cut out the beginning or end of a video so your demo starts and ends exactly where you want.
The **timeline** at the bottom of the editor shows your full video along with an audio waveform. Use the **drag handles** on either end of the timeline to set your trim points -- everything outside the handles will be removed. As you drag, the timestamp display updates to reflect your current position within the trimmed range.
Use these controls to navigate and fine-tune your trim:
* **Play/Pause** -- Preview your video to find the right cut points
* **Mute/Unmute** -- Toggle audio while previewing
* **Zoom slider** -- Zoom the timeline from 1x up to 4x for more precise control over short clips
The red **playhead** shows where the video is currently playing. Hover over the timeline to see a gray indicator that helps you preview a position before clicking.
### Crop
Cropping lets you define a specific region of the video frame to keep, removing any surrounding areas you don't want to show.
To enter crop mode, click the **Crop** button in the playback controls. A crop overlay with drag handles will appear over the video preview. Drag the handles to adjust the crop area. The current dimensions are shown in pixels as you resize.
Use the **aspect ratio** dropdown to constrain your crop to a common format:
| Preset | Ratio |
| ---------- | ------------------------------------- |
| Freeform | No constraint |
| Original | Matches the video's native dimensions |
| Widescreen | 16:9 |
| Fullscreen | 4:3 |
| Square | 1:1 |
| Vertical | 9:16 |
When you're satisfied with the crop area, click **Apply** to confirm. To exit crop mode without making changes, click **Discard**.
### Saving your edits
Once you've finished trimming and cropping, click **Save** to apply your edits. The edited video replaces the original and is ready to use in your demo.
Trim and crop are applied together when you save. You can adjust either at any point before clicking Save.
## Video capture controls
Video captures can be a good option for showcasing dynamic content, such as animations or user interactions like drag-and-drop.
Select **Video options** from the Capture dropdown in the Demo Builder, or select **Advanced** on a Video capture in the Flow builder to control the following settings:
**Auto play** your video capture when a viewer lands on the step. This creates a smooth, immediate viewing experience without requiring the user to click play.
If the video capture is on the first step, audio will not play until the visitor has interacted with the demo (such as clicking or scrolling) due to browser restrictions.
Use **Playback controls** to display standard video controls like play, pause, and mute so viewers can control their own pace.
Enable or disable **Audio** for your video capture. Enabling audio can add context and personality to your walkthrough, while disabling it ensures the focus stays on visuals—especially in quiet or public settings.
Enable **Loop** to automatically restart the video when it finishes.
#### Example Media capture demos
#### FAQ
Navattic includes mobile, tablet, and desktop borders for Apple and non-Apple devices. Adding a device border helps end users best visualize your desktop or mobile application. Learn more about' ' [adding a device border](/captures#M2cYM) to a media capture.
Yes, to add a PDF to your demo, you'll have to convert the file to a .PNG or .JPEG file before uploading it as a Media Capture. We recommend using this free online converter: [https://www.freeconvert.com/pdf-converter/download](https://www.freeconvert.com/pdf-converter/download).
[Watch a 1-minute tutorial](https://www.loom.com/share/3aee01f369764ab0837901fb455ee6c9?sid=00576aa6-1538-4791-beaf-75e1cab15659) on converting and uploading PDFs in Navattic.
Using [device mode](https://developer.chrome.com/docs/devtools/device-mode) in Google Chrome paired with a [tool like this](https://chromewebstore.google.com/detail/gofullpage-full-page-scre/fdpohaocaechififmbbbbbknoalclacl) , you are able to take screenshots that better fit with the device borders.
No. Navattic does not currently support image editing. We recommend using a tool like Figma or Adobe to make modifications prior to uploading.
We recommend using images that are greater than 1200px in width as smaller images will appear blurry in Navattic.
To avoid the need to scroll, find the ratio of the device border and ensure your image has the same ratio before uploading it to Navattic.
* The ratio for the Desktop border within Navattic is 3:2.
An easy way to get the correct ratio is to set up a Google Slides deck with this same ratio as the device border you want to use. Then, fill the slides with your images before downloading each individual Slide.
 Navattic makes it easy to create demos of Desktop or Mobile native apps by uploading any screenshots, videos or GIFS you already have.
## Taking Media Captures
Follow these instructions for taking media captures across different platforms:
Navattic makes it easy to create demos of Desktop or Mobile native apps by uploading any screenshots, videos or GIFS you already have.
## Taking Media Captures
Follow these instructions for taking media captures across different platforms: