> ## Documentation Index
> Fetch the complete documentation index at: https://docs.navattic.com/llms.txt
> Use this file to discover all available pages before exploring further.
# Labels
> Add labels to your demos to categorize them and make them easier to find.
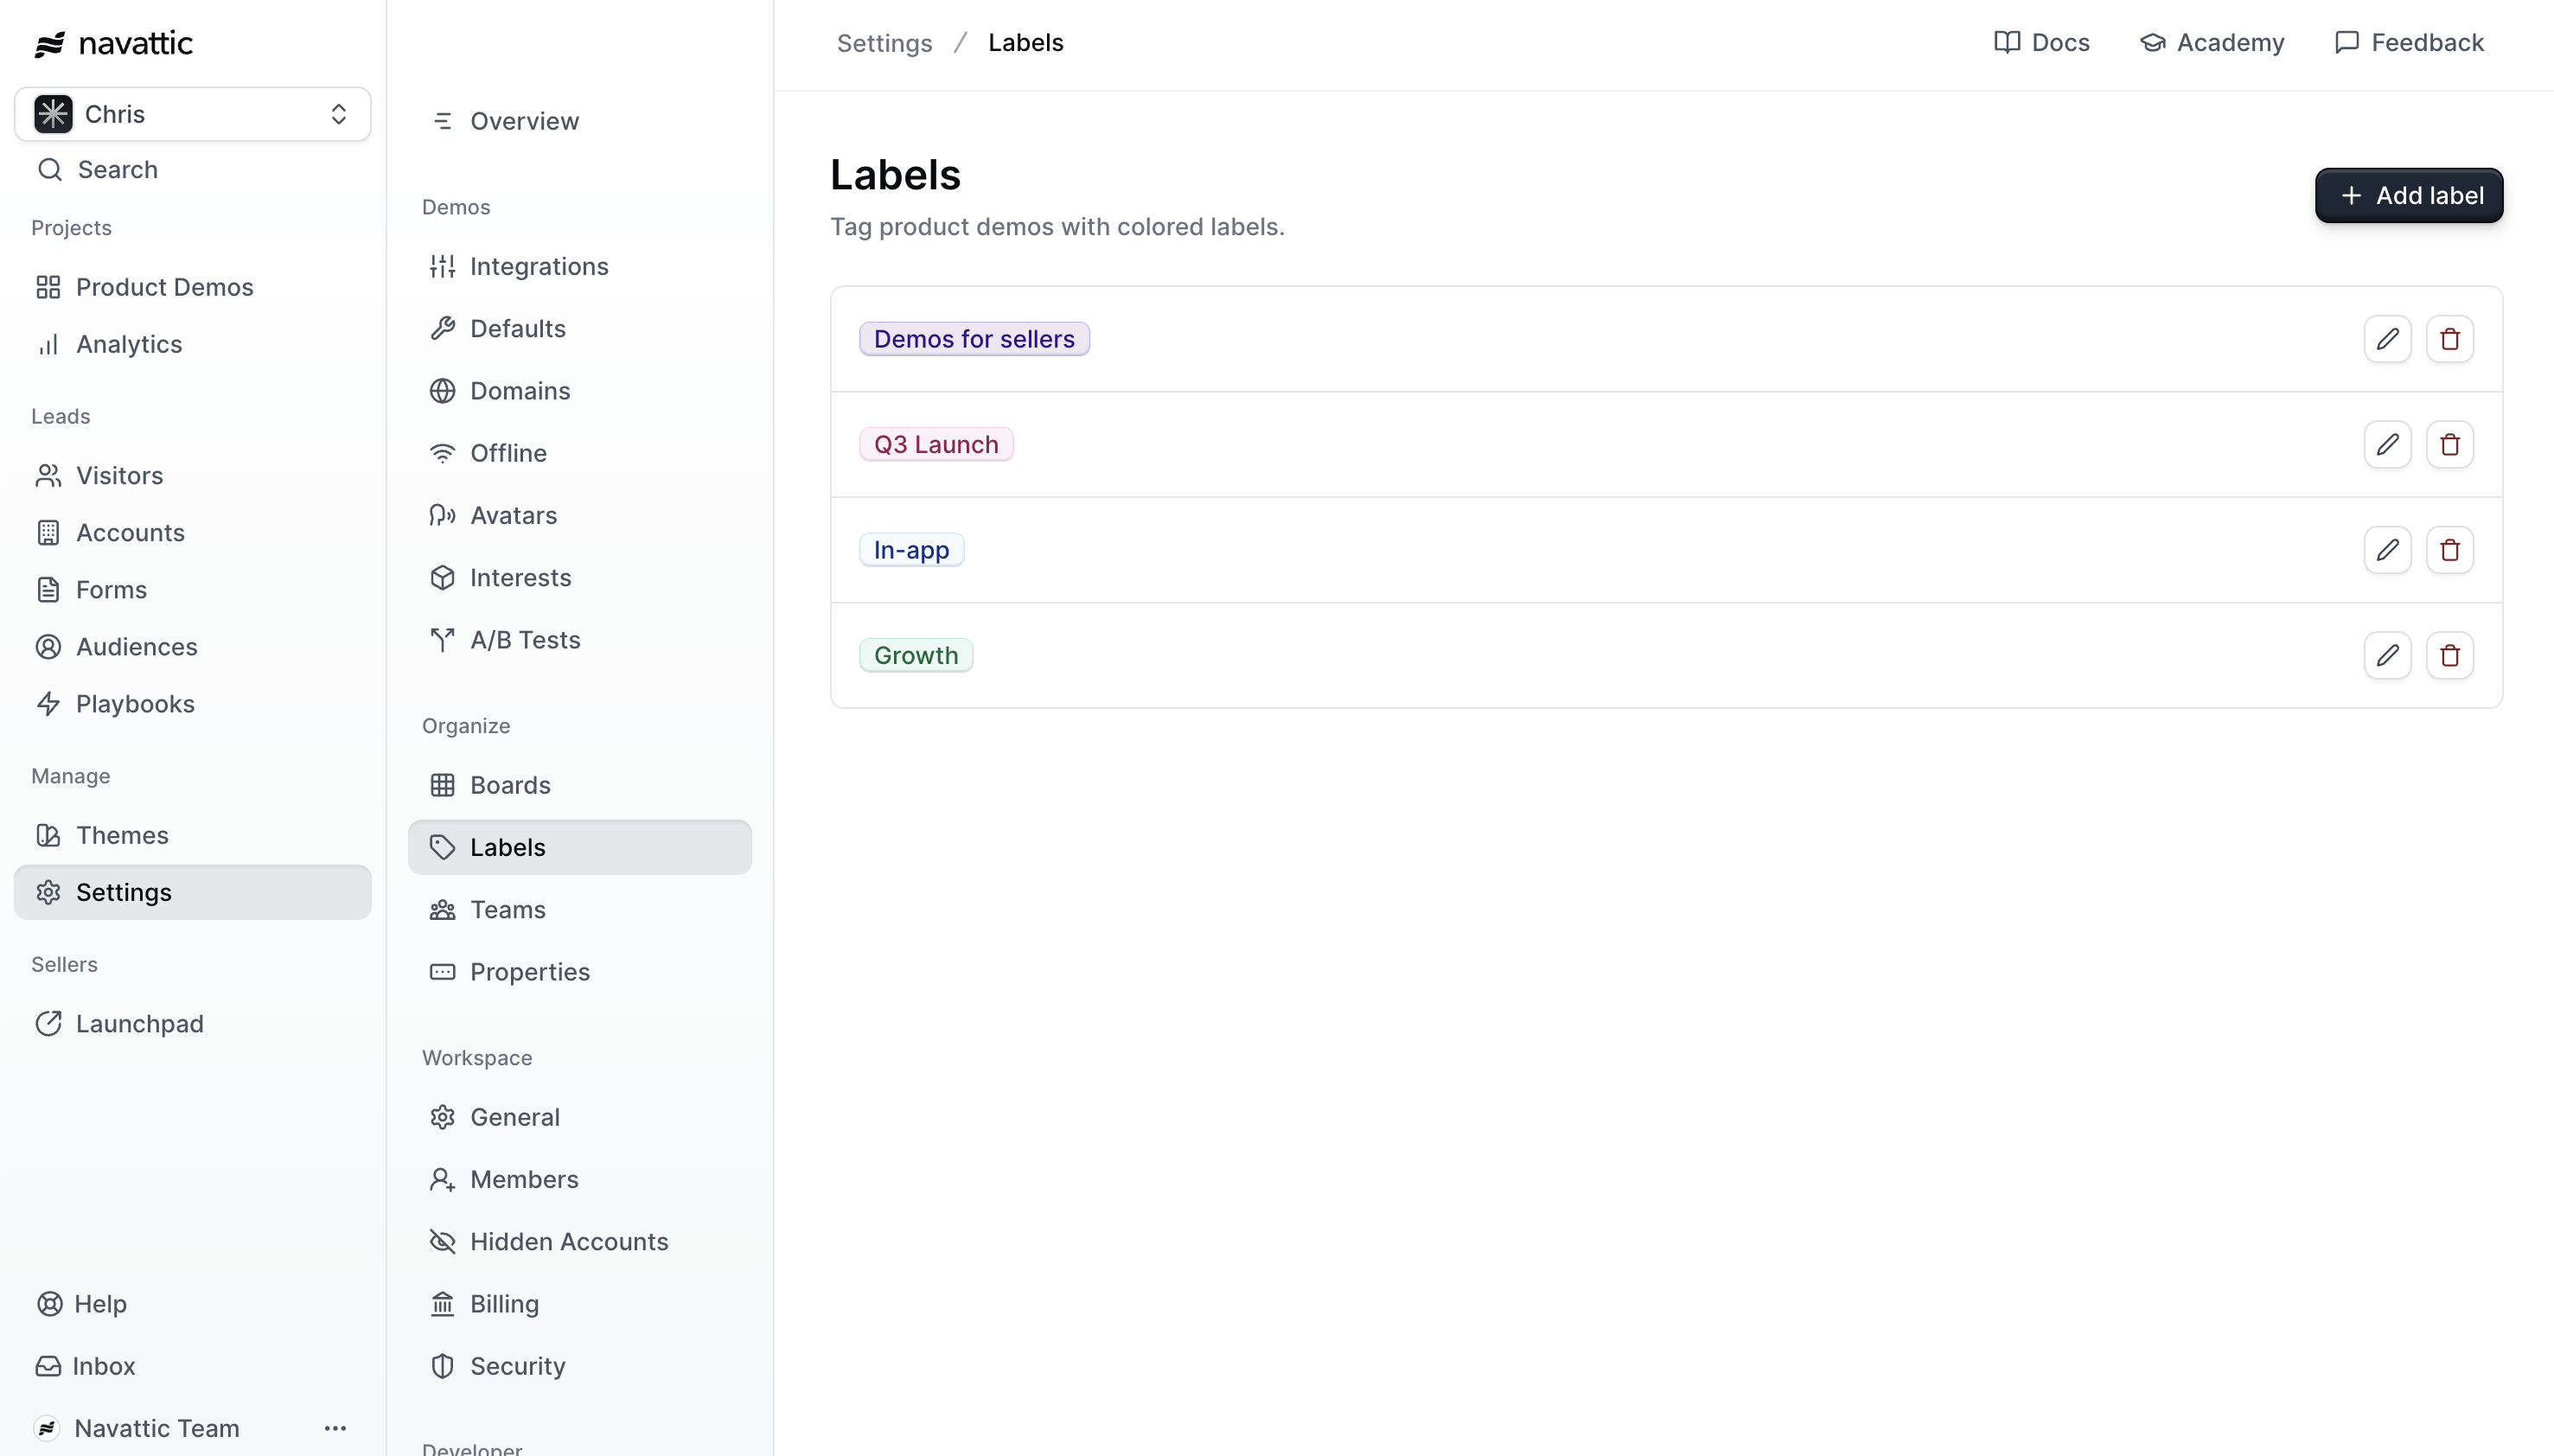 **Labels** are a way to categorize your demos and make them easier to find.
You can develop your own strategy for labeling your demos. For example, you could use labels to categorize demos by product feature, customer type, or sales stage. Here are some examples:
* **Product Feature**: "Product A", "Product B", "Product C"
* **Customer Type**: "Enterprise", "Small Business", "Individual"
* **Sales Stage**: "Prospecting", "Qualification", "Proposal"
### How to create labels
Follow these steps to learn how to create labels:
Navigate to
Label Settings
and create a label.
**Labels** are a way to categorize your demos and make them easier to find.
You can develop your own strategy for labeling your demos. For example, you could use labels to categorize demos by product feature, customer type, or sales stage. Here are some examples:
* **Product Feature**: "Product A", "Product B", "Product C"
* **Customer Type**: "Enterprise", "Small Business", "Individual"
* **Sales Stage**: "Prospecting", "Qualification", "Proposal"
### How to create labels
Follow these steps to learn how to create labels:
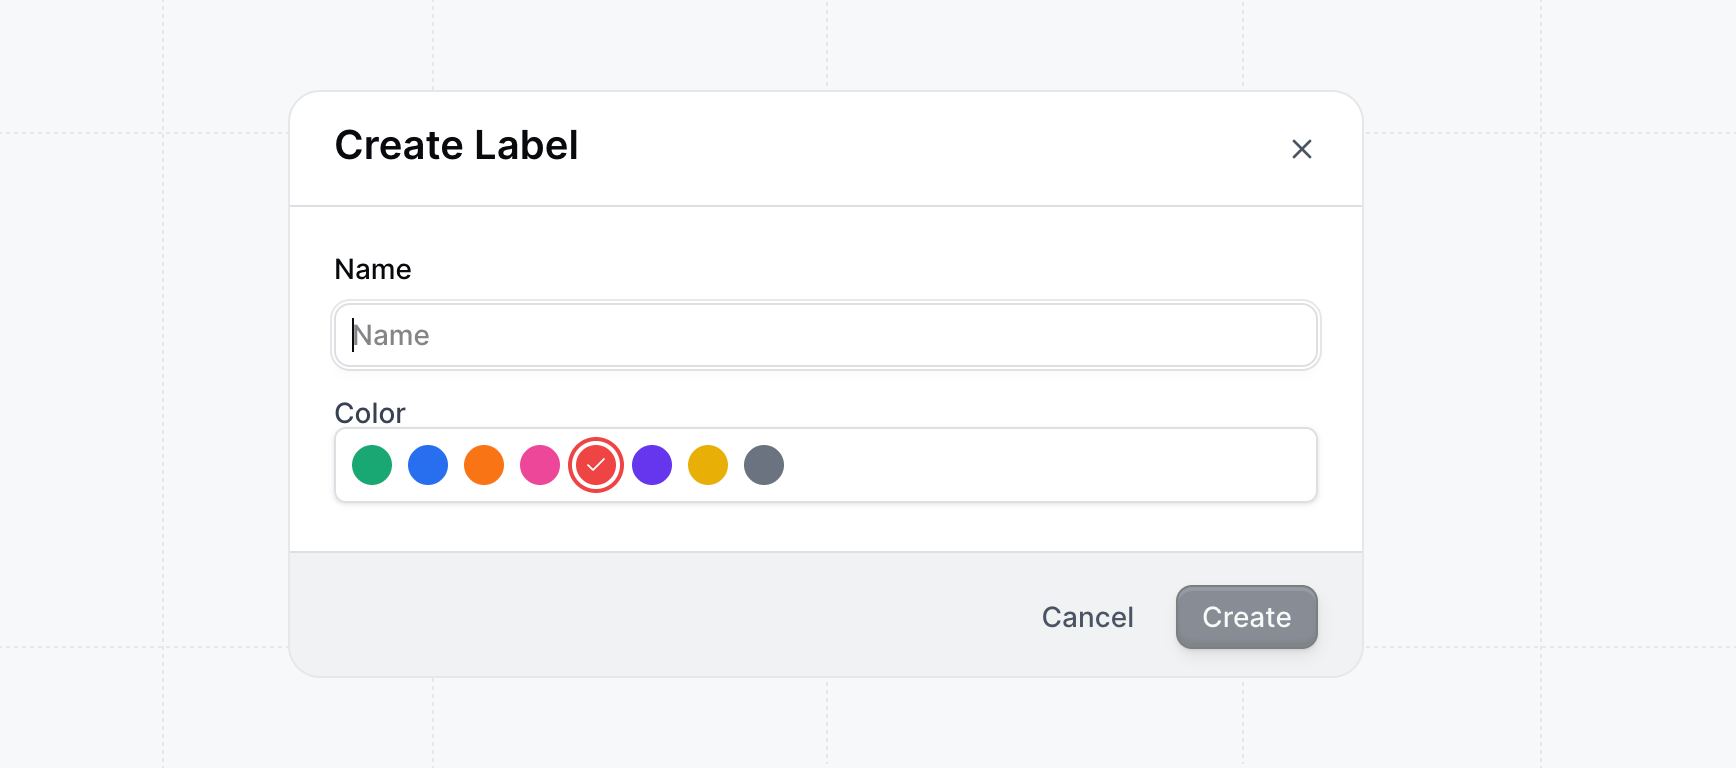
Navigate to
Label Settings
and create a label.
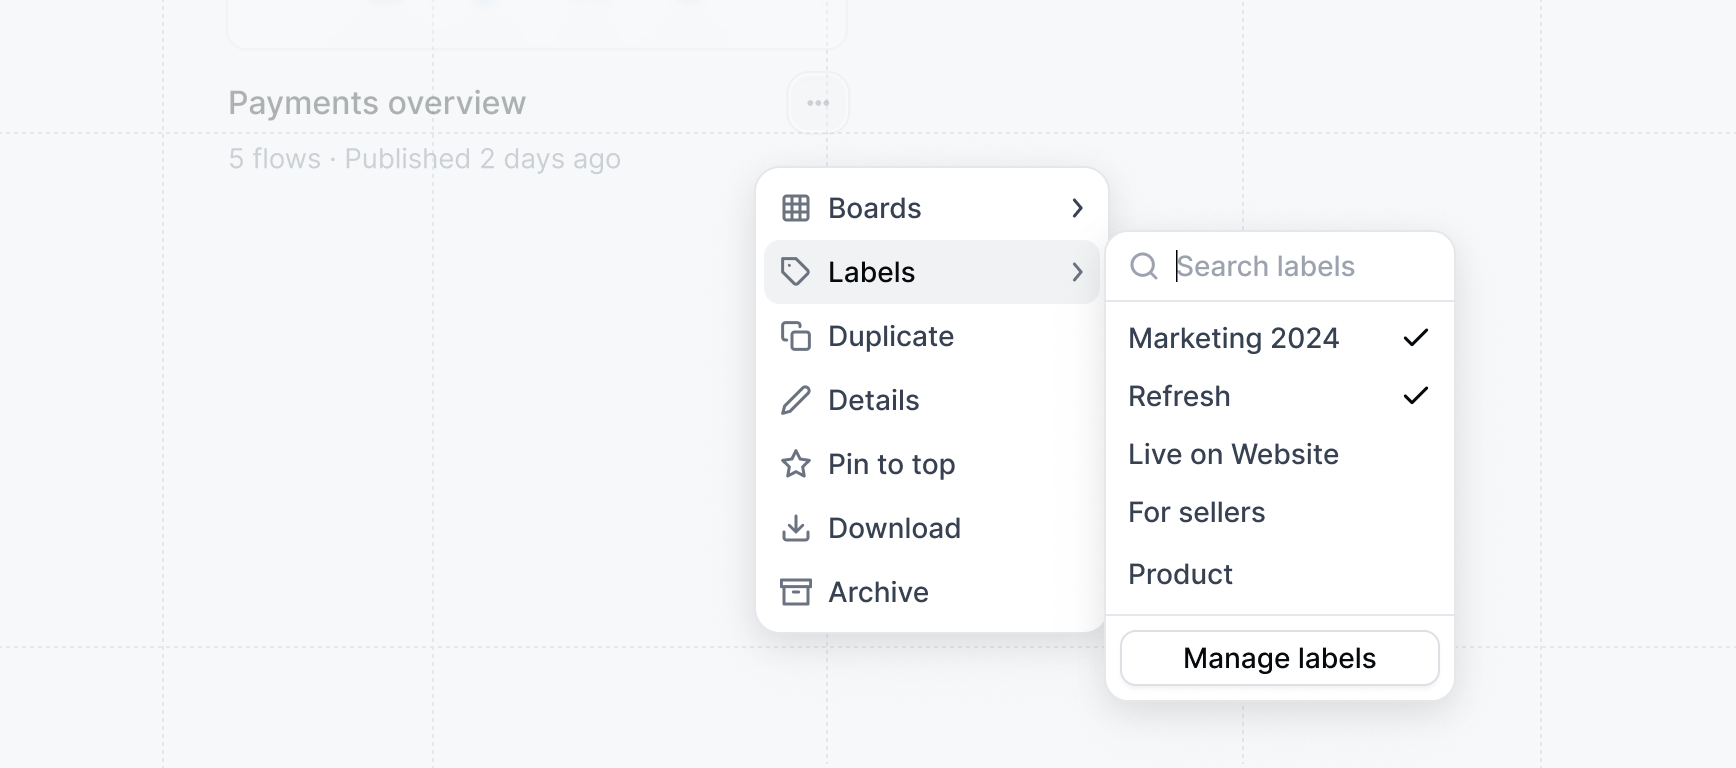
 Under Product demos, select more actions on a demo to add labels.
 **Congratulations** -- you've learned how to build
**Boards** to organize your demo.
Next, learn how to manage your teams and specify their access to demos.
Manage your teams and specify their access to demos.
**Congratulations** -- you've learned how to build
**Boards** to organize your demo.
Next, learn how to manage your teams and specify their access to demos.
Manage your teams and specify their access to demos.