> ## Documentation Index
> Fetch the complete documentation index at: https://docs.navattic.com/llms.txt
> Use this file to discover all available pages before exploring further.
# Boards
> Organize your product demos onto shared views.
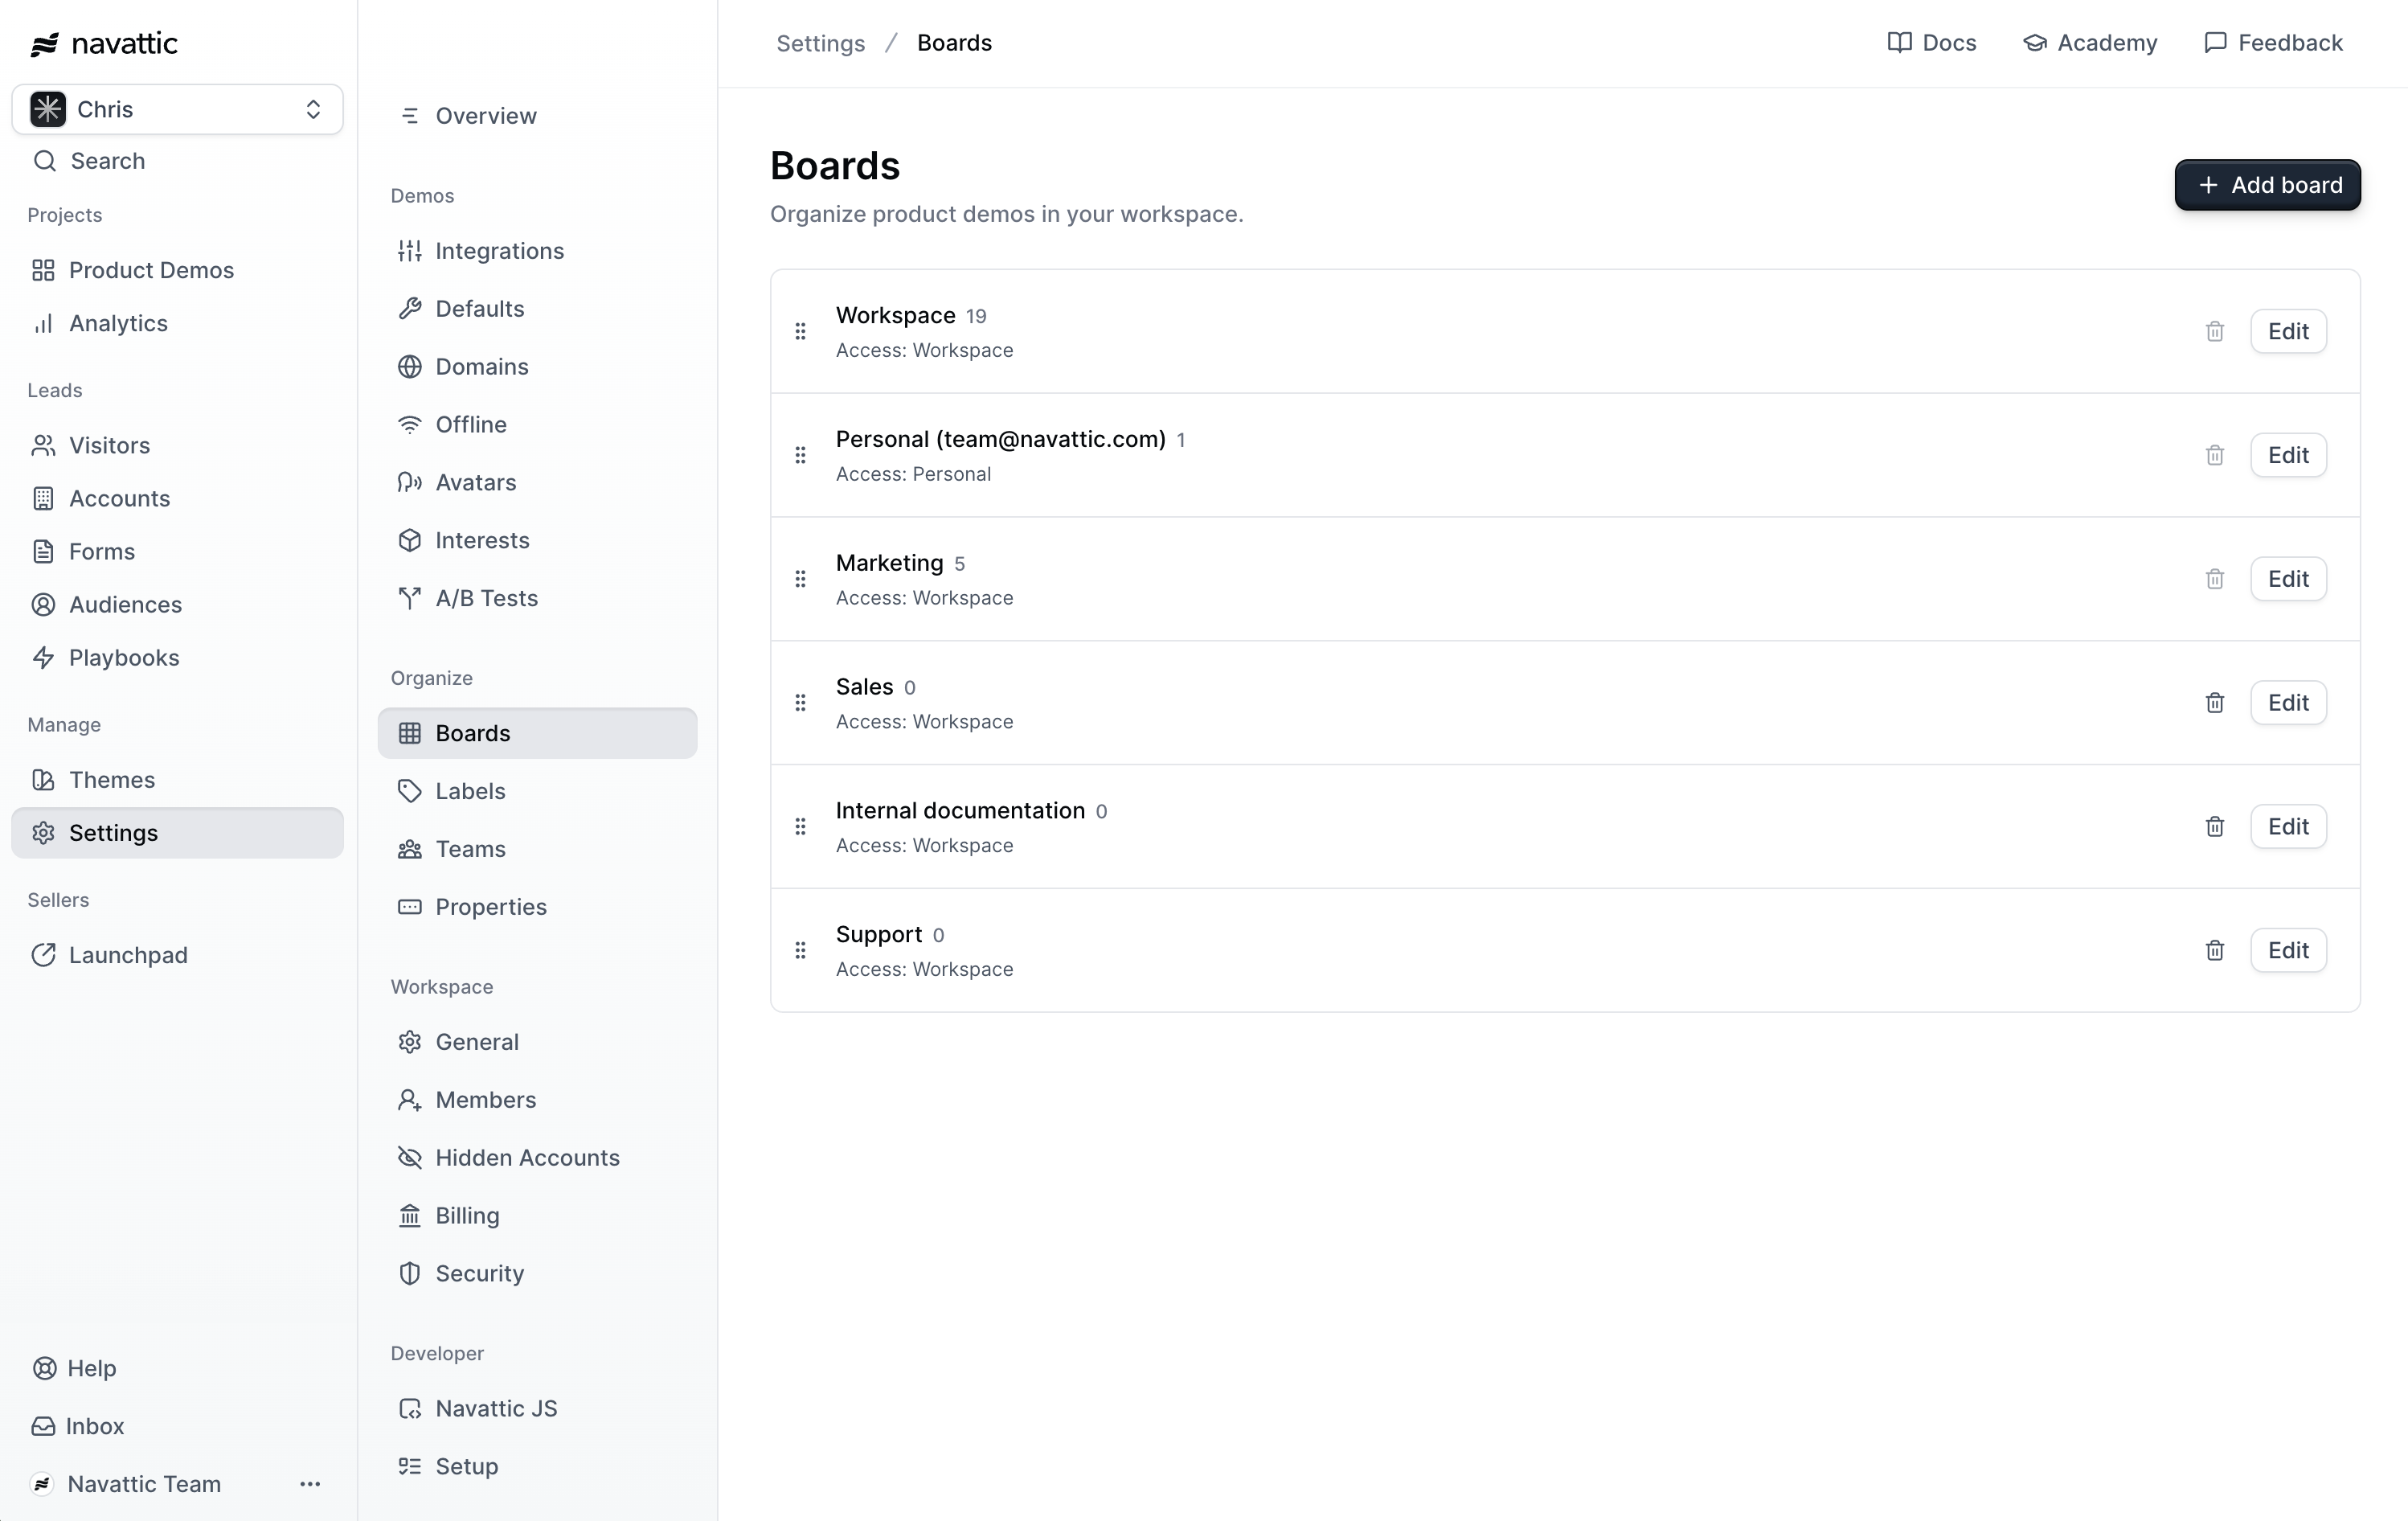 **Boards** are a powerful way to organize your product demos onto shared views.
### How to create boards
Follow these steps to learn how to create boards:
Navigate to Board Settings
and create a board for your newly created team. You can name the board anything memorable for your team ex. "Sales" or "Outbound demos". Any number of boards can be created for Launchpad.
**Boards** are a powerful way to organize your product demos onto shared views.
### How to create boards
Follow these steps to learn how to create boards:
Navigate to Board Settings
and create a board for your newly created team. You can name the board anything memorable for your team ex. "Sales" or "Outbound demos". Any number of boards can be created for Launchpad.
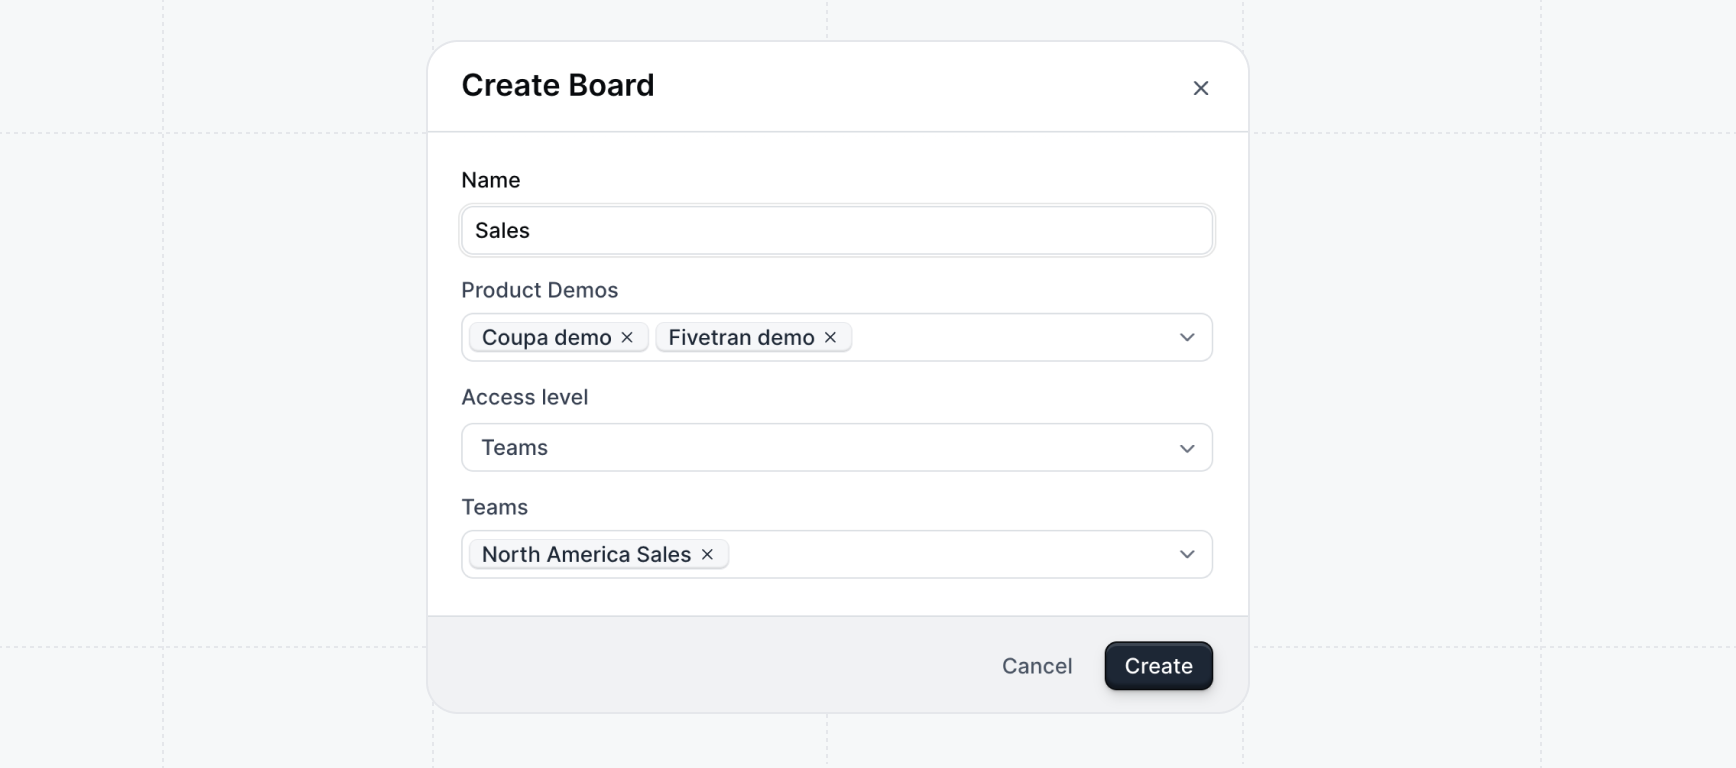 Over time you can create boards per use case, product, team, etc. We recommend you start simple and create boards based on your organization's initial needs.
Under **Product demos**, find the top-performing demos relevant to your sales team. You can use the filters to narrow down the demos by activity or labels.
Consult your top sales reps (AEs, SEs, BDRs, and SDRs) on what areas of the product are particularly important for them to show off in demos.
Over time you can create boards per use case, product, team, etc. We recommend you start simple and create boards based on your organization's initial needs.
Under **Product demos**, find the top-performing demos relevant to your sales team. You can use the filters to narrow down the demos by activity or labels.
Consult your top sales reps (AEs, SEs, BDRs, and SDRs) on what areas of the product are particularly important for them to show off in demos.
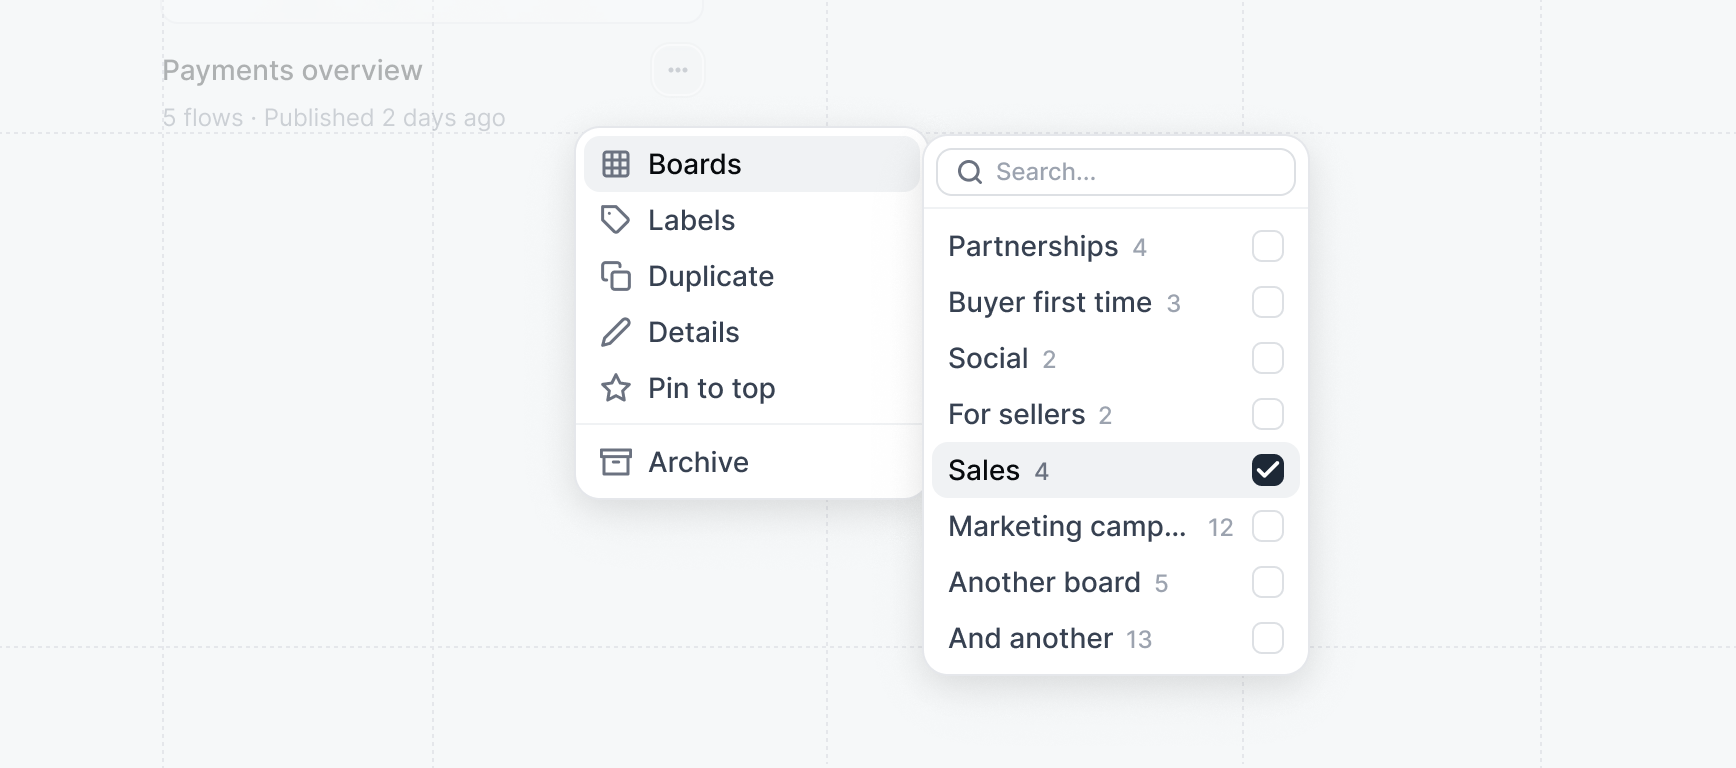 **Congratulations** -- you've learned how to build **Boards** to organize your demo.
Next, learn how to add labels to demos and categorize them and make them easier to find.
Add labels to your demos to categorize them and make them easier to find.
## Navigating boards with teams
If your workspace has [teams](/workspace/teams) enabled and contains more than five boards, the board selector organizes boards into groups to make navigation easier.
Boards are grouped as follows:
* **Workspace** — Boards accessible to all workspace members
* **Personal** — Your private boards
* **\[Team name]** — One group per team you belong to, showing boards scoped to that team
Click a group name to expand it, then select the board you want to view. Workspace admins can see all boards across every group, including teams they're not a member of. Personal boards also display the owner's name so admins can identify who created each one.
Team boards can contain both Interactive Demos and Launchpad boards — you no longer need a Launchpad-only workspace to use team-scoped boards.
**Congratulations** -- you've learned how to build **Boards** to organize your demo.
Next, learn how to add labels to demos and categorize them and make them easier to find.
Add labels to your demos to categorize them and make them easier to find.
## Navigating boards with teams
If your workspace has [teams](/workspace/teams) enabled and contains more than five boards, the board selector organizes boards into groups to make navigation easier.
Boards are grouped as follows:
* **Workspace** — Boards accessible to all workspace members
* **Personal** — Your private boards
* **\[Team name]** — One group per team you belong to, showing boards scoped to that team
Click a group name to expand it, then select the board you want to view. Workspace admins can see all boards across every group, including teams they're not a member of. Personal boards also display the owner's name so admins can identify who created each one.
Team boards can contain both Interactive Demos and Launchpad boards — you no longer need a Launchpad-only workspace to use team-scoped boards.