> ## Documentation Index
> Fetch the complete documentation index at: https://docs.navattic.com/llms.txt
> Use this file to discover all available pages before exploring further.
# Google Tag Manager
> Integrate Navattic events with Google Tag Manager for flexible tracking configurations.
Follow these steps to integrate Navattic JS events with  **Google Tag Manager**:
In Google Tag Manager, create a new tag:
1. Go to **Tags** → **New** and name it "Navattic JS"
2. Under **Tag Configuration**, select **Custom HTML**
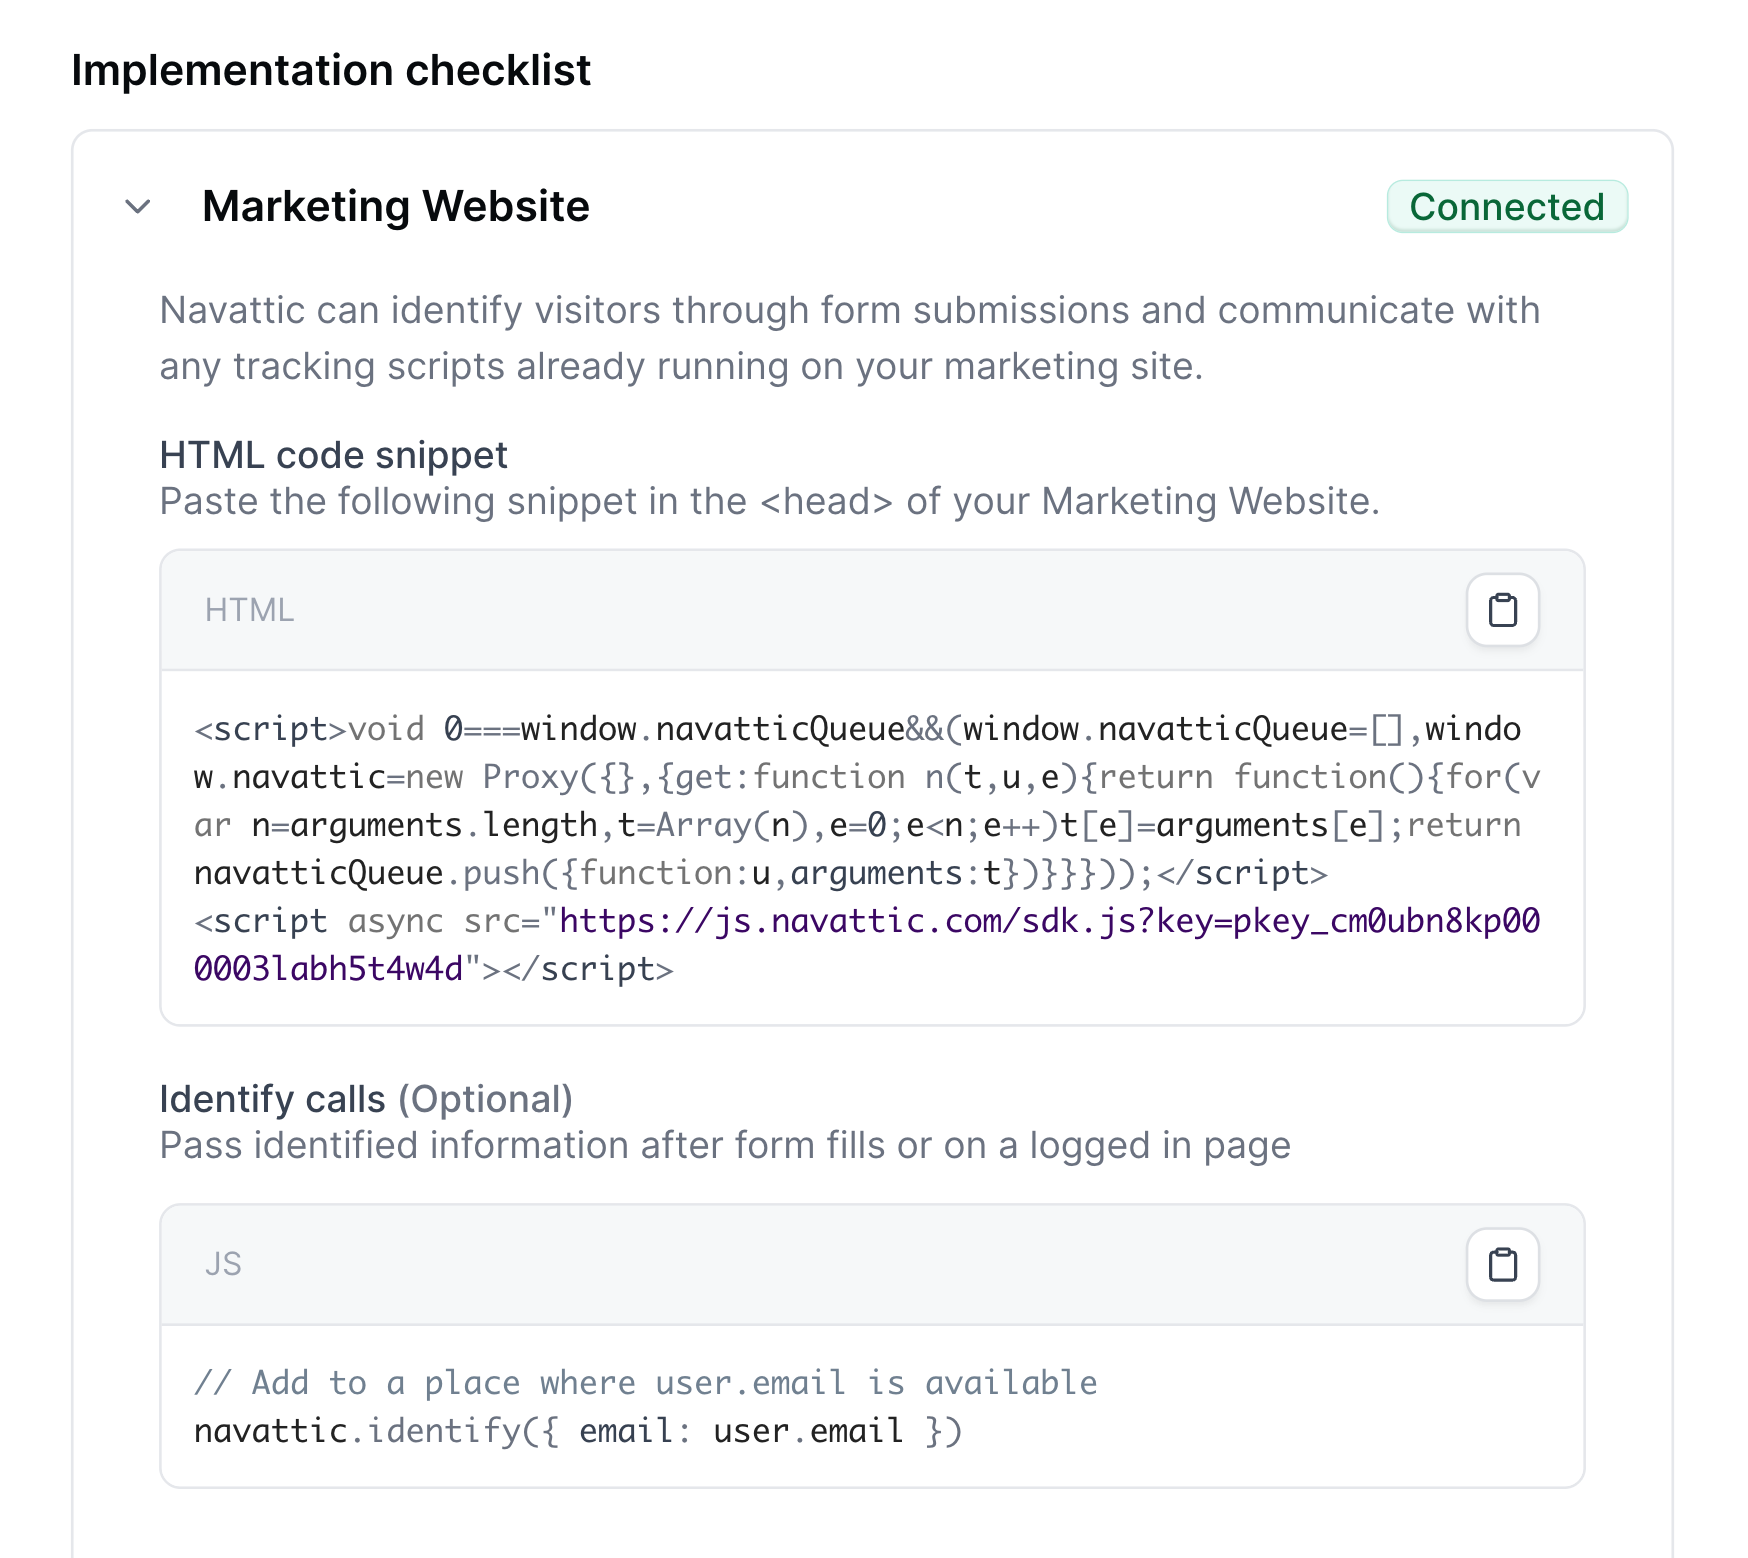
3. Navigate to Navattic Settings > [Navattic JS](https://app.navattic.com/u/settings/js) and copy the installation code
4. Paste the code into the Custom HTML field
**Google Tag Manager**:
In Google Tag Manager, create a new tag:
1. Go to **Tags** → **New** and name it "Navattic JS"
2. Under **Tag Configuration**, select **Custom HTML**
3. Navigate to Navattic Settings > [Navattic JS](https://app.navattic.com/u/settings/js) and copy the installation code
4. Paste the code into the Custom HTML field
 If you have **GA4 + Google Tag Manager integration** enabled in Navattic JS configuration, events will be automatically tracked. Otherwise, add this to your installation snippet:
```html theme={null}
```
```html theme={null}
```
5. Under **Triggering**, select **All Pages** or create a custom trigger for specific pages
6. Click **Save**
If you have **GA4 + Google Tag Manager integration** enabled in Navattic JS configuration, events will be automatically tracked. Otherwise, add this to your installation snippet:
```html theme={null}
```
```html theme={null}
```
5. Under **Triggering**, select **All Pages** or create a custom trigger for specific pages
6. Click **Save**
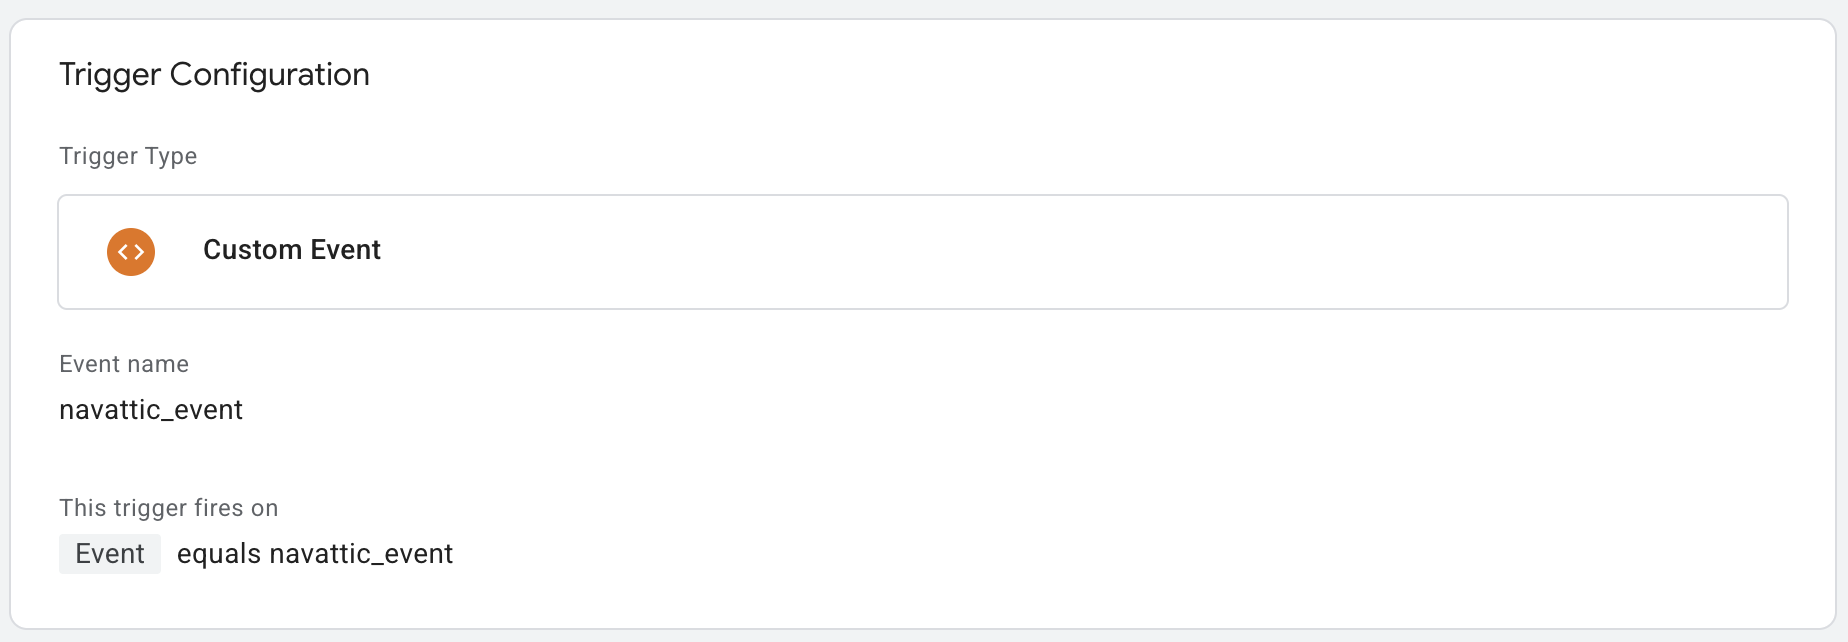
 Set up a trigger to capture Navattic events:
1. Go to **Triggers** → **New**
2. Under **Trigger Configuration**, select **Custom Event**
3. Set **Event name** to `navattic_event`
4. Under **This trigger fires on**, select **Some Custom Events**
5. Add condition: `{{Event}}` equals `navattic_event`
6. Save the trigger
Set up a trigger to capture Navattic events:
1. Go to **Triggers** → **New**
2. Under **Trigger Configuration**, select **Custom Event**
3. Set **Event name** to `navattic_event`
4. Under **This trigger fires on**, select **Some Custom Events**
5. Add condition: `{{Event}}` equals `navattic_event`
6. Save the trigger
 Define variables for the below Navattic event fields:
| Variable Name | Type | Data layer variable name |
| ------------------- | ------------------- | ------------------------ |
| Navattic event type | Data Layer Variable | data.type |
| Navattic demo name | Data Layer Variable | data.project\_\_name |
| Navattic flow name | Data Layer Variable | data.flow\_\_name |
| Navattic step name | Data Layer Variable | data.step\_\_name |
1. Go to **Variables** → **User-Defined Variables** → **New**
2. For each variable in the table above:
* Set variable name
* Set **Variable Type** to **Data Layer Variable**
* Enter the corresponding data layer variable name (e.g., `data.type`, `data.project__name`)
3. Save each variable
Define variables for the below Navattic event fields:
| Variable Name | Type | Data layer variable name |
| ------------------- | ------------------- | ------------------------ |
| Navattic event type | Data Layer Variable | data.type |
| Navattic demo name | Data Layer Variable | data.project\_\_name |
| Navattic flow name | Data Layer Variable | data.flow\_\_name |
| Navattic step name | Data Layer Variable | data.step\_\_name |
1. Go to **Variables** → **User-Defined Variables** → **New**
2. For each variable in the table above:
* Set variable name
* Set **Variable Type** to **Data Layer Variable**
* Enter the corresponding data layer variable name (e.g., `data.type`, `data.project__name`)
3. Save each variable
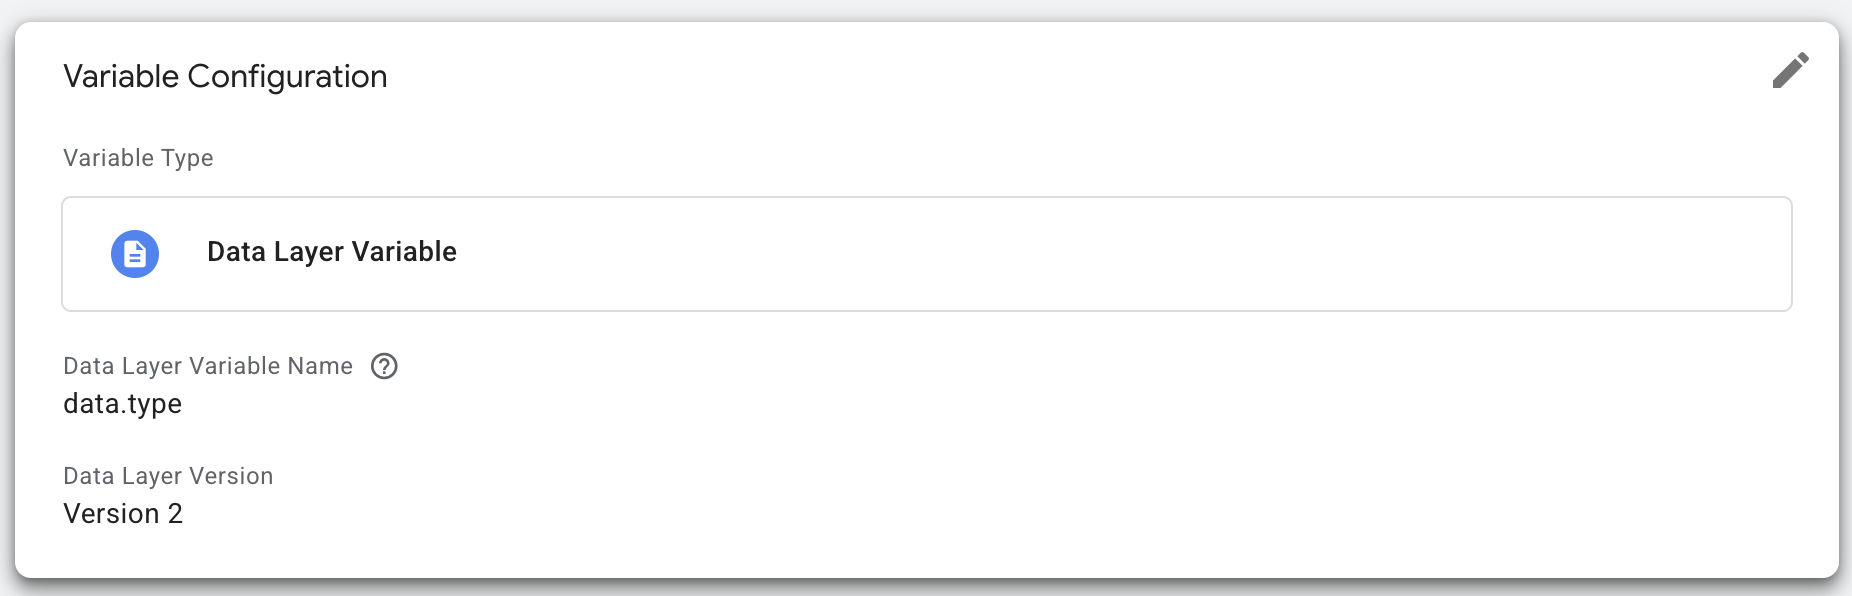 These variables will be used in the following step to make the Navattic event data accessible to your GA4 event tag.
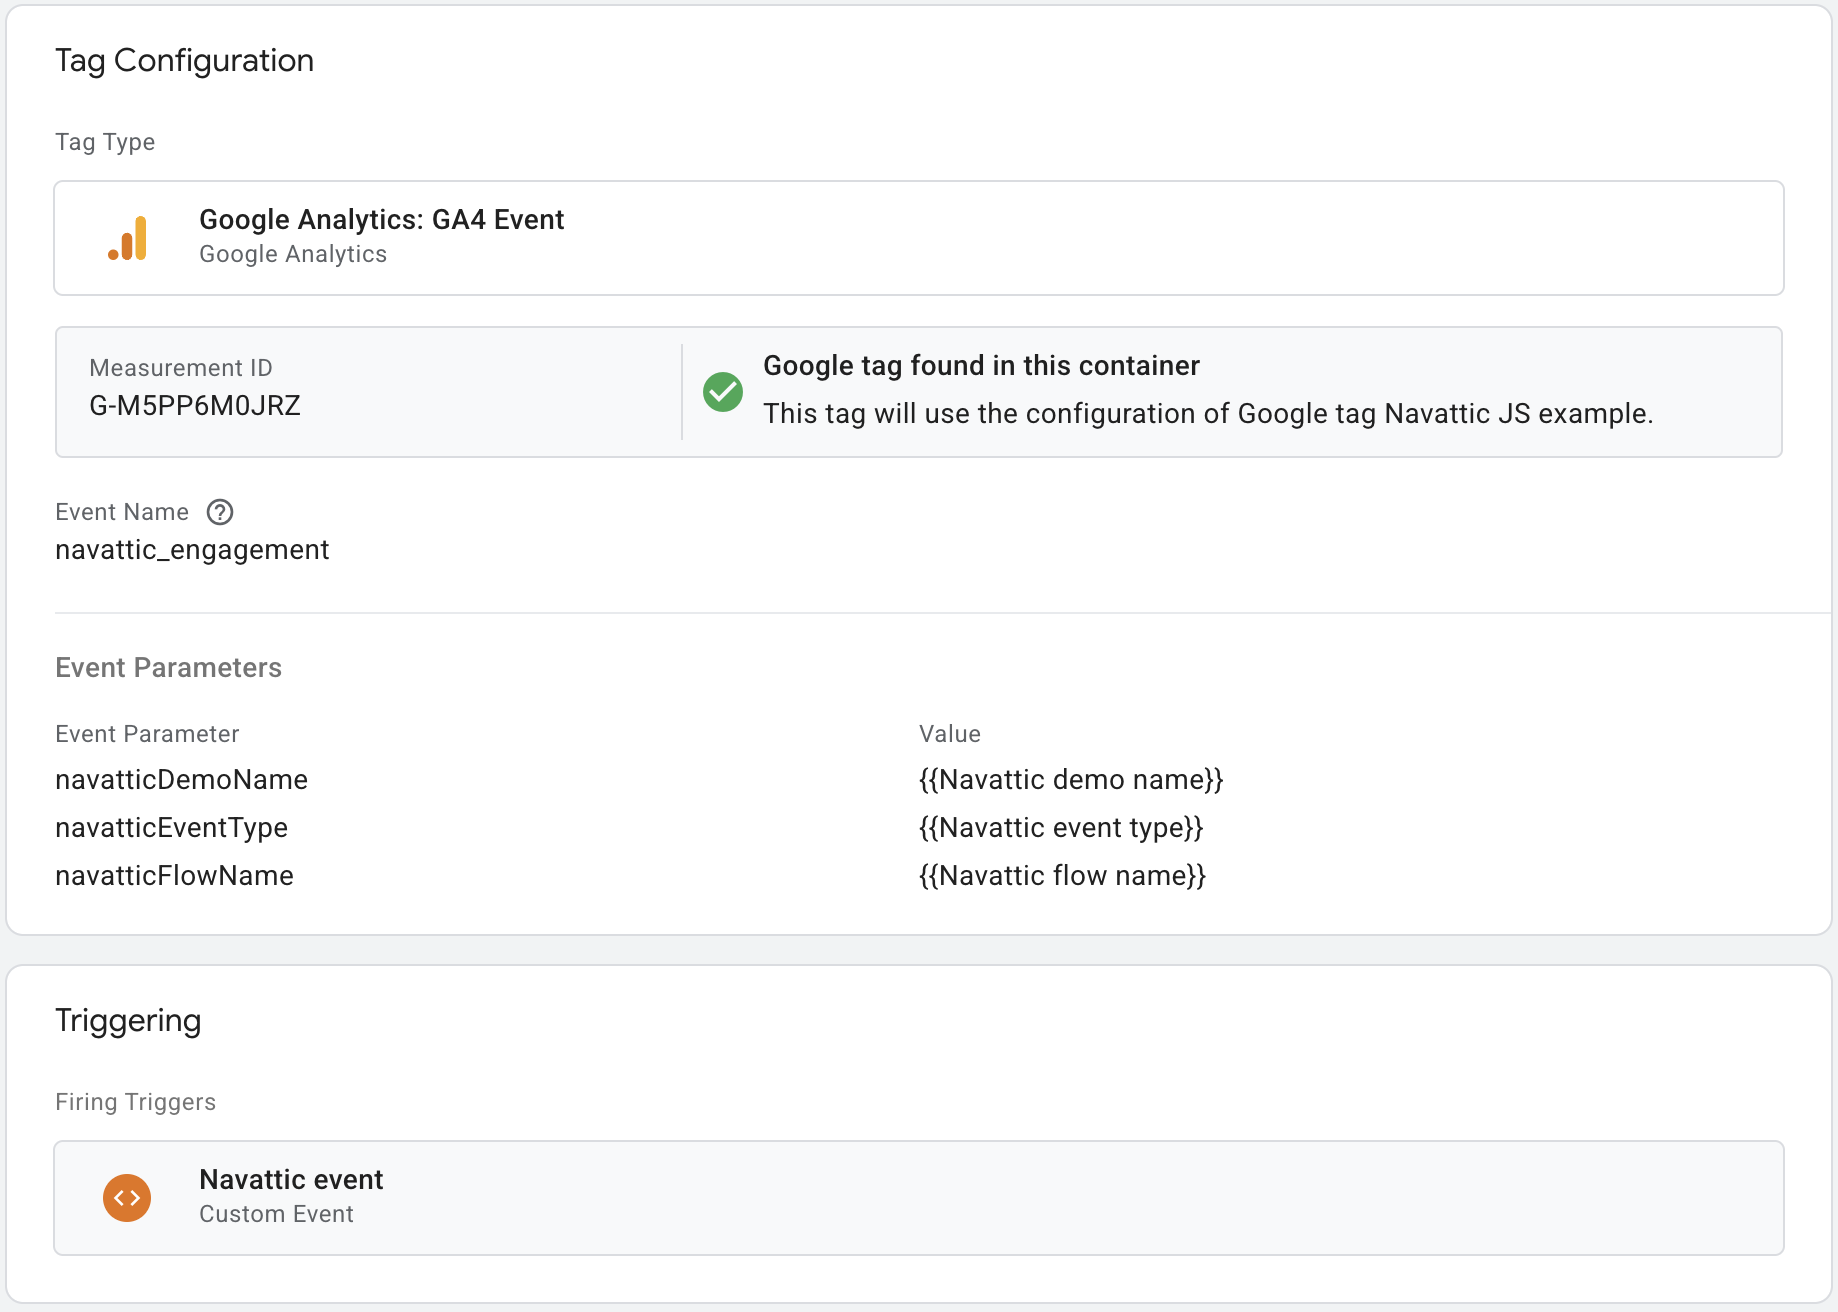
Create a tag to send Navattic events to GA4:
1. Go to **Tags** → **New** and name it "Navattic event tag"
2. Under **Tag Configuration**, select **Google Analytics: GA4 Event**
3. Enter your **Measurement ID** for GA4
4. Set **Event Name** to `navattic_engagement`
5. Add **Event Parameters**:
| Event Parameter | Data layer variable name |
| ----------------- | ------------------------- |
| navatticEventType | `{{Navattic event type}}` |
| navatticDemoName | `{{Navattic demo name}}` |
| navatticFlowName | `{{Navattic flow name}}` |
| navatticStepName | `{{Navattic step name}}` |
6. Under **Triggering**, select the custom event trigger from Step 2
7. Save the tag
These variables will be used in the following step to make the Navattic event data accessible to your GA4 event tag.
Create a tag to send Navattic events to GA4:
1. Go to **Tags** → **New** and name it "Navattic event tag"
2. Under **Tag Configuration**, select **Google Analytics: GA4 Event**
3. Enter your **Measurement ID** for GA4
4. Set **Event Name** to `navattic_engagement`
5. Add **Event Parameters**:
| Event Parameter | Data layer variable name |
| ----------------- | ------------------------- |
| navatticEventType | `{{Navattic event type}}` |
| navatticDemoName | `{{Navattic demo name}}` |
| navatticFlowName | `{{Navattic flow name}}` |
| navatticStepName | `{{Navattic step name}}` |
6. Under **Triggering**, select the custom event trigger from Step 2
7. Save the tag
 Click "Preview" in Tag Manager and navigate to a page with a demo.
When you engage with the demo, you should see "navattic\_event" and "navattic\_engagement" events with the variables we defined above populated with the correct values for your demo.
Click "Preview" in Tag Manager and navigate to a page with a demo.
When you engage with the demo, you should see "navattic\_event" and "navattic\_engagement" events with the variables we defined above populated with the correct values for your demo.