> ## Documentation Index
> Fetch the complete documentation index at: https://docs.navattic.com/llms.txt
> Use this file to discover all available pages before exploring further.

# Identifying visitors

> Learn about who is viewing your demos.

export const MediaCard = ({title = '', url, type = 'demo'}) => {
  const attributes = type === 'demo' ? {
    'data-navattic-open': url,
    'data-navattic-title': title
  } : {
    'data-video': url
  };
  return <div {...attributes} className="hidden md:inline-block w-auto cursor-pointer overflow-hidden rounded-lg border border-gray-200 dark:border-gray-700 shadow-sm">
<div className="flex items-center gap-3 bg-white dark:bg-gray-800 px-3 py-2">
<div className={`flex h-7 w-7 items-center justify-center rounded-md ${type === 'video' ? 'bg-blue-100 dark:bg-blue-900' : 'bg-orange-100 dark:bg-orange-900'}`} style={{
    backgroundColor: type === 'video' ? 'var(--video-bg)' : 'var(--demo-bg)'
  }}>
<Icon icon={type === 'video' ? 'circle-play' : 'square-mouse-pointer'} color={type === 'video' ? 'var(--video-icon)' : 'var(--demo-icon)'} />
</div>
<div>
<div className="text-sm font-medium text-gray-900 dark:text-gray-100">
{type === 'video' ? 'Watch video' : 'Try a demo'}
</div>
<div className="text-sm text-gray-500 dark:text-gray-400">{title}</div>
</div>
</div>
<style jsx>{`
  :root {
    --video-bg: #dbeafe;
    --video-icon: #2563eb;
    --demo-bg: #ffedd5;
    --demo-icon: #ea580c;
  }
  :global(.dark) {
    --video-bg: #1e3a8a;
    --video-icon: #60a5fa;
    --demo-bg: #7c2d12;
    --demo-icon: #fb923c;
  }
`}</style>
</div>;
};

<Frame>
  <img src="https://mintcdn.com/navattic-app/KyLVfu_TECs3vwBD/images/visitors-page.png?fit=max&auto=format&n=KyLVfu_TECs3vwBD&q=85&s=0b6aa64d65ecb98a101236b3b6ccf937" alt="" width="3000" height="1706" data-path="images/visitors-page.png" />
</Frame>

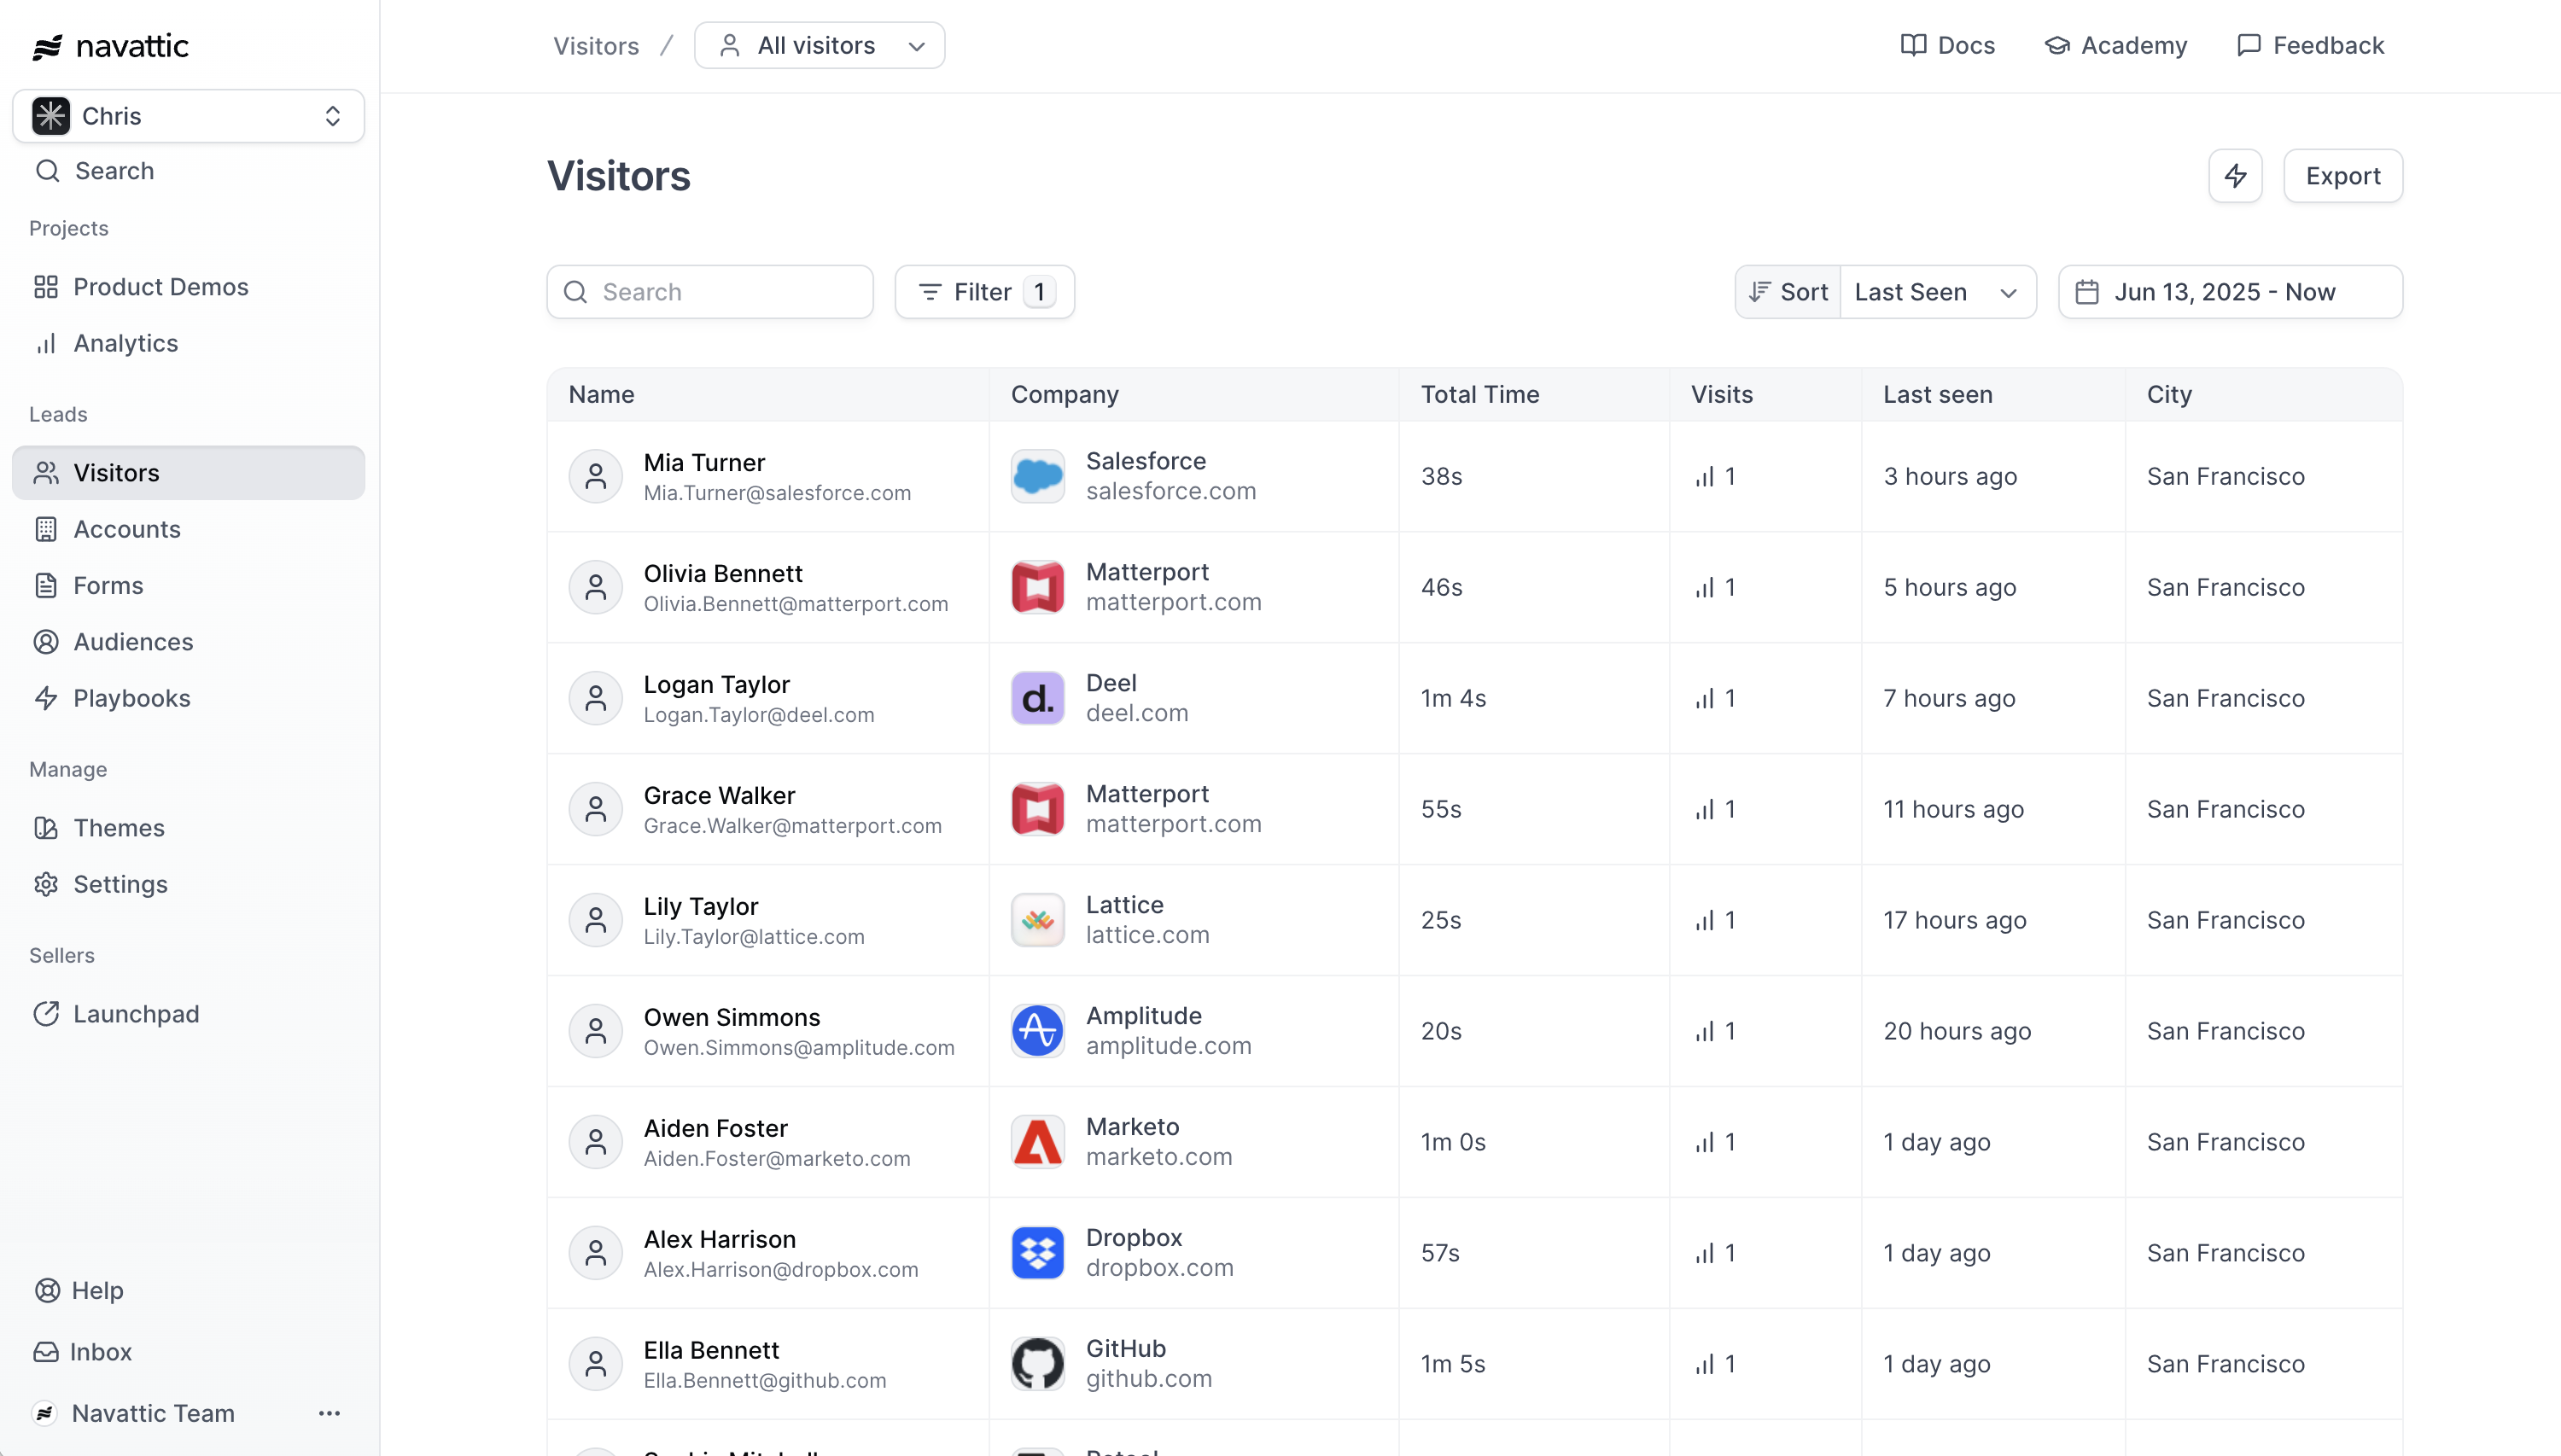
<Icon icon="user-round-search" /> **Identification** helps you understand which **Visitors** and
**Accounts** are engaging with your demos. This section covers the various methods of identifying
Visitors and Accounts in Navattic.

## How to identify visitors

There are a few different ways to identify visitors in Navattic:

<CardGroup>
  <Card icon="file-text" title="Forms" href="#forms">
    Add a form gate to your demo (Good for website embeds)
  </Card>

  <Card icon="link" title="Query Params" href="#query-params">
    Add tracking params to the URL (Good for email campaigns)
  </Card>

  <Card icon="code" title="Navattic JS" href="#navattic-js">
    Track logged in users in your app (Good for in-app demos)
  </Card>
</CardGroup>

<Tabs>
  <Tab title="Forms">
    One easy way to identify visitors to your interactive demos is through a form. Follow these steps to add a Navattic or third-party (ex Marketo, Hubspot, etc) form:

    <CardGroup>
      <Card title="Navattic Forms" icon="file-text" href="/tracking/forms" horizontal>
        Capture and track visitor information through forms in your demos.
      </Card>

      <Card title="Embedded forms" icon="square-code" href="/tracking/forms/embedded" horizontal>
        Integrate third-party forms and scheduling tools directly in your demo.
      </Card>
    </CardGroup>
  </Tab>

  <Tab title="Query Params">
    Query strings can be used to add identification tokens to demo share links at scale. This occurs outside of the Navattic app and is a quick way to identify demo recipients if you are sending a quick email or setting up an email campaign.

    ### Manual Entry of Query Strings

    Full Name, Email, and Company Name can be added to any demo share link as identification tokens, using the corresponding Attribute Names:

    | Value        | Type   | Attribute Name |
    | ------------ | ------ | -------------- |
    | Full name    | STRING | user.fullName  |
    | Email        | STRING | user.email     |
    | Company name | STRING | company.name   |

    Use this format when adding attributes to the end of any Navattic demo share link:

    * `navattic-demo-link``?``attribute=value`

    For example, this link will now identify the recipient as [jane.doe@navattic.com](mailto:jane.doe@navattic.com), since the "user.email" attribute is set to "[jane.doe@navattic.com](mailto:jane.doe@navattic.com)".

    * [https://training.navattic.com/rd3v0zhg?user.email=jane.doe@navattic.com](https://training.navattic.com/rd3v0zhg?user.email=jane.doe@navattic.com)

    You may add more attributes by adding a **&** in between clauses:

    * `navattic-demo-link?user.email=value&user.fullName=value&company.name=value`

      ### Assisted Entry of Query Strings

      If you are using a sales automation tool such as Hubspot, Outreach, Salesloft, or other similar tools that contain contact email addresses, you may use the email variable already present in these tools to identify recipients.

      Simply append the `?user.email={{email}}` query string to the end of your demo URL in any templates you create, and these tools will unfurl the demo URL containing the correct value.

      Example link:

      * `navattic-demo-link?user.email={{EMAIL_VARIABLE}}&user.fullName={{NAME_VARIABLE}}`

      Take care to use the correct attribute name as these may vary between platforms. Here are a few common examples:

      | Platform                                                                                              | Value | Attribute Name        | Complete query string for outreach                  |
      | ----------------------------------------------------------------------------------------------------- | ----- | --------------------- | --------------------------------------------------- |
      | [HubSpot](https://knowledge.hubspot.com/website-pages/personalize-your-content)                       | Email | `{{contact.email}}`   | `navattic-demo-link?user.email={{contact.email}}`   |
      | [Outreach](https://support.outreach.io/hc/en-us/articles/226680368-Outreach-Variables-Overview)       | Email | `{{email}}`           | `navattic-demo-link?user.email={{email}}`           |
      | [Salesloft](https://help.salesloft.com/s/article/Available-Dynamic-Fields?language=en_US#Person_Tags) | Email | `{{email_address}}`   | `navattic-demo-link?user.email={{email_address}}`   |
      | [Pardot](https://help.salesforce.com/s/articleView?id=sf.pardot_handlebars_merge_fields.htm\&type=5)  | Email | `{{Recipient.Email}}` | `navattic-demo-link?user.email={{Recipient.Email}}` |
  </Tab>

  <Tab title="Navattic JS">
    If you need more flexibility about when and how to identify visitors, the following implementation will allow Navattic to receive Visitor or Account identification data that is gathered elsewhere on your marketing website. Share these steps with your website team for implementation.

    ### Implementation

    By including the JavaScript snippet in Step 1 of [Navattic JS](/navattic-js#NuYfC), we unlock the ability to programattically identify users from your marketing website. The Embed Events script will expose a global `window.navattic` object for your marketing website to use.

    To identify a user programmatically, call `window.navattic.identify` in your code.

    ```javascript theme={null}
    navattic.identify({
      'user.email': 'steve@apple.com',
      'user.fullName': 'Steve Jobs',
      // ...any other fields you want to use!
    });
    ```
  </Tab>
</Tabs>

# Other Use Cases and Workflows

The following workflows require you to add the [Navattic JS](/tracking/navattic-js) snippet to the `head` of your website(s).

## Identifying visitors across subdomains

If you have demos embedded on multiple subdomains or you want to identify Visitors on one subdomain and track their demo engagement on another subdomain, it is possible for the Visitors identity to be shared across these subdomains. This can be enabled with the following steps:

1. Install [Navattic JS](/tracking/navattic-js) on each site
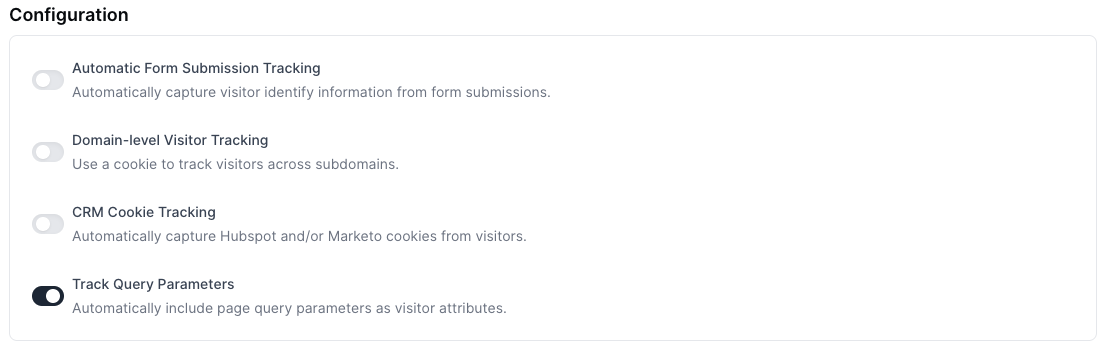
2. On the Navattic JS **Configuration** page (in your Navattic Workspace under Settings > Navattic JS), enable [Domain-level Visitor Tracking](/tracking/navattic-js)
3. Follow the above steps to identify Visitors

## Tracking UTM Parameters

Embedded iframe demos do not automatically receive UTM parameters from the page on which they are embedded. However, you can automatically pass on UTM parameters by adding [Navattic JS](/tracking/navattic-js) to the \<head> of your site and enabling the **Query Parameter Tracking** option shown below.

<img src="https://mintcdn.com/navattic-app/eEo16-sBVsd0fYuf/images/identify-3.png?fit=max&auto=format&n=eEo16-sBVsd0fYuf&q=85&s=1b511d765d319252abb740003819ada7" alt="" width="1104" height="355" data-path="images/identify-3.png" />

You will now see Visitor UTMs appear in your CSV export and your Visitors tab > expand a Visitor > "Tracking" section.

### Manually Tracking UTMs

If you would prefer to manually set up UTM tracking use [these steps](https://stackoverflow.com/questions/20366731/how-can-i-pass-utm-parameters-from-url-to-an-iframe) to pass UTM parameters from the landing page URL into the iframe src URL. This step makes UTMs visible to Navattic.

Once this is set up, navigate to the Flow Builder and select the CTA button that uses a **Navigate to URL** action > include your UTM variables using this format:

`?utm_medium={{utm_medium}}&utm_campaign={{utm_campaign}}`

To automatically add utm\_source=navattic, check the box for **Add tracking params.**
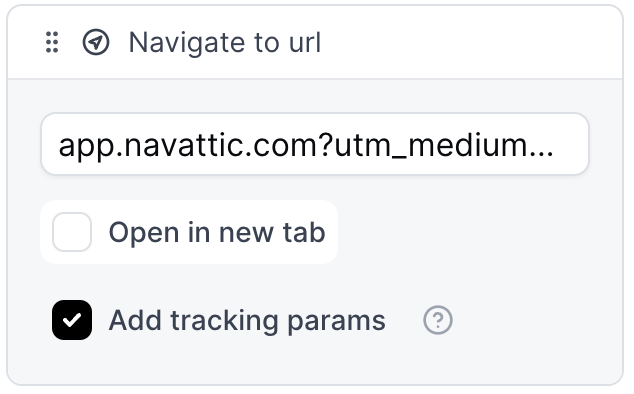
<img src="https://mintcdn.com/navattic-app/eEo16-sBVsd0fYuf/images/identify-5.png?fit=max&auto=format&n=eEo16-sBVsd0fYuf&q=85&s=64ce1c2a086f15d190292914215910d2" size="50" width="634" height="394" position="center" caption="Add tracking params checkbox" alt={true} style={{ width: '56%' }} data-path="images/identify-5.png" />

#### Tracking CRM Cookies

If you are using a Hubspot or Marketo cookie on your marketing site, [Navattic JS](/tracking/navattic-js) can associate the cookie when identifying Visitors. This can make it easier to route Visitor and engagement data to these CRMs.

To include CRM cookies when identifying visitors, enable the Navattic JS `CRM Cookie Tracking`.

## Benefits of Identifying visitors

**Once a Visitor is identified, you can:**

* Connect demo engagement data with the correct Visitor record in the [Visitors tab](/analyze#_MXGs)
* Send combined visitor and demo engagement data to third-party platforms for additional analysis (ex. see in Hubspot, "*Jessica* at *Navattic* viewed *8 steps* of the *Get Started Product Tour*")
* Personalize demos for the visitor (ex., "Hi, {firstname}, welcome to your demo!")

**Once an Account is identified, you can:**

* Prioritize your most engaged Accounts in ABM strategies
* See which demos the Account interacted with to prepare relevant resources
* Send this data to Slack, Salesforce, or Hubspot to alert the right teams

<Note>
  If a visitor is identified by email, their associated account is always visible in the Visitors tab — even if Account Based Engagement (ABE) is not enabled on your workspace.
</Note>

***

#### FAQs

<Accordion title="What are the following app.navattic.com cookies used for?">
  The following filtered cookies are used for Navattic app auth and are not used for Visitor tracking. These cookies would never be sent from a Visitor page.

  ```text theme={null}
  __Secure-xxxxxxx
  ```

  ```text theme={null}
  __Host-next-auth-.csrf-token'
  ```
</Accordion>
