> ## Documentation Index
> Fetch the complete documentation index at: https://docs.navattic.com/llms.txt
> Use this file to discover all available pages before exploring further.
# Navattic Forms
> Capture and track visitor information through forms in your demos
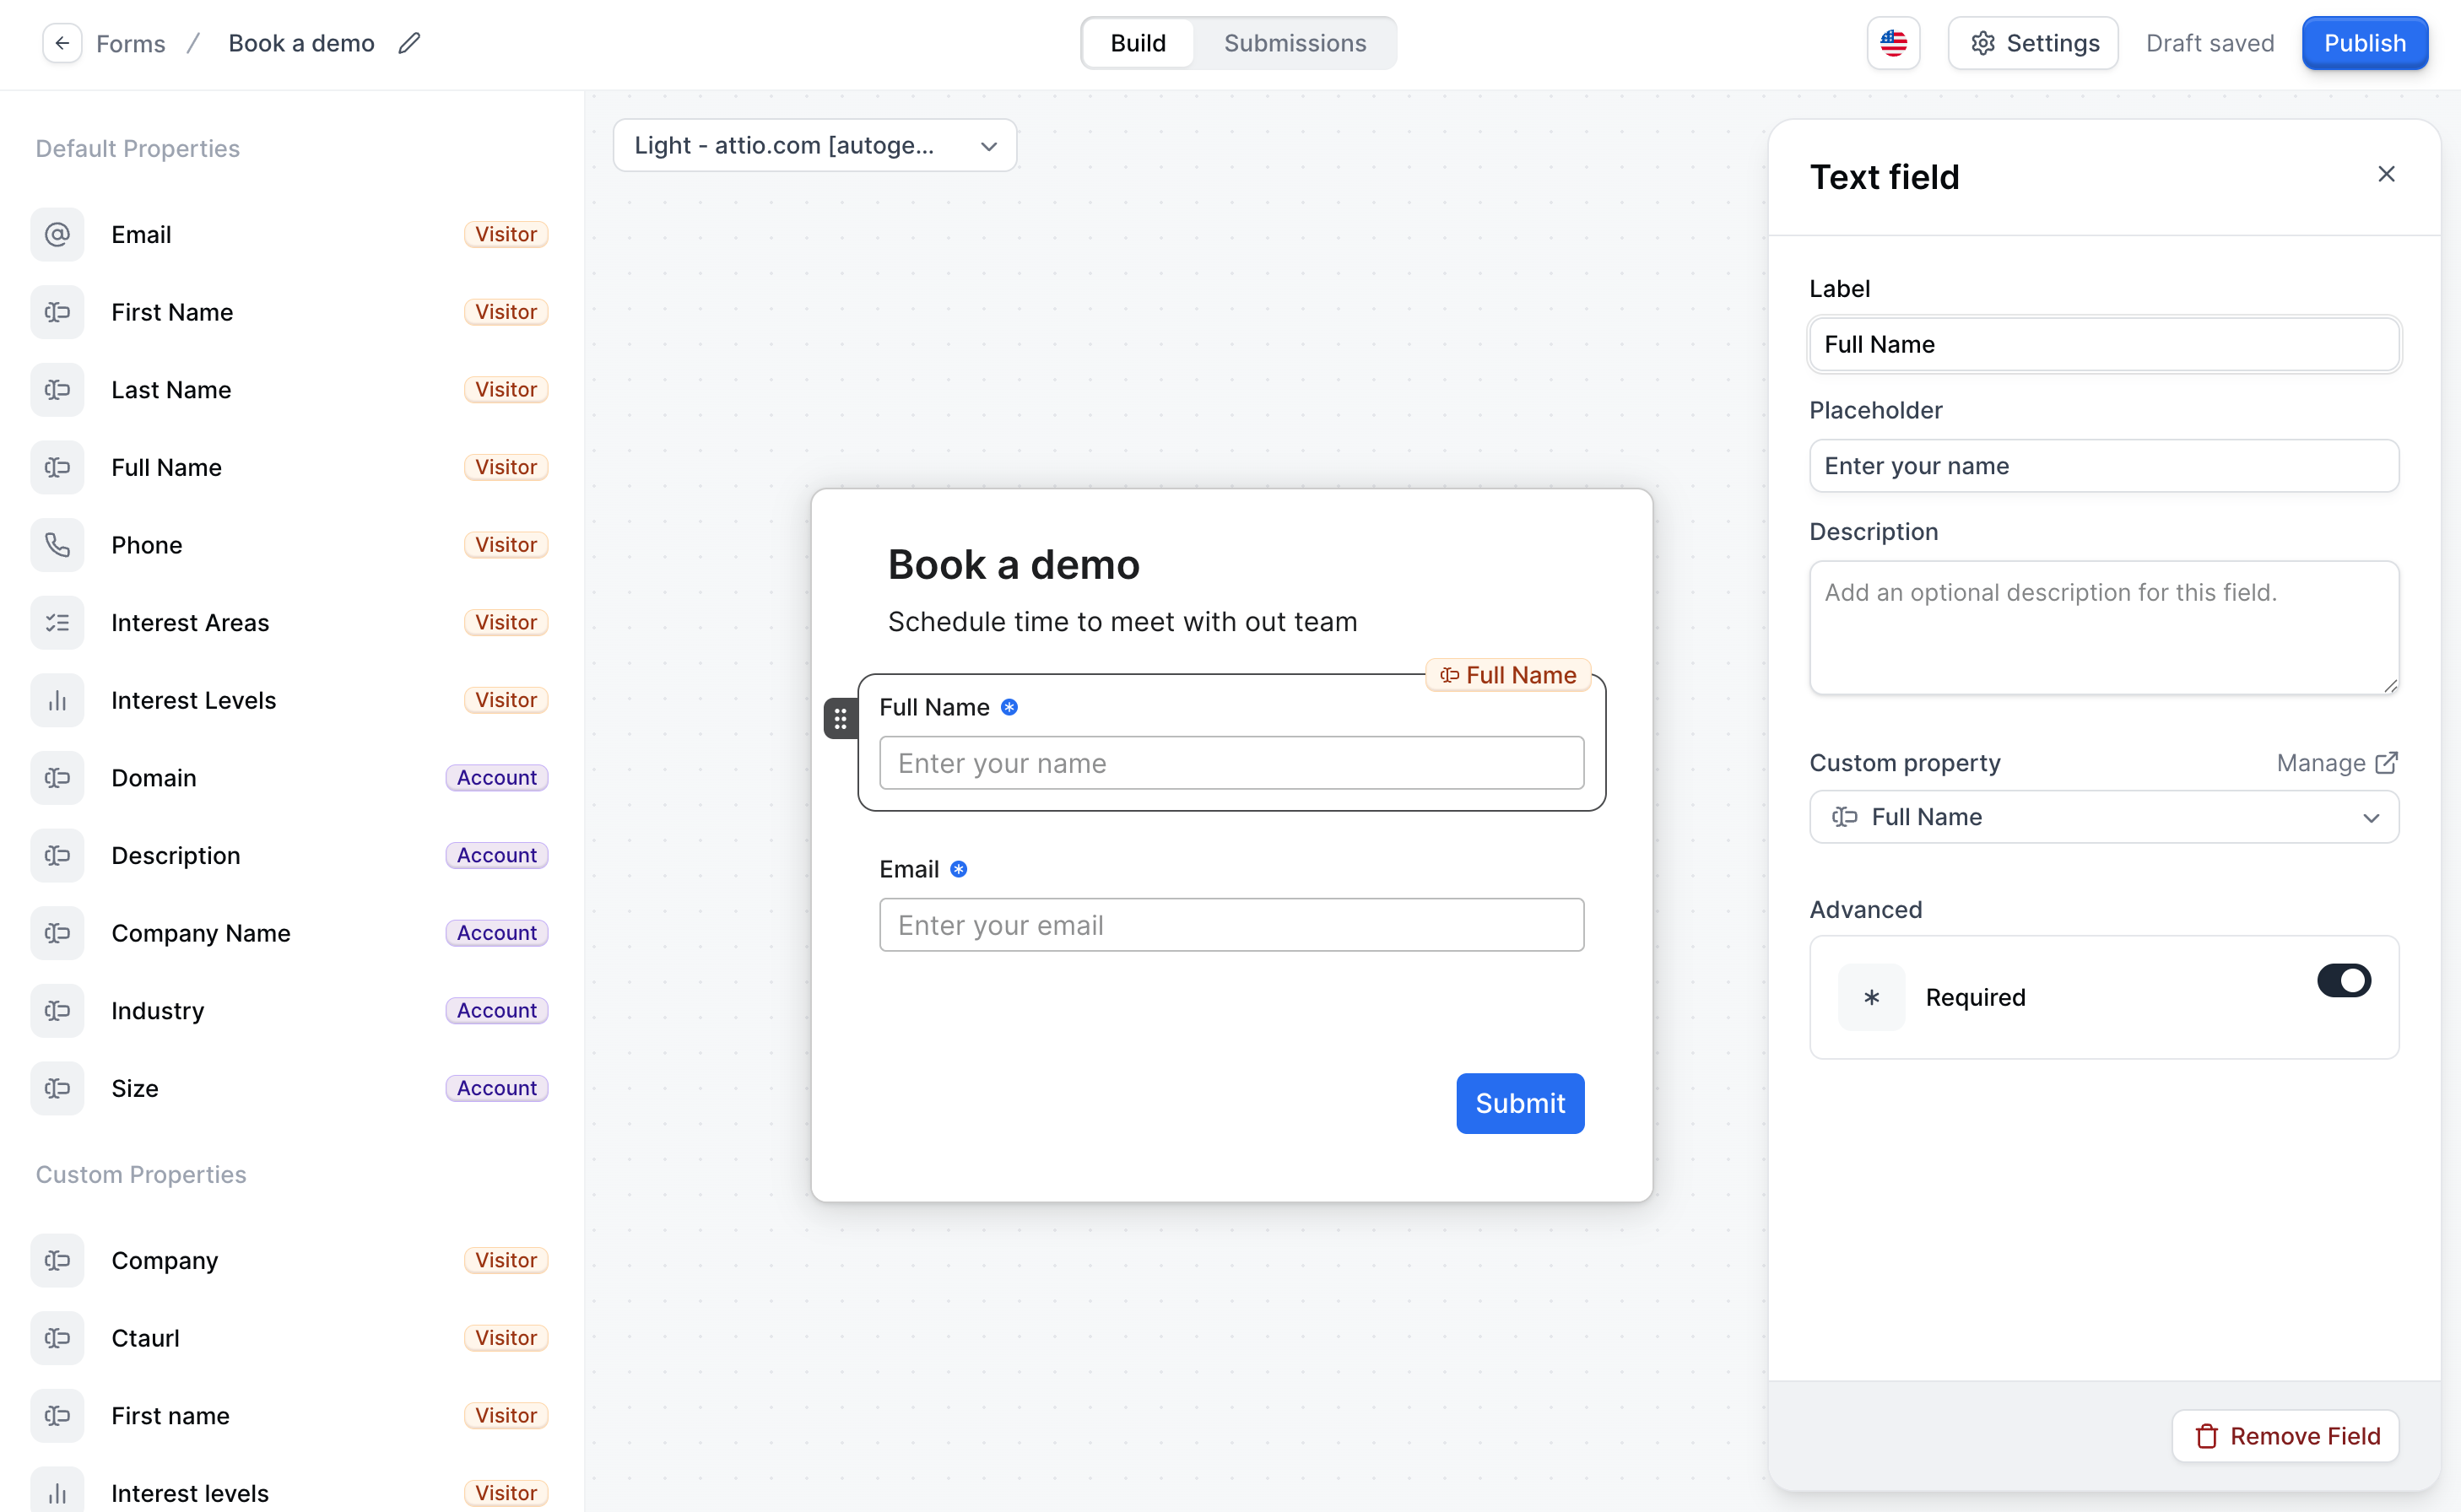 **Forms** are one of the most effective ways to capture visitor information during demos. Forms can identify visitors, qualify leads, and trigger personalized follow-ups based on demo engagement.
## Why use forms in demos?
Forms serve multiple purposes in your interactive demos:
* **Lead capture**: Collect visitor contact information for follow-up
* **Lead qualification**: Gather company and role information to prioritize outreach
* **Personalization**: Use form data to customize the demo experience
* **Analytics**: Track conversion rates and identify drop-off points
* **Integration**: Sync form submissions with your CRM and marketing automation tools
### How to create a form
Forms can be created from within the flow builder or on the forms page. Once a form has been created, it can be reused across different demos. To create a form, follow these steps:
Click `+Create` to be taken directly into the form builder.
Add form fields by clicking on the [Properties](/tracking/forms/properties) in the left sidebar. Every form field has an associated property. A property is field of information stored on a Visitor or an Account.
Mark the field as `required` if you want to require every visitor to fill it out.
**Forms** are one of the most effective ways to capture visitor information during demos. Forms can identify visitors, qualify leads, and trigger personalized follow-ups based on demo engagement.
## Why use forms in demos?
Forms serve multiple purposes in your interactive demos:
* **Lead capture**: Collect visitor contact information for follow-up
* **Lead qualification**: Gather company and role information to prioritize outreach
* **Personalization**: Use form data to customize the demo experience
* **Analytics**: Track conversion rates and identify drop-off points
* **Integration**: Sync form submissions with your CRM and marketing automation tools
### How to create a form
Forms can be created from within the flow builder or on the forms page. Once a form has been created, it can be reused across different demos. To create a form, follow these steps:
Click `+Create` to be taken directly into the form builder.
Add form fields by clicking on the [Properties](/tracking/forms/properties) in the left sidebar. Every form field has an associated property. A property is field of information stored on a Visitor or an Account.
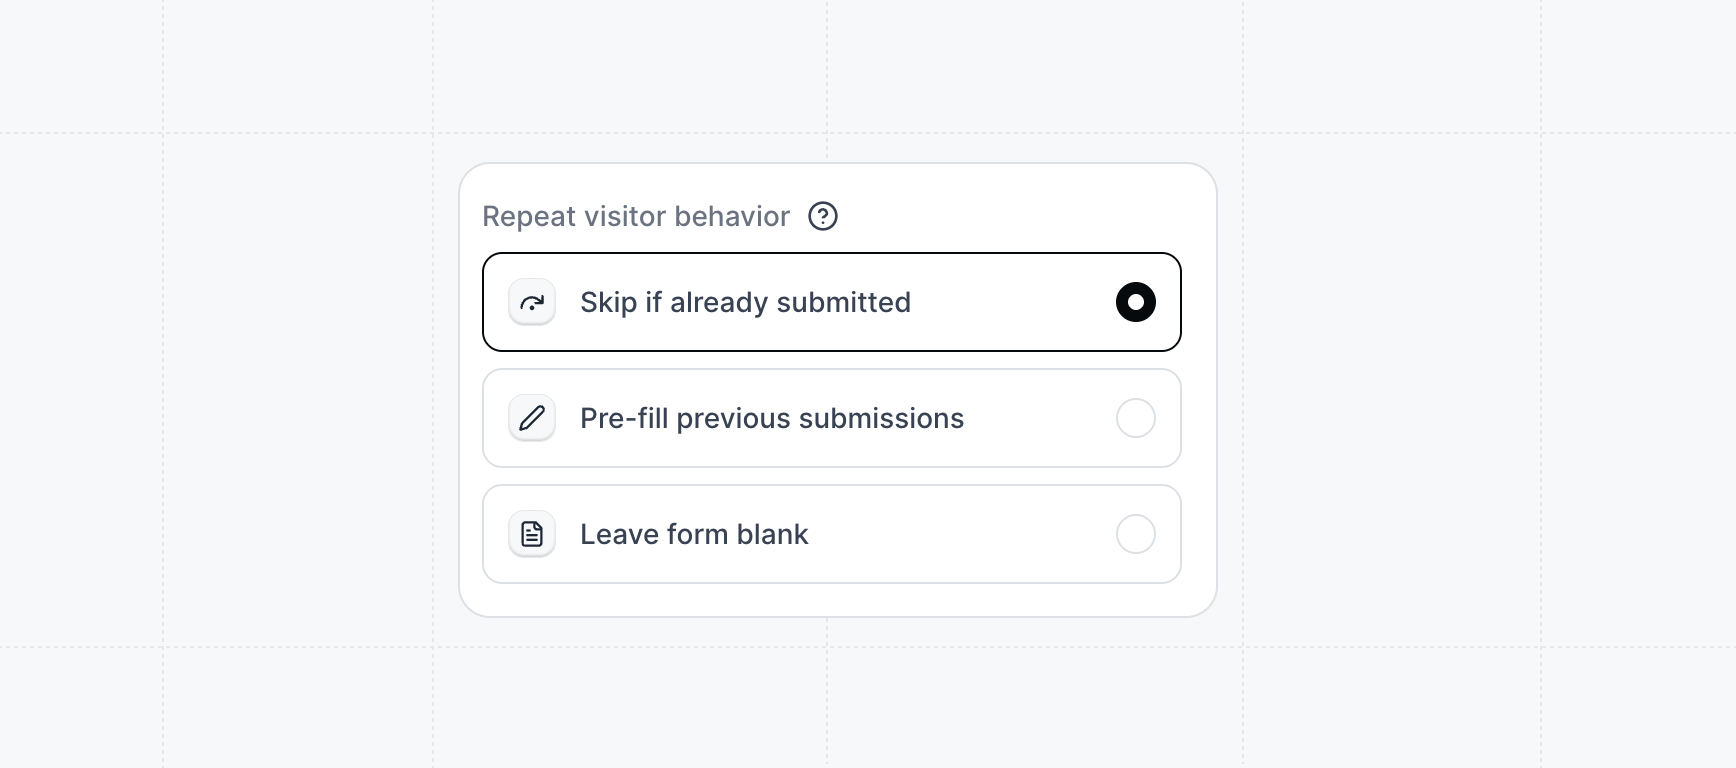
Mark the field as `required` if you want to require every visitor to fill it out. 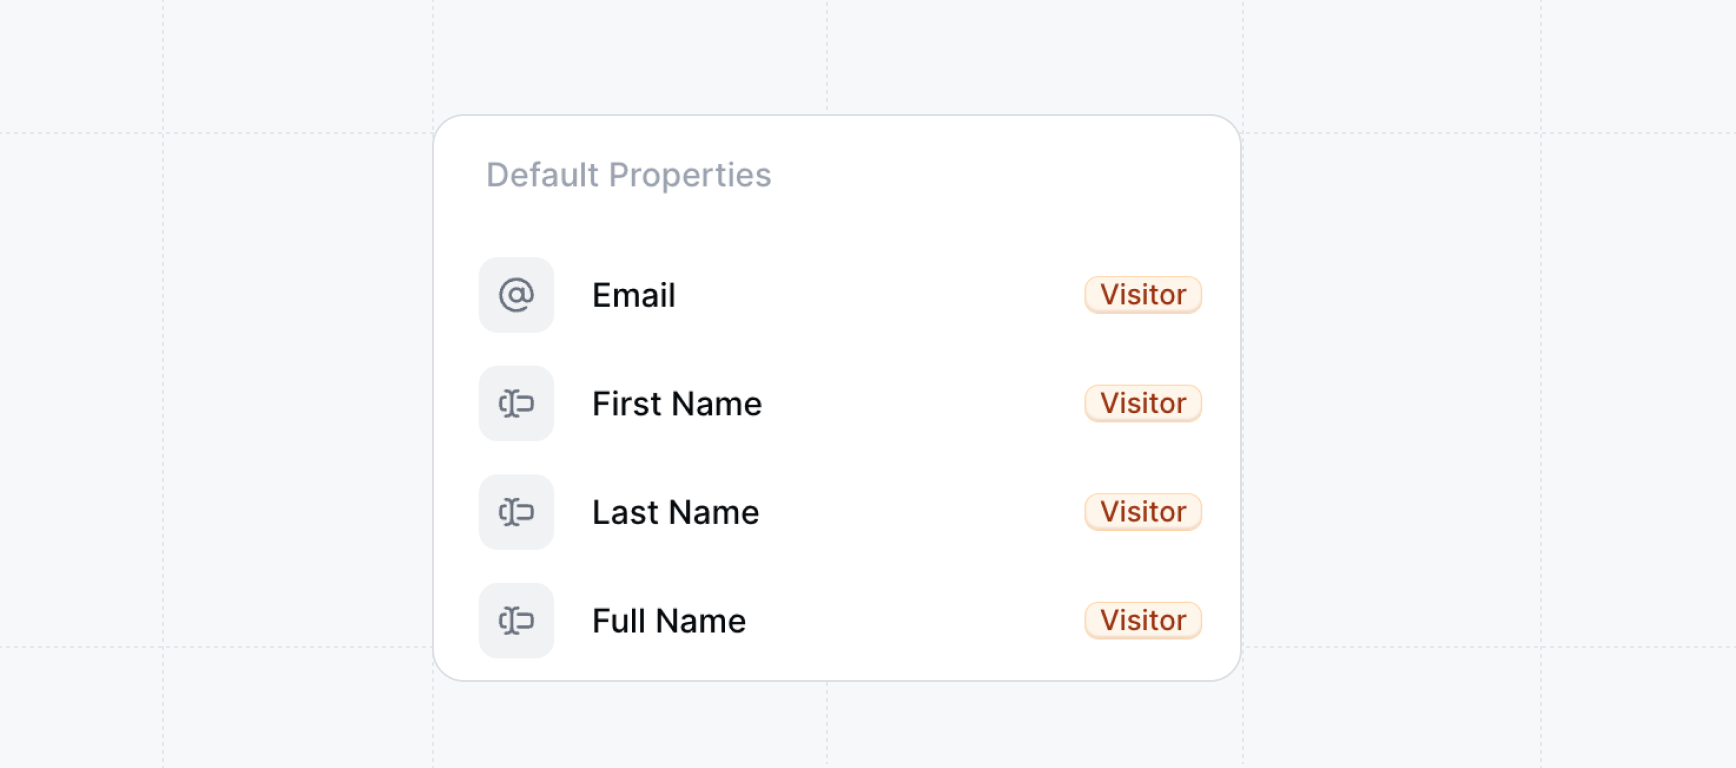 Adjust the settings of the form by clicking `Settings` in the top right. You can configure things like the submit button text, the company logo on the form, and the repeat visitor behavior.
Visitors who have already submitted the form will bypass it and continue to the next step.
Form fields are automatically populated with data from the visitor's previous submissions.
Form fields remain empty regardless of previous submissions, requiring visitors to fill out all fields again.
Adjust the settings of the form by clicking `Settings` in the top right. You can configure things like the submit button text, the company logo on the form, and the repeat visitor behavior.
Visitors who have already submitted the form will bypass it and continue to the next step.
Form fields are automatically populated with data from the visitor's previous submissions.
Form fields remain empty regardless of previous submissions, requiring visitors to fill out all fields again.
 Once you've finished adding form fields, click `Publish` to save your form. Inside the form builder, you can now add the form by adding a form step and selecting the form.
**Congratulations** -- you've finished building your first form, next learn how to view submissions and connect it to your CRM.
View and export form submission data
Configure how form fields map to your CRM
#### FAQs
Cookies must be enabled on the demo for properties to persist between sessions. Workspace admins can enable cookies by default within the Workspace **Settings** > **Defaults** > toggle on **Cookie tracking.**
To enable cookie tracking for just one demo, locate the demo in the **Product Demos** tab > Click the three dots that appear when you hover over the demo > **Edit details** > toggle on **Cookie tracking.**
Ad blockers and browser privacy extensions can intercept Navattic's form tracking events, causing submissions to appear missing during testing even when they would work for real visitors.
If you're testing a form and submissions aren't showing up:
1. Disable any ad blockers or privacy extensions for the page you're testing on.
2. Alternatively, open the demo in an incognito/private window with extensions disabled.
3. Re-submit the form and check again.
Real visitors without ad blockers will not experience this issue.
Yes. When you add an **Email** field to a form, you can configure a list of blocked domains directly on that field. Visitors who enter an email address from a blocked domain will see an error ("Please enter a valid work email") and cannot submit the form.
To configure blocked domains:
1. Open the form in the form builder.
2. Click the **Email** field to select it.
3. In the field settings panel, enable the **Blocked domains** toggle.
4. Add the domains you want to block (for example, `gmail.com`, `yahoo.com`). You can add them one at a time or paste a list.
The block applies only to the specific Email field where it is configured. Other fields in the same form are not affected.
Once you've finished adding form fields, click `Publish` to save your form. Inside the form builder, you can now add the form by adding a form step and selecting the form.
**Congratulations** -- you've finished building your first form, next learn how to view submissions and connect it to your CRM.
View and export form submission data
Configure how form fields map to your CRM
#### FAQs
Cookies must be enabled on the demo for properties to persist between sessions. Workspace admins can enable cookies by default within the Workspace **Settings** > **Defaults** > toggle on **Cookie tracking.**
To enable cookie tracking for just one demo, locate the demo in the **Product Demos** tab > Click the three dots that appear when you hover over the demo > **Edit details** > toggle on **Cookie tracking.**
Ad blockers and browser privacy extensions can intercept Navattic's form tracking events, causing submissions to appear missing during testing even when they would work for real visitors.
If you're testing a form and submissions aren't showing up:
1. Disable any ad blockers or privacy extensions for the page you're testing on.
2. Alternatively, open the demo in an incognito/private window with extensions disabled.
3. Re-submit the form and check again.
Real visitors without ad blockers will not experience this issue.
Yes. When you add an **Email** field to a form, you can configure a list of blocked domains directly on that field. Visitors who enter an email address from a blocked domain will see an error ("Please enter a valid work email") and cannot submit the form.
To configure blocked domains:
1. Open the form in the form builder.
2. Click the **Email** field to select it.
3. In the field settings panel, enable the **Blocked domains** toggle.
4. Add the domains you want to block (for example, `gmail.com`, `yahoo.com`). You can add them one at a time or paste a list.
The block applies only to the specific Email field where it is configured. Other fields in the same form are not affected.