> ## Documentation Index
> Fetch the complete documentation index at: https://docs.navattic.com/llms.txt
> Use this file to discover all available pages before exploring further.

# Navattic Agents

> AI-powered voice agents that present your product interactively.

export const MediaCard = ({title = '', url, type = 'demo'}) => {
  const attributes = type === 'demo' ? {
    'data-navattic-open': url,
    'data-navattic-title': title
  } : {
    'data-video': url
  };
  return <div {...attributes} className="hidden md:inline-block w-auto cursor-pointer overflow-hidden rounded-lg border border-gray-200 dark:border-gray-700 shadow-sm">
<div className="flex items-center gap-3 bg-white dark:bg-gray-800 px-3 py-2">
<div className={`flex h-7 w-7 items-center justify-center rounded-md ${type === 'video' ? 'bg-blue-100 dark:bg-blue-900' : 'bg-orange-100 dark:bg-orange-900'}`} style={{
    backgroundColor: type === 'video' ? 'var(--video-bg)' : 'var(--demo-bg)'
  }}>
<Icon icon={type === 'video' ? 'circle-play' : 'square-mouse-pointer'} color={type === 'video' ? 'var(--video-icon)' : 'var(--demo-icon)'} />
</div>
<div>
<div className="text-sm font-medium text-gray-900 dark:text-gray-100">
{type === 'video' ? 'Watch video' : 'Try a demo'}
</div>
<div className="text-sm text-gray-500 dark:text-gray-400">{title}</div>
</div>
</div>
<style jsx>{`
  :root {
    --video-bg: #dbeafe;
    --video-icon: #2563eb;
    --demo-bg: #ffedd5;
    --demo-icon: #ea580c;
  }
  :global(.dark) {
    --video-bg: #1e3a8a;
    --video-icon: #60a5fa;
    --demo-bg: #7c2d12;
    --demo-icon: #fb923c;
  }
`}</style>
</div>;
};

<Frame>
  <img className="block overflow-hidden rounded-xl border" src="https://mintcdn.com/navattic-app/OxPUNlfNpHj1xjhP/images/agent-demo-viewer.png?fit=max&auto=format&n=OxPUNlfNpHj1xjhP&q=85&s=571ca0317f155baa66cfff15b4b18f7c" alt="Navattic Agent viewer showing live browser session" width="1489" height="800" data-path="images/agent-demo-viewer.png" />
</Frame>

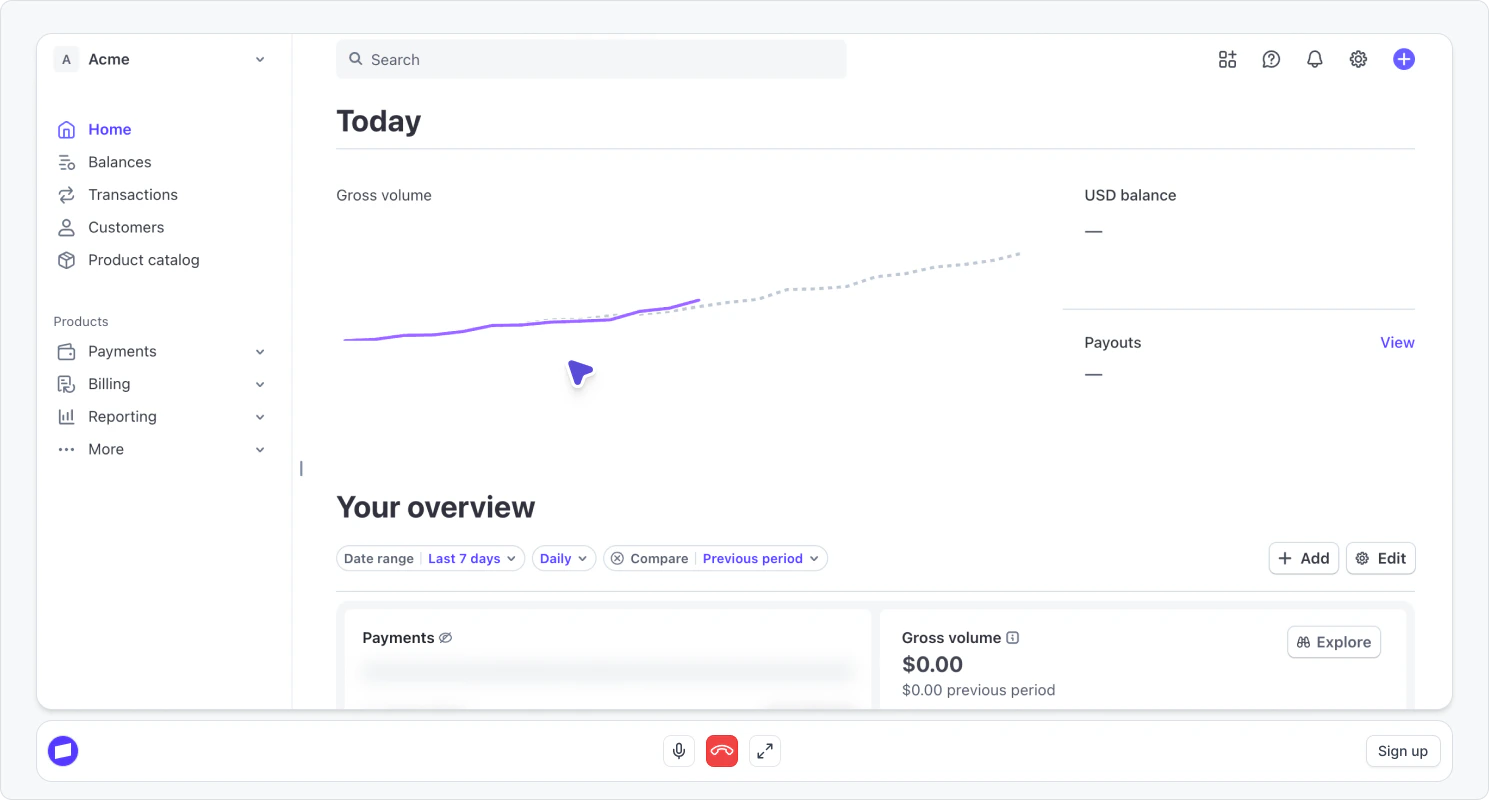
Navattic Agents are AI-powered voice agents that can walk prospects through your product in real-time. Using voice interaction and capture playback, Navattic Agents provide an interactive, personalized demo experience that adapts to each visitor's questions and interests—in their own language, on their own schedule.

## How Navattic Agents work

Navattic Agents combine several capabilities to create interactive product demonstrations:

1. **Voice conversation** - Visitors speak naturally with an AI agent that understands questions and responds in real-time
2. **Text input** - Visitors can type their questions and responses instead of speaking, making demos accessible in quiet environments or for visitors who prefer not to use their microphone
3. **Capture playback** - The agent navigates through pre-recorded captures of your application, guiding visitors through relevant features and flows
4. **Personalized guidance** - Each demo adapts based on the conversation, showing relevant features and answering specific questions

When a visitor starts an Navattic Agent, they're connected to an interactive session where the AI agent guides them through captures of your product while having a natural conversation—by voice or text—about their needs and interests.

## Use cases for Navattic Agents

Navattic Agents are particularly effective for scenarios where personalization and interactivity matter most:
<AccordionGroup>
  <Accordion title="24/7 demo availability">
    **The problem**: Your sales team can't be available around the clock, causing you to miss prospects in different time zones.

    **How Navattic Agents help**: Provide live product demonstrations around the clock, even when your sales team is offline. Add an Navattic Agent option alongside your demo request form so prospects can choose an instant AI-guided demo instead of waiting. Configure after-hours routing to direct visitors to an Navattic Agent rather than a "we'll get back to you" message, capturing high-intent traffic that would otherwise go cold.
  </Accordion>

  <Accordion title="International demo requests">
    **The problem**: Language barriers limit your ability to engage global prospects without hiring multilingual sales staff.

    **How Navattic Agents help**: Deliver demos in any language and engage global prospects without adding operational overhead. The agent localizes explanations, answers questions, and runs the demo environment in the visitor's language. Create localized landing pages for key markets, use geo-detection to route visitors to demos in their preferred language, or equip regional sales teams with multilingual Navattic Agent links for outbound prospecting.
  </Accordion>

  <Accordion title="Qualifying leads before sales calls">
    **The problem**: Sales teams spend too much time on discovery calls with prospects who aren't familiar with the product basics.

    **How Navattic Agents help**: Let the agent handle initial product education and qualification, so your sales team can focus on high-value conversations. Send Navattic Agent links before scheduled calls so prospects arrive already familiar with your product. Use engagement data like session duration, questions asked, and features explored to enrich lead scores and prioritize follow-ups. Prompt engaged prospects to book a call immediately after their demo session while interest is at its peak.
  </Accordion>

  <Accordion title="Feature-specific deep dives">
    **The problem**: Complex workflows or technical features are difficult to explain without real-time interaction and demonstration.

    **How Navattic Agents help**: Guide prospects through complex workflows or technical features that benefit from real-time explanation. Link Navattic Agents from your documentation so users can see features in action as they read. CSMs can share feature-specific demos to help customers unlock value from underutilized parts of your product, scaling customer education without requiring live walkthroughs for every request.
  </Accordion>

  <Accordion title="SMB sales support">
    **The problem**: High-touch demos don't scale for smaller deals, and technical sales bandwidth is too limited to cover every prospect.

    **How Navattic Agents help**: Enable SMB customers to have a stellar sales experience, as if they had a demo from a top SE, without requiring dedicated sales engineering resources. Route demo requests from smaller companies (e.g., fewer than 15 employees) to an automated email with the Navattic Agent link, or direct them to a thank you page with an embedded demo for instant access. Equip SMB reps with Navattic Agent links they can share directly, delivering consistent, high-quality demonstrations while maintaining a personal touch.
  </Accordion>
</AccordionGroup>

## Creating an Navattic Agent

<Steps>
  <Step title="Set up an environment">
    Before creating your first Navattic Agent, you'll need to configure an environment. Environments hold the captures your agent will navigate during demos and define how the agent appears to visitors.

    Navigate to **Agents** > **Environments** and click **Create environment**. Choose how you want to populate the environment:

    * **Take new captures** - Enter your app's URL, then use the Navattic Chrome extension to capture screens. This lets you build captures from scratch.
    * **Start from existing demo** - Select an existing Navattic interactive demo. Copilot automatically processes the demo's captures — deduplicating screens, splitting content into agent-friendly flows, and ranking flows by engagement — and pre-populates starter chips in the Conversation Builder. This is the fastest path to a ready-to-use agent environment.

    After choosing a source, configure the environment details:

    * **Environment name** - An internal name to identify this setup (e.g., "Product Tour" or "Pricing Demo")
    * **App URL** - The URL associated with your application
    * **Avatar** - Optional image that represents your agent
    * **Cursor color** - The color of the cursor when the agent is navigating

    <Note>
      Environments can be reused across multiple Navattic Agents, making it easy to maintain consistent demo experiences.
    </Note>
  </Step>

  <Step title="Create your Navattic Agent">
    With your environment ready, navigate to **Agents** and click **Create Navattic Agent**.

    Start by configuring the basic settings:

    * **Demo name** - An internal identifier for this Navattic Agent
    * **Environment** - Select the environment you created in the previous step
    * **Language** - Choose the language the agent will speak (defaults to English)
  </Step>

  <Step title="Configure the agent's behavior">
    Define how your agent will present your product using these key settings:

    **Objective** — Describe what the agent should accomplish during the demo. This guides the overall conversation and demonstration strategy.

    *Example:*

    ```
    Guide prospects through our project management features,
    focusing on team collaboration and workflow automation capabilities.
    ```

    **Presentation message** — The agent's opening message when visitors join the demo. Keep this welcoming and set clear expectations.

    *Example:*

    ```
    Welcome! I'm here to show you how our platform helps teams
    collaborate more effectively. What brings you here today?
    ```

    <Tip>
      If your presentation message ends with a question, the agent will pause and wait for the visitor's answer before continuing. Use this to qualify visitors or tailor the demo path — for example, ending with "What brings you here today?" prompts the agent to listen and adapt before moving on.
    </Tip>

    **Personality and tone** — Shape how the agent communicates:

    * **Personality** - Define the agent's character traits (professional, friendly, enthusiastic, etc.)
    * **Tone** - Set the communication style (conversational, formal, technical, etc.)

    *Example personality:*

    ```
    Professional and knowledgeable, but approachable. Acts as a
    helpful product specialist who understands customer challenges.
    ```

    *Example tone:*

    ```
    Conversational and clear. Avoids jargon unless the visitor
    demonstrates technical expertise.
    ```
  </Step>

  <Step title="Design the conversation flow">
    The **Conversation** tab in the editor lets you structure the demo into stages that guide the agent through a defined arc — from opening through qualification, discovery, presentation, and close. Each stage has topics that tell the agent what to address, and starters: clickable suggestion chips shown to visitors during the demo.

    See [Conversation Builder](#conversation-builder) for full details.
  </Step>

  <Step title="Add guidelines and guardrails">
    Help your agent provide the best possible experience by defining guidelines and guardrails.

    **Guidelines** — Instructions that shape how the agent conducts demos. These help ensure consistent, effective demonstrations.

    **Guardrails** — Boundaries that define what the agent should avoid discussing or promising to keep the agent focused and ensure accurate responses.

    <Tip>
      Start with the default guidelines and guardrails, then customize based on your product and sales process.
    </Tip>
  </Step>

  <Step title="Provide product context">
    Supply the agent with knowledge about your product through multiple resource types:

    **Product context** — General information about your product, key features, and value propositions. This helps the agent understand what to demonstrate and when. Click **Upload context** to have Copilot extract context automatically from a website URL or an uploaded document (PDF, Word, or text file). Copilot shows you a preview of the extracted content before applying it.

    **Knowledge resources** — Add documentation, support articles, or other materials that the agent can reference.

    When you add a URL, Navattic crawls the site and formats the content for the agent to reference during demos. Full-website crawls appear as a single entry for the hostname. Click the entry to open a page browser where you can browse and search all crawled pages, organized by folder.

    To manage a source, hover over it and click the **...** menu. Available actions depend on the source type:

    | Action           | Text | URL | File |
    | ---------------- | ---- | --- | ---- |
    | Edit information | Yes  | Yes | Yes  |
    | Refresh source   | —    | Yes | —    |
    | Download source  | —    | —   | Yes  |
    | Flag as outdated | Yes  | Yes | Yes  |
    | Remove           | Yes  | Yes | Yes  |

    Flag a source as outdated to mark it for review without removing it from the agent's context immediately.

    **FAQs** — Common questions and their answers help the agent respond accurately to frequently asked questions.

    **Pronunciations** — Specify how the agent should pronounce product names, technical terms, or company names that might be unclear.

    **Resources** — Links and files that the agent can share with prospects directly in the chat panel during a session. See [Sharing resources during demos](#sharing-resources-during-demos) for details.
  </Step>

  <Step title="Configure the Settings tab (optional)">
    Open the **Settings** tab in the Navattic Agent editor to customize your agent's appearance and visitor experience.

    **Avatar**

    Choose how your agent appears visually:

    * **Orb** - Displays an animated orb with a custom color. Use the color picker to set the orb color.
    * **Logo** - Displays your company or product logo. Enter the logo URL in the input field.
    * **Live** - Displays a photo-realistic avatar. Click **Create live avatar** to upload a photo and configure it in a two-step modal:
      1. **Framing** - Crop your photo to a square. The source image must be at least 1152px on its shortest edge and no larger than 25MB. Any aspect ratio is accepted.
      2. **Details** - Enter a name for the avatar and choose whether to remove the background.

    When you create a new Navattic Agent, the avatar defaults to the logo configured for your selected environment.

    When a live avatar is selected, a **Display mode** control appears to set how the avatar is positioned during a session:

    * **Dynamic** (default) - The avatar expands to fill the demo panel when the agent is talking, then contracts into the chat sidebar tile while a flow is presenting. This keeps the visitor's attention focused on whichever mode — speaking or showing — is active.
    * **Fixed** - The avatar stays pinned in the chat sidebar tile at all times, regardless of whether the agent is talking or navigating a flow.

    **Welcome screen**

    Customize what visitors see before they start the demo:

    * **Title** - The headline on the welcome screen (defaults to your demo name)
    * **Description** - A short message introducing the demo experience
    * **Button text** - The label on the start button (defaults to "Get Started")

    **Call to action**

    Add a call-to-action that appears during or after the demo session:

    * **CTA text** - The button label (e.g., "Schedule a call with our team")
    * **CTA URL** - Where visitors go when they click the button
    * **Highlight when stuck** - Surfaces the CTA automatically when the agent reaches an impasse in the conversation

    When a visitor clicks a CTA button, the button label is recorded and surfaced as the **Navattic Agent CTAs** End User property — a comma-separated list of every CTA clicked during that session. You can map this property to a field in your CRM via [field mappings](/integrations/field-mappings) to use clicked CTAs in lead scoring and marketing automation workflows.

    <Note>
      Navattic Agent CTAs are only tracked when the visitor is identified (for example, via a form gate or CRM cookie). The property is per session and is not cleared by later sessions with no CTA clicks.
    </Note>

    **Form gate**

    Require visitors to submit a form before starting the demo. Use this to capture lead information before granting access.

    **Conversation**

    * **Allow interruptions** - When enabled, visitors can speak at any time, including while the agent is talking. Disable this if you want the agent to finish before accepting input.
    * **Allow mic input** - When enabled (the default), visitors can speak to the agent using their microphone. When disabled, the microphone button is hidden from the player and visitors interact through text chat only. Disabling this also turns off **Start with voice enabled** automatically.
    * **Start with voice enabled** - When enabled, the microphone is activated for visitors as soon as they join the demo. Only available when **Allow mic input** is on.
    * **Pace** - Controls how quickly the agent progresses through the demo. Choose **Relaxed** to give visitors more time between moments, **Default** for automatic pacing, or **Brisk** for a faster experience. Contact your account team if this option isn't visible in your workspace.

    **Scheduling link**

    Add a booking button to the player so visitors can schedule a meeting without leaving the demo:

    * **Enable scheduling** - Shows a calendar icon in the player toolbar
    * **Provider** - Choose your scheduling tool: Calendly, Chili Piper, RevenueHero, HubSpot Meeting, or a default scheduler
    * **Scheduling URL** - The URL for your scheduling page
    * **Button label** - The label shown when hovering the button (defaults to "Book a meeting")

    When enabled, clicking the calendar button slides a scheduling panel in from the right side of the player.
  </Step>

  <Step title="Publish your Navattic Agent">
    Once you've configured your agent, click **Publish** to make it available to visitors. You can continue editing the draft version while the published version remains live.

    Navattic maintains separate edit and live versions, so you can test changes before publishing updates.
  </Step>
</Steps>

## Conversation Builder

The Conversation Builder structures the demo into a sequence of **stages**, each with **topics** and **starters** that guide the agent and give visitors easy ways to engage. Open the **Conversation** tab in the Navattic Agent editor to access it.

### Stages

Stages represent phases of the conversation. The Opening stage is always first and maps to your presentation message. Add as many additional stages as your demo needs:

| Stage type    | Default goal                       |
| ------------- | ---------------------------------- |
| Qualification | Confirm prospect's intent and fit  |
| Discovery     | Uncover pain points and priorities |
| Present       | Demonstrate the product in action  |
| Explore       | Give the prospect time to explore  |
| Objections    | Acknowledge and resolve concerns   |
| Close         | —                                  |
| Custom        | Define your own goal               |

Each stage has a **goal** field that tells the agent what to accomplish before advancing. Stages marked **Allow exploration** let visitors ask off-topic questions; the agent addresses them and then returns to the stage's topics.

<Note>
  Knowledge resources are available to the agent in all stages except Opening. If a visitor asks a question the agent cannot answer by navigating the demo, it draws on the knowledge base to respond.
</Note>

To add a stage, click **Add stage** in the Conversation tab. Drag stages to reorder them.

### Topics

Topics tell the agent what to say or ask within a stage. Each topic has a type:

* **Question** — Something the agent asks the visitor (e.g., "How large is your team?"). Questions can be mapped to a [custom property](/tracking) so the answer is saved to the visitor record automatically.
* **Presentation** — A narrated walkthrough of a specific flow from your environment. The agent navigates the flow while explaining it.
* **Suggestion** — A flow the agent can offer to show when relevant, without requiring it.

Each topic also has a mode:

* **Read exactly** — The agent delivers the text you provide verbatim.
* **Use as prompt** — The text serves as context; the agent phrases it naturally.

To add a topic, open a stage and click the topic type you want from the **Add topic** panel.

### Starters

Starters are clickable suggestion chips that appear at the bottom of the chat panel during a demo session. They give visitors quick ways to ask questions or request demos without typing freeform text.

Each stage supports up to five starters. Click **Generate** to let Copilot draft starters based on the stage's topics and flows, or add them manually.

When the demo advances to a new stage, the starters update to reflect that stage's topics.

<Note>
  Starters don't appear until after the agent finishes its intro greeting. The text input submit button is also disabled during the intro, so visitors can't send a message before the agent is ready to respond. Both become active automatically once the intro greeting ends.
</Note>

### Outcomes

Outcomes let you configure what the agent presents to a visitor when the right moment in the conversation arrives — a button to a landing page, a calendar to book a call, or a closing message. Each outcome fires when its conditions are met.

To add an outcome, open the **Conversation** tab in the Navattic Agent editor and click **Add outcome**.

**Outcome types**

| Type         | What the visitor sees                                      |
| ------------ | ---------------------------------------------------------- |
| CTA          | A card with a title, description, and a link button        |
| Calendar     | A scheduling widget to book a meeting directly in the demo |
| Message only | A card with a title and description, no button             |

**Conditions**

Each outcome has one or more conditions that must all be true for it to fire. You can mix condition types:

* **AI-evaluated** — Write a natural-language prompt describing what the conversation must show (e.g., *"The visitor is at an enterprise company and has asked about security compliance"*). The agent evaluates this against the full conversation.
* **Conversation length** — Fires after the visitor has sent a set number of messages.
* **Flow started** — Fires after the agent has navigated a set number of flows.
* **Step viewed** — Fires after a set number of steps have been shown.

**Eligible stages**

You can restrict an outcome to specific stages so it only fires when the conversation is in the right phase. Leave all stages selected to allow the outcome to fire at any point.

<Note>
  Only one outcome fires per session. Once an outcome fires, subsequent conditions are not evaluated.
</Note>

## Sharing resources during demos

Resources are links and files you pre-configure in the **Knowledge** tab that the agent can drop into the chat panel as rich-preview cards at the right moment in a conversation.

When the agent determines that a resource is relevant — based on what the prospect is asking about and the **When to share** guidance you provide — it automatically sends the card into the chat. The prospect sees the title, a short description, and for links, a thumbnail preview. They can open the link in a new tab or download the file without leaving the demo.

A badge on the chat toggle shows how many new resources have been shared while the panel is closed, so prospects don't miss them.

### Adding a link resource

<Steps>
  <Step title="Open the Resources section">
    In the Navattic Agent builder, open the **Knowledge** tab. Scroll to the **Resources** section and click **Add link**.
  </Step>

  <Step title="Enter the URL">
    Paste the link URL. Navattic automatically fetches the page title, description, and preview image. You can edit any of these fields.
  </Step>

  <Step title="Fill in the details">
    * **Title** — The headline shown on the chat card (required).
    * **Description** — A short summary shown beneath the title on the card (optional but recommended).
    * **When to share** — Instructions for the agent describing when to surface this resource, e.g. *"When the prospect asks about pricing tiers or wants enterprise pricing."*
  </Step>

  <Step title="Save">
    Click **Save**. The resource appears in the Resources list and is immediately available to the agent.
  </Step>
</Steps>

### Adding a file resource

<Steps>
  <Step title="Open the Resources section">
    In the **Knowledge** tab, click **Add file**.
  </Step>

  <Step title="Upload the file">
    Drag a file into the upload area or click to browse. Supported formats are the same as knowledge base documents (PDF, Word, plain text).
  </Step>

  <Step title="Fill in the details">
    * **Title** — The name shown on the chat card (required).
    * **Description** — A short summary visible to the prospect (optional).
    * **When to share** — Instructions for the agent, e.g. *"When the prospect asks for the security overview or SOC 2 report."*
  </Step>

  <Step title="Save">
    Click **Save**. The file is uploaded and the resource is available to the agent immediately.
  </Step>
</Steps>

<Tip>
  The **When to share** field is the most important part of each resource. Be specific about the conversation signals that should trigger sharing — vague guidance leads to the agent sharing too broadly or not at all.
</Tip>

<Note>
  Each resource is only shared once per session. If the agent determines the same resource is relevant a second time, it will not resend it.
</Note>

## Testing with preview mode

Before sharing your Navattic Agent with prospects, use preview mode to test the experience without affecting your analytics or usage quota.

To access preview mode, click **Preview** in the Navattic Agent editor. A banner at the top of the session indicates you're in preview mode. Share the preview link with your team for internal testing — only the published live URL should be distributed to external prospects.

Preview sessions differ from live sessions in these key ways:

|                                      | Preview | Live |
| ------------------------------------ | ------- | ---- |
| Visitor record created               | No      | Yes  |
| Session counted toward monthly quota | No      | Yes  |
| Playbooks triggered on disconnect    | No      | Yes  |
| Session summaries generated          | No      | Yes  |
| Analytics tracked                    | No      | Yes  |

<Tip>
  Test your Navattic Agent in preview mode after every significant change to your presentation message, guidelines, or product context.
</Tip>

## Version history

Navattic Agent version history lets you view past snapshots of your demo and restore any earlier version if a change doesn't work as expected.

Navattic automatically saves a new version each time you publish or make significant edits. Each version records when it was created and who made the change.

### Viewing version history

To open version history, click the **Version history** button (the clock icon) in the Navattic Agent editor toolbar. A drawer slides in from the right showing a timeline of all saved versions.

Each entry in the timeline displays:

* The version title and timestamp
* Who created the version
* A **Live** badge on the version currently published to visitors
* A **Draft** badge on the version you're currently editing

### Restoring a version

To restore a version:

1. Open **Version history** from the editor toolbar.
2. Find the version you want to restore in the timeline.
3. Click **Restore** on that entry. A confirmation prompt appears.
4. Confirm the restore. The editor reloads with the restored content as your new draft.

<Note>
  Restoring a version updates your draft only — the live demo your visitors see stays unchanged until you publish again. Review the restored content in preview mode before publishing.
</Note>

## Managing environment flows

After setting up your environment, you can edit and refine the flows your agent uses during demos.

### Editing a capture

If a step's capture needs to be fixed or retaken, you can open the capture editor directly from the Navattic Agent builder without navigating away.

Hover over the step thumbnail in the environment, click the three-dot menu in the top-right corner of the thumbnail, and select **Edit capture**. The capture editor opens scoped to that step's screen, letting you retake, crop, or adjust it. Your changes are automatically reflected in the environment when you save.

<Note>
  **Edit capture** is only available for steps based on web captures. Steps that use uploaded media (images or video) do not show this option.
</Note>

### Recapturing a step

Use Recapture to replace a step's underlying capture with a fresh one taken directly from your live product. This is useful when a page has changed significantly and you want to swap in a new capture rather than editing the existing one.

To recapture a step:

1. Hover over the step thumbnail in the environment flow editor to reveal the three-dot menu in the top-right corner of the thumbnail.
2. Click the menu and select **Recapture**.
3. Navattic opens the Recapture modal, which shows the original URL associated with the capture.
4. Click **Start recapture**. The Navattic Chrome extension opens your browser to the original URL so you can take a new capture.
5. Use the extension to capture the screen. Once you finish, the step thumbnail in the environment updates automatically.

<Note>
  **Recapture** requires the Navattic Chrome extension and is only available for steps based on web captures. Steps using uploaded media (images or video) do not show this option.
</Note>

### Configuring step settings

Each step in a flow has optional per-step settings you can configure from the environment editor. To open step settings, hover over the step thumbnail in the flow and click the settings icon that appears.

A **Step settings** drawer slides in from the right with the following controls:

**Spotlight**

Spotlight dims the background of your capture and cuts out the area around the click target, focusing the viewer's attention on the relevant element when the agent navigates that step.

To configure spotlight:

1. Toggle **Spotlight** on.
2. Click **Pick target** and select the element on the capture you want to highlight. The selected region appears as a preview.
3. Choose an intensity level: **Light**, **Medium**, or **Heavy**. Higher intensity makes the background darker, creating a stronger focus effect.

<Note>
  Spotlight is available for both web and media captures.
</Note>

**Trigger**

By default, the agent advances a step by clicking the element recorded during capture. The Trigger setting lets you override this — useful when the original click target isn't the most reliable or visible element to click during playback.

To set a custom trigger:

1. Click **Pick trigger** in the Step settings drawer.
2. Select the element on the capture you want the agent to click.

The trigger applies only to web captures. If no trigger is set, the agent falls back to the capture's original anchor.

**Video audio**

For steps that contain an uploaded video, you can enable the video's native audio so it plays during the demo. When video audio is enabled:

* The agent stops narrating while the video plays.
* When the video ends, the agent automatically continues the conversation.
* If a visitor speaks or types during playback, the video pauses and the agent responds. The visitor can ask the agent to resume the video if needed.

To enable video audio, open the **Step settings** drawer for a video step and toggle on **Video audio**.

<Note>
  The Video audio setting only appears on steps that use an uploaded video. It is not available for web captures or image steps.
</Note>

***

### Deleting a step

To remove a step from a flow, open the environment and select the flow you want to edit. Hover over the step preview thumbnail to reveal a menu button (the three-dot icon in the top-right corner of the thumbnail). Click the menu and select **Delete step**.

<Note>
  Deleting a step is permanent. The agent will no longer navigate to that screen during demos. You can recapture a step by taking new captures and adding them to the flow.
</Note>

### Uploading media as a flow

You can add images and videos directly to an environment without capturing them from a live app.

1. Open the environment in the Navattic Agent builder.
2. In the **Flows** panel, open the menu and select **Upload media**.
3. Drop up to 10 files — images (PNG, JPEG, WebP, GIF) or videos (MP4, WebM, MOV).
4. Copilot automatically generates narration for each image. You can edit or replace this text before saving.
5. Enter a name for the new flow, then click **Create**.

Each uploaded file becomes one step in the flow. The agent navigates these steps during demos the same way it navigates web captures.

### Importing a flow from an existing demo

To pull a flow from one of your existing Navattic demos into an environment:

1. Open the environment in the Navattic Agent builder.
2. In the **Flows** panel, open the menu and select **Import flow**.
3. Choose a demo, then select the specific flow you want to import.
4. Click **Import**.

The flow — including flows made entirely of uploaded images or video — is copied into the environment and becomes available to the agent immediately.

### Archiving a flow

To remove an entire flow from an environment, open the environment, select the flow, and choose **Archive flow** from the flow options menu. Archived flows are no longer shown to the agent during demos.

## Leads

The **Agents** section includes a **Leads** sidebar with pages for tracking who has engaged with your Navattic Agents.

### Visitors

The **Visitors** page lists individual visitors who have interacted with your Navattic Agents. For each visitor you can see which demos they engaged with, session duration, questions asked, and whether they converted.

### Accounts

The **Accounts** page groups visitor activity by company, giving you aggregate engagement data across all visitors from the same organization.

To access Leads, navigate to **Agents** > **Leads** in the sidebar.

## Conversations

The **Conversations** page gives you a detailed view of individual Navattic Agent sessions. Navigate to **Agents** > **Conversations** to see a list of all sessions, including visitor name, demo used, session duration, and when it took place.

### Filtering conversations

Use the filter menu to narrow the conversation list by:

* **Demo** — Show sessions for a specific Navattic Agent.
* **Duration** — Filter by session length range.
* **Turns** — Filter by the number of conversation exchanges (visitor messages plus agent responses) in the session. Use this to find high-engagement sessions or to exclude very short sessions.

### Viewing a session transcript

Click any conversation to open the session detail page. The **Transcript** card shows the full back-and-forth between the visitor and the agent, with timestamps and signals detected during the session.

### Replaying a session

On any conversation detail page, click the **Replay** button in the transcript card header to open a fullscreen session replay. The replay includes:

* **Transcript** — The complete conversation with timestamps.
* **Capture playback** — A synchronized recording of the agent navigating your environment, scrubbed to each conversation turn.
* **Stage timeline** — A visual indicator of which demo stage was active at each point in the session.
* **Eval flags** — Automated quality signals logged during the session.

Use session replays to review how visitors experienced your demo, identify where conversations stalled, and find opportunities to improve your flows or agent configuration.

<Note>
  Replay is available for completed live sessions. If a replay shows "Replay not available," the session is still being processed — check back in a few minutes.
</Note>

## Signals

Signals are workspace-level buying-intent indicators that the AI detects from visitor conversations across all your Navattic Agents. When a visitor's words match a signal you've defined, the detection is logged and visible in your analytics.

Navigate to **Agents** > **Signals** to manage your signals.

### Creating a signal

<Steps>
  <Step title="Add a category">
    Signals are organized into categories (for example, "Pricing interest" or "Competitor mentions"). Click **Add category** to create one, then give it a name.
  </Step>

  <Step title="Create a signal">
    Inside a category, click **Add signal**. Give the signal a name (e.g., "Asked about enterprise pricing"), choose an icon, and write a detection prompt.

    The detection prompt tells the AI what to look for in the conversation. Be specific:

    *Example: "The visitor has asked about pricing, pricing tiers, or how much the product costs."*
  </Step>

  <Step title="Enable the signal">
    Signals are enabled by default. Use the toggle to disable a signal without deleting it.
  </Step>
</Steps>

### Viewing signal detections

Signal detections appear in the transcript on each conversation detail page, marked with the signal name and icon. Aggregate signal data — counts and daily trends — is available on the **Signals** page.

<Tip>
  Use signals to identify which topics come up most in demos and use that to refine your Conversation Builder topics and starters.
</Tip>

## Sharing Navattic Agents

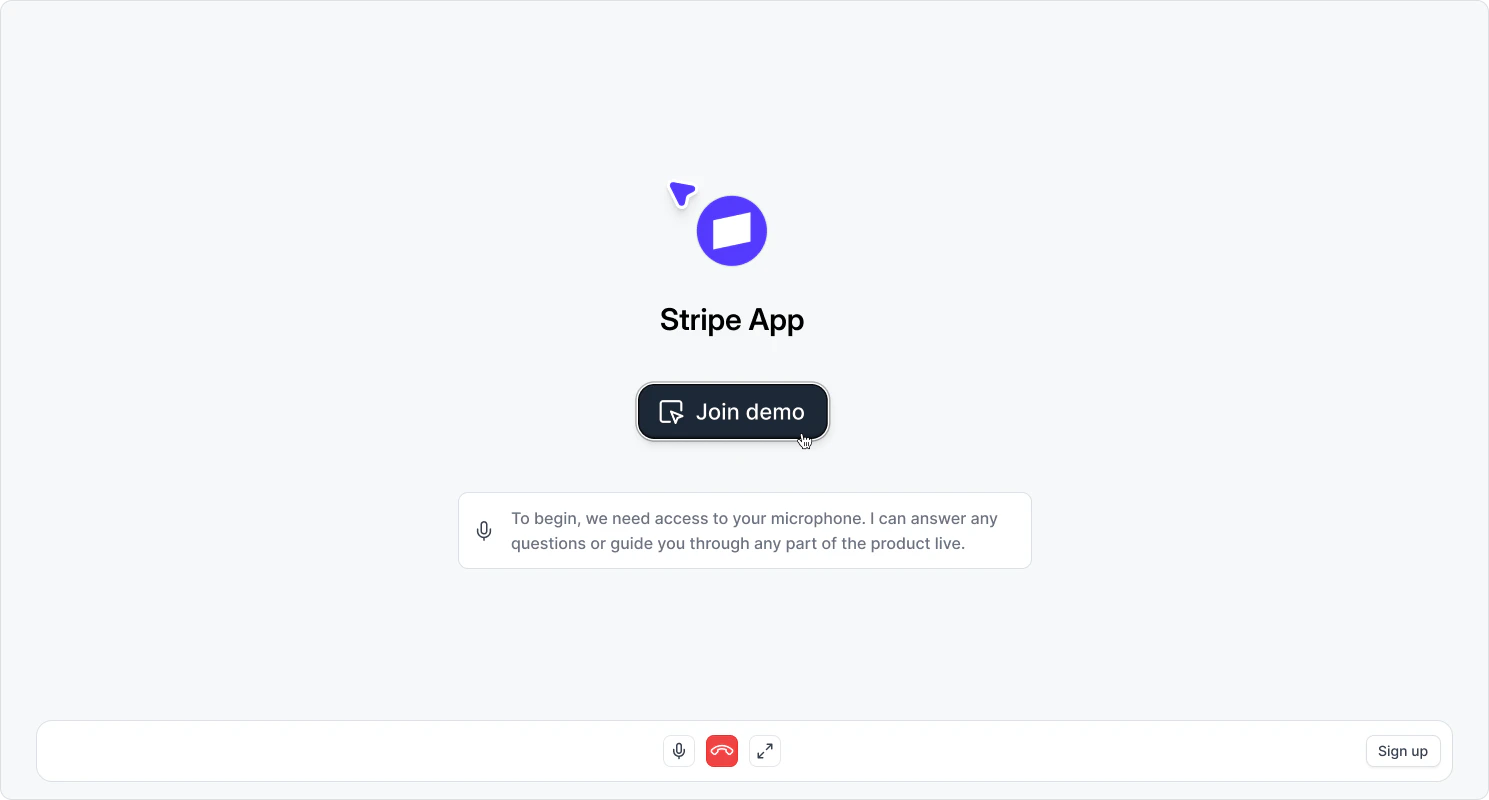
After publishing your Navattic Agent, you'll receive a shareable URL that you can distribute to prospects. When visitors access this link:

<Frame>
  <img src="https://mintcdn.com/navattic-app/OxPUNlfNpHj1xjhP/images/agent-demo-join.png?fit=max&auto=format&n=OxPUNlfNpHj1xjhP&q=85&s=a31f1dc39d1fbdcfdb90b99dc5cef973" alt="Navattic Agent join screen prompting visitor to allow microphone access" width="1489" height="800" data-path="images/agent-demo-join.png" />
</Frame>

1. They'll be prompted to allow microphone access (if mic input is enabled for the demo)
2. The agent will greet them with your configured presentation message
3. A recording of your application will open, showing your pre-captured screens
4. The agent will guide the visitor through relevant captures based on the conversation

<Note>
  If **Allow mic input** is enabled, visitors will be prompted to grant microphone permission before joining. If it's disabled, visitors skip the microphone step and interact through text chat only.
</Note>

## Best practices

Follow these guidelines to create effective Navattic Agents:

**Start with clear objectives** — Define specific goals for your agent before configuring behavior. What should prospects learn? What actions should they take?

**Provide comprehensive product context** — The more information you give the agent about your product, the better it can answer questions and demonstrate relevant features.

**Test thoroughly before sharing** — Run through several demo sessions yourself to ensure the agent behaves as expected and can handle common questions.

**Review session transcripts regularly** — Check actual conversations to identify gaps in the agent's knowledge or opportunities to improve responses.

**Update content as your product evolves** — When you add features or change pricing, update your Navattic Agent's product context to keep information current.

**Set appropriate guardrails** — Be specific about what the agent should not promise or claim, especially around pricing, custom features, and implementation timelines.

## Frequently asked questions

<AccordionGroup>
  <Accordion title="What languages do Navattic Agents support?">
    Navattic Agents support multiple languages including English, Spanish, French, German, Japanese, and more. Select your preferred language when creating the demo.
  </Accordion>

  <Accordion title="What happens if the agent doesn't know the answer to a question?">
    The agent will acknowledge uncertainty and, based on your guardrails, either redirect to documented information or suggest connecting with your sales team for specific questions.
  </Accordion>

  <Accordion title="How do I update a live Navattic Agent?">
    Edit the draft version and click Publish when ready. The published version will update with your changes while maintaining your demo URL.
  </Accordion>

  <Accordion title="How long can an Navattic Agent session last?">
    Navattic Agent sessions support up to 60 minutes of conversation time. Sessions automatically end at the 60-minute mark, so plan your demo flows with that limit in mind. Most demos run well under this — the limit exists as a safeguard for unusually long sessions.
  </Accordion>
</AccordionGroup>
