> ## Documentation Index
> Fetch the complete documentation index at: https://docs.navattic.com/llms.txt
> Use this file to discover all available pages before exploring further.
# Quick Start Guide
> Get up and running with Launchpad in minutes.
 **Launchpad** gives you streamlined access to interactive demos that help shorten sales cycles, improve the buying experience, and close more deals.
This quick guide will get you started sharing interactive demos with prospects in just a few minutes.
## Install the Chrome Extension
The easiest way to access and share demos is through the **Launchpad Chrome Extension**. It follows you anywhere on the web and integrates with the tools you already use.
**Launchpad** gives you streamlined access to interactive demos that help shorten sales cycles, improve the buying experience, and close more deals.
This quick guide will get you started sharing interactive demos with prospects in just a few minutes.
## Install the Chrome Extension
The easiest way to access and share demos is through the **Launchpad Chrome Extension**. It follows you anywhere on the web and integrates with the tools you already use.
 } title="Install Launchpad extension" href="https://chromewebstore.google.com/detail/navattic-launchpad/niekkpiejdapnjipjciadeddkpnpbbik">
Download from the Chrome Web Store.
Once installed, you'll see the Launchpad icon in your browser toolbar. Click it anytime to access your demos and share them with prospects.
The extension integrates with Salesforce, LinkedIn, Gmail, and other tools you use daily, making it easy to share demos right where you're working.
## Sharing Demos
You can access and share demos from several places. Follow these steps to create a personalized demo link for your prospect.
### Access Your Demos
**From the Chrome Extension**
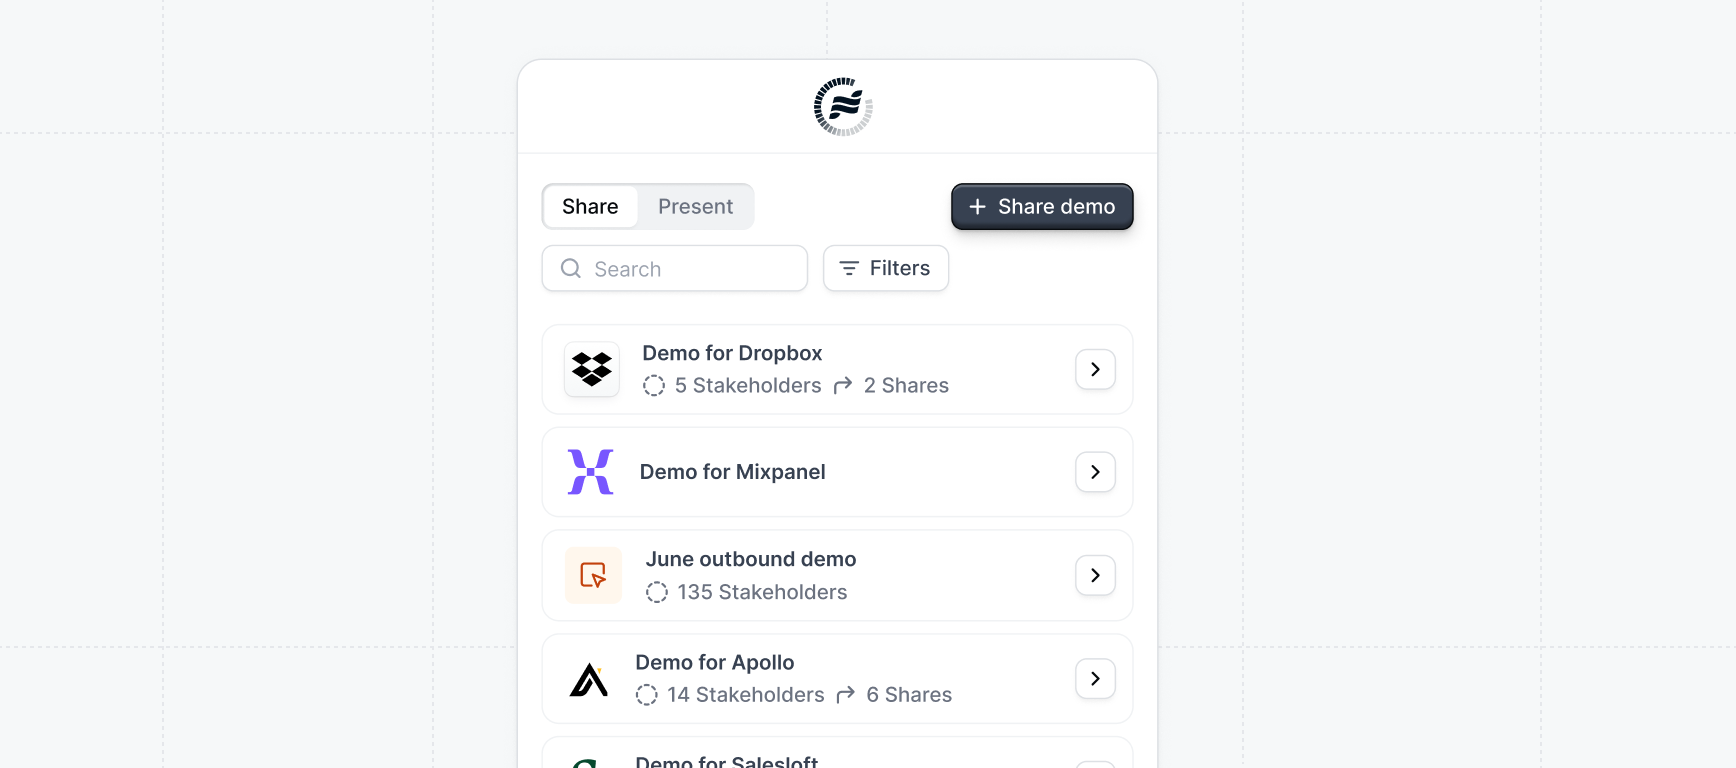
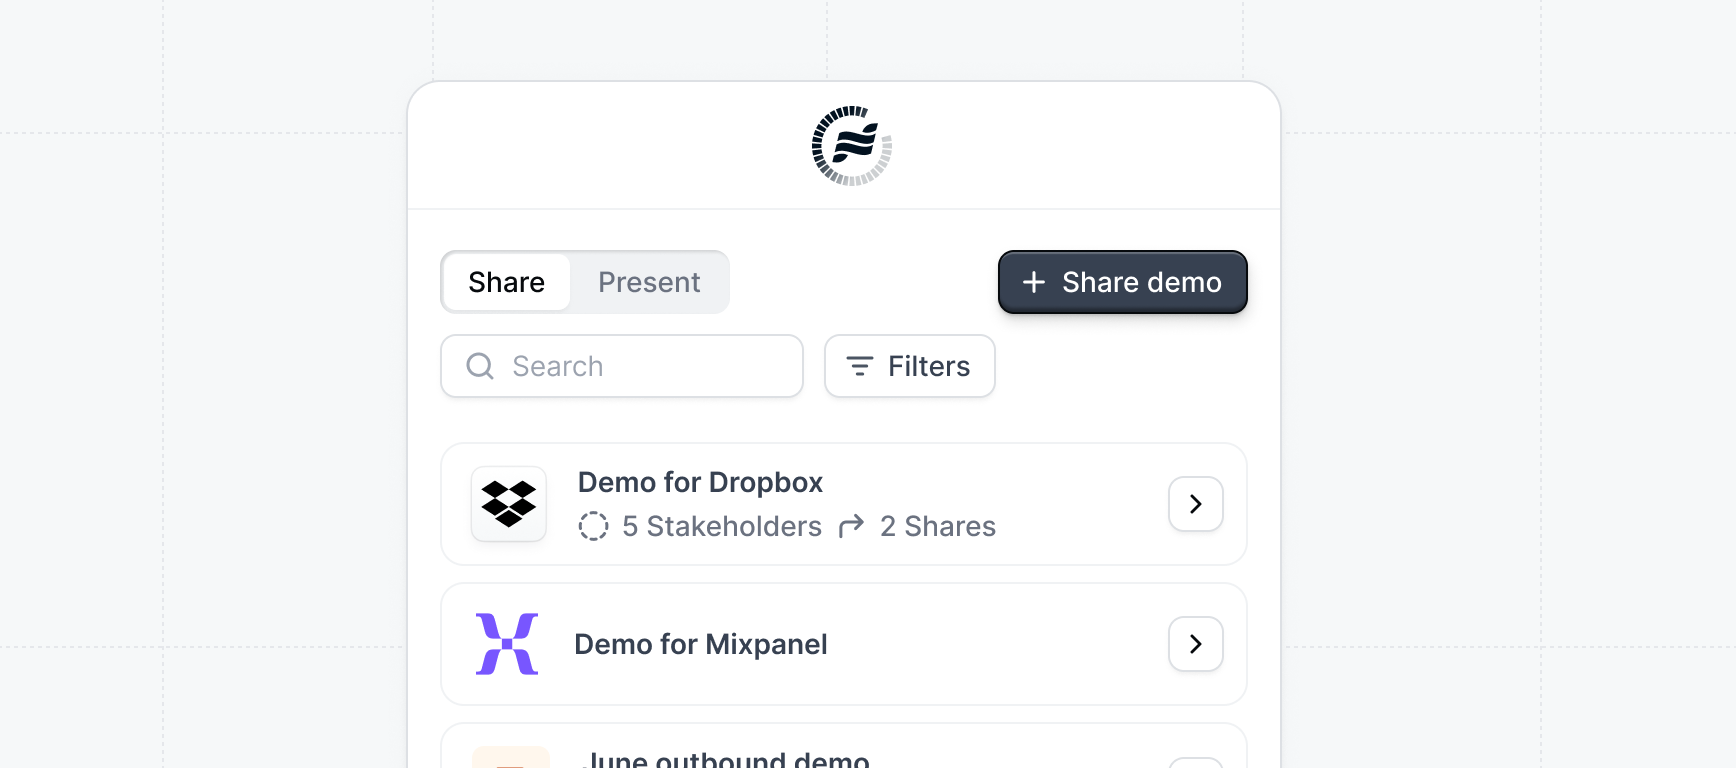
Click the Launchpad icon in your browser toolbar and click `+ Share demo` to get started.
} title="Install Launchpad extension" href="https://chromewebstore.google.com/detail/navattic-launchpad/niekkpiejdapnjipjciadeddkpnpbbik">
Download from the Chrome Web Store.
Once installed, you'll see the Launchpad icon in your browser toolbar. Click it anytime to access your demos and share them with prospects.
The extension integrates with Salesforce, LinkedIn, Gmail, and other tools you use daily, making it easy to share demos right where you're working.
## Sharing Demos
You can access and share demos from several places. Follow these steps to create a personalized demo link for your prospect.
### Access Your Demos
**From the Chrome Extension**
Click the Launchpad icon in your browser toolbar and click `+ Share demo` to get started.
 **From the Launchpad App**
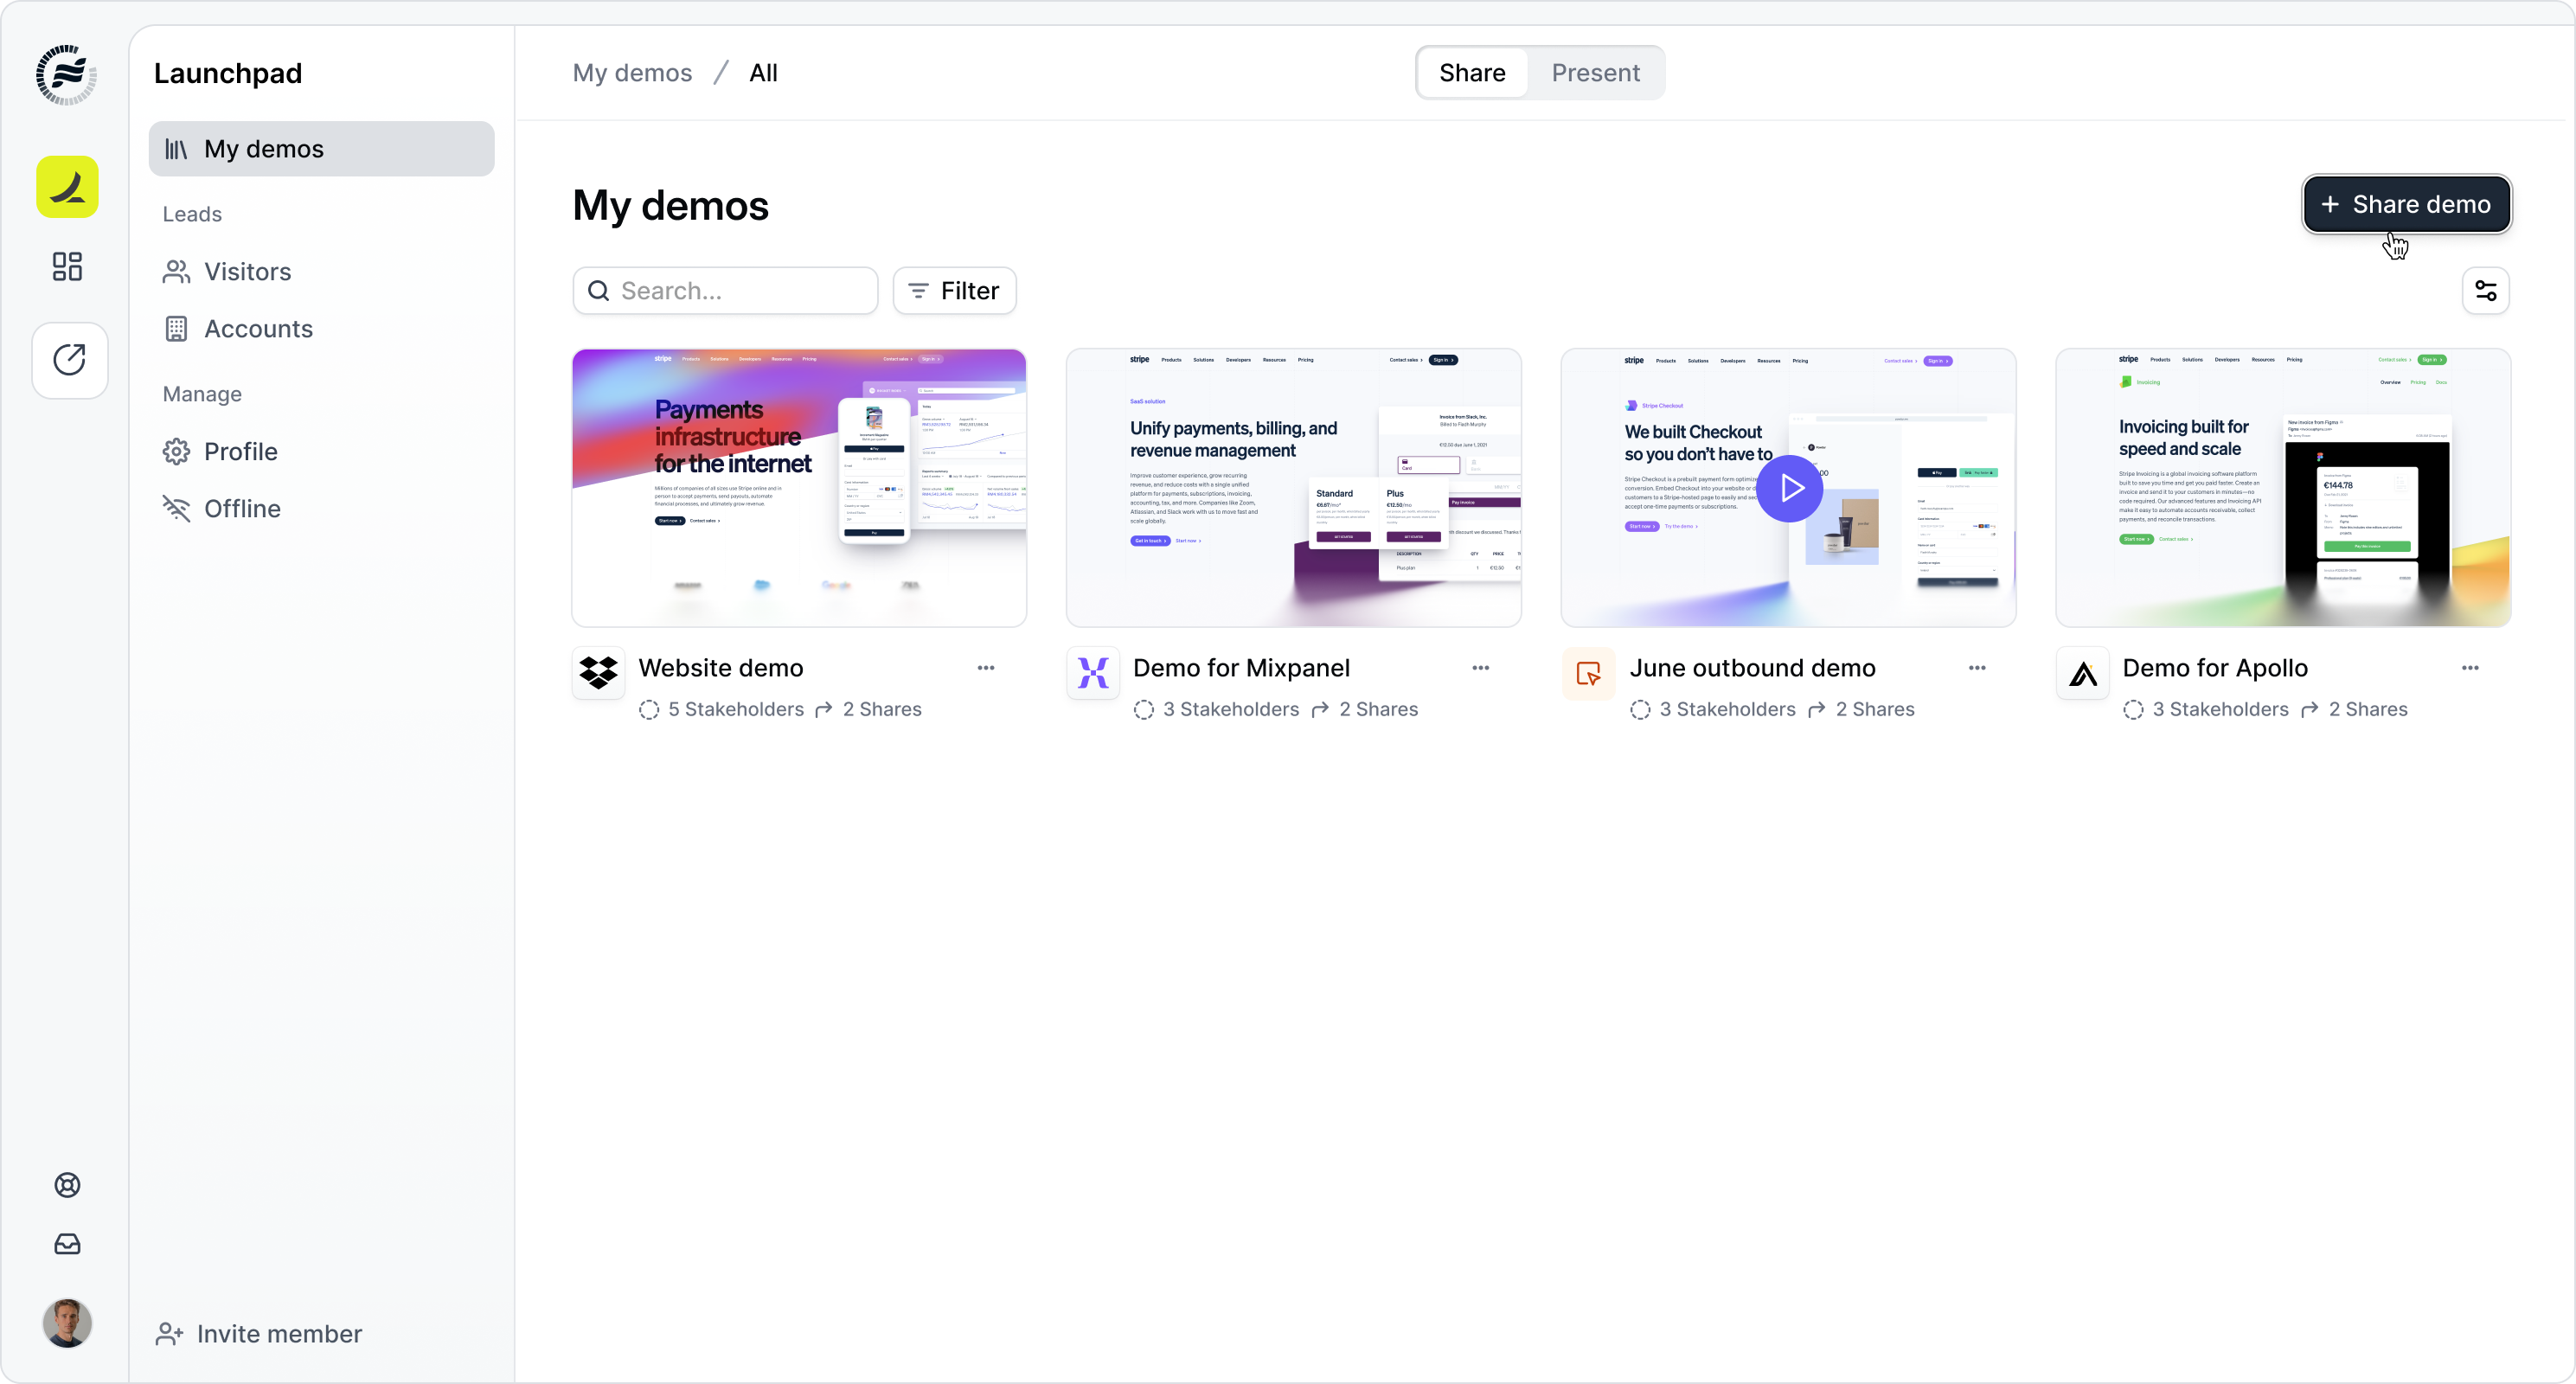
Visit the **My demos** page in the Launchpad app and click `+ Share demo` to create a new demo link.
**From the Launchpad App**
Visit the **My demos** page in the Launchpad app and click `+ Share demo` to create a new demo link.
 **From Your Email Client**
If your workspace has email integrations set up, you can share demos directly from Gmail, Outlook, Outreach, or Salesloft, and more.
See all available integrations
### How to Share
Follow these steps to create a personalized demo link:
Open the Launchpad extension or go to the Launchpad app and click `+ Share demo`.
**From Your Email Client**
If your workspace has email integrations set up, you can share demos directly from Gmail, Outlook, Outreach, or Salesloft, and more.
See all available integrations
### How to Share
Follow these steps to create a personalized demo link:
Open the Launchpad extension or go to the Launchpad app and click `+ Share demo`.
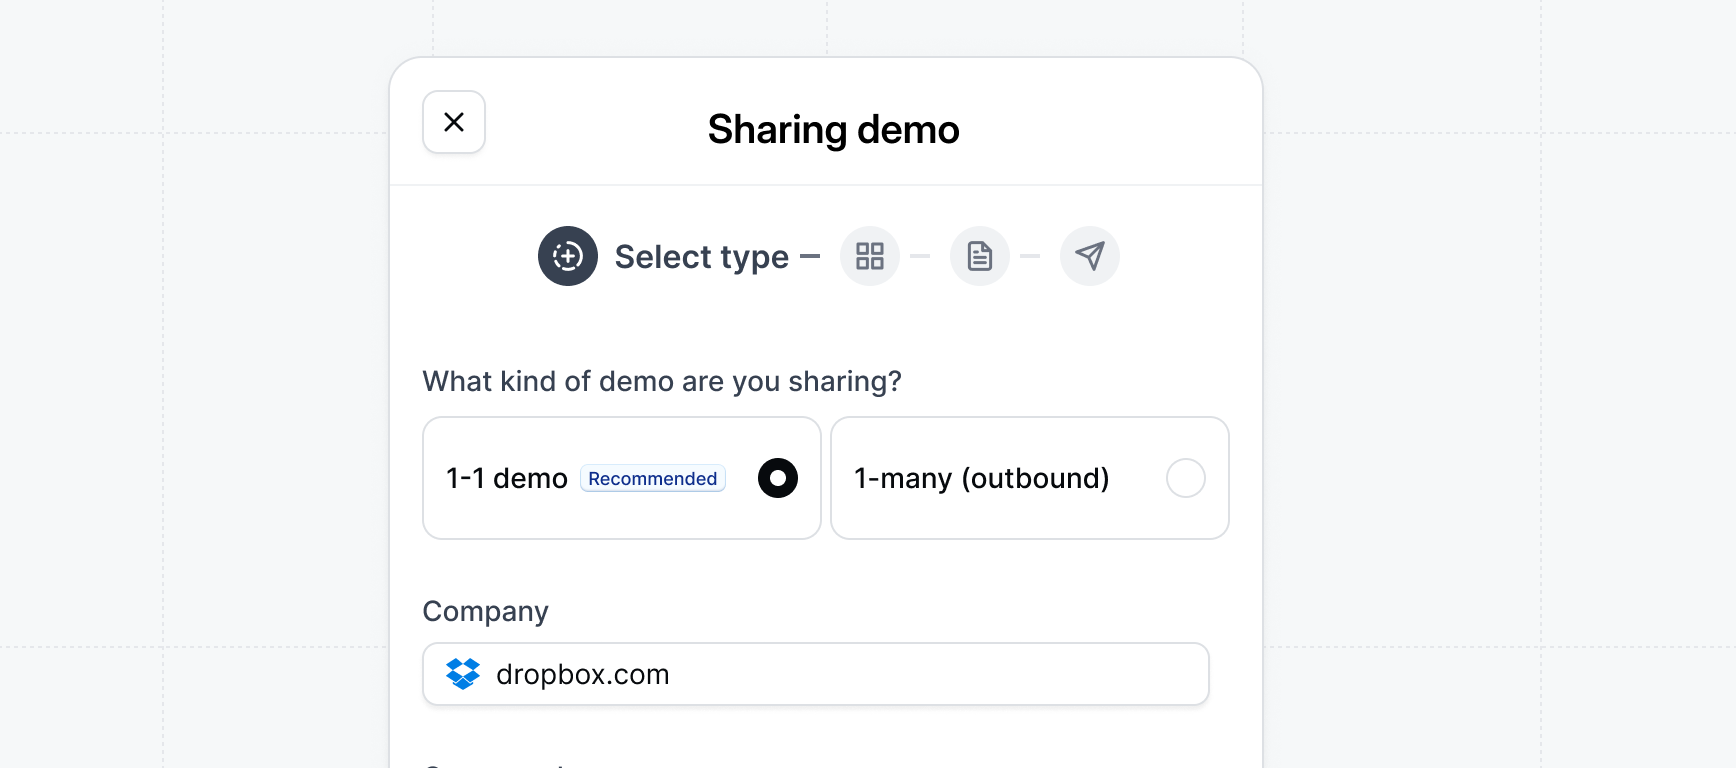 Choose between:
* **1-1 demo**: Specify the company domain for personalized content and tracking (recommended for most deals)
* **1-many (outbound)**: For sharing with multiple prospects in campaigns
In most cases, we recommend sharing **1-1 demos** as this allows you to share more relevant content and better track engagement.
Choose between:
* **1-1 demo**: Specify the company domain for personalized content and tracking (recommended for most deals)
* **1-many (outbound)**: For sharing with multiple prospects in campaigns
In most cases, we recommend sharing **1-1 demos** as this allows you to share more relevant content and better track engagement.
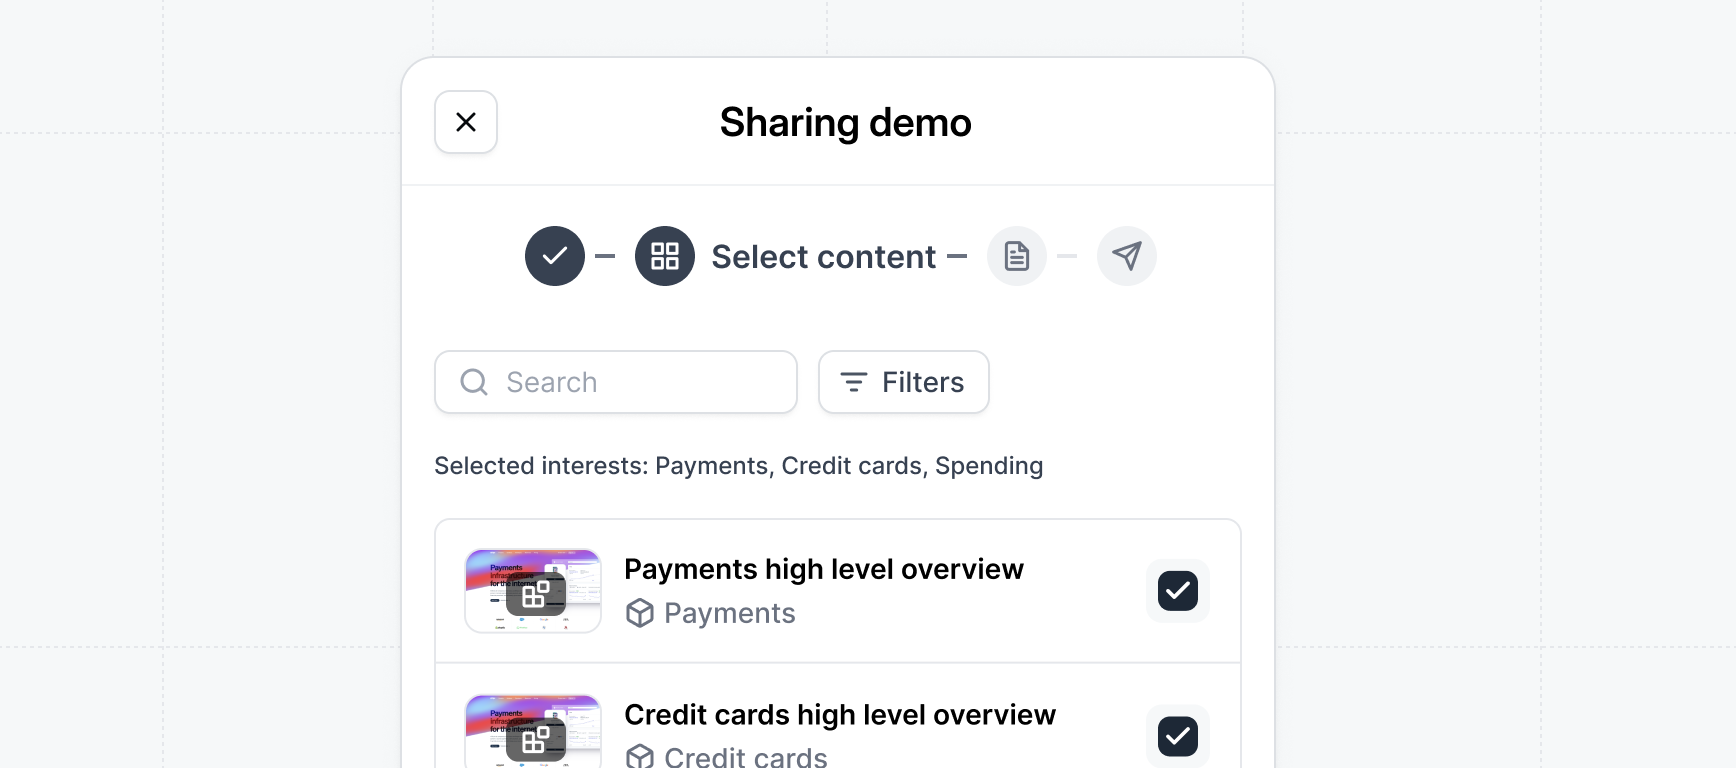 Choose the flows or standard demo that best matches your prospect's needs. You can filter by interests if you know what the prospect cares about.
A **flow** is a focused walkthrough of a specific product area like reporting or integrations.
**Standard demo**: Share a single pre-built standard demo.
**Custom flow**: Assemble multiple flows into a custom demo.
We recommend using **custom flow**, as these can be assembled ad hoc based on your prospect's specific use case or areas of interest.
Customize your demo to match your needs:
* **Personal intro video** - Include a personal welcome to your demo
* **Interests form** - Allow visitors to select their areas of interests
* **Recipient form gate** - Require visitors to fill out a form before accessing the demo to identify new stakeholders
* **Expiration date** - Set when the demo link expires to control access (can be updated after sharing)
* **Custom URL** - Customize the URL path for your demo
* **Downloadable files** - Include case studies, pricing docs, or other resources
Adding a personal intro video can significantly increase engagement. Reference the prospect by name or mention specific talking points from your conversation.
Add your prospect's details and any relevant stakeholders. This ensures everyone receives a personalized invite and their engagement is tracked.
If prospects forward the demo to other stakeholders, you'll be notified and can track their engagement. Learn more in the [Tracking Engagement](#tracking-engagement) section.
Choose the flows or standard demo that best matches your prospect's needs. You can filter by interests if you know what the prospect cares about.
A **flow** is a focused walkthrough of a specific product area like reporting or integrations.
**Standard demo**: Share a single pre-built standard demo.
**Custom flow**: Assemble multiple flows into a custom demo.
We recommend using **custom flow**, as these can be assembled ad hoc based on your prospect's specific use case or areas of interest.
Customize your demo to match your needs:
* **Personal intro video** - Include a personal welcome to your demo
* **Interests form** - Allow visitors to select their areas of interests
* **Recipient form gate** - Require visitors to fill out a form before accessing the demo to identify new stakeholders
* **Expiration date** - Set when the demo link expires to control access (can be updated after sharing)
* **Custom URL** - Customize the URL path for your demo
* **Downloadable files** - Include case studies, pricing docs, or other resources
Adding a personal intro video can significantly increase engagement. Reference the prospect by name or mention specific talking points from your conversation.
Add your prospect's details and any relevant stakeholders. This ensures everyone receives a personalized invite and their engagement is tracked.
If prospects forward the demo to other stakeholders, you'll be notified and can track their engagement. Learn more in the [Tracking Engagement](#tracking-engagement) section.
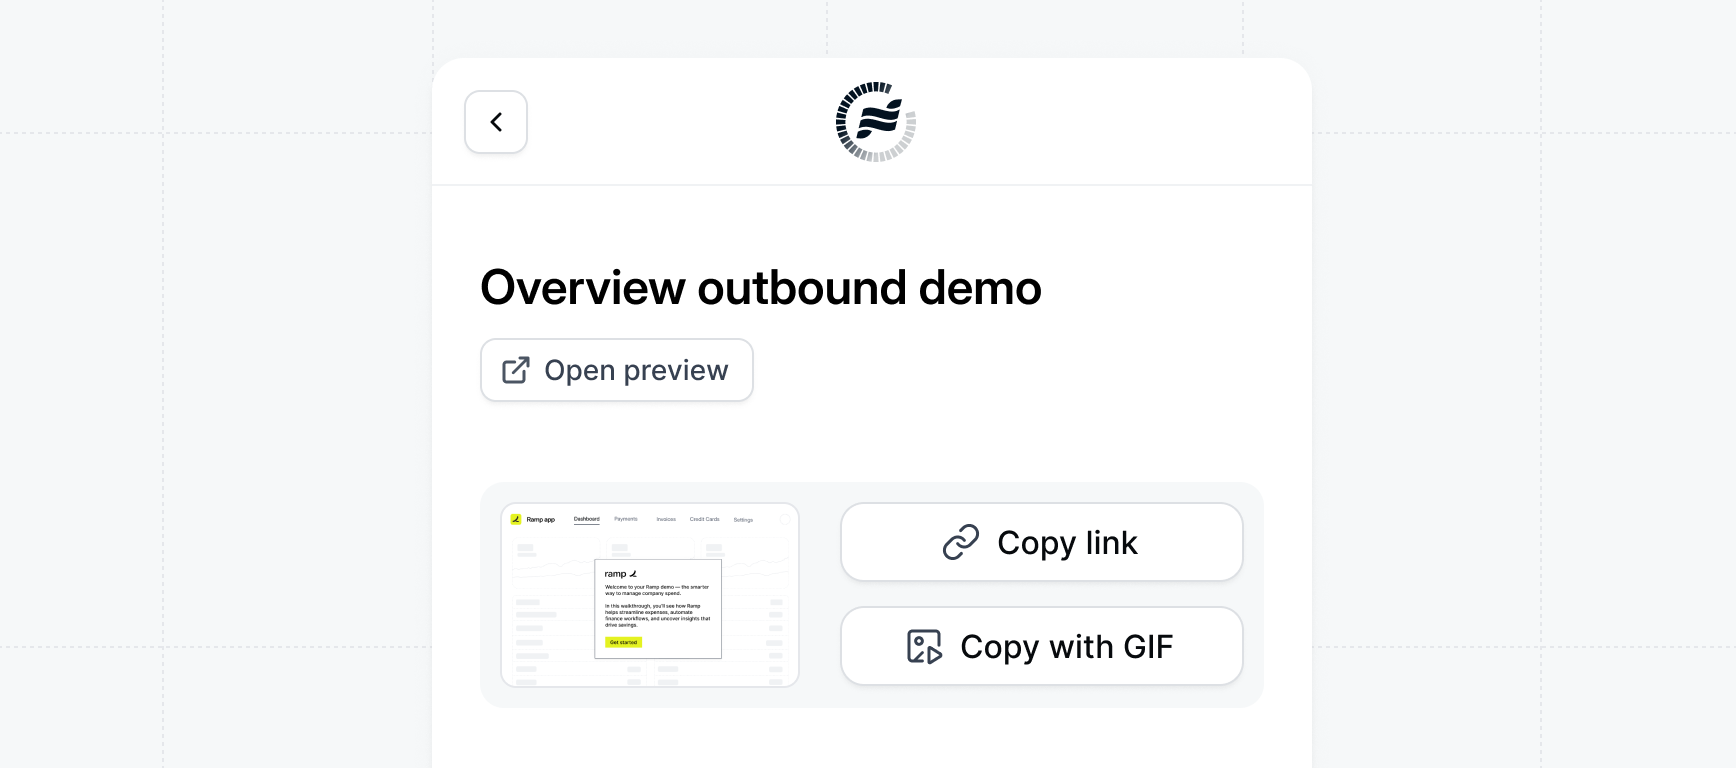 Copy the demo link and include it in your email to the prospect. You can also include a preview of the demo for extra engagement.
Detailed guide on sharing demos
Best practices for timing
## Tracking Engagement
### Monitoring Your Activity
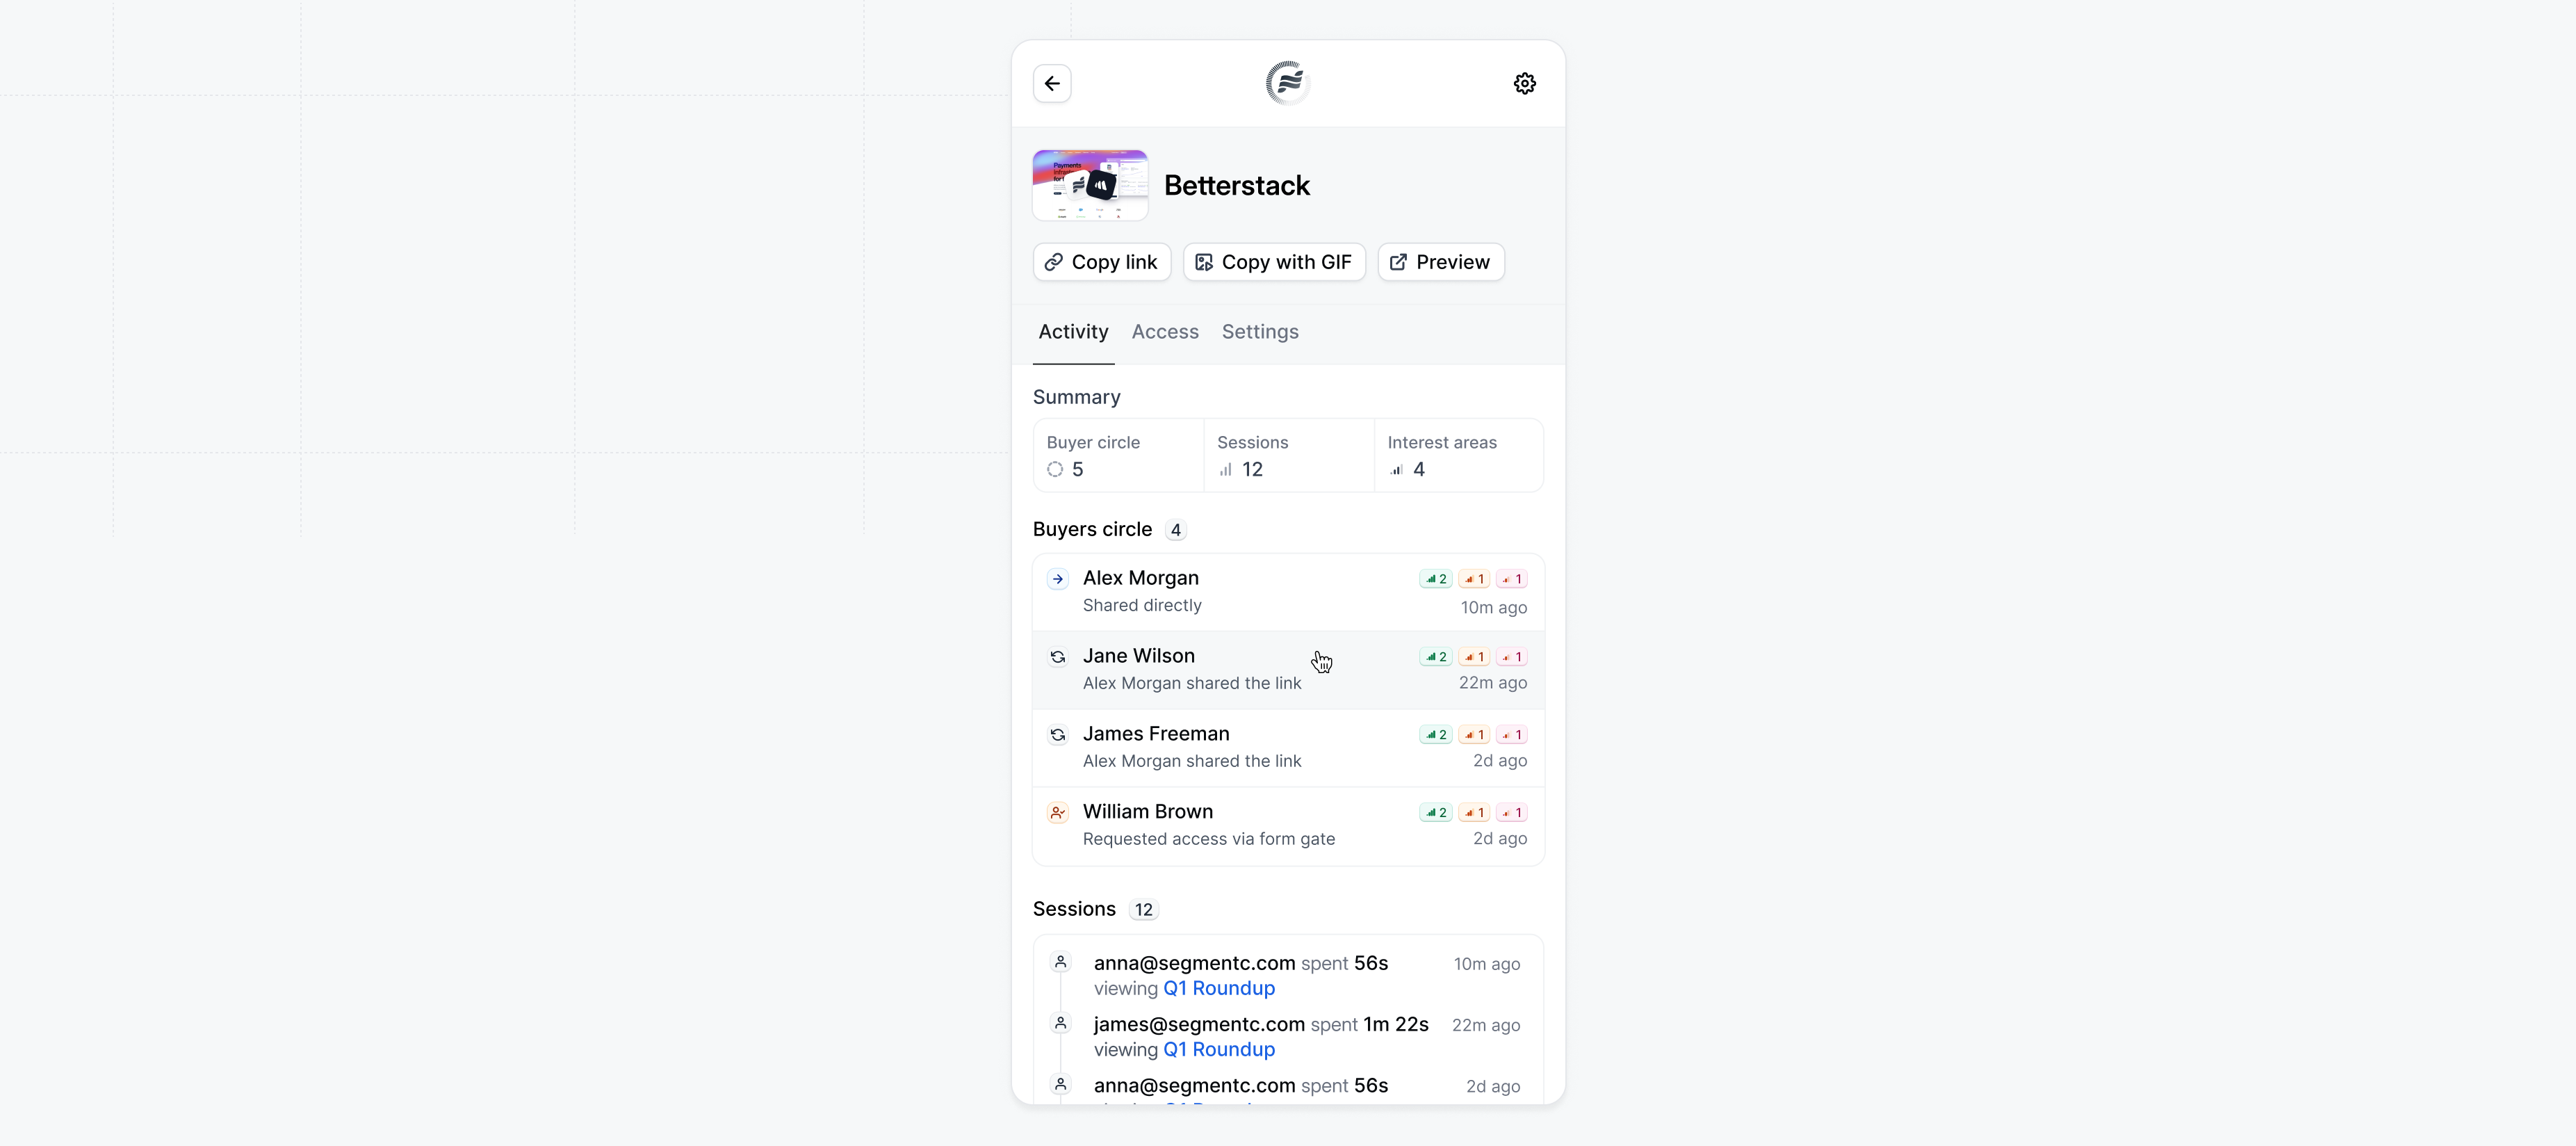
View your demo performance in the Launchpad app:
* **Buyer Circle**: See how many stakeholders have engaged with your demos
* **Sessions**: Track total viewing sessions and engagement time
* **Interest Areas**: Discover what features prospects care about most
Copy the demo link and include it in your email to the prospect. You can also include a preview of the demo for extra engagement.
Detailed guide on sharing demos
Best practices for timing
## Tracking Engagement
### Monitoring Your Activity
View your demo performance in the Launchpad app:
* **Buyer Circle**: See how many stakeholders have engaged with your demos
* **Sessions**: Track total viewing sessions and engagement time
* **Interest Areas**: Discover what features prospects care about most
 ### What to Do When You Receive an Alert
After you send the demo link, here's what happens and what to do:
**What happens:**
1. **Prospect receives the link** - They can view the demo at their convenience
2. **You get an email alert** - When they finish viewing, you'll receive a notification with engagement details. You can also receive [Slack notifications](/launchpad/integrations/slack) for real-time updates.
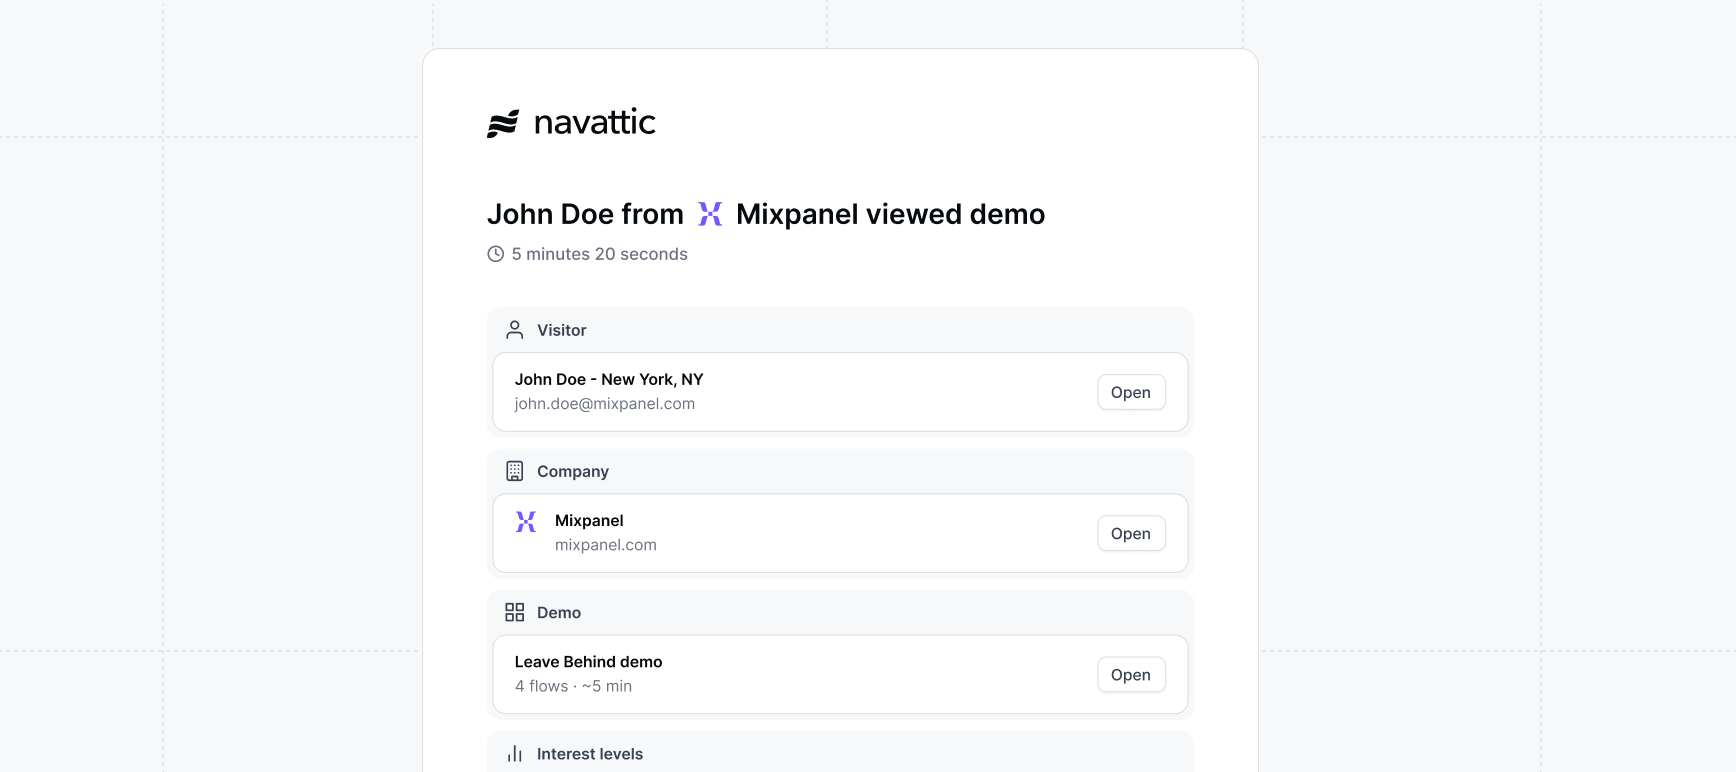
3. **Alert shows engagement** - The alert includes what they viewed, interest levels, and engagement metrics. You'll also get alerts when new stakeholders are discovered as the demo is shared internally across the organization, updating your buyer circle.
### What to Do When You Receive an Alert
After you send the demo link, here's what happens and what to do:
**What happens:**
1. **Prospect receives the link** - They can view the demo at their convenience
2. **You get an email alert** - When they finish viewing, you'll receive a notification with engagement details. You can also receive [Slack notifications](/launchpad/integrations/slack) for real-time updates.
3. **Alert shows engagement** - The alert includes what they viewed, interest levels, and engagement metrics. You'll also get alerts when new stakeholders are discovered as the demo is shared internally across the organization, updating your buyer circle.
 **What to do next:**
When you receive demo view notification, your prospect has expressed intent by engaging with your demo. This is an ideal time to follow up:
**Act fast** - Reach out within the next few minutes while the demo is fresh in their mind.
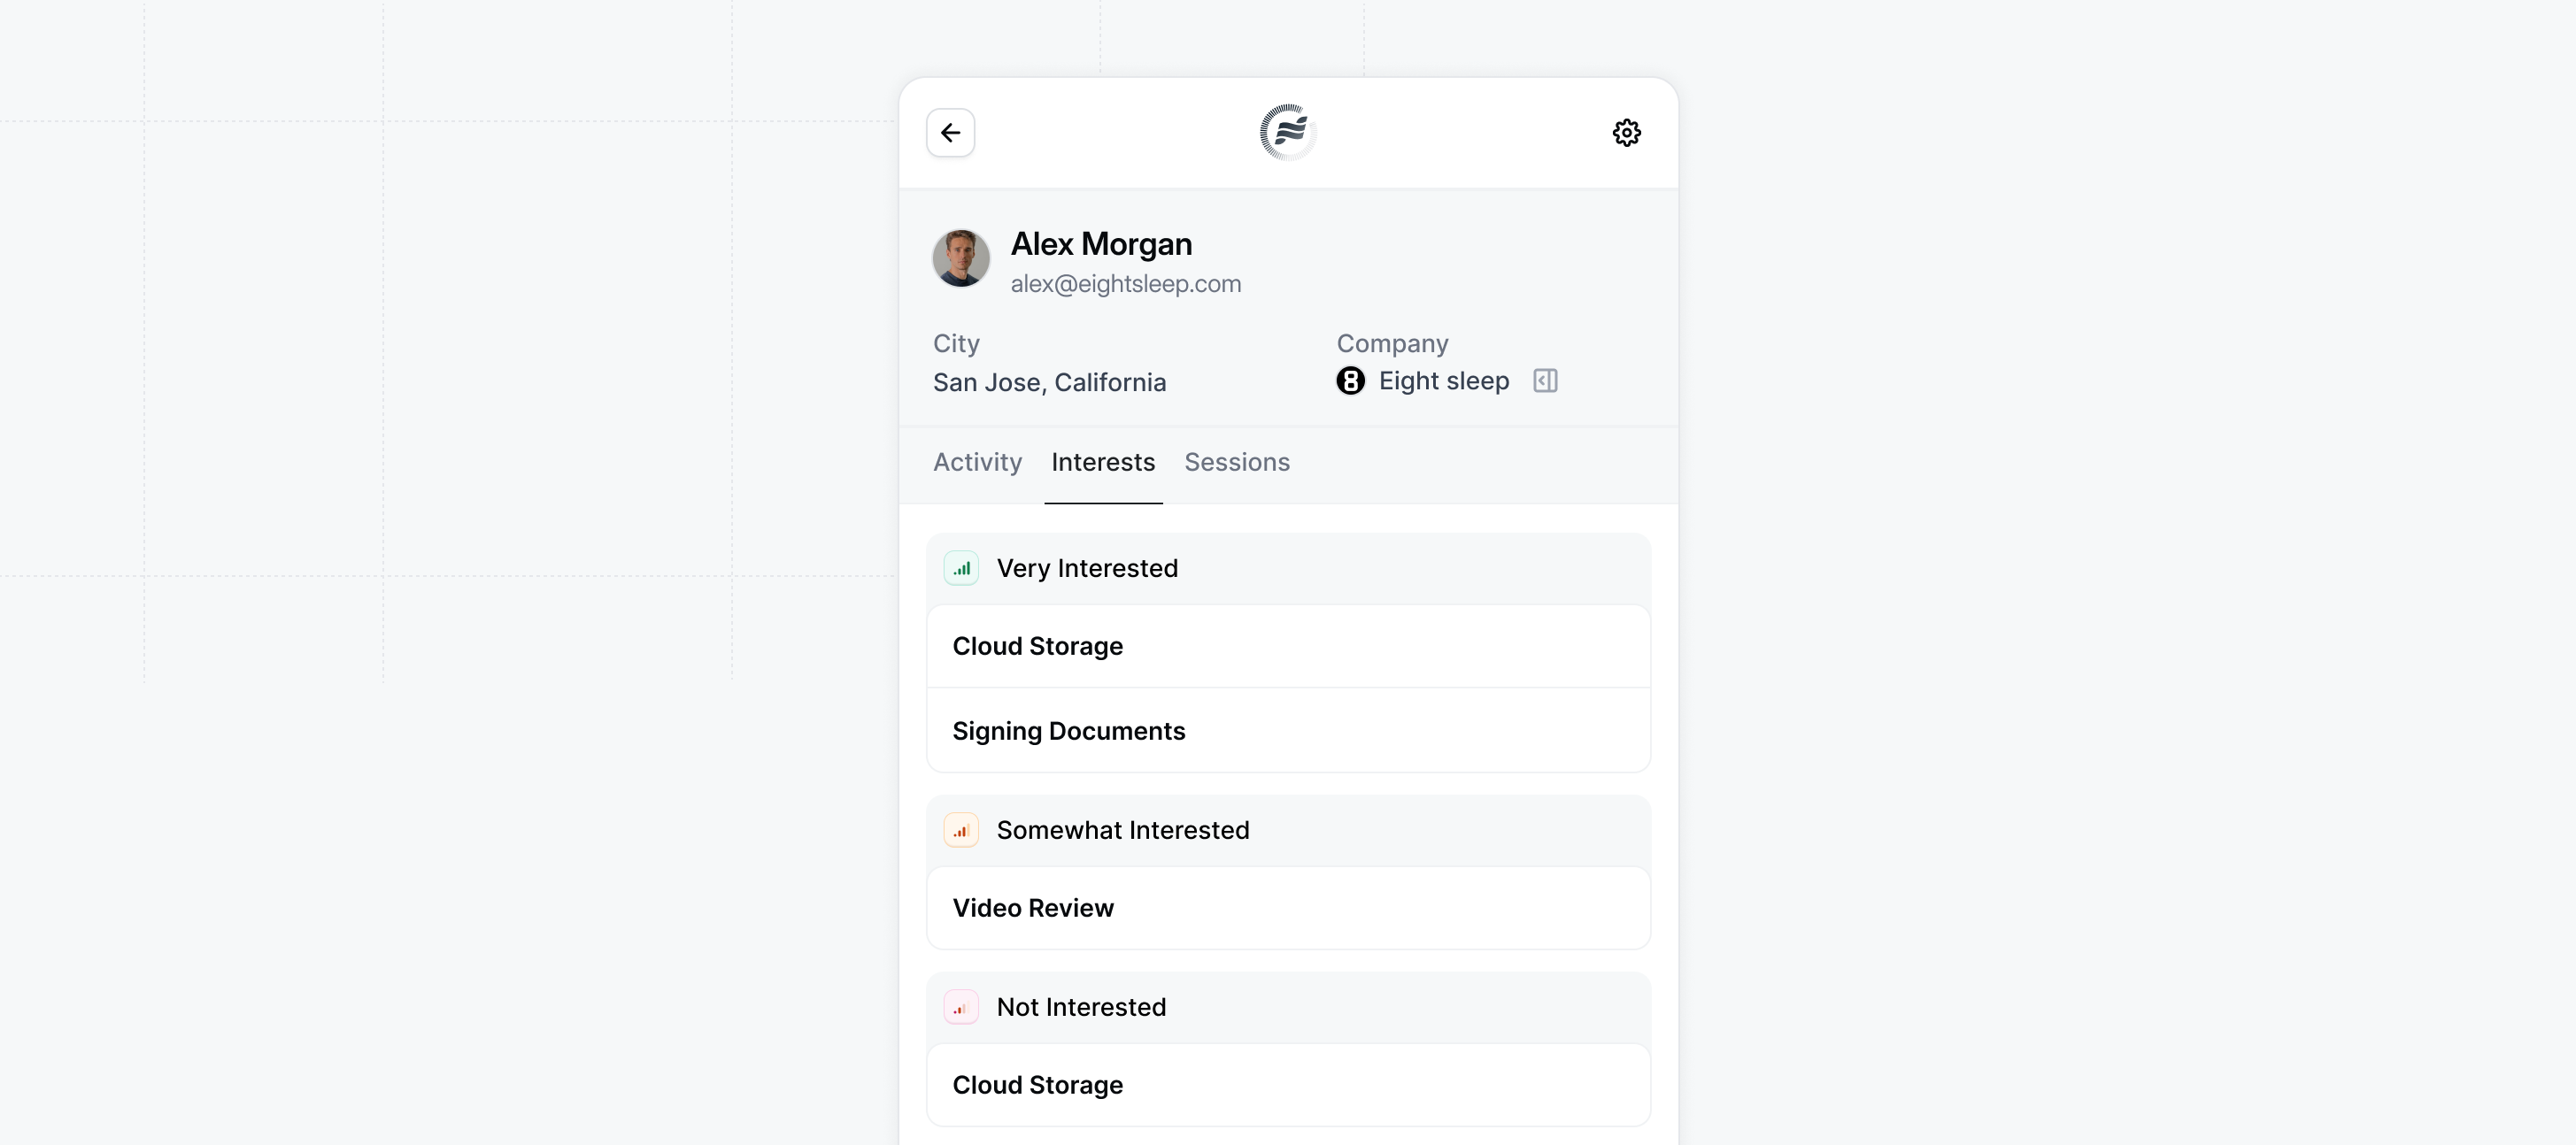
**Reference interests** - Check what the prospect viewed and their interest levels, then personalize your message based on their engagement.
**Suggest next steps** - Use their interests to guide the conversation and, if appropriate, suggest a meeting to discuss next steps.
Email alerts are sent at the end of the visitor session, so you'll know exactly when someone has finished viewing your demo.
**What to do next:**
When you receive demo view notification, your prospect has expressed intent by engaging with your demo. This is an ideal time to follow up:
**Act fast** - Reach out within the next few minutes while the demo is fresh in their mind.
**Reference interests** - Check what the prospect viewed and their interest levels, then personalize your message based on their engagement.
**Suggest next steps** - Use their interests to guide the conversation and, if appropriate, suggest a meeting to discuss next steps.
Email alerts are sent at the end of the visitor session, so you'll know exactly when someone has finished viewing your demo.
 ## Presenting Demos
You can **present demos** during live calls, on-site with prospects, or at events to provide a consistent, interactive, hands-on product experience.
### How to Present
When creating a share link, you can enable **Presenter mode** to use demos in live calls. Key features include:
* **Presenter Notes** - Add talking points to each step so you can stay on message without switching screens
* **Keyboard Navigation** - Use arrow keys (`← →`) to move forward and backward through demo steps
* **Click to Progress** - Click anywhere in Presenter mode to advance steps, making presentations more fluid
* **Keyboard Shortcuts** - Use `⌘P` to launch Presenter mode and `⌘N` to toggle presenter notes
## Presenting Demos
You can **present demos** during live calls, on-site with prospects, or at events to provide a consistent, interactive, hands-on product experience.
### How to Present
When creating a share link, you can enable **Presenter mode** to use demos in live calls. Key features include:
* **Presenter Notes** - Add talking points to each step so you can stay on message without switching screens
* **Keyboard Navigation** - Use arrow keys (`← →`) to move forward and backward through demo steps
* **Click to Progress** - Click anywhere in Presenter mode to advance steps, making presentations more fluid
* **Keyboard Shortcuts** - Use `⌘P` to launch Presenter mode and `⌘N` to toggle presenter notes
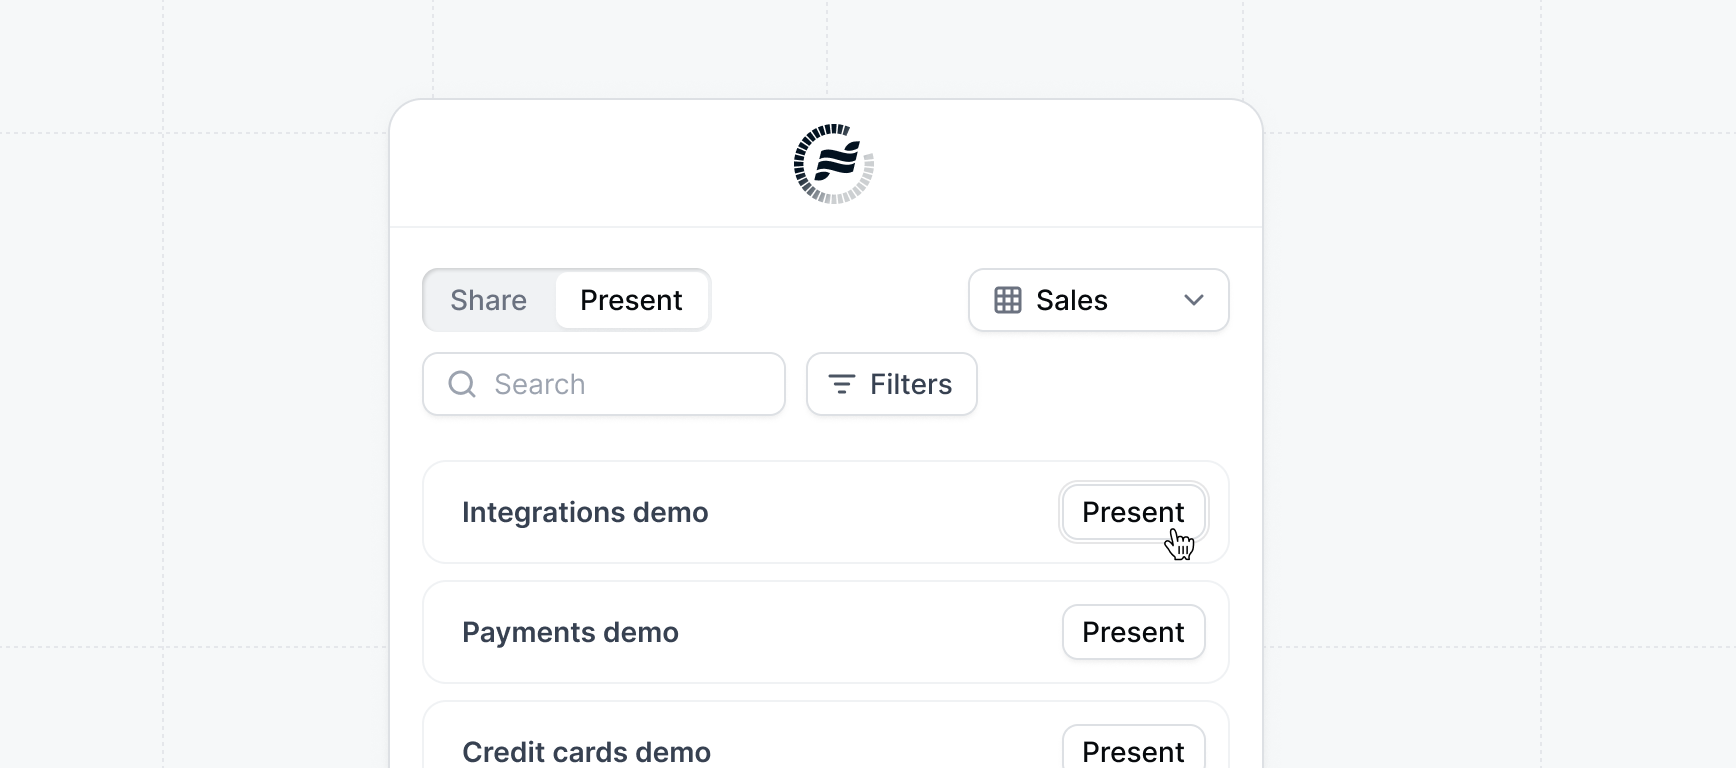 Presenter notes are visible only to you, giving you confidence and consistency without distracting the prospect.
Learn more about presenting demos
## Next Steps
Now that you're set up, here are some ways to get the most out of Launchpad:
* **Share demos before calls** - Send demos before scheduled meetings to help prospects qualify themselves and bring in stakeholders
* **Use interest demos** - Learn what features prospects care about most
* **Follow up quickly** - Act on email alerts promptly to keep momentum going
* **Share feedback** - Let your team know which demos work best and how prospects respond
Learn about sharing demos before calls
Send followup demos after meetings
Use demos in outbound emails
Presenter notes are visible only to you, giving you confidence and consistency without distracting the prospect.
Learn more about presenting demos
## Next Steps
Now that you're set up, here are some ways to get the most out of Launchpad:
* **Share demos before calls** - Send demos before scheduled meetings to help prospects qualify themselves and bring in stakeholders
* **Use interest demos** - Learn what features prospects care about most
* **Follow up quickly** - Act on email alerts promptly to keep momentum going
* **Share feedback** - Let your team know which demos work best and how prospects respond
Learn about sharing demos before calls
Send followup demos after meetings
Use demos in outbound emails