> ## Documentation Index
> Fetch the complete documentation index at: https://docs.navattic.com/llms.txt
> Use this file to discover all available pages before exploring further.

# Interest demos

> Unlock a powerful insight - what features your prospects are interested in.

<Frame>
  <img className="overflow-hidden rounded-xl border" src="https://mintcdn.com/navattic-app/bR17QzPUtrfb78_J/images/interest-levels.png?fit=max&auto=format&n=bR17QzPUtrfb78_J&q=85&s=636a108242014dea770e853f636eeead" alt="Interest Levels" width="2880" height="1580" data-path="images/interest-levels.png" />
</Frame>

## Interest Level demos

We highly recommend leveraging <Icon icon="chart-no-axes-column" /> **Interest Level demos** across your sales teams to gain valuable insights into prospect interests and create a better, more relevant experience for your buyers.

Interest level demos help create a better buying experience for both buyers and sellers:

<Tabs>
  <Tab title="For buyers">
    **Relevant content**

    <div>
      Buyers benefit from Interest demos by receiving a tailored experience that highlights the most relevant features for their specific needs.
    </div>
  </Tab>

  <Tab title="For sellers">
    **Interests insight**

    <div>
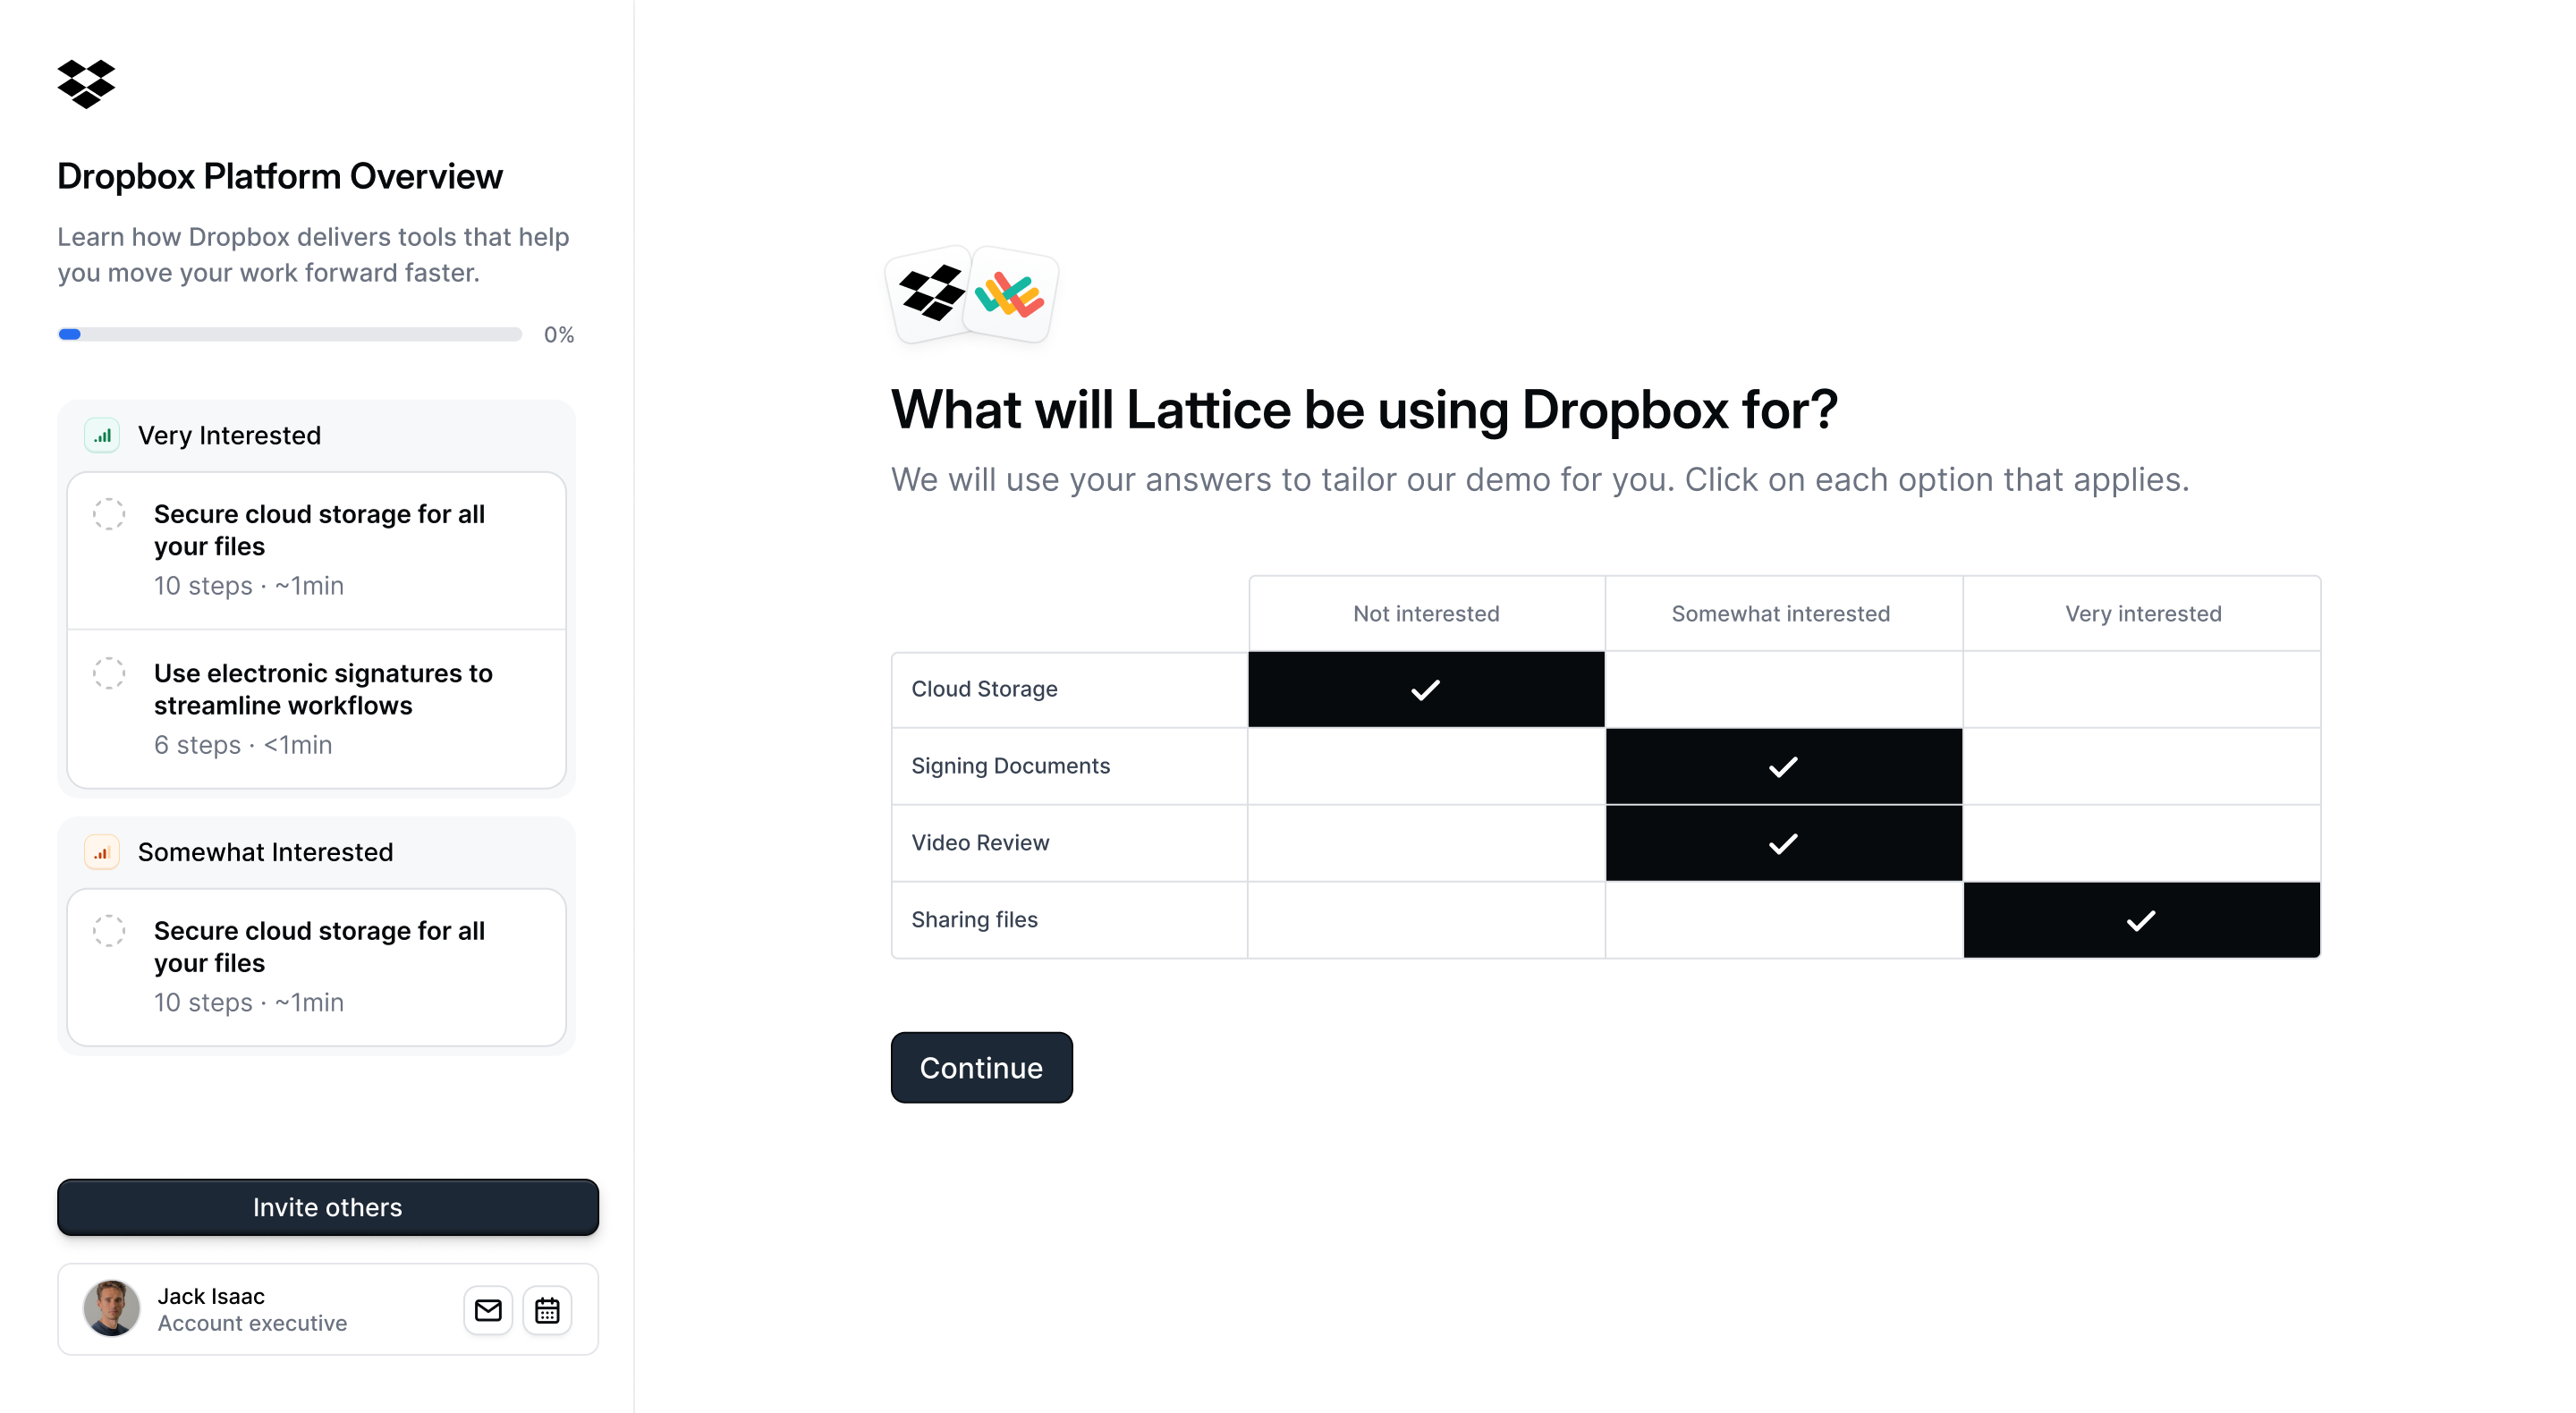
      One of the most valuable insights you can gain from interactive demos is understanding the level of interest prospects have in different features. Sales reps can use this insight to tailor their live demos and highlight the most relevant features for each prospect.
    </div>
  </Tab>
</Tabs>

## How Interests and Flows work together

Understanding the relationship between **Interests** and **Flows** helps you control exactly what content appears in a prospect's checklist.

<AccordionGroup>
  <Accordion title="Key concepts">
    * **Flows** are individual items in the checklist. Each flow represents a specific piece of demo content (e.g., "Payments Overview" or "Invoice Management").
    * **Interests** are groupings of flows. They represent broader product or feature areas (e.g., "Payments", "Invoicing"). An Interest can have one or more flows assigned to it.
    * **Interest Forms** allow prospects to indicate which Interests they care about. Based on their selections, the associated flows are added to their checklist.
  </Accordion>

  <Accordion title="What happens when a prospect selects an Interest">
    When a prospect indicates positive interest in an Interest (e.g., selects "Very Interested" in your Interest Form), all flows assigned to that Interest **that were included in the share link's content selection** are added to the checklist as separate items.

    For example, if you have an Interest called "Payments" with three flows assigned to it:

    * Payment Dashboard Overview
    * Creating an Invoice
    * Processing Refunds

    And all three flows are included in the share link, then when a prospect selects "Payments," all three flows appear as separate checklist items.
  </Accordion>

  <Accordion title="How to add multiple flows to a single Interest">
    To have multiple flows added when an Interest is selected:

    1. Create the Interest (e.g., "Reporting")
    2. Create multiple flows and assign them to that Interest
    3. All assigned flows will be added to the checklist when a prospect selects that Interest
  </Accordion>
</AccordionGroup>

### Controlling which flows are added

There are two ways to control which flows appear when an Interest is selected:

<CardGroup cols={2}>
  <Card title="Use separate Interests" icon="layer-group">
    If you don't want certain flows to be grouped together, assign them to different Interests. Each Interest acts as an independent grouping, so prospects can select only the ones relevant to them.
  </Card>

  <Card title="Exclude from share link" icon="filter">
    When creating a share link, use the **content selection step** to exclude specific flows. Only flows included in the share link's content selection will be added to the checklist, even if they're assigned to a selected Interest.
  </Card>
</CardGroup>

<Info>
  **Example**: You have an Interest called "Analytics" with 5 flows. For a particular prospect, you only want to show 2 of those flows. When creating the share link, deselect the 3 flows you want to exclude. If the prospect selects "Analytics," only the 2 included flows will appear in their checklist.
</Info>

## Building an Interest Level Demo

Interest Level demos are created through the Launchpad share flow. Follow these steps to set up an Interest Level demo for discovery:

<Steps>
  <Step title="Create an Interest demo with Interest Areas">
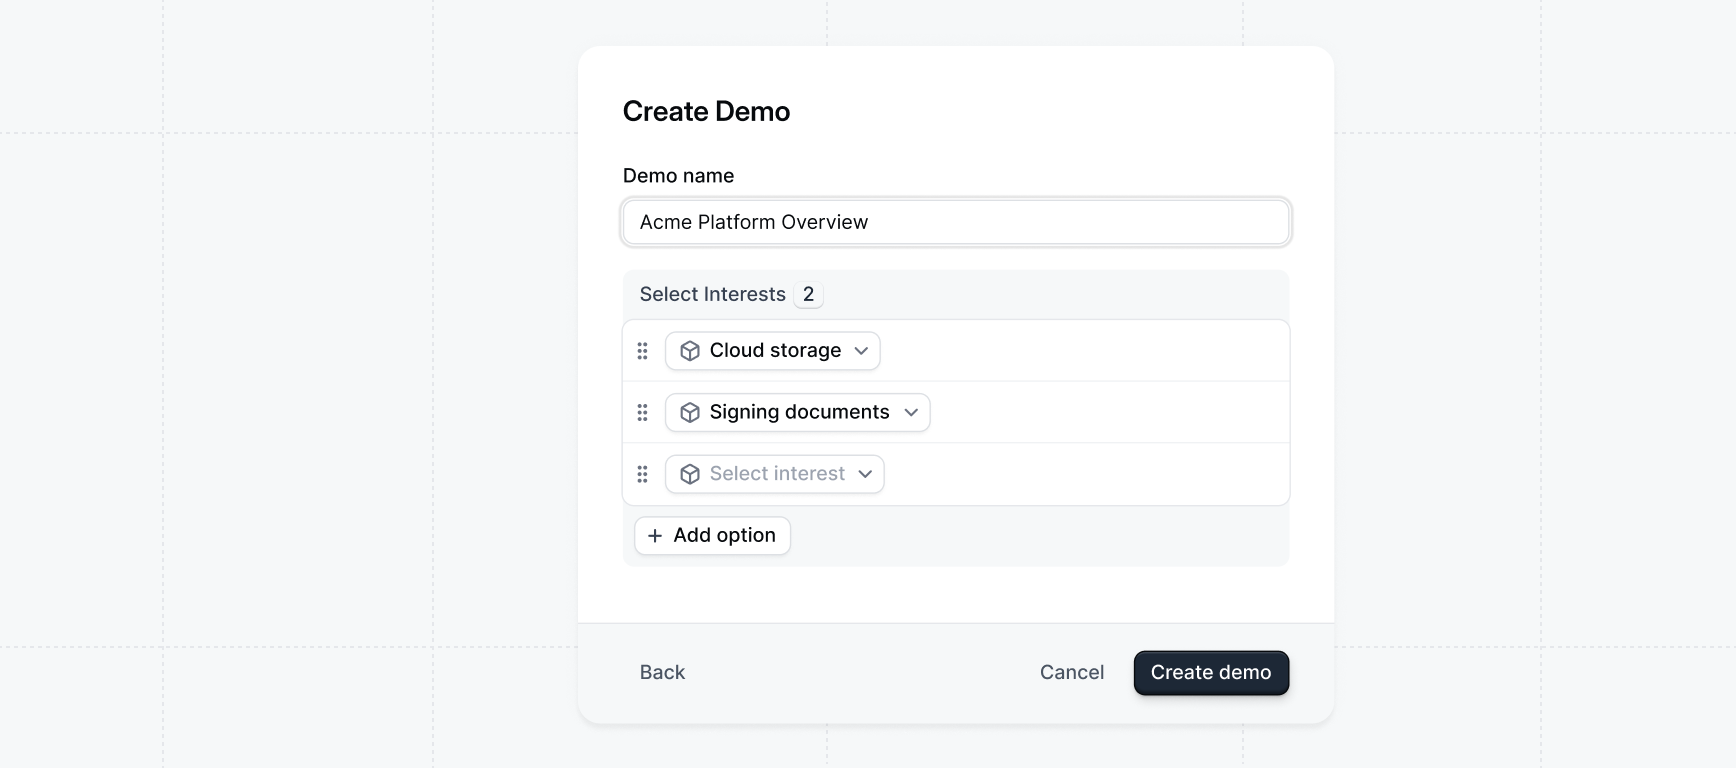
    First, create an Interest demo using the Interest Area form type. On the Product Demo page, select `+ Create new`, then choose `Generating interest demo` and select `Interest areas` as your form type.

    Learn more about creating Interest demos in our [Interest demo guide](/demos/interest).

    <img className="block rounded-md border" src="https://mintcdn.com/navattic-app/QNOHztjorxprHO7d/images/create-demo-select-interests.png?fit=max&auto=format&n=QNOHztjorxprHO7d&q=85&s=ed4dd04d0e6715ca476cd14413b69e56" alt="Select interests for your demo" width="1736" height="768" data-path="images/create-demo-select-interests.png" />
  </Step>

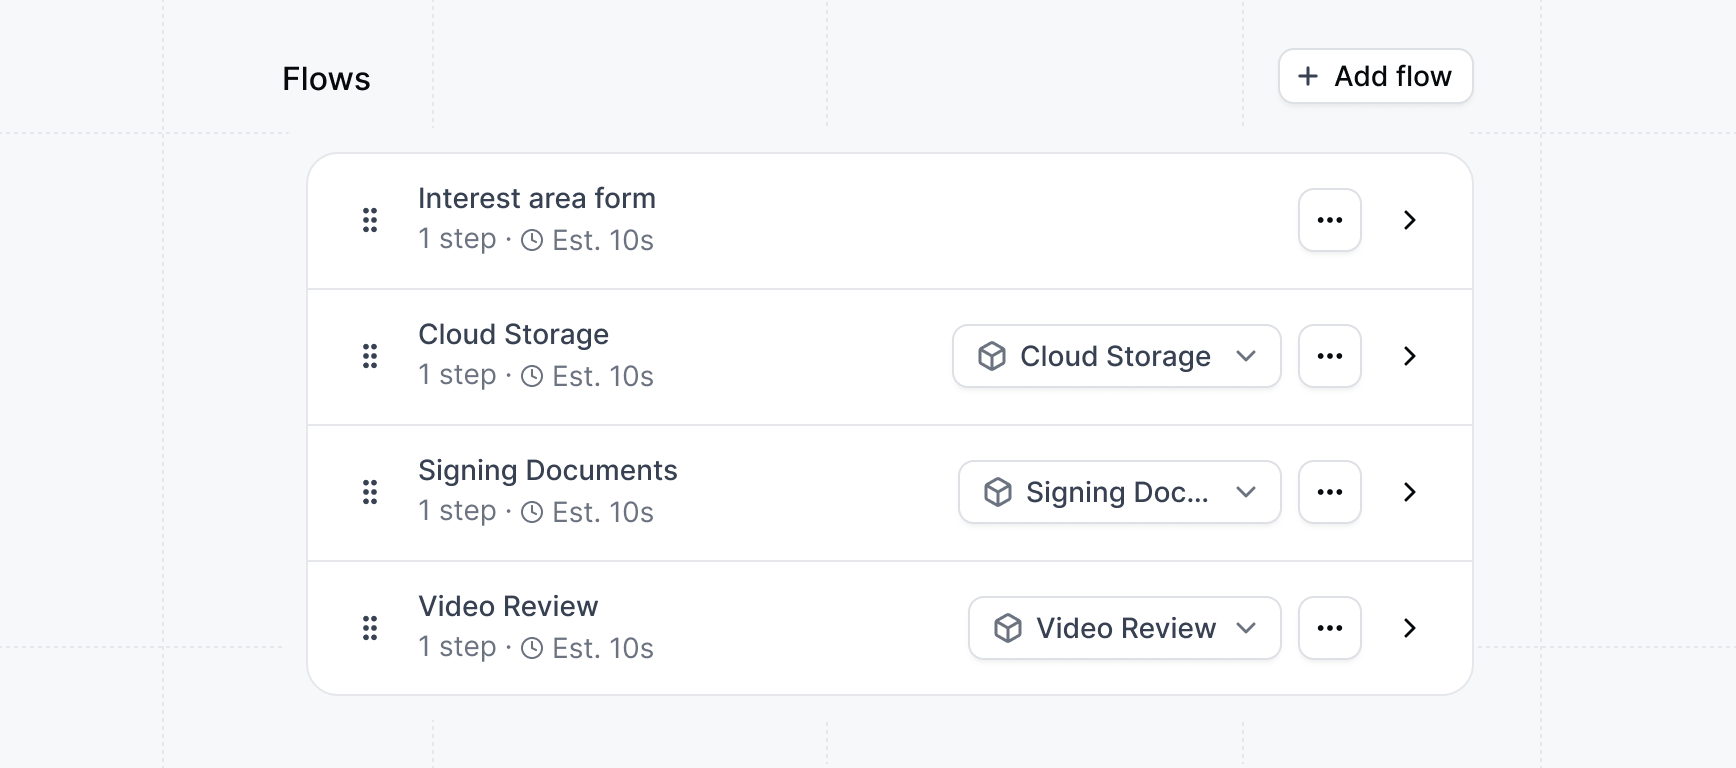
  <Step title="Build your Interest flows">
    Create flows for each Interest area that you want prospects to be able to explore. Each Interest should have one or more flows assigned to it (5-15 steps recommended per flow).

    <Info>
      **Tip**: You can link multiple flows to a single Interest. When that Interest is selected, all its Flows appear in the Checklist in the order listed in the Flows menu.
    </Info>

    <img className="block rounded-md border" src="https://mintcdn.com/navattic-app/QNOHztjorxprHO7d/images/created-interest-flows.png?fit=max&auto=format&n=QNOHztjorxprHO7d&q=85&s=2dc330f6c1da9460d6098c75f697982b" alt="Generated interest flows" width="1736" height="768" data-path="images/created-interest-flows.png" />
  </Step>

  <Step title="Share with Interest Level form">
    When a sales rep shares the demo through Launchpad, they can choose to use an **Interest Level** form instead of the default Interest Area form. During the share flow, select `Interest Level` as the form type.

    This replaces the standard checkbox interface with a ranking interface where prospects can indicate their level of interest (High, Medium, or Low) for each topic.
  </Step>
</Steps>

<Icon icon="party-popper" /> **Congratulations** -- you've finished building your first <Icon icon="chart-no-axes-column" /> **Interest Levels demo** and it's ready to share!

Interest level demos are useful at several stages of the sales cycle, but are particularly useful for collecting interest during [Pre-call Discovery](/launchpad/use-cases/pre-call-discovery).

Interest Level demos are a powerful way to collect prospect interest.

You can also enable your reps to assemble Interest Level [custom demos](/launchpad/demos/custom) from pre-built Interest flows. Follow the below steps to get started:

<CardGroup cols={2}>
  <Card title="Building custom demos" icon="circle-fading-plus" href="/launchpad/demos/custom" img="/images/custom-demo.png">
    Enable your sales team to assemble custom demos from pre-built templates.
  </Card>
</CardGroup>