> ## Documentation Index
> Fetch the complete documentation index at: https://docs.navattic.com/llms.txt
> Use this file to discover all available pages before exploring further.

# Salesforce

> Sync demo engagement data to Leads and Contacts for better sales insights.

export const MediaCard = ({title = '', url, type = 'demo'}) => {
  const attributes = type === 'demo' ? {
    'data-navattic-open': url,
    'data-navattic-title': title
  } : {
    'data-video': url
  };
  return <div {...attributes} className="hidden md:inline-block w-auto cursor-pointer overflow-hidden rounded-lg border border-gray-200 dark:border-gray-700 shadow-sm">
<div className="flex items-center gap-3 bg-white dark:bg-gray-800 px-3 py-2">
<div className={`flex h-7 w-7 items-center justify-center rounded-md ${type === 'video' ? 'bg-blue-100 dark:bg-blue-900' : 'bg-orange-100 dark:bg-orange-900'}`} style={{
    backgroundColor: type === 'video' ? 'var(--video-bg)' : 'var(--demo-bg)'
  }}>
<Icon icon={type === 'video' ? 'circle-play' : 'square-mouse-pointer'} color={type === 'video' ? 'var(--video-icon)' : 'var(--demo-icon)'} />
</div>
<div>
<div className="text-sm font-medium text-gray-900 dark:text-gray-100">
{type === 'video' ? 'Watch video' : 'Try a demo'}
</div>
<div className="text-sm text-gray-500 dark:text-gray-400">{title}</div>
</div>
</div>
<style jsx>{`
  :root {
    --video-bg: #dbeafe;
    --video-icon: #2563eb;
    --demo-bg: #ffedd5;
    --demo-icon: #ea580c;
  }
  :global(.dark) {
    --video-bg: #1e3a8a;
    --video-icon: #60a5fa;
    --demo-bg: #7c2d12;
    --demo-icon: #fb923c;
  }
`}</style>
</div>;
};

<Frame>
  <img className="overflow-hidden rounded-xl border" src="https://mintcdn.com/navattic-app/Wym34-C-snZlIePn/images/salesforce-integration.png?fit=max&auto=format&n=Wym34-C-snZlIePn&q=85&s=3fddca05ae133913b639dfa7367cb1bc" alt="Salesforce integration" width="1736" height="772" data-path="images/salesforce-integration.png" />
</Frame>

<Info>
  Check that you are [Identifying visitors](/tracking/identify/visitors) before setting up the Salesforce integration.
</Info>

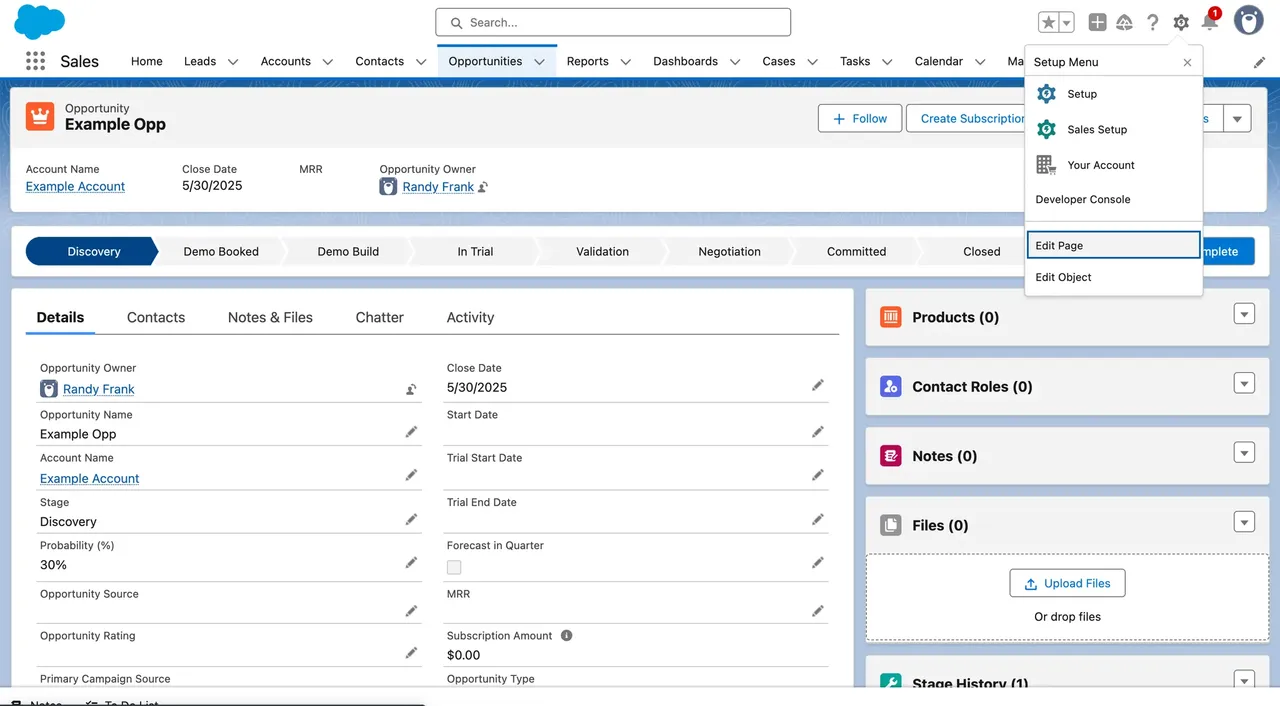
The **Salesforce integration** allows you to send engagement data from demos to your Salesforce Opportunity, Leads, Contact, and Accounts.

<MediaCard url="https://navattic-docs.navattic.com/9521052u" type="demo" title="Salesforce" />

## Setting up the Salesforce Integration

Follow these steps or the demo below to set up the Salesforce integration with Navattic:

<MediaCard url="https://navattic-docs.navattic.com/7h700bs3" type="demo" title="Salesforce Setup" />

<Steps>
  <Step title="Connect Salesforce">
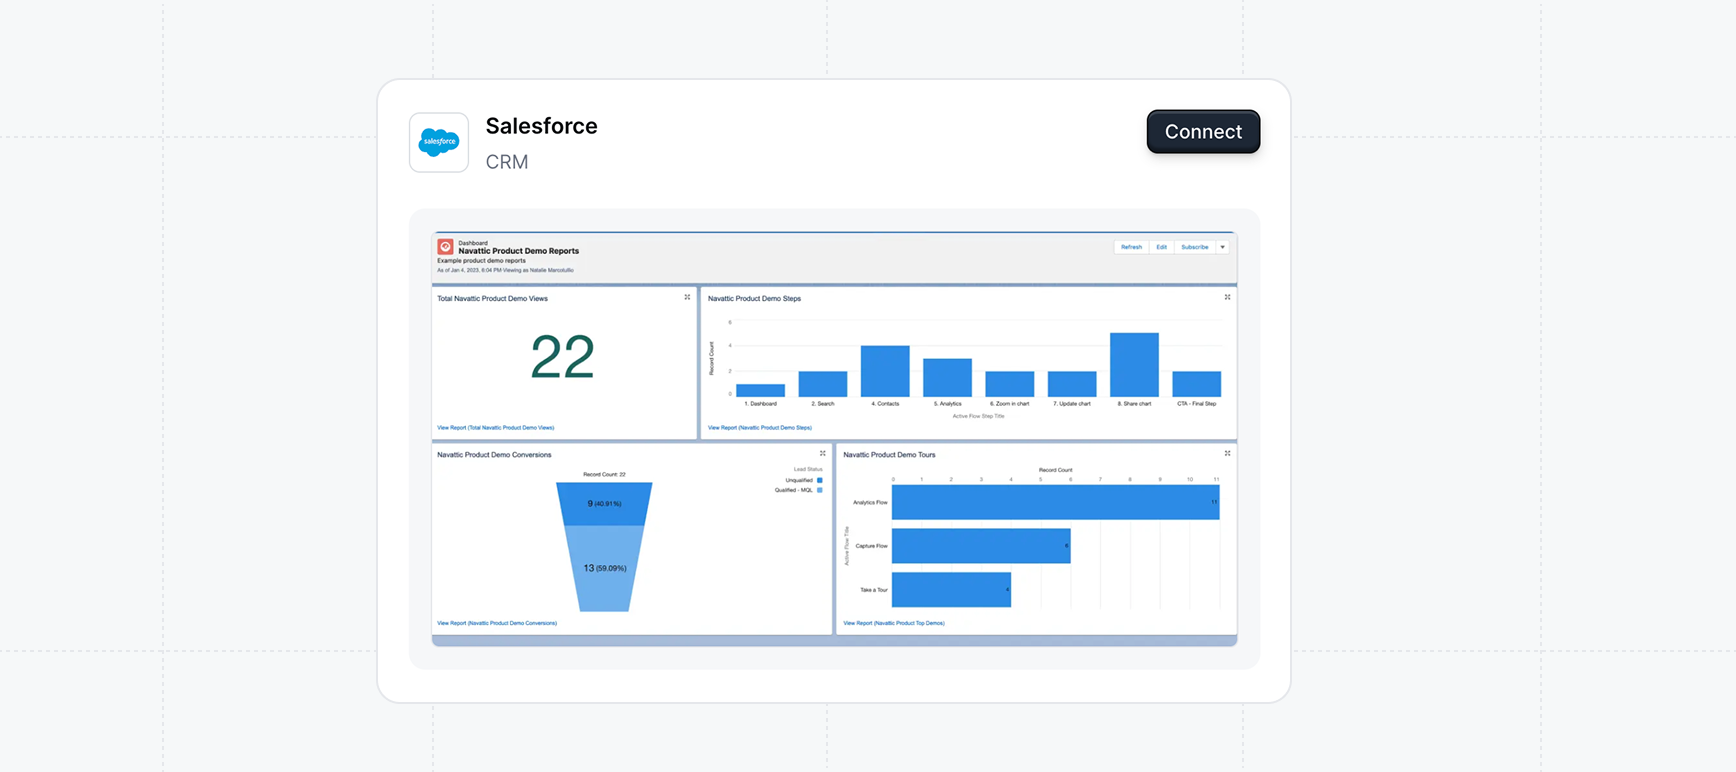
    Navigate to `Integrations` in Settings and select `Salesforce`. Click on `Connect` and follow the instructions to authorize your Salesforce account.

    <img className="rounded-xl border overflow-hidden" src="https://mintcdn.com/navattic-app/Wym34-C-snZlIePn/images/salesforce-integration.png?fit=max&auto=format&n=Wym34-C-snZlIePn&q=85&s=3fddca05ae133913b639dfa7367cb1bc" alt="Salesforce Integration" width="1736" height="772" data-path="images/salesforce-integration.png" />

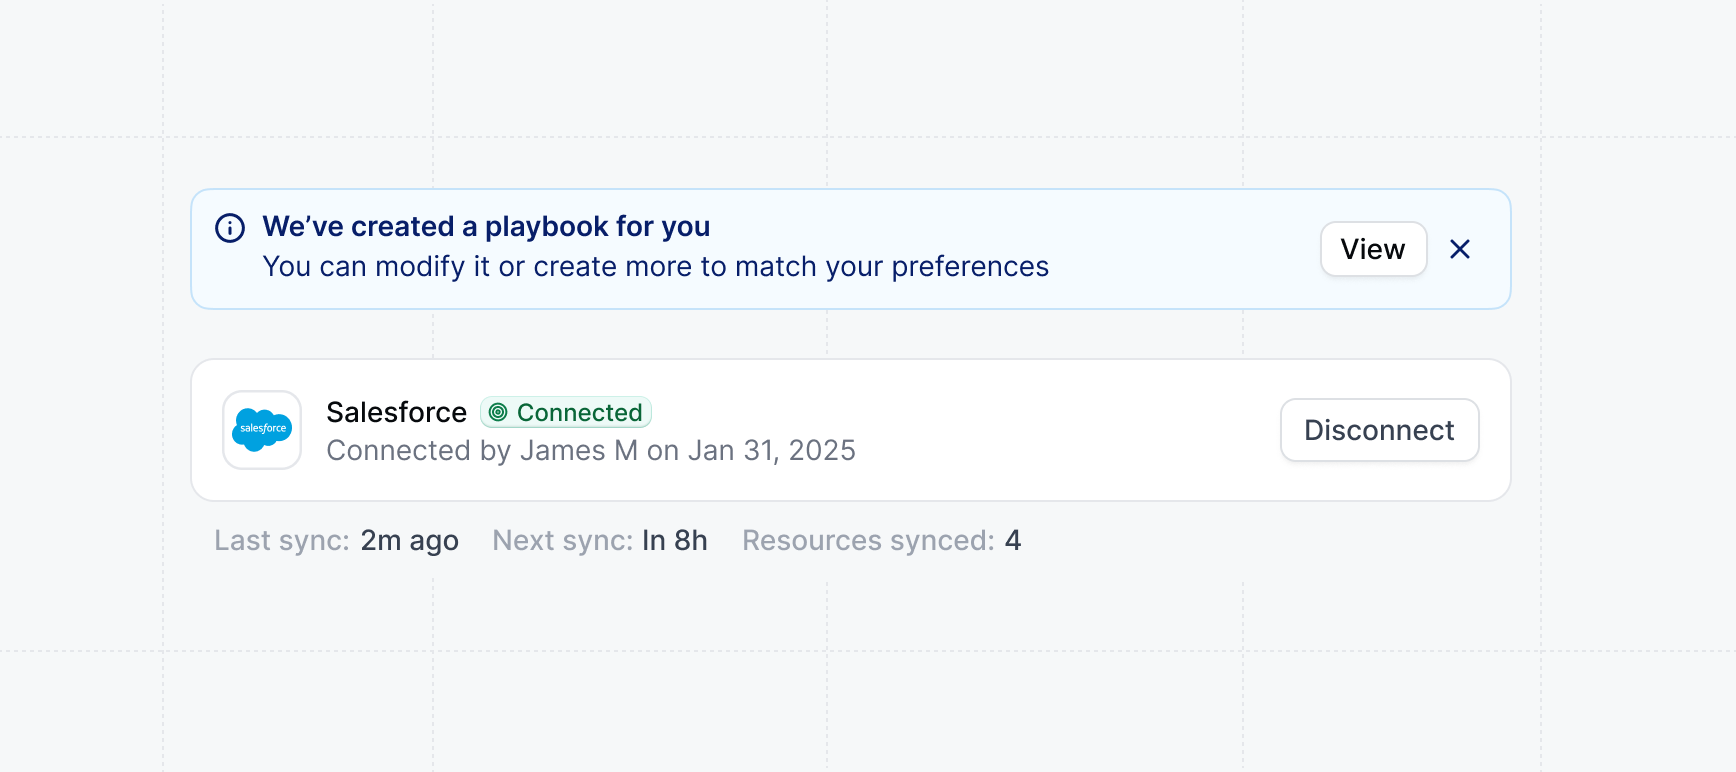
    Once you've connected your Salesforce account, a `Playbook` will be automatically created to send engagement data from demos to your Salesforce Opportunity, Leads, Contact, and Accounts.

    You can click view to manage the `Playbook` or refine the `Audience` filters.
    <img className="rounded-xl border overflow-hidden" src="https://mintcdn.com/navattic-app/Wym34-C-snZlIePn/images/salesforce-integration-connected.png?fit=max&auto=format&n=Wym34-C-snZlIePn&q=85&s=a04bca1530f5a4f4034c5abf7d438097" alt="Salesforce Integration Connected" width="1736" height="772" data-path="images/salesforce-integration-connected.png" />
  </Step>

  <Step title="Set Up Field Mapping">
    [Field mappings](/navattic-field-mappings) allow you to control which pieces of Navattic's data go where. To set up field mapping, go to the **Settings** tab of your Salesforce integration. Open the **Field Mapping** dropdown, and start mapping fields. Fields on the left are Navattic data, and fields on the right are destinations within your Salesfoce instance.

    Navattic provides 20+ Visitor and Account level fields to map. To map fields, you need to first create the recipient field on the Salesforce objects you’re mapping to. We recommend starting with these 3 text fields for Contact, Leads, and Account objects.

    | **Name**                 | **Description**                                                       | **Type** |
    | ------------------------ | --------------------------------------------------------------------- | -------- |
    | Last Viewed Flow Name    | Human-readable name of the last flow viewed                           | Text     |
    | Last Viewed Project Name | Human-readable name of the last demo viewed                           | Text     |
    | Last Viewed Step Index   | Numerical position of the last step viewed (e.g., “3” for third step) | Text     |
  </Step>

  <Step title="Create a Playbook">
    Once your Salesforce integration is fully set up, visit [Playbooks](/integrations/playbooks) in your Workspace to start pushing data into Salesforce. You can use a Template or create your own Playbook.

    There are six separate Salesforce Actions that you can set up: Sync lead, Sunc contact, Submit session object, and Send notification to opportunity owner (at the Visitor and/or Account level), and Sync account.

    <Note>
      A Playbook consists of [Audiences](/integrations/playbooks) and Actions. You can use one of the default Audiences or you can create your own. If you create your own, remember to add new demos to the Audience if you are choosing to filter by specific demos.
    </Note>
  </Step>

  <Step title="Run a Test">
    Once the Playbook is set up, run a quick test to ensure this test data populates in Salesforce. To run a test, click the three dots next to the **Save** button > **Test run.**
  </Step>

  <Step title="Edit your Salesforce Object page">
    <MediaCard url="https://navattic-docs.navattic.com/vcbv0s7w" type="demo" title="Salesforce Object" />

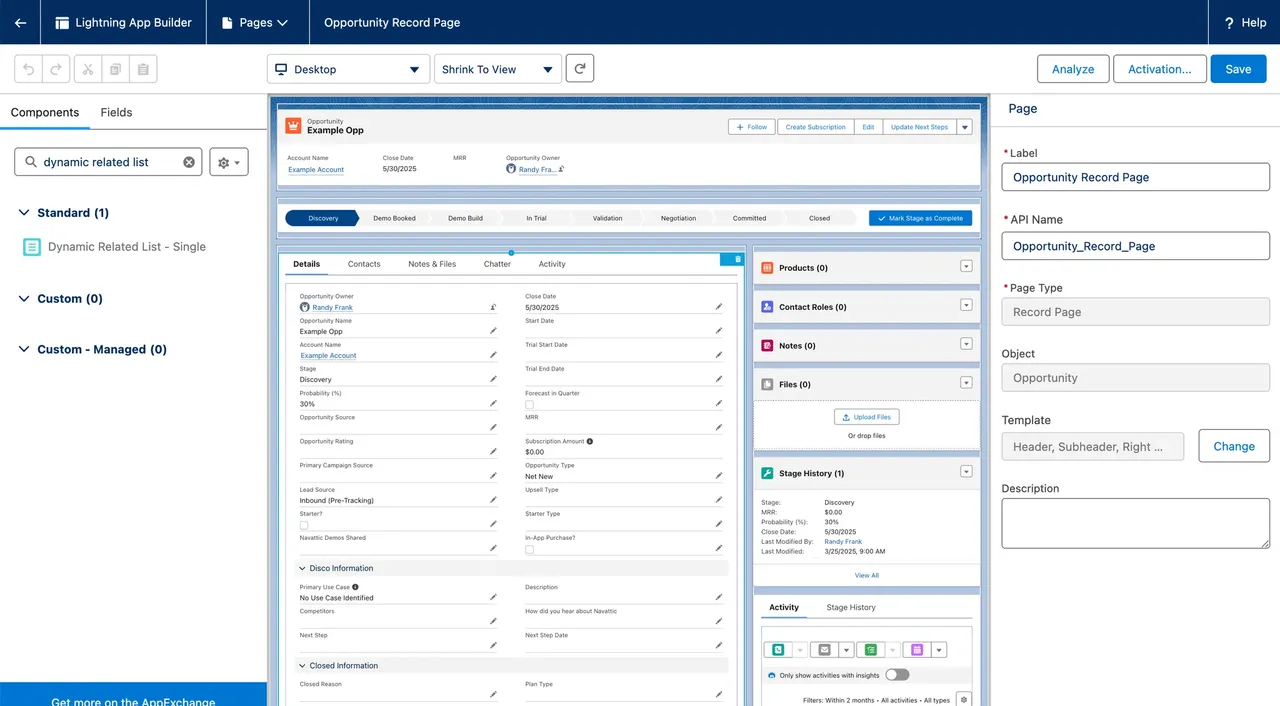
    Navigate to your Salesforce object page that you'd like to edit (Opportunity, Lead, Contact, or Account). Select `Edit Page` under the `Setup Menu`.

    <Frame>
      <img className="rounded-xl border overflow-hidden" src="https://mintcdn.com/navattic-app/Wym34-C-snZlIePn/images/salesforce-opportunity-page.png?fit=max&auto=format&n=Wym34-C-snZlIePn&q=85&s=5d55cf8886b3480dadf5625b419e2b81" alt="Salesforce Opportunity page" width="1280" height="706" data-path="images/salesforce-opportunity-page.png" />
    </Frame>

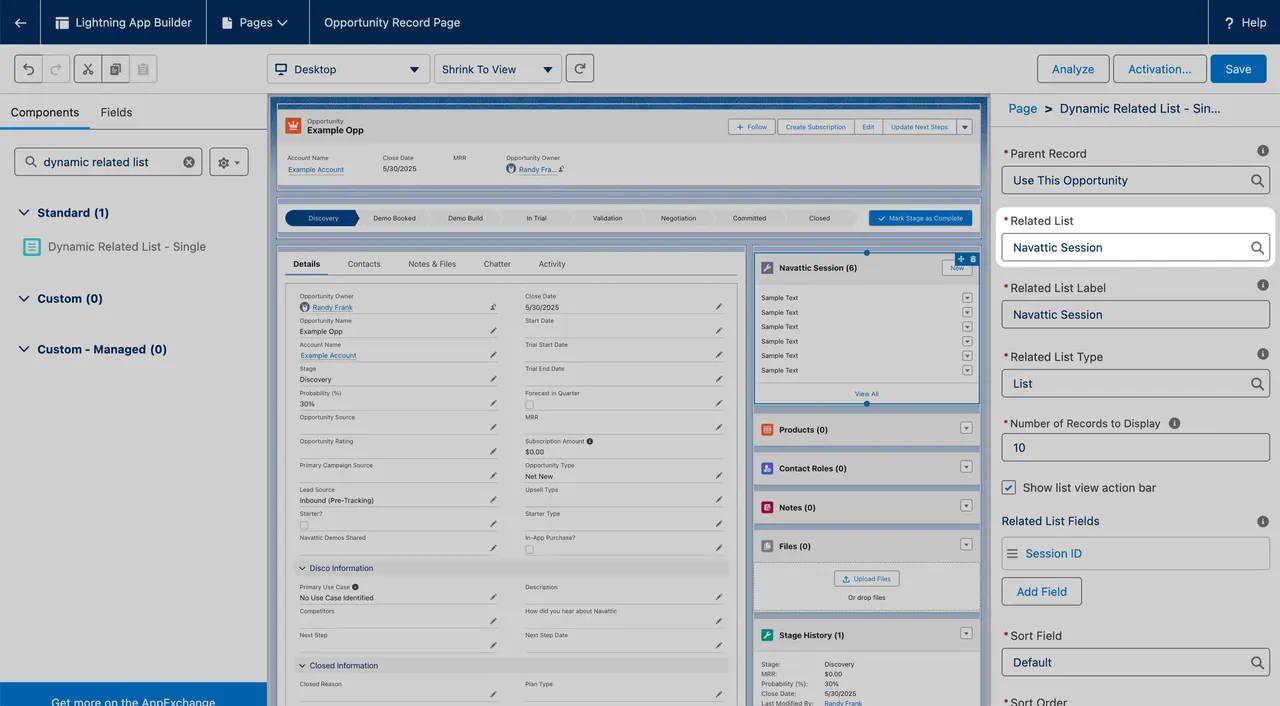
    Search for `Dynamic Related List - Single` in the `Components` search field.
    <Frame>
      <img className="rounded-xl border overflow-hidden" src="https://mintcdn.com/navattic-app/Wym34-C-snZlIePn/images/salesforce-component-list.png?fit=max&auto=format&n=Wym34-C-snZlIePn&q=85&s=7e26bd4cb3f25a63d89e8305149e407c" alt="Salesforce component list" width="1280" height="706" data-path="images/salesforce-component-list.png" />
    </Frame>

    Search for `Navattic Session` in the Related List field. Make sure that the Parent Record is set to the default `Use This Opportunity` (or the relevant Salesforce object).
    <Frame>
      <img className="rounded-xl border overflow-hidden" src="https://mintcdn.com/navattic-app/Wym34-C-snZlIePn/images/salesforce-navattic-session.png?fit=max&auto=format&n=Wym34-C-snZlIePn&q=85&s=ae266e6f1f150d224d694e86b2c639e0" alt="Salesforce Navattic Session" width="1280" height="706" data-path="images/salesforce-navattic-session.png" />
    </Frame>

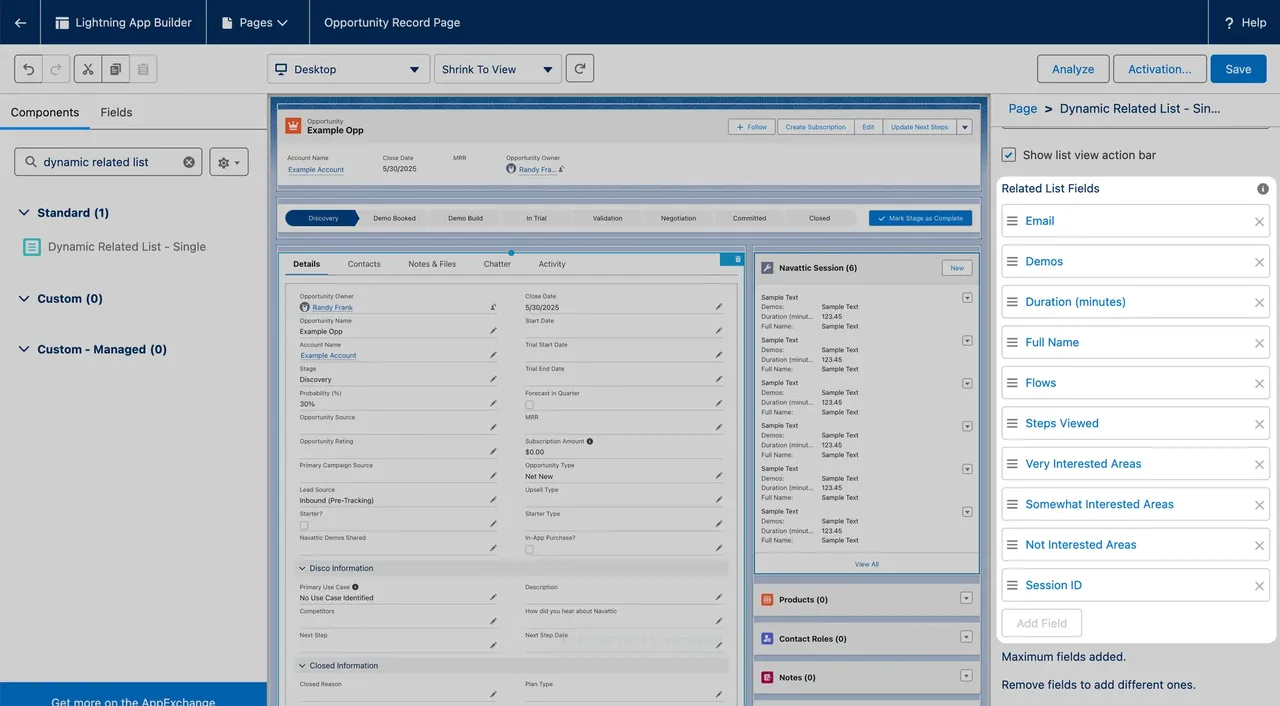
    Update the `Related List Fields` to show the following fields:

    * Email
    * Demos
    * Duration (minutes)
    * Full Name
    * Flows
    * Steps Viewed
    * Very Interested Areas
    * Somewhat Interested Areas
    * Not Interested Areas
    * Session ID
    <Frame>
      <img className="rounded-xl border overflow-hidden" src="https://mintcdn.com/navattic-app/Wym34-C-snZlIePn/images/salesforce-navattic-fields.png?fit=max&auto=format&n=Wym34-C-snZlIePn&q=85&s=471e52c6be51f3c236c35d596ab19fe0" alt="Salesforce Navattic Fields" width="1280" height="706" data-path="images/salesforce-navattic-fields.png" />
    </Frame>

    Save the Page Builder and exit to the page layout.

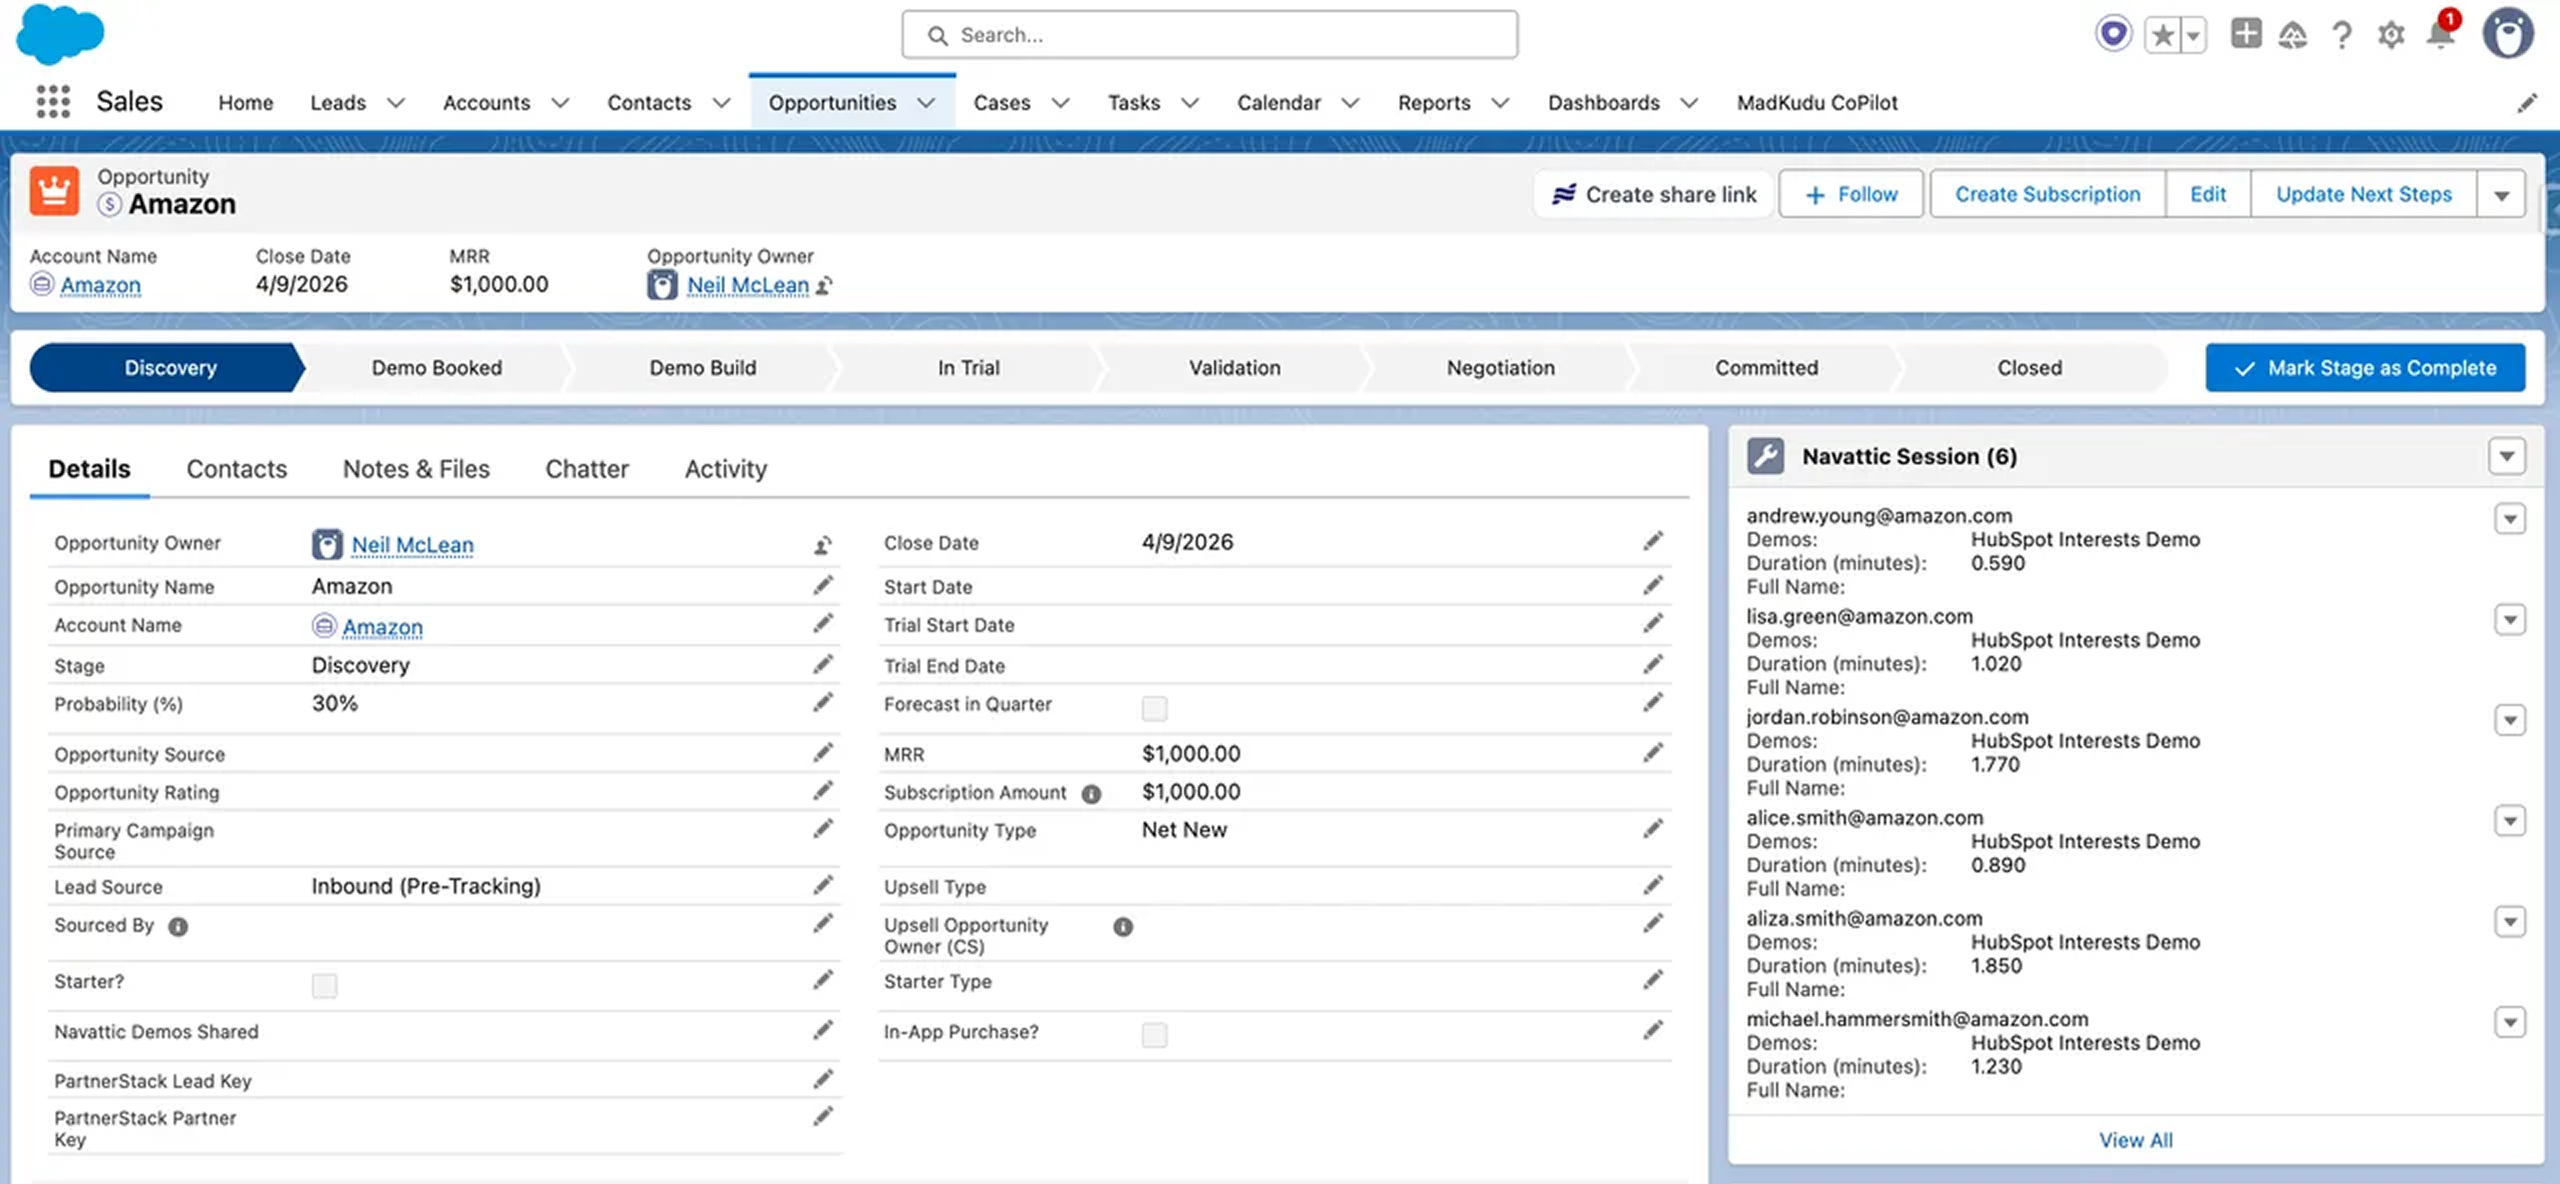
    Once a visitor views the interactive demo share link and completes their session, this will be logged in Salesforce.

    <Frame>
      <img className="rounded-xl border overflow-hidden" src="https://mintcdn.com/navattic-app/Wym34-C-snZlIePn/images/salesforce-opportunity-navattic-data.png?fit=max&auto=format&n=Wym34-C-snZlIePn&q=85&s=6d330851a3986e5c7e86a2ccb1c15eb0" alt="Salesforce Opportunity Navattic Data" width="2560" height="1184" data-path="images/salesforce-opportunity-navattic-data.png" />
    </Frame>

    <br />

    <Frame>
      <img className="rounded-xl border overflow-hidden" src="https://mintcdn.com/navattic-app/Wym34-C-snZlIePn/images/salesforce-opportunity-navattic-session-data.png?fit=max&auto=format&n=Wym34-C-snZlIePn&q=85&s=05ebdf84de1ddcec886e072a5d1ac47c" alt="Salesforce Opportunity Navattic Session Data" width="2560" height="510" data-path="images/salesforce-opportunity-navattic-session-data.png" />
    </Frame>
  </Step>

  <Step title="[Optional] Set up a Salesforce Reporting Dashboard">
    Once your data is flowing into Salesforce, you can create a dashboard to track how your demos are performing. Check out the video below for a step-by-step walkthrough on setting this up.

    <MediaCard url="https://www.loom.com/share/ee9482cafb284679be4a3b066668a62a" title="Salesforce dashboard" type="video" />

    <Icon icon="party-popper" /> Congratulations -- You've finished setting up Salesforce with Navattic.
  </Step>
</Steps>

## Pipeline impact

Once your Salesforce integration is connected, Navattic automatically pulls opportunity data to power the [Pipeline Impact](/analyze) dashboard. This gives you visibility into how your demos influence pipeline and revenue — showing sourced and influenced pipeline, new accounts, and deal value across your CRM data.

No additional setup is required. The Pipeline Impact dashboard in **Analytics** will reflect your Salesforce opportunities once the integration is active.

<Note>
  The Pipeline Impact dashboard uses Salesforce Opportunity data. Metrics marked with an asterisk (\*) on the dashboard require the Salesforce integration to be connected.
</Note>