> ## Documentation Index
> Fetch the complete documentation index at: https://docs.navattic.com/llms.txt
> Use this file to discover all available pages before exploring further.

# Sandbox demos

> Create a lightweight sandbox that your sales team can use live on calls.

export const MediaCard = ({title = '', url, type = 'demo'}) => {
  const attributes = type === 'demo' ? {
    'data-navattic-open': url,
    'data-navattic-title': title
  } : {
    'data-video': url
  };
  return <div {...attributes} className="hidden md:inline-block w-auto cursor-pointer overflow-hidden rounded-lg border border-gray-200 dark:border-gray-700 shadow-sm">
<div className="flex items-center gap-3 bg-white dark:bg-gray-800 px-3 py-2">
<div className={`flex h-7 w-7 items-center justify-center rounded-md ${type === 'video' ? 'bg-blue-100 dark:bg-blue-900' : 'bg-orange-100 dark:bg-orange-900'}`} style={{
    backgroundColor: type === 'video' ? 'var(--video-bg)' : 'var(--demo-bg)'
  }}>
<Icon icon={type === 'video' ? 'circle-play' : 'square-mouse-pointer'} color={type === 'video' ? 'var(--video-icon)' : 'var(--demo-icon)'} />
</div>
<div>
<div className="text-sm font-medium text-gray-900 dark:text-gray-100">
{type === 'video' ? 'Watch video' : 'Try a demo'}
</div>
<div className="text-sm text-gray-500 dark:text-gray-400">{title}</div>
</div>
</div>
<style jsx>{`
  :root {
    --video-bg: #dbeafe;
    --video-icon: #2563eb;
    --demo-bg: #ffedd5;
    --demo-icon: #ea580c;
  }
  :global(.dark) {
    --video-bg: #1e3a8a;
    --video-icon: #60a5fa;
    --demo-bg: #7c2d12;
    --demo-icon: #fb923c;
  }
`}</style>
</div>;
};

<Info>
  <span>Enabled in workspaces on the Growth plan and above through</span>

  <span className="inline-flex gap-1 ml-2">
    <img src="https://mintcdn.com/navattic-app/CaLa6x42vs1NHRL9/images/icons/launchpad-logo.svg?fit=max&auto=format&n=CaLa6x42vs1NHRL9&q=85&s=dad3c35c02234ff5de704cd11c7cba78" className="m-0 -mt-px inline-flex h-5 w-5" width="35" height="35" data-path="images/icons/launchpad-logo.svg" />

    {' '}

    **Launchpad**.
  </span>
</Info>

<Frame>
  <img className="overflow-hidden rounded-xl border" src="https://mintcdn.com/navattic-app/Wym34-C-snZlIePn/images/sandbox-builder.png?fit=max&auto=format&n=Wym34-C-snZlIePn&q=85&s=ff279683bfb1b06a7939c87cd30dcdf9" alt="Sandbox builder" width="2887" height="1738" data-path="images/sandbox-builder.png" />
</Frame>

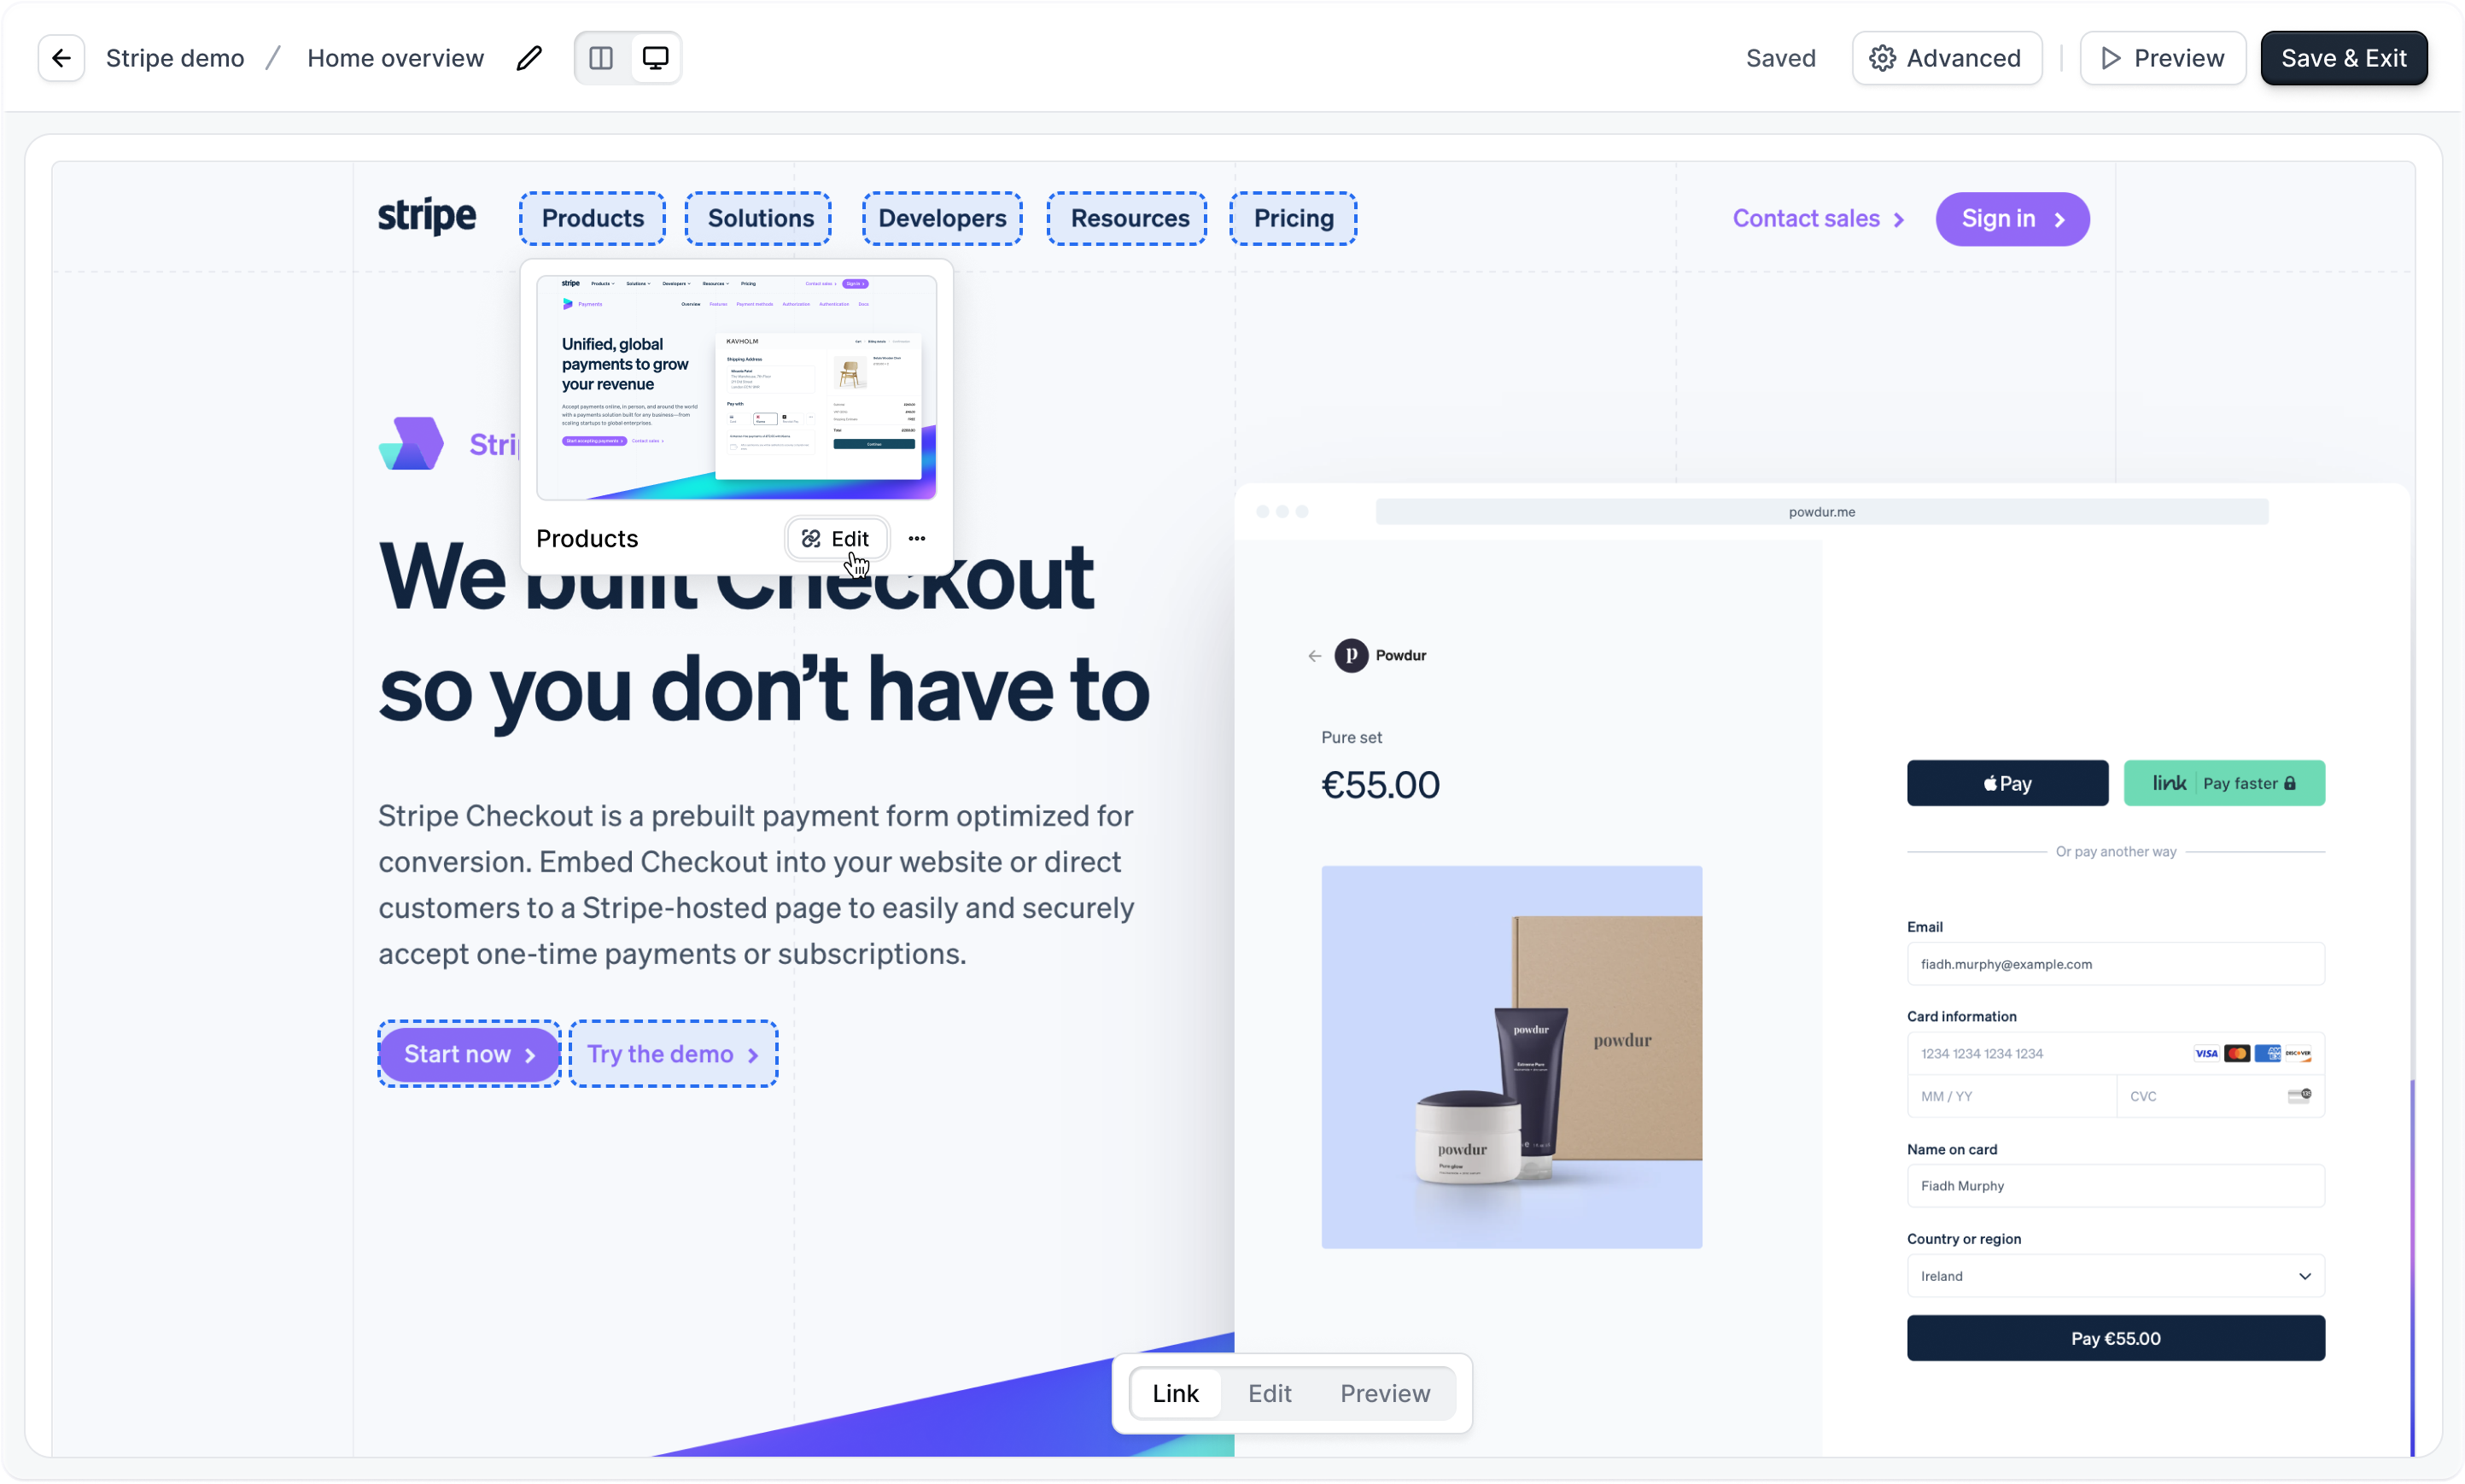
Sandboxes allow you to click elements to navigate different parts of your application, making them perfect for live presentations. No engineering support needed.

## Step 1: Generate a Sandbox Demo

The quickest way to get started is by generating your sandbox demo from the Chrome extension or in-app.

<Tabs>
  <Tab title="Chrome Extension">
    <Steps>
      <Step title="Open the Chrome Extension">
        Open the Navattic Chrome Extension over your application.
      </Step>

      <Step title="Create a new demo">
        Select **New demo** and name your project.
      </Step>

      <Step title="Configure capture settings">
        Under **Capture Type**, select **Web capture**. Check the box for **Click to capture** and check the box for **Generate Sandbox from captures**.
      </Step>

      <Step title="Capture your screens">
        Click **Start capturing** and click naturally through your app to save your screens. Your clicks will be used as anchors to generate links for the sandbox.
      </Step>
    </Steps>
  </Tab>

  <Tab title="In-App Generator">
    <Steps>
      <Step title="Create a new demo">
        From the Navattic **Product Demos** page, click **Create demo**.
      </Step>

      <Step title="Select Sandbox demo">
        Select **Sandbox demo** under "What type of demo are you creating?"
      </Step>

      <Step title="Start capturing">
        Enter your **App URL** and click **Start capturing**. Click naturally through your app to save your screens.
      </Step>
    </Steps>
  </Tab>
</Tabs>

## Step 2: Edit the NavLinks

By clicking around your app using click to capture, sandbox links are automatically created. Open your sandbox demo in the Demo builder to edit them — the sandbox editing interface is built into the Build tab.

To view and manage all links at once, click the **Sandbox links** icon in the toolbar. A panel opens where you can switch between **This screen** (links on the current step) and **All links** (every link in the demo).

<AccordionGroup>
  <Accordion title="Creating Links">
    Select any onscreen element on your capture to create a link.
  </Accordion>

  <Accordion title="Flow Links">
    To move to another screen within the same section, set your link to navigate to a step within the same Flow. Use **Flow scoped links** (GoToStep) when navigating within the same section.
  </Accordion>

  <Accordion title="Demo Links">
    To jump to a completely different section of your app, set your link to start a new Flow. Use **Demo scoped links** (StartFlow) for top-level navigation between distinct sections.
  </Accordion>

  <Accordion title="Edit & Sync">
    You can edit existing matches, sync links across multiple screens, or delete steps directly from the sandbox builder without losing context.
  </Accordion>

  <Accordion title="Bulk remove or delete links">
    Select multiple links using the checkboxes in the Sandbox links panel, then click the trash icon to remove or delete them in one action.

    The behavior depends on which view you are in:

    * **This screen** — removes selected links from the current screen. The links still exist in other steps where they are used.
    * **All links** — permanently deletes selected links from the entire project, removing all associated beacons and triggers across every flow.

    A confirmation dialog shows which links will be affected before you proceed.
  </Accordion>

  <Accordion title="Duplicating flows, moving flows, and copying steps">
    When you duplicate a flow, move a flow to another demo, or copy steps to another flow, Navattic automatically handles any NavLinks in those flows or steps:

    * **Duplicate a flow** — Links that navigate to steps within the duplicated flow are automatically remapped to point to the corresponding steps in the new copy. Links that point outside the duplicated flow are preserved as-is.
    * **Move to another demo** — Links that reference steps in the original demo are remapped where possible. Links that cannot be remapped (because the target step doesn't exist in the destination demo) are dropped.
    * **Copy a step** — Flow-scoped links (GoToStep) that navigate to steps within the same flow are preserved in the copied step.

    After any of these operations, open the **Sandbox links** panel to confirm your links point to the right destinations.
  </Accordion>
</AccordionGroup>

<Tip>
  Stay organized by making every top-level navigation of your app (e.g., Home, Assignments, Evaluations) a separate Flow. You can then use Demo-scoped links to connect these separate flows together.
</Tip>

## Step 3: Configure Settings and Present

Prepare your demo for the perfect live call.

<CardGroup cols={3}>
  <Card title="Reveal link hints" icon="eye">
    Turn this on in the settings menu to highlight clickable areas so presenters always know where to click.
  </Card>

  <Card title="Keyboard navigation" icon="keyboard">
    Enable keyboard navigation for smoother transitions during live calls.
  </Card>

  <Card title="Presenter notes" icon="sticky-note">
    Add presenter notes to your steps to help your team stay on script.
  </Card>

  <Card title="Presenter mode" icon="presentation">
    Enable presenter mode to show an optimized view for live delivery.
  </Card>

  <Card title="Show link suggestions" icon="sparkles">
    Display the original capture anchors to help you quickly identify and click elements to create new links.
  </Card>
</CardGroup>

## FAQs

<AccordionGroup>
  <Accordion title="What is the difference between a Sandbox demo and a guided Flow?">
    Flows are step-by-step demos that a user progresses through at their own pace, best used for sharing. Sandbox demos allow the presenter to click around elements freely to navigate many different parts of the application live on a call.
  </Accordion>

  <Accordion title="Why can't I use Media captures for my Sandbox?">
    Sandbox generation requires interactive elements to link screens together. You must use Web captures (interactive copies of your application) rather than Media captures like static screenshots or videos.
  </Accordion>

  <Accordion title="How do I delete a step in the Sandbox Builder?">
    You can delete steps directly from the Sandbox builder toolbar to save time and reduce context switching.
  </Accordion>

  <Accordion title="What if I have conflicting links?">
    If multiple actions are assigned to the same element, the Sandbox Builder will flag it as a collision. Click the collision badge to open the conflict resolve popover, where you can select your primary navigation action.

    To remove or delete multiple conflicting links at once, select them using the checkboxes in the conflict resolve popover and click the trash icon. A confirmation dialog lets you choose:

    * **Remove from screen** — removes the selected links from the current step only. Their anchors in other steps remain intact.
    * **Delete everywhere** — permanently removes the selected links and all their anchors from every flow in the project.
  </Accordion>

  <Accordion title="How do I link completely different sections of my app together?">
    Stay organized by making every top-level navigation of your app (e.g., Home, Assignments, Evaluations) a separate Flow. Use Demo-scoped links to connect these separate flows together.
  </Accordion>

  <Accordion title="When should I use Flow vs. Demo scoped links?">
    Use **Flow scoped links** (GoToStep) to navigate to a step within the same flow -- best for moving around the same section. Use **Demo scoped links** (StartFlow) to jump to the start of a flow in the same project -- ideal for top-level navigation between distinct sections.
  </Accordion>

  <Accordion title="When should I use 'Sync link' or 'Apply to all steps'?">
    Use this when you have a persistent navigation element (like a top navbar or side menu) that appears across many screens. Syncing the link applies it to all relevant screens automatically, saving you from adding it manually to each step.
  </Accordion>

  <Accordion title="When should I use 'Show link suggestions'?">
    Use this feature when building your sandbox. It shows the original anchors from your capture, allowing you to easily identify and click elements to create new sandbox links faster.
  </Accordion>
</AccordionGroup>

## Next steps

<CardGroup cols={2}>
  <Card title="Present demos" icon="presentation" href="/launchpad/share/present">
    Share and present Navattic demos during live calls.
  </Card>

  <Card title="Demo builder" icon="hammer" href="/build/demo-builder">
    Learn more about the Demo builder interface.
  </Card>
</CardGroup>
