> ## Documentation Index
> Fetch the complete documentation index at: https://docs.navattic.com/llms.txt
> Use this file to discover all available pages before exploring further.

# Personalized demos

> Make demos personalized by adding user and account properties.

<Icon icon="user-pen" /> **Personalization** lets you customize demo content based on user
information, such as their name, role, or company logo. Use variables to create a more relevant
experience for each viewer.

<a href="https://www.salesforce.com/in/resources/articles/customer-expectations/#:~:text=73%25%20of%20customers%20expect%20better,as%20its%20products%20and%20services." target="_blank" rel="noopener noreferrer" className="font-normal">
  <Tip>
    <b>73% of Buyers</b>
    expect better personalization with technology improvements.
  </Tip>
</a>

## Custom properties

Personalization is powered by **custom properties**: the same visitor and account data you use for forms, identification, and CRM field mapping. Setting up a property once makes it available anywhere you personalize content.

Custom properties live on two objects, managed as separate tabs on the `Properties` page in `Settings`:

* **Visitor** properties, like `firstName`, `lastName`, `fullName`, or `email`
* **Company** properties, like `name`, `domain`, `logo`, `industry`, `employeeCount`, `city`, `state`, or `country`

Navattic ships all of the properties listed above by default. You can add your own on top of them, such as a deal size, plan tier, or use case. Only `String`, `Image`, and `Color` property types are available for personalization.

<Note>
  See [Custom properties](/tracking/forms/properties) for how to create and manage properties.
</Note>

## Custom properties vs. the HTML block

When you select an element in the capture editor, you can personalize it two ways: through the **Personalization** editor or through the **HTML block**. Both insert the same custom properties, they just differ in how much control you need.

|                      | Personalization editor                                               | HTML block                                                                                                                        |
| -------------------- | -------------------------------------------------------------------- | --------------------------------------------------------------------------------------------------------------------------------- |
| **How it works**     | Point-and-click: pick a property, set a fallback                     | Type `{{` in the raw HTML to insert a property inline                                                                             |
| **Best for**         | Binding an entire element's content, image, or style to one property | Mixing a variable into surrounding text or markup, using more than one variable, or editing the element's markup at the same time |
| **Knowledge needed** | None                                                                 | Comfort editing HTML                                                                                                              |

Use the **Personalization** editor by default. Reach for the **HTML block** when a variable needs to sit inside other text or tags rather than replace the whole element, when an element needs more than one variable, or when you need to change the element's markup at the same time.

Any static text you type directly into the HTML block is hardcoded and shows the same to every viewer. If the content should change per viewer, use a custom property instead of typing it in as plain text.

<Note>
  For a full walkthrough of personalizing text, images, colors, and styles, see [Personalizing
  captures](/build/captures/personalization).
</Note>

## Personalize your captures

<Steps>
  <Step title="Select elements to personalize">
    Determine which elements you want to personalize. For example, you might want to personalize the `Name`, `Role`, and `Company Logo` of the visitor.
  </Step>

  <Step title="Add the personalization">
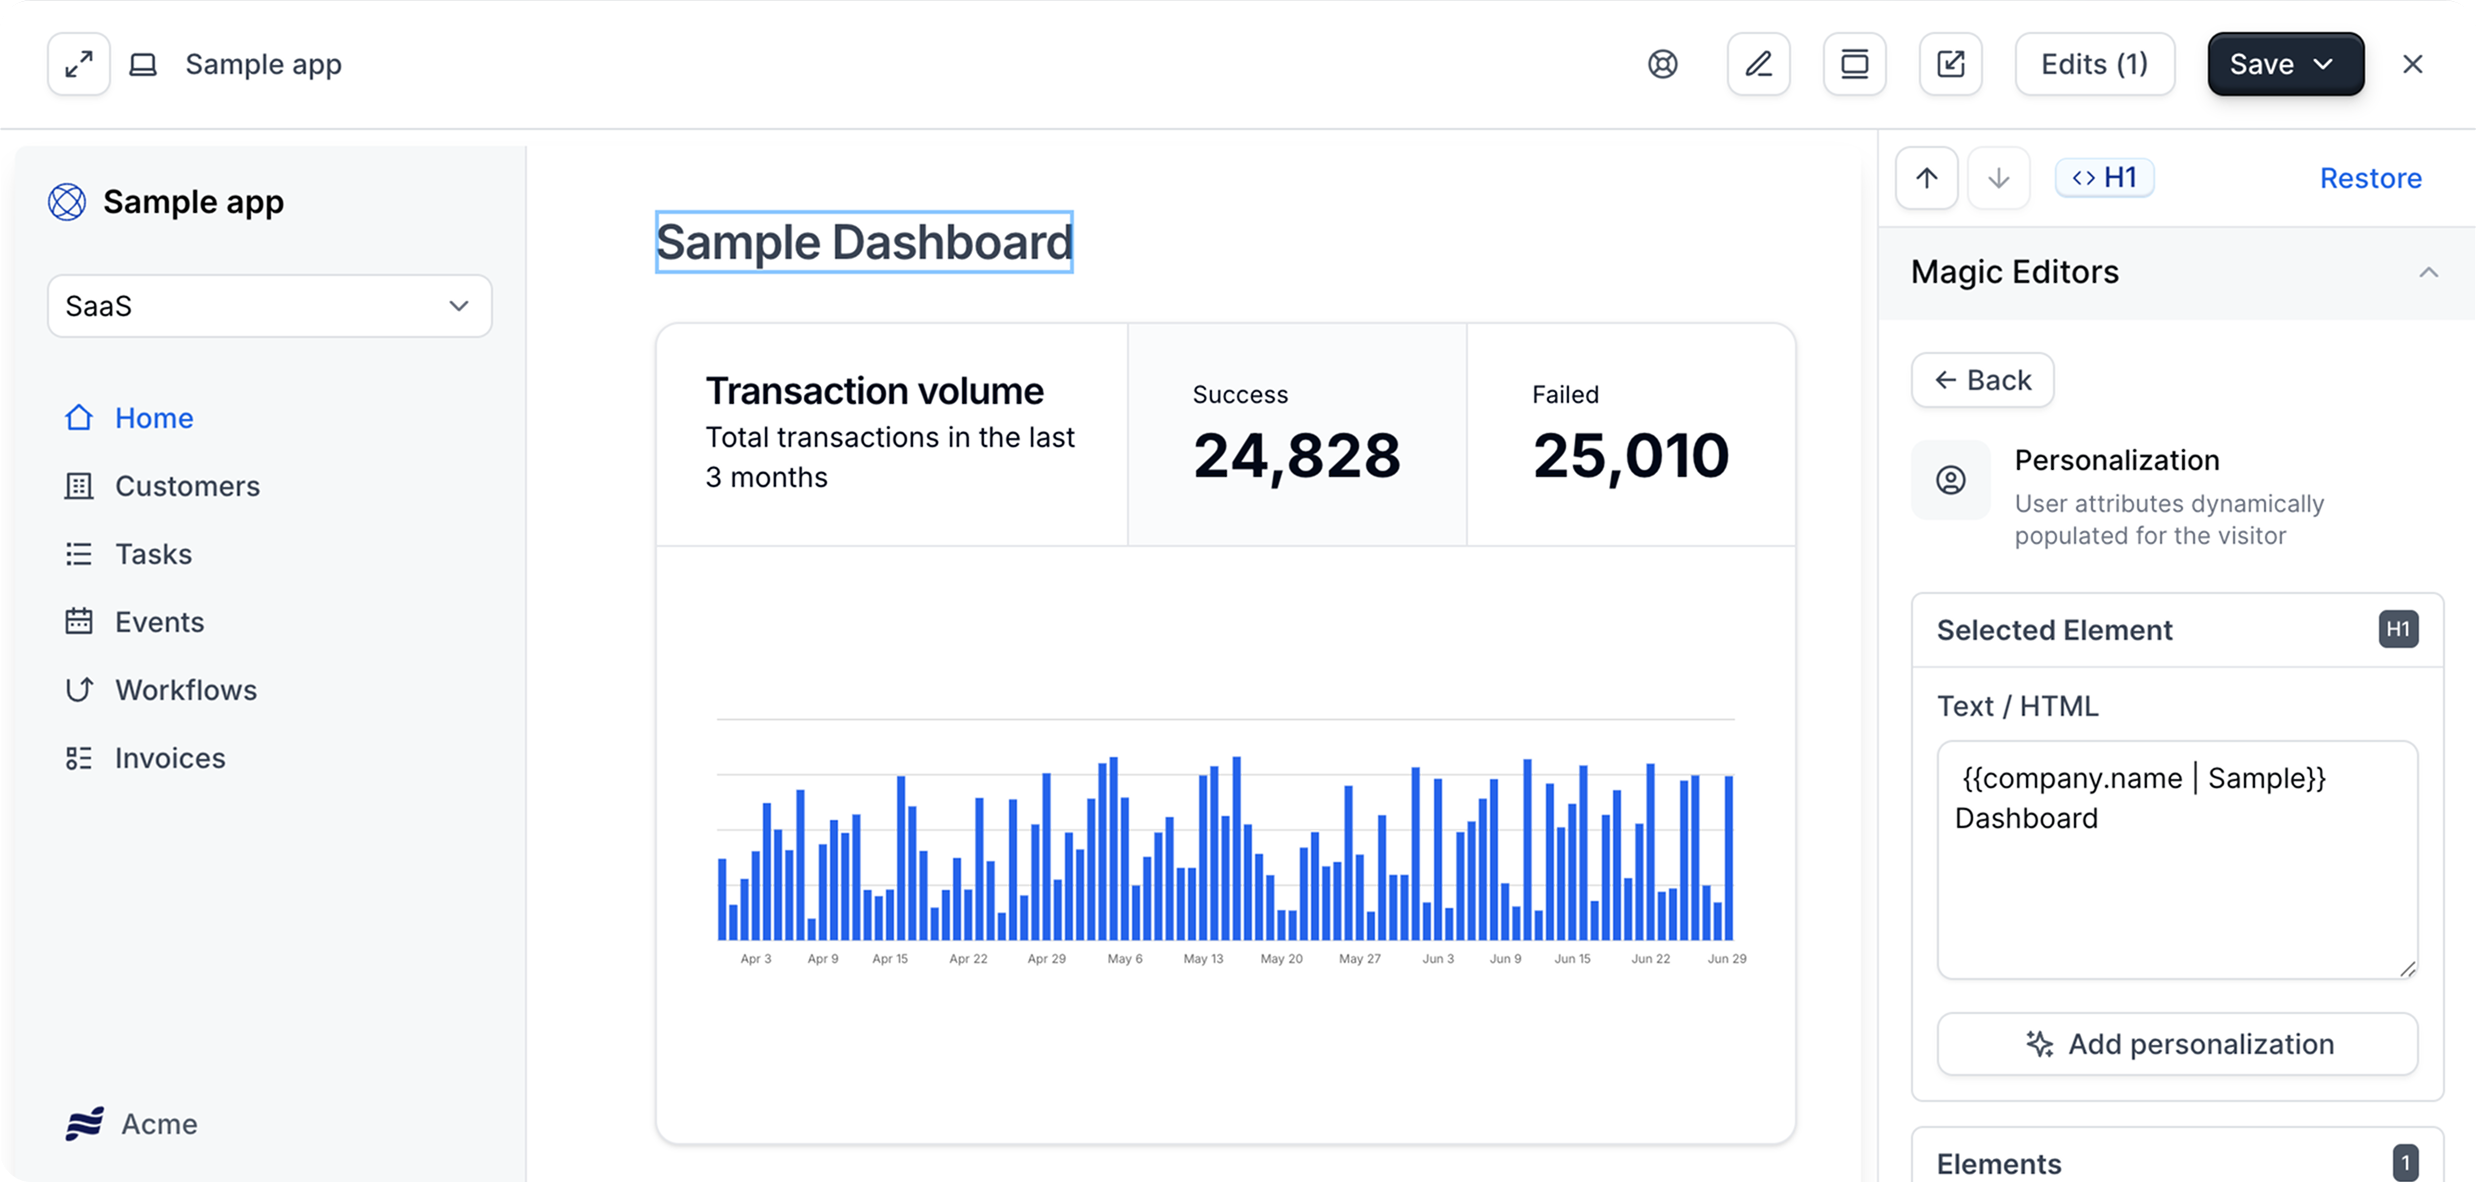
    Open the `Capture Editor` and select the element(s) you want to personalize. Open <Icon icon="user-pen" /> **Personalization** in the Magic Editors.
    Click `+ Add Personalization` and select a property.

    You can add a fallback for the text using the format: `{{ property | fallback }}`. The fallback is shown when the variable has no value for that visitor.

    To apply the same personalization to matching elements across the capture, check `Replace all instances`.

    <Frame>
      <img className="rounded-xl border overflow-hidden" src="https://mintcdn.com/navattic-app/bR17QzPUtrfb78_J/images/personalize-capture-editor.png?fit=max&auto=format&n=bR17QzPUtrfb78_J&q=85&s=b1f723207455696d44b3bf772591bd56" alt="Personalize Capture Editor" width="2476" height="1182" data-path="images/personalize-capture-editor.png" />
    </Frame>
  </Step>

  <Step title="Personalize company logo">
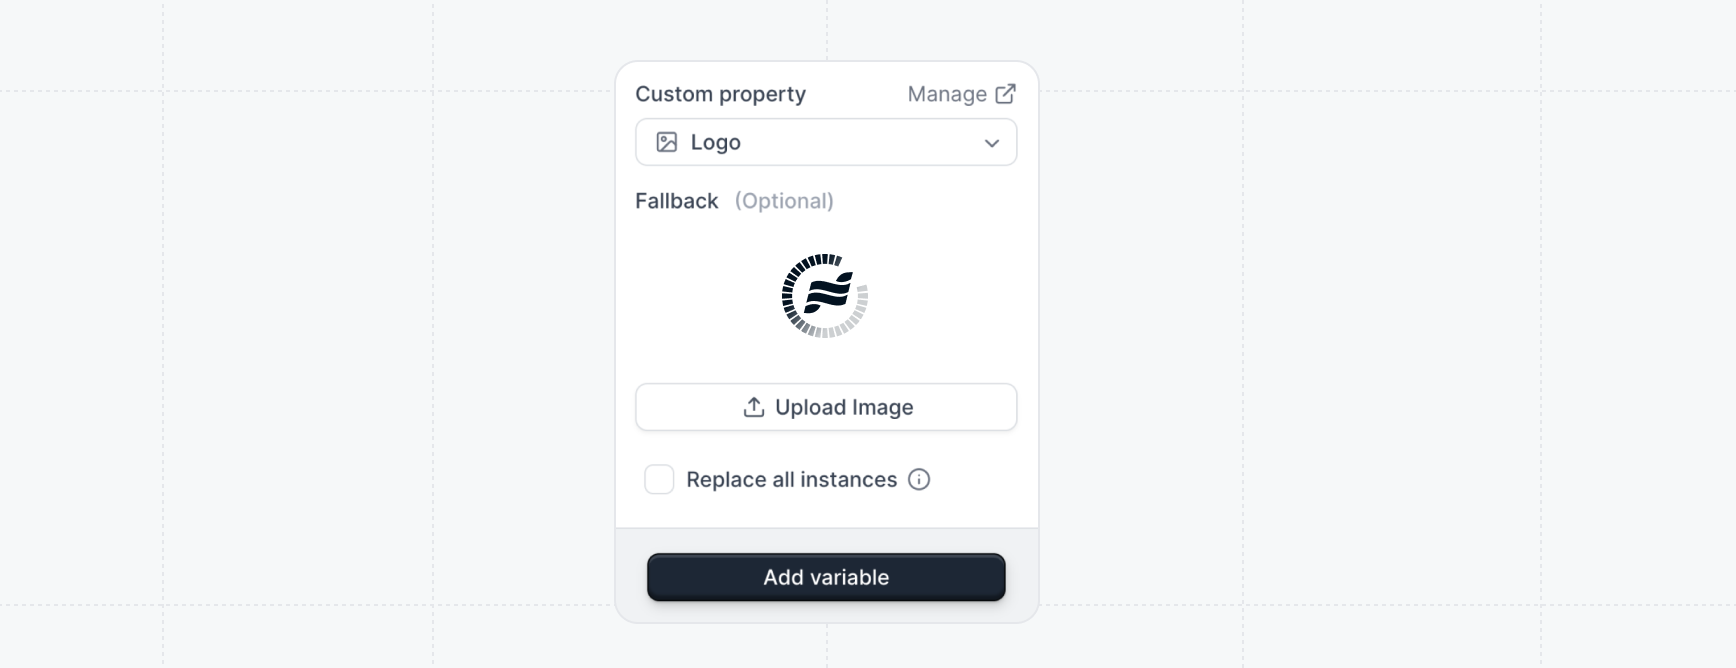
    Select the logo that you would like to personalize in your capture, click `Add Personalization` and select `Company Logo` for the property.

    The `Company Logo` will be personalized with the Navattic Logo API anytime the `Company Domain` or the `Visitor email` is populated.
    <img className="rounded-xl border overflow-hidden" src="https://mintcdn.com/navattic-app/bR17QzPUtrfb78_J/images/personalization-company-logo.png?fit=max&auto=format&n=bR17QzPUtrfb78_J&q=85&s=b25af00345bbb28d55ce52f1bb652b8a" alt="Personalize Company logo Capture Editor" width="1736" height="668" data-path="images/personalization-company-logo.png" />
  </Step>
</Steps>

## Personalize flows

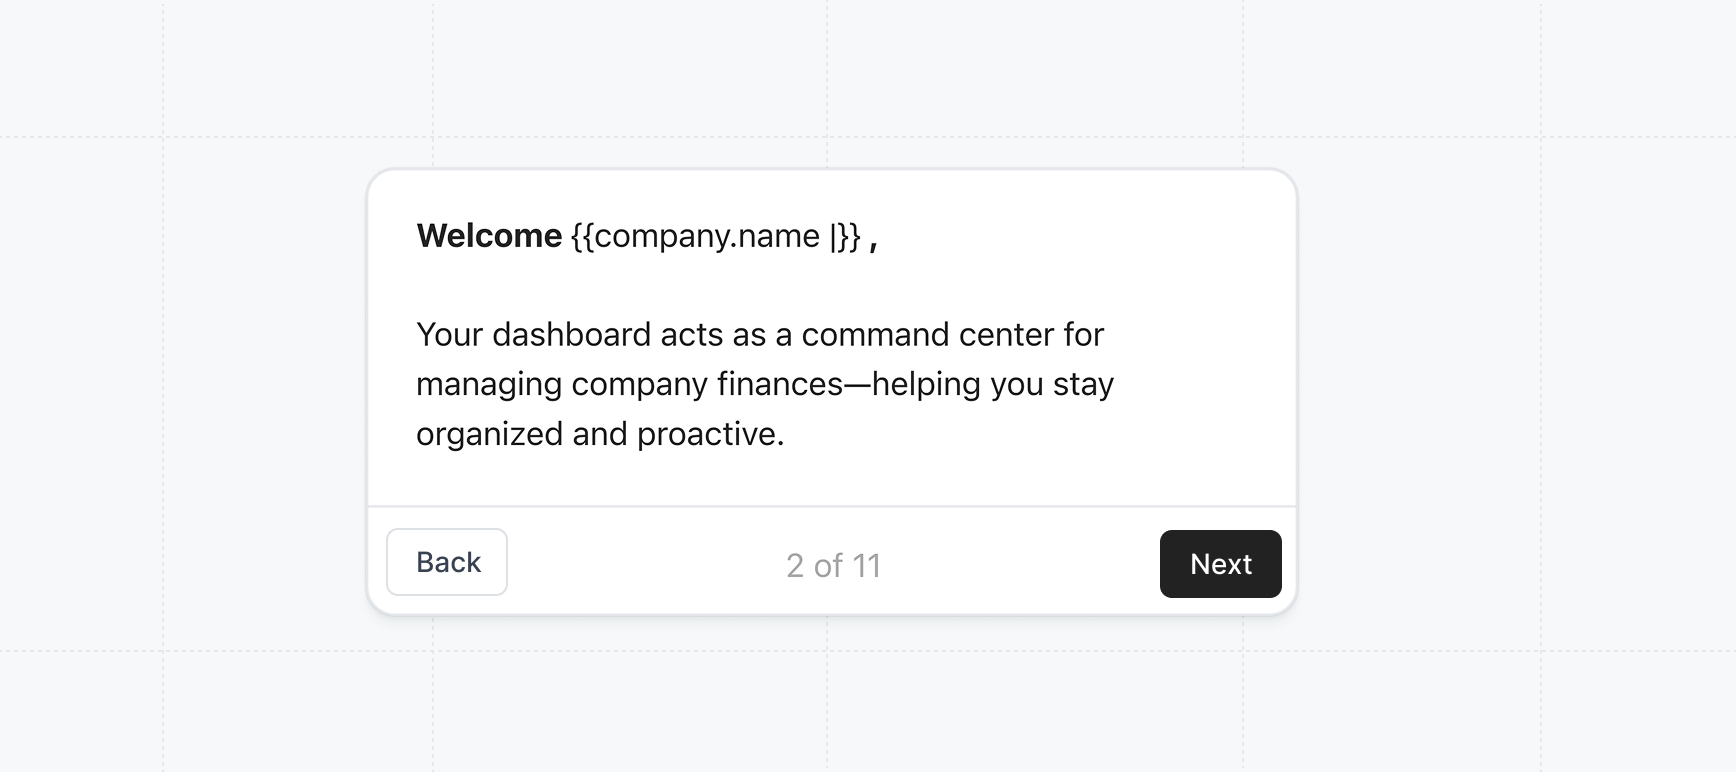
Any text in your flows can also be personalized. In the `Flow Builder`, click `Personalization` in the More Actions menu of the rich text editor for a step, or type `{{` directly in the editor to search for a property. The same `{{ property | fallback }}` syntax applies.

<img className="overflow-hidden rounded-xl border" src="https://mintcdn.com/navattic-app/bR17QzPUtrfb78_J/images/personalization-rich-text.png?fit=max&auto=format&n=bR17QzPUtrfb78_J&q=85&s=ad3388bc47549f5f35a05fce66793250" alt="Personalize Richtext" width="1736" height="772" data-path="images/personalization-rich-text.png" />

## Share personalized links

Once you've personalized your demo, you can give each prospect their own link with their values filled in.

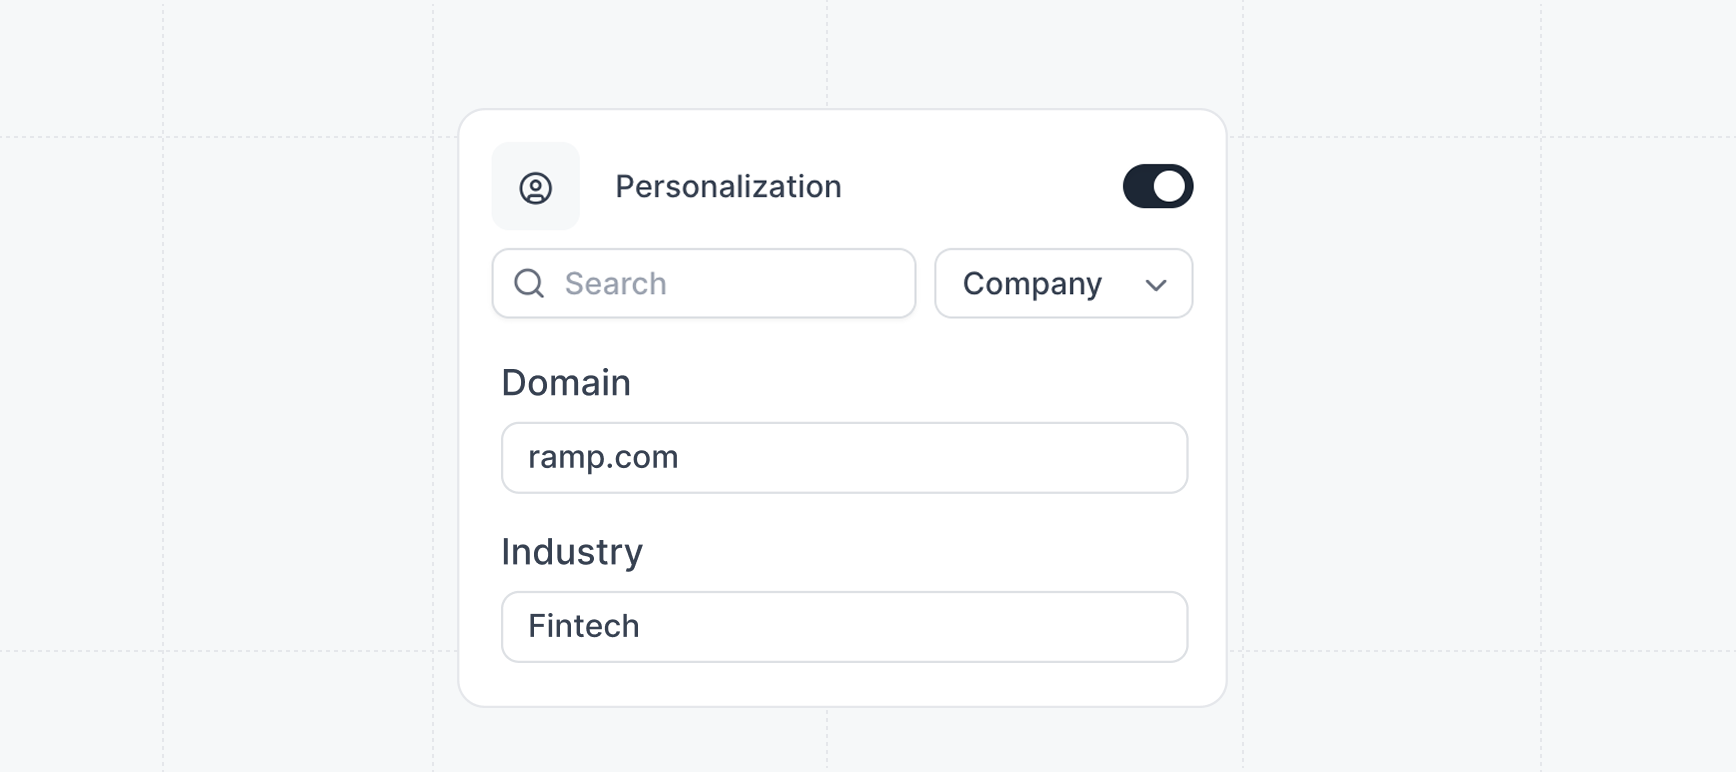
Open your demo and click `Share` to open the share drawer. Next to `Copy link`, click the gear icon for `Link settings` to open the share link drawer. There, turn on the `Personalization` card and enter values for the visitor and company properties you want to set for that recipient.

Specifying the recipient of a share link personalizes the company logo automatically. Values you enter in the `Personalization` card override that logo and can supply any other personalized property.

You can also create and personalize share links from Launchpad.

<img className="overflow-hidden rounded-xl border" src="https://mintcdn.com/navattic-app/bR17QzPUtrfb78_J/images/personalization-share-link.png?fit=max&auto=format&n=bR17QzPUtrfb78_J&q=85&s=a99d959fb9c5cbd8f66619fa31cbd3fc" alt="Personalize Share Link" width="1736" height="772" data-path="images/personalization-share-link.png" />

<Icon icon="party-popper" /> **Congratulations** -- you've created a
<Icon icon="user-pen" /> **personalized demo** that you can use to share with visitors. Personalized
demos are great to create a personalized buyer experience.

<Note>
  Already have a list of prospects or accounts in mind? Use CONCATENATE within [Google
  Sheets](https://www.causal.app/formulae/concat-google-sheets#:~:text=To%20use%20CONCAT%20in%20Google,that%20you%20want%20to%20concatenate.)
  or
  [Excel](https://support.microsoft.com/en-us/office/combine-text-from-two-or-more-cells-into-one-cell-81ba0946-ce78-42ed-b3c3-21340eb164a6)
  to create personalized project share links in bulk.
</Note>